PIDAIRSPAN-700Hybrid System Tranceiver
Airspan Networks Inc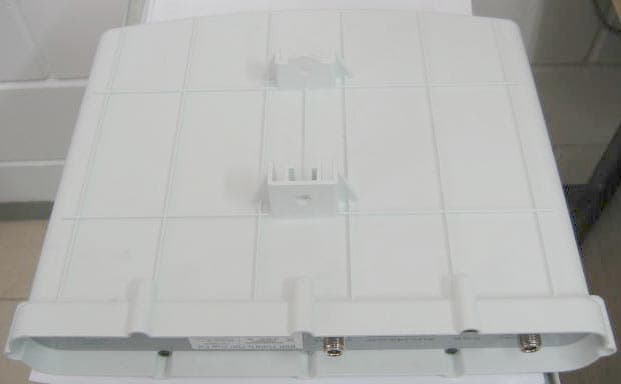
Click to zoom
Application Details
- Equipment Class
- TNB - Licensed Non-Broadcast Station Transmitter
- Date of Grant
- Jun 08, 2004
- Application Purpose
- Original Equipment
- Date of Application
- Jun 08, 2004
- Equipment Note
- Hybrid System Tranceiver
- Frequency Range
- 699.00000000 - 745.00000000
- Company
- Airspan Networks Inc
- Country
- United States
Documents & Files
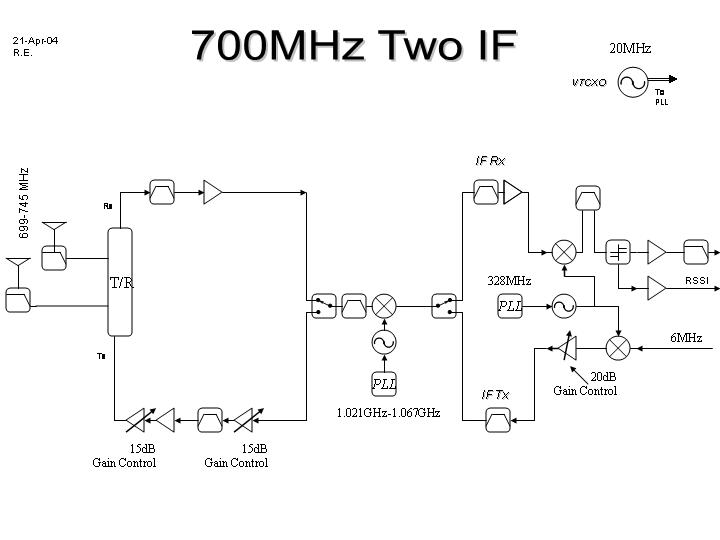
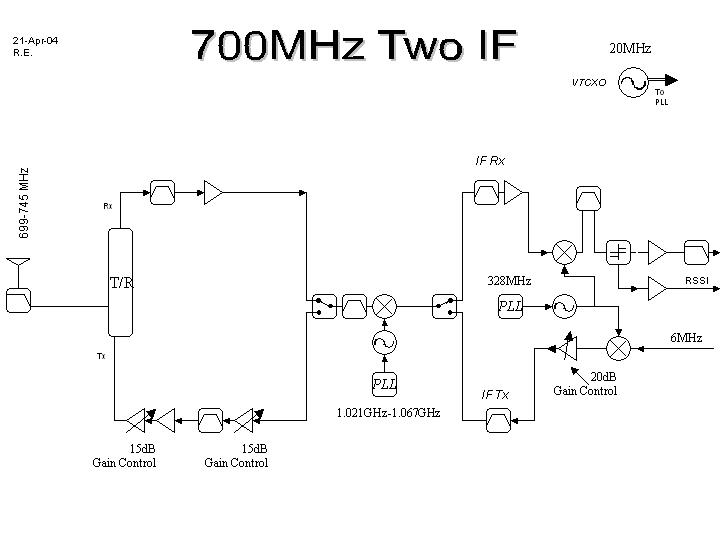
Document Text
Text extracted from the exhibit documents filed with the FCC. Open a document above to read the original.
Users Manual
6 Installing the BSR This chapter describes the installation of the WipLL Base Station Radio (BSR), which is installed at the Base Station. Warning: This device must not be co-located or operating in conjunction with any other antenna or transmitter. Note: The maximum cable length between the BSR and terminating equipment is 100 meters. 6.1. Basic Design and Physical Dimensions The BSR is encased in a chassis providing access to the BSR’s communication ports on the front panel. The BSR’s bottom panel provides holes for mounting the BSR to, for example, a pole or wall. The BSR provides the following ports: 9-pin D-type: RS-232 (serial) interface 15-pin D-type: data, synchronization, and power interface 02030311-07 Airspan Networks Inc. 6-1 Installing the BSR Hardware Installation Guide Serial port Data, synchronization, and power port Figure 6-1: BSR front panel (built-in antenna model) The BSR’s physical dimensions are described in Table 6-1 Table 6-1: BSR physical dimensions Parameter Value Comment Height 400 mm (15.74 inches) Width 317 mm (12.48 inches) Depth 65.5 mm (2.58 inches) Weight 4.7 kg The BSR’s physical dimensions exclude the mounting kit 6-2 Airspan Networks Inc. 02030311-07 Hardware Installation Guide Installing the BSR 6.2. Mounting The BSR can be mounted on a wall or pole. The BSR is mounted using the mounting holes located on the BSR’s bottom panel (see Figure 6-2) and the mounting bracket (provided by Airspan). Mounting holes Figure 6-2: BSR bottom panel providing holes for mounting Note: The BSR must be mounted in a location whereby the antenna used fo r the BSR is not co-located or operated in conjunction with any other antenna or transmitter. 02030311-07 Airspan Networks Inc. 6-3 Installing the BSR Hardware Installation Guide 6.2.1. Minimum Distance Between BSRs To prevent radio interference, each BSR requires a minimum of 1-metre separation between adjacent BSRs (see Figure 6-3). 1 Metre min. Figure 6-3: Minimum separation between mounted BSRs Warning: To avoid RF interference between BSRs operating in the 700 MHz, where four BSRs are installed at a Base Station, a 1-meter separation must be provided between the antennas of the BSRs operating in the lower frequencies (i.e., 711.5 and 714.5 for 1 Msps mode; 712 and 714 for 1.33 Msps mode) and the antennas of the BSRs operating in the upper frequencies (i.e., 741.5 and 744.5 for 1 Msps mode; 742 and 744 for 1.33 Msps mode). Warning: The BSR emits microwave radiation; a minimum distance o f 200 mm must be maintained from the front of the BSR. However, for the 700 MHz band (i.e. WipLL 700), when external antennas are used, a minimum distance of 800 mm must be maintained from the front of the device. 6-4 Airspan Networks Inc. 02030311-07 Hardware Installation Guide Installing the BSR 6.2.2. Wall Mounting BSR wall mounting is performed in two stages: 1. Attaching the mounting bracket to the BSR’s mounting holes Attaching the mounting bracket (attached to the BSR) to the wall To mount the BSR on a wall: Attach the mounting bracket to the BSR using two stainless steel bolts, as shown in Figure 6-4. Jubilee clip slots BSR BSR Fixing Bolts BSR Mounting Bracket 15-pin D-type connector Figure 6-4: Attaching the mounting bracket to the BSR 2. Attach the mounting bracket to the wall using four screws. The fixing dimensions for the mounting bracket are illustrated in Figure 6-5 02030311-07 Airspan Networks Inc. 6-5 Installing the BSR Hardware Installation Guide Note: Airspan does not provide screws for attaching the mounting bracket to the wall. The screw size depends on the structure of the building to which the bracket is to be attached. When selecting screw sizes, consideration must be given to the weight of the BSR and load that may be induced in windy conditions. 58mm 8mm 99mm Figure 6-5: BSR mounting bracket dimensions for the four fixing holes 3. Adjust the horizontal positioning of the BSR, and then fasten tight the two stainless-steel bolts. 6-6 Airspan Networks Inc. 02030311-07 Hardware Installation Guide Installing the BSR Rotation is restricted to the horizontal plane only. The permissible rotation is shown in Figure 6-6. Figure 6-6: Horizontal rotation of the BSR Note: A thread-locking compound is to be used to prevent the bolts working loose. 02030311-07 Airspan Networks Inc. 6-7 Installing the BSR Hardware Installation Guide 6.2.3. Pole Mounting The BSR can be mounted on a pole (see Figure 6-7). Pole mounting allows the BSR to be adjusted in the horizontal and vertical planes. The pole-mounting bracket is designed to support the BSR on a round pole of 45 mm in diameter. Figure 6-7: Pole-mounted BSR 6-8 Airspan Networks Inc. 02030311-07 Hardware Installation Guide Installing the BSR To mount the BSR on a pole: 1. Attach the mounting bracket to the BSR using two stainless steel bolts. Pivot Hole ‘U’ Bolt Locking Holes BSR mounting Bracket Clamping Bracket Figure 6-8: BSR mounting bracket assembly 2. 3. Attach the clamping bracket to the mounting bracket using two M8 stainless bolts. Attach the Clamping bracket to the pole by placing the U-bolt around the pole, and then inserting the U-bolt through the Clamping bracket and securing it by screwing the two bolts on the U-bolt. 02030311-07 Airspan Networks Inc. 6-9 Installing the BSR Hardware Installation Guide 4. 5. Adjust the vertical position of the BSR. Lock the BSR at the desired position by inserting the locking bolt in the desired position. Once the correct angle has been set both bolts must be tightened to lock the BSR bracket in place. Adjust the horizontal position of the BSR by rotating the BSR about the pole, and then tighten the U-bolt. BSR positioning is obtained in two planes by adjustment of the mounting bracket assembly a shown in Figure 6-9. Rotation about the mounting pole Rotation about the mounting bracket Figure 6-9: BSR orientation in vertical (top figure) and horizontal plane (lower figure) Note: A thread-locking compound is to be used to p…
Text truncated - open the document above for the full version.
Users Manual
Installing the SPR This chapter describes the installation of the WipLL Subscriber Premises Radio (SPR), located at the subscriber's premises. Warning: Cables with exposed ends (i.e., not yet crimped) should be covered with protective polythene bags during external cable installation processes. Warning: As the system emits microwave radiation, a minimum distance o f 200 mm must be maintained from the front of the SPR. However, for the 700 MHz band (i.e. WipLL 700), when external antennas are used, a minimum distance of 800 mm must be maintained from the front of the device. Warning: To avoid electrical or fire hazard, connect the SPR to the powe r supply only after mounting the SPR and connecting data cables. Note: Usually, the SPR is initialized (i.e., configured with an IP address) at Airspan's factory. However, if the SPR has not been configured, see Section 10.5, “Connecting to a PC for Serial Configuration”, before mounting the SPR. 10 02030311-07 Airspan Networks Inc. 10-1 Installing the SPR Hardware Installation Guide Note: The digital portion of the transceiver has been tested and found to comply with the limits for a Class B digital device, pursuant to part 15 of the FCC rules. These limits are designed to provide reasonable protection against harmful interference in a residential installation. This equipment generates, uses, and can radiate radio frequency energy and, if not installed and used in accordance with the instructions, may cause harmful interference to radio communications. However, there is no guarantee that interference will not occur in a particular installation. If this equipment does cause harmful interference to radio or television reception, which can be determined by turning the equipment on and off, the user is encouraged to try correct the interference by performing one or more of the following measures: - Reorientate or relocate the receiving antenna - Increase separation between the equipment and receiver - Connect the equipment to an outlet on a circuit different from that to which the receiver is connected - Consult the dealer or an experienced radio/TV technician for help Note: A minimum separation of 200 mm should exist between power and data cables. 10-2 Airspan Networks Inc. 02030311-07 Hardware Installation Guide Installing the SPR 10.1. Physical Dimensions and Basic Design The SPR is encased in a chassis and provides access to the SPR’s communication port (15-pin D-type) at the front panel (see figure below). The SPR’s bottom panel provides holes for mounting the SPR to, for example, a pole or wall. 15-pin D-type port Figure 10-1: SPR (with built-in antennal) The SPR’s physical dimensions are described in the following table. Table 10-1: SPR physical dimensions SPR model Parameter Standard Gain Antenna High Gain Antenna Comment Height 311 mm (12.24 inches) 400 mm (15.74 inches) Width 224 mm (8.82 inches) 317 mm (12.48 inches) Depth 65.5 mm (2.58 inches) 65.5 mm (2.58 inches) Weight 2.5 kg 4.7 kg The SPR’s physical dimensions exclude the mounting kit. SPR models with an N-type receptacle for attaching a third-party external antenna are also available. 02030311-07 Airspan Networks Inc. 10-3 Installing the SPR Hardware Installation Guide 10.2. Mounting the SPR The SPR can be mounted on a wall or pole. The SPR is mounted using the mounting holes located on the SPR’s bottom panel (see Figure 10-2), and the mounting bracket (provided). The mounting brackets for wall- and pole mounting are different from one another. Mounting holes Figure 10-2: SPR bottom panel providing holes for mounting 10-4 Airspan Networks Inc. 02030311-07 Hardware Installation Guide Installing the SPR 10.2.1. Minimum Distance between SPRs A minimum of 3-meter separation is required between mounted SPRs and existing customer radio equipment when not transmitting on the same sector (see Figure 10-3). 3.0 metres Figure 10-3: SPR separation when not transmitting on the same sector A 1-meter separation is required between SPRs when on the same sector and transmitting to the same BSR without requiring shielding (see Figure 10-4). 1.0 metre Figure 10-4: SPR separation when transmitting on the same sector to the same BSR 02030311-07 Airspan Networks Inc. 10-5 Installing the SPR Hardware Installation Guide 10.2.2. Wall-Mounting SPR wall mounting is performed in two stages: 1. 2. 3. 4. Attaching the mounting bracket to the SPR’s mounting holes. Attaching the mounting bracket (attached to the SPR) to the wall. To mount the SPR on a wall: Position the mounting bracket on the mounting surface (e.g., wall), and then use a pencil to mark the position of the four mounting holes. Drill holes for each hole that you marked in the step above. Insert wall anchors into each of the drilled holes. Align the mounting bracket’s four holes with the wall anchors, and then insert a screw through the mounting bracket holes into each wall anchor, and tighten. The figure below displays relevant dimensions of the mounting bracket. Note the two different sized fixing holes. 10-6 Airspan Networks Inc. 02030311-07 Hardware Installation Guide Installing the SPR Figure 10-5: Attaching mounting bracket to wall Below is a diagram illustrating the fixing dimensions of the mounting bracket. Ensure that the distance between the hole centers are 120 mm and 60 mm. 02030311-07 Airspan Networks Inc. 10-7 Installing the SPR Hardware Installation Guide Figure 10-6: SPR mounting bracket dimensions for the four fixing holes 10-8 Airspan Networks Inc. 02030311-07 Hardware Installation Guide Installing the SPR 5. Attach the SPR to the mounting bracket using the two stainless steel bolts (supplied), washers, and nuts as shown in the figure below. Figure 10-7: Attaching SPR to mounting bracket 02030311-07 Airspan Networks Inc. 10-9 Installing the SPR Hardware Installation Guide Note: Airspan does not provide screws for attaching the mounting bracket to the wall. The screw size depends on the structure of the building to which the b…
Text truncated - open the document above for the full version.
Users Manual
2 Safety Guidelines This chapter outlines safety guidelines when installing the WipLL system. Warning: The user and the installer should be aware that changes and modifications not expressly approved by Airspan Networks could void the user’s authority to operate the equipment. Warning: Never install equipment that is damaged. Warning: Only qualified personnel should be allowed to install, replace, and service the WipLL equipment. 2.1. Electrical Safety Guidelines Warning: Disconnect all power when installing. 2.1.1. Handling Electrostatic Devices Electrostatic devices are those devices that may be damaged by the inadvertent discharge of static electricity from a charged body. The risk of damage, due to electrostatic discharge (ESD) to a device, may cause the device to fail suddenly, or it may induce a partial defect within the device, which will cause subsequent premature failure. 02030311-07 Airspan Networks Inc. 2-1 Safety Guidelines Hardware Installation Guide Static electricity can result from operators walking on floors, moving around on chairs, from the movement of operator's clothing or even casual brushing against racks, benches or walls. Airspan recommends the following guidelines to be adopted to minimize the risk of component failure due to electrostatic discharge to the device: WipLL devices are provided typically in see-through anti-static bags. Wherever possible, checking and inspection of a unit should occur without removing it from the bag. All operators shall wear the approved conductive overall. Where operators come into direct contact with any piece of electronic hardware, operators must wear an ESD-preventive wrist strap. All straps and cords should be tested using a Wrist Strap Tester prior to use. The wrist strap cords shall have a 2 Meg Ohm resistor fitted at either end. Wrist straps should be worn in direct contact with bare skin and not over clothing. Warning: To prevent ESD damage to WipLL devices, always wear an ESD wris t strap when handling these devices or coming into contact with internal components. 2.1.2. Grounding Only certain WipLL devices require additional grounding. WipLL devices that do not require additional grounding have grounding at the main supply outlet. The following table lists the WipLL devices’ grounding requirements. Table 2-1: WipLL grounding requirements Site WipLL device Grounding BSR Through the mains (via BSDU) BSDU Additional grounding required (grounding lug at rear end of chassis) Base Station BSPS Additional grounding required (grounding lug at rear end of chassis) SPR Through the mains (via SDA) CPE IDR Through the mains 2-2 Airspan Networks Inc. 02030311-07 Hardware Installation Guide Safety Guidelines 2.1.3. Lightening Protection Warning: Never install the equipment during stormy weather and lightening. WipLL devices comply with the Surge Immunity standard: EN 61000-4-5. WipLL devices are protected from lightening surges as the outdoor devices (BSRs and SPRs) are encased in a plastic chassis. Therefore, if lightening strikes the device, an electrical circuit cannot be completed, and hence, no electrical surge can occur. In addition, WipLL outdoor and indoor (SDA) devices provide high-speed data line protection against direct and induced transient over-voltages surges on the cables. This capability is provided by the fact that all WipLL devices are designed with TVS (transient voltage suppressor) components that maintain potential differences. However, for geographical areas that have above normal lightening activity, Airspan can supply a surge protector composed of a 15-pin D-type adapter with a grounding wire. 02030311-07 Airspan Networks Inc. 2-3 Safety Guidelines Hardware Installation Guide 2.2. Installing WipLL Radios and Third-Party External Antennas Warning: For unlicensed bands, it is the responsibility of the person installing the WipLL system to ensure that when using the outdoor antenna kits in the United States (or where FCC rules apply), that only those antennas certified with the product are used. The use of any antenna other than those certified with the product is expressly forbidden in accordance with FCC rules CFR47 part 15.204. The installer should configure the output power level of antennas according to country regulations and per antenna type. Warning: Outdoor WipLL units and antennas should be installed ONLY by experienced installation professionals who are familiar with local building and safety codes and, wherever applicable, are licensed by the appropriate government regulatory authorities. Failure to do so may void Airspan’s WipLL product warranty and may expose the end user or the service provider to legal and financial liabilities. Airspan and its resellers or distributors are not liable fo r injury, damage or violation of regulations associated with the installation of outdoor units or antennas. Warning: When using external antennas, the external antennas must not be co-located or operating in conjunction with any other antenna or transmitter. Warnings: 1) The device cannot be sold retail, to the general public or by mail order. It must be sold to dealers. 2) Installation must be controlled. 3) Installation must be performed by licensed professionals. 4) Installation requires special training. 2-4 Airspan Networks Inc. 02030311-07 Hardware Installation Guide Safety Guidelines Warning: For unlicensed bands, in accordance with FCC regulations, ensure that the external antennas provide an EIRP of less than or equal to 36 dBm to prevent interference with other radios operating in the unlicensed band. The EIRP is defined by the following formula: Max. Power Output + Antenna Gain - Cable Loss ≤ 36 dBm (EIRP) Thus, ensure that cable loss is sufficiently high to achieve EIRP of 36 dBm or less. The table below lists examples of cable loss per cable for maximum antenna gains, based on the formula above. Note that the EIRP is either equal to or less than 36 dBm. Warning: The WipLL transceivers emit micr…
Text truncated - open the document above for the full version.
Users Manual
6 Installing the BSR This chapter describes the installation of the WipLL Base Station Radio (BSR), which is installed at the Base Station. Warning: This device must not be co-located or operating in conjunction with any other antenna or transmitter. Notes: 1) The BSR operating in the 700 MHz band does not contain an internal (built- in) antenna. Instead, the BSR provides an N-type port for attaching a third-party external antenna. 2) The maximum cable length between the BSR and terminating equipment is 100 meters. 6.1. Basic Design and Physical Dimensions The BSR is encased in a chassis providing access to the BSR’s communication ports on the front panel. The BSR’s bottom panel provides holes for mounting the BSR to, for example, a pole or wall. The BSR provides the following ports: 9-pin D-type: RS-232 (serial) interface 15-pin D-type: data, synchronization, and power interface N-type: attaching a third-party external antenna 02030311-07 Airspan Networks Inc. 6-1 Installing the BSR Hardware Installation Guide Serial port N-type port Data, synchronization, and power port Figure 6-1: BSR front panel (built-in antenna model) The BSR’s physical dimensions are described in Table 6-1 Table 6-1: BSR physical dimensions Parameter Value Comment Height 400 mm (15.74 inches) Width 317 mm (12.48 inches) Depth 65.5 mm (2.58 inches) Weight 4.7 kg The BSR’s physical dimensions exclude the mounting kit 6-2 Airspan Networks Inc. 02030311-07 Hardware Installation Guide Installing the BSR 6.2. Mounting The BSR can be mounted on a wall or pole. The BSR is mounted using the mounting holes located on the BSR’s bottom panel (see Figure 6-2) and the mounting bracket (provided by Airspan). Mounting holes Figure 6-2: BSR bottom panel providing holes for mounting Note: The BSR must be mounted in a location whereby the antenna used fo r the BSR is not co-located or operated in conjunction with any other antenna or transmitter. 02030311-07 Airspan Networks Inc. 6-3 Installing the BSR Hardware Installation Guide 6.2.1. Minimum Distance Between BSRs To prevent radio interference, each BSR requires a minimum of 1-metre separation between adjacent BSRs (see Figure 6-3). 1 Metre min. Figure 6-3: Minimum separation between mounted BSRs Warning: To avoid RF interference between BSRs operating in the 700 MHz, where four BSRs are installed at a Base Station, a 1-meter separation must be provided between the antennas of the BSRs operating in the lower frequencies (i.e., 711.5 and 714.5 for 1 Msps mode; 712 and 714 for 1.33 Msps mode) and the antennas of the BSRs operating in the upper frequencies (i.e., 741.5 and 744.5 for 1 Msps mode; 742 and 744 for 1.33 Msps mode). Warning: The BSR emits microwave radiation; a minimum distance o f 200 mm must be maintained from the front of the BSR. However, for the 700 MHz band (i.e. WipLL 700), when external antennas are used, a minimum distance of 800 mm must be maintained from the front of the device. 6-4 Airspan Networks Inc. 02030311-07 Hardware Installation Guide Installing the BSR 6.2.2. Wall Mounting BSR wall mounting is performed in two stages: 1. Attaching the mounting bracket to the BSR’s mounting holes Attaching the mounting bracket (attached to the BSR) to the wall To mount the BSR on a wall: Attach the mounting bracket to the BSR using two stainless steel bolts, as shown in Figure 6-4. Jubilee clip slots BSR BSR Fixing Bolts BSR Mounting Bracket 15-pin D-type connector Figure 6-4: Attaching the mounting bracket to the BSR 2. Attach the mounting bracket to the wall using four screws. The fixing dimensions for the mounting bracket are illustrated in Figure 6-5 02030311-07 Airspan Networks Inc. 6-5 Installing the BSR Hardware Installation Guide Note: Airspan does not provide screws for attaching the mounting bracket to the wall. The screw size depends on the structure of the building to which the bracket is to be attached. When selecting screw sizes, consideration must be given to the weight of the BSR and load that may be induced in windy conditions. 58mm 8mm 99mm Figure 6-5: BSR mounting bracket dimensions for the four fixing holes 3. Adjust the horizontal positioning of the BSR, and then fasten tight the two stainless-steel bolts. 6-6 Airspan Networks Inc. 02030311-07 Hardware Installation Guide Installing the BSR Rotation is restricted to the horizontal plane only. The permissible rotation is shown in Figure 6-6. Figure 6-6: Horizontal rotation of the BSR Note: A thread-locking compound is to be used to prevent the bolts working loose. 02030311-07 Airspan Networks Inc. 6-7 Installing the BSR Hardware Installation Guide 6.2.3. Pole Mounting The BSR can be mounted on a pole (see Figure 6-7). Pole mounting allows the BSR to be adjusted in the horizontal and vertical planes. The pole-mounting bracket is designed to support the BSR on a round pole of 45 mm in diameter. Figure 6-7: Pole-mounted BSR 6-8 Airspan Networks Inc. 02030311-07 Hardware Installation Guide Installing the BSR To mount the BSR on a pole: 1. Attach the mounting bracket to the BSR using two stainless steel bolts. Pivot Hole ‘U’ Bolt Locking Holes BSR mounting Bracket Clamping Bracket Figure 6-8: BSR mounting bracket assembly 2. 3. Attach the clamping bracket to the mounting bracket using two M8 stainless bolts. Attach the Clamping bracket to the pole by placing the U-bolt around the pole, and then inserting the U-bolt through the Clamping bracket and securing it by screwing the two bolts on the U-bolt. 02030311-07 Airspan Networks Inc. 6-9 Installing the BSR Hardware Installation Guide 4. 5. Adjust the vertical position of the BSR. Lock the BSR at the desired position by inserting the locking bolt in the desired position. Once the correct angle has been set both bolts must be tightened to lock the BSR bracket in place. Adjust the horizontal position of the BSR by rotating the BSR about the pole, and then tighten the U-bolt. BSR positioning is obtained in two planes by adjustment of the mounting bra…
Text truncated - open the document above for the full version.
Users Manual
Installing the SPR This chapter describes the installation of the WipLL Subscriber Premises Radio (SPR), located at the subscriber's premises. Warning: Cables with exposed ends (i.e., not yet crimped) should be covered with protective polythene bags during external cable installation processes. Warning: As the system emits microwave radiation, a minimum distance o f 200 mm must be maintained from the front of the SPR. However, for the 700 MHz band (i.e. WipLL 700), when external antennas are used, a minimum distance of 800 mm must be maintained from the front of the device. Warning: To avoid electrical or fire hazard, connect the SPR to the powe r supply only after mounting the SPR and connecting data cables. Note: Usually, the SPR is initialized (i.e., configured with an IP address) at Airspan's factory. However, if the SPR has not been configured, see Section 10.5, “Connecting to a PC for Serial Configuration”, before mounting the SPR. Note: The SPR operating in the 700 MHz band does not contain an internal, built-in antenna. Instead, this SPR model provides an N-type port for attaching a third-party external antenna. 10 02030311-07 Airspan Networks Inc. 10-1 Installing the SPR Hardware Installation Guide Note: The digital portion of the transceiver has been tested and found to comply with the limits for a Class B digital device, pursuant to part 15 of the FCC rules. These limits are designed to provide reasonable protection against harmful interference in a residential installation. This equipment generates, uses, and can radiate radio frequency energy and, if not installed and used in accordance with the instructions, may cause harmful interference to radio communications. However, there is no guarantee that interference will not occur in a particular installation. If this equipment does cause harmful interference to radio or television reception, which can be determined by turning the equipment on and off, the user is encouraged to try correct the interference by performing one or more of the following measures: - Reorientate or relocate the receiving antenna - Increase separation between the equipment and receiver - Connect the equipment to an outlet on a circuit different from that to which the receiver is connected - Consult the dealer or an experienced radio/TV technician for help Note: A minimum separation of 200 mm should exist between power and data cables. 10-2 Airspan Networks Inc. 02030311-07 Hardware Installation Guide Installing the SPR 10.1. Physical Dimensions and Basic Design The SPR is encased in a chassis and provides access to the SPR’s communication port (15-pin D-type) at the front panel (see figure below). The SPR’s bottom panel provides holes for mounting the SPR to, for example, a pole or wall. 15-pin D-type port N-type port Figure 10-1: SPR The SPR’s physical dimensions are described in the following table. Table 10-1: SPR physical dimensions SPR model Parameter Standard Gain Antenna High Gain Antenna Comment Height 311 mm (12.24 inches) 400 mm (15.74 inches) Width 224 mm (8.82 inches) 317 mm (12.48 inches) Depth 65.5 mm (2.58 inches) 65.5 mm (2.58 inches) Weight 2.5 kg 4.7 kg The SPR’s physical dimensions exclude the mounting kit. SPR models with an N-type receptacle for attaching a third-party external antenna are also available. 02030311-07 Airspan Networks Inc. 10-3 Installing the SPR Hardware Installation Guide 10.2. Mounting the SPR The SPR can be mounted on a wall or pole. The SPR is mounted using the mounting holes located on the SPR’s bottom panel (see Figure 10-2), and the mounting bracket (provided). The mounting brackets for wall- and pole mounting are different from one another. Mounting holes Figure 10-2: SPR bottom panel providing holes for mounting 10-4 Airspan Networks Inc. 02030311-07 Hardware Installation Guide Installing the SPR 10.2.1. Minimum Distance between SPRs A minimum of 3-meter separation is required between mounted SPRs and existing customer radio equipment when not transmitting on the same sector (see Figure 10-3). 3.0 metres Figure 10-3: SPR separation when not transmitting on the same sector A 1-meter separation is required between SPRs when on the same sector and transmitting to the same BSR without requiring shielding (see Figure 10-4). 1.0 metre Figure 10-4: SPR separation when transmitting on the same sector to the same BSR 02030311-07 Airspan Networks Inc. 10-5 Installing the SPR Hardware Installation Guide 10.2.2. Wall-Mounting SPR wall mounting is performed in two stages: 1. 2. 3. 4. Attaching the mounting bracket to the SPR’s mounting holes. Attaching the mounting bracket (attached to the SPR) to the wall. To mount the SPR on a wall: Position the mounting bracket on the mounting surface (e.g., wall), and then use a pencil to mark the position of the four mounting holes. Drill holes for each hole that you marked in the step above. Insert wall anchors into each of the drilled holes. Align the mounting bracket’s four holes with the wall anchors, and then insert a screw through the mounting bracket holes into each wall anchor, and tighten. The figure below displays relevant dimensions of the mounting bracket. Note the two different sized fixing holes. 10-6 Airspan Networks Inc. 02030311-07 Hardware Installation Guide Installing the SPR Figure 10-5: Attaching mounting bracket to wall Below is a diagram illustrating the fixing dimensions of the mounting bracket. Ensure that the distance between the hole centers are 120 mm and 60 mm. 02030311-07 Airspan Networks Inc. 10-7 Installing the SPR Hardware Installation Guide Figure 10-6: SPR mounting bracket dimensions for the four fixing holes 10-8 Airspan Networks Inc. 02030311-07 Hardware Installation Guide Installing the SPR 5. Attach the SPR to the mounting bracket using the two stainless steel bolts (supplied), washers, and nuts as shown in the figure below. Figure 10-7: Attaching SPR to mounting bracket 02030311-07 Airspan Networks Inc. 10-9 Installing the SPR Hardware In…
Text truncated - open the document above for the full version.
Contact Information
Applicant
Grant Pottash(Technical Services Director)
Technical Contact
Hermon LabsoratoriesAlex Usoskin
[email protected]972 4628 8001
Harakevet Industrial zone · Binyamina · Israel
Technical Specifications
| # | Rule Parts | Frequency Range | Power Output | Emission | Tolerance |
|---|---|---|---|---|---|
| 1 | 27 | 699 MHz - 745 MHz | 1.524 W | 1M40F1D | 3898.0000000000 Hz |
Other Applications from Airspan Networks Inc
PIDAS1035
Sep 20, 2023LTE Base Station
Equipment Class
TNB - Licensed Non-Broadcast Station Transmitter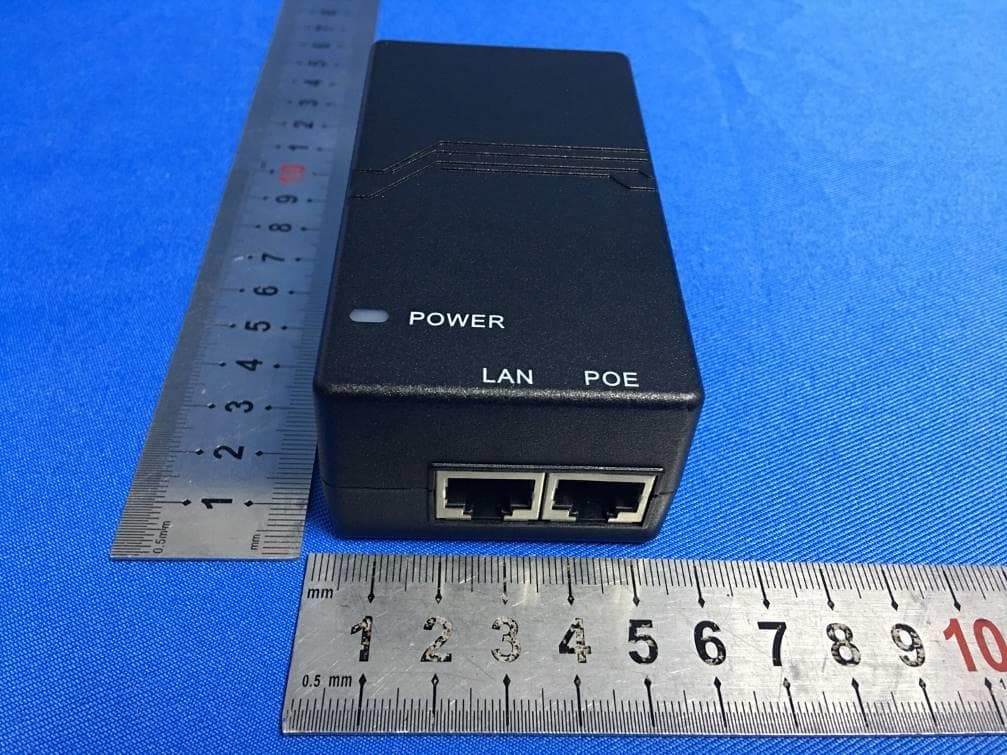
PIDASPOT5410
Jan 10, 2021B42H/B43L/B48
Equipment Class
CBD - Citizens Band Category A and B Devices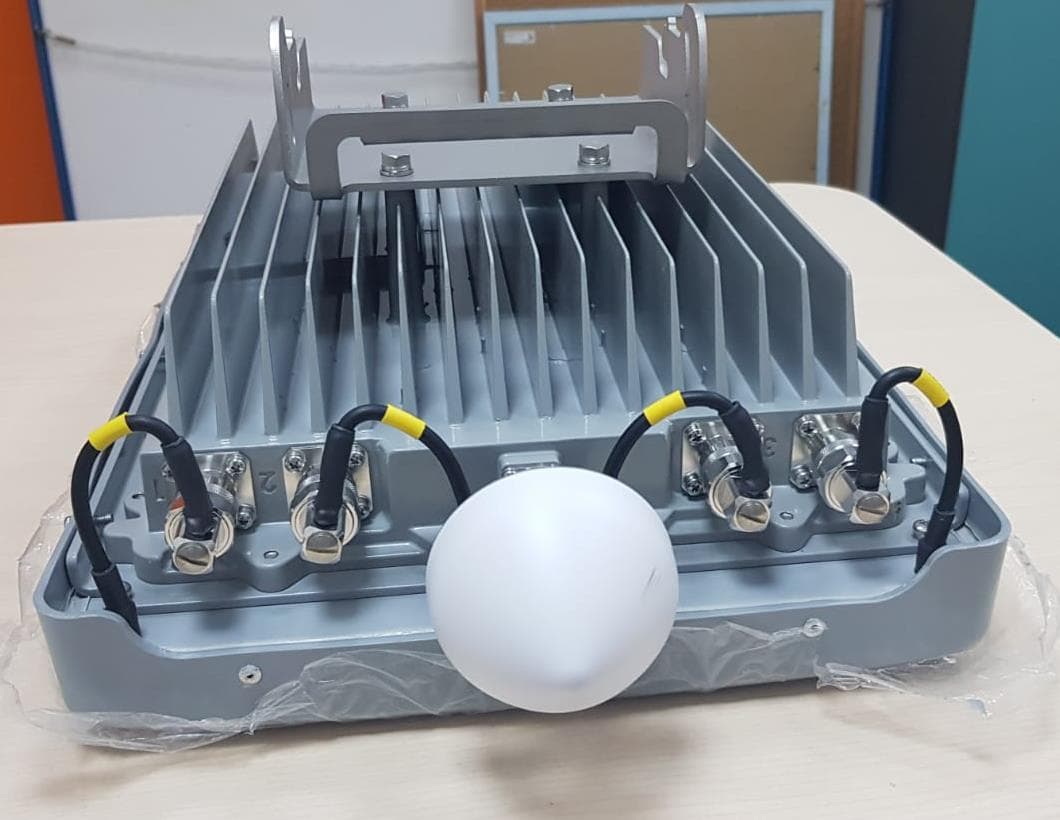
PIDAS1030
Aug 23, 2020LTE Base Station Radio
Equipment Class
CBD - Citizens Band Category A and B Devices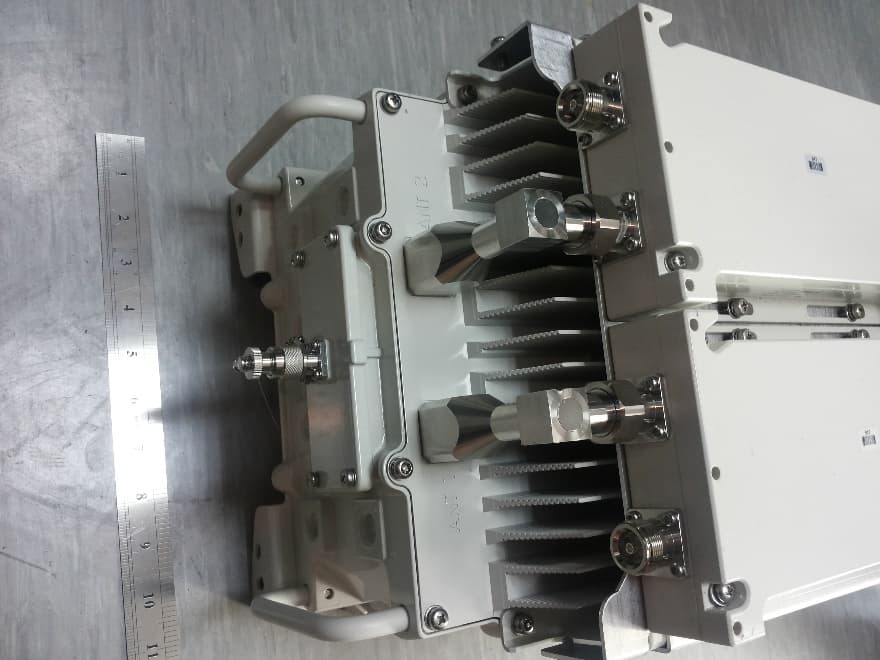
PIDH4K25
Jan 27, 2016Base station of LTE fixed cellular system
Equipment Class
TNB - Licensed Non-Broadcast Station Transmitter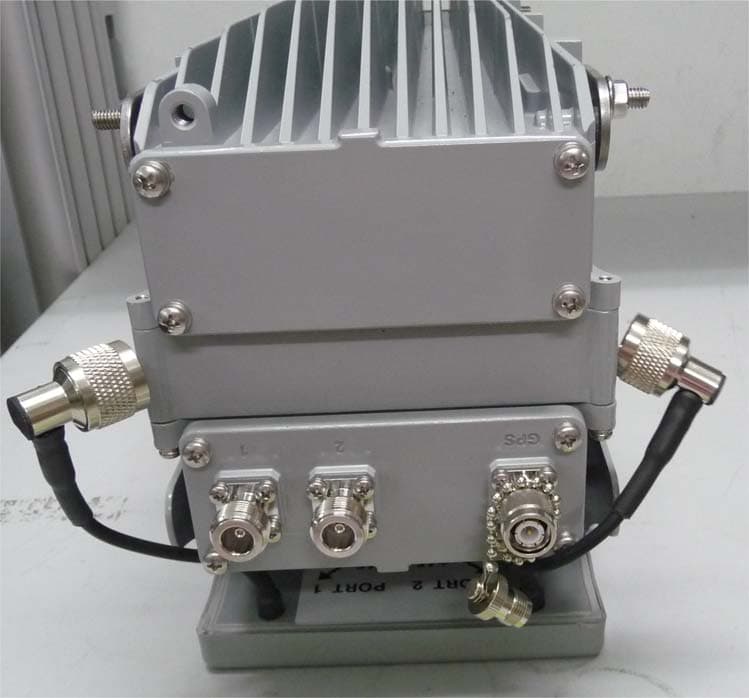
PIDAHR2500
Aug 23, 2015Base station of LTE fixed cellular system
Equipment Class
TNB - Licensed Non-Broadcast Station Transmitter