QAM001Wireless Data Transceiver
Promethean Ltd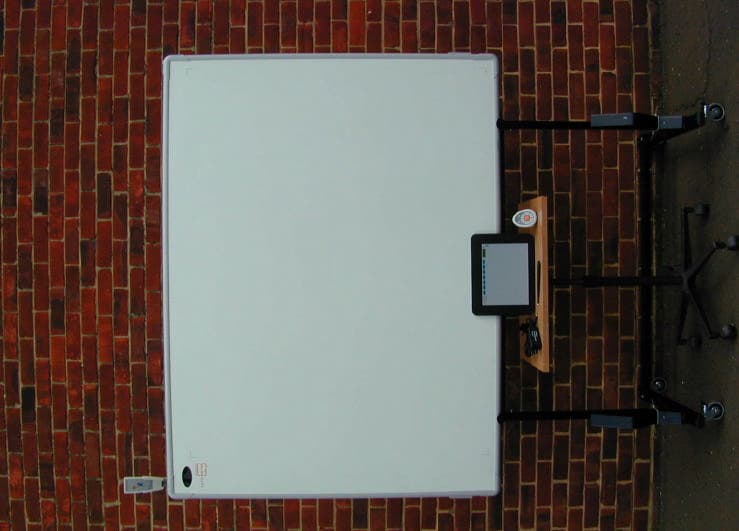
Click to zoom
Application Details
- Equipment Class
- DXT - Part 15 Low Power Transceiver, Rx Verified
- Date of Grant
- Aug 19, 2002
- Application Purpose
- Original Equipment
- Date of Application
- Aug 19, 2002
- Equipment Note
- Wireless Data Transceiver
- Frequency Range
- 915.00000000 - 915.00000000
- Company
- Promethean Ltd
- Country
- United Kingdom
Documents & Files
Document Text
Text extracted from the exhibit documents filed with the FCC. Open a document above to read the original.
Users Manual
The for Windows 95 /98 /NT4 /2000 /Me /XP ® USER MANUAL Release 3.4 June 2002 English Edition PROMETHEAN LTD. TDS House, Lower Philips Road, Blackburn. BB1 5TH. United Kingdom TP 1333 Issue 3.4 Jun 2002 ACTIVBOARD for Windows Users Guide ____________________________________________________________________ User Guide 2 ACTIVBOARD for Windows Users Guide _____________________________________________________________ User Guide 3 Promethean Ltd. TDS House Lower Philips Road Blackburn Lancashire. BB1 5TH UK If you experience any problems that cannot be resolved by referring to this manual please call the Promethean support team on 01254 676921 (UK only). © Copyright Promethean Ltd., 1997-2002 All rights reserved. All information contained in this document is subject to change without notice. This guide was prepared with the intention of being error free. The discussion of procedures and techniques, unintended errors in syntax or grammar may modify or prevent your understanding of certain topics. Any use of the contents of this User Manual other than for the purpose intended requires express written permission of Promethean Ltd. All trademarks noted with the ™ mark are the properties of their respective companies _____________________________________________________ NOTE: All utility and driver software provided to operate the ACTIVboard is the property of Promethean Ltd.. Use of this software is granted for the purpose of installation, set up and operation of the ACTIVboard and its standard feature set outlined in this guide. Promethean does not encourage or authorise any other use. Additional application software is provided from time to time as a service to our customers. This software is licensed to the end user by the supplier. Use, possession and upgrades are the responsibility of that supplier. Registered owners of Promethean product should contact those suppliers directly for support. _____________________________________________________ This device complies with Part 15 of the FCC Rules. Operation is subject to the following two conditions (1) this device may not cause harmful interference, and (2) this device must accept any interference received, including interference that may cause undesired operation. ACTIVBOARD for Windows Users Guide ____________________________________________________________________ User Guide 4 Contents Welcome About the ACTIVboard and This Guide 5 Registration and Warranty 6 Features 7 System Requirements 8 System Recommendations 9 Connection and Installation Electrical Connections 10 ACTIVboard Software Installation 11 De-installation (Uninstall) 14 Starting ACTIVstudio 16 User Profiles 17 Notebook & Portable Computers 23 E - Pen 24 Operation Mode Set Up 25 Calibrating the ACTIVboard 26 Maintenance and Cleaning appendix A Physical Installation appendix B ACTIVBOARD for Windows Users Guide _____________________________________________________________ User Guide 5 Welcome About the ACTIVboard and this guide Welcome to the presentation world of the ACTIVboard. The ACTIVboard is the computer peripheral that truly humanises the computer interface for effective presentations of all kinds. Your classroom, meeting or conference room now has one device that replaces your white board, paper FlipChart, electronic copyboard and projection screen. Set up your LCD projector and use it as you would a normal projection screen. Connect it to your computer and you have the electronic replacement for your paper FlipChart or an economical electronic copyboard. Save all that meeting data or notes as Flipchart files to your hard drive instead of reams of paper too large to handle comfortably or those curled up electrostatic sheets. Print them out when you are ready or pass them along the network to everyone as an e-mail attachment. Use the ACTIVboard in conjunction with an overhead projector and LCD panel or integrated LCD projector. You no longer have to run back and forth to the keyboard during presentations or use a clumsy remote control mouse or pointer to make your presentation. Stand in front of your meeting and control the presentation from the screen surface. Your ACTIVboard pen is your personal control device as you annotate or manipulate your slide show or create new data. With telecommunications or videoconferencing software you are able to have remote meetings and interact with multiple rooms of people instead of being limited to a small screen monitor. Imagine the possibilities—training, remote learning, collaborative design or even remote presentations. The ACTIVboard is designed to place you in control of your lessons, presentations and meetings and provide the basis for making you more effective. The ACTIVboard surface has been designed for optimal projection characteristics. We therefore do not recommend the use of dry-wipe marker pens. The information in this guide, and the contents of any help files or ReadMe.txt files associated with, or included in, the utility software provided with the ACTIVboard will enable you to operate this product effectively and efficiently. ACTIVBOARD for Windows Users Guide ____________________________________________________________________ User Guide 6 Registration and Warranty Your ACTIVboard will be registered by date of shipment. This product is warranted for Three year from date of sale for the main unit, one year from date of sale for the electronic pens, to be free of defects in material and workmanship and one year labour. You are also entitled to these benefits: • Service and support. UK only 0870 2413194 • Free upgrades or revisions via the Promethean website to keep you informed of the latest features. www.promethean.co.uk • Notification of related products or software releases that may enhance the capabilities and value of your system are available on the Promethean website. • In addition the ACTIVboard User group is now available for you to join. The User group allows you to post discussion topics surrounding the use…
Text truncated - open the document above for the full version.
Users Manual
INSTALLATION GUIDE For ACTIVote UPGRADE KIT for the ACTIVboard PROMETHEAN LTD TP 1397 Issue 1 TP1397 PRM-AVOTE-UPGRADE Installation instructions 2 ACTIVote Upgrade Kit. Installation instructions. Installing the hardware. The ACTIVote transceiver is installed by simply plugging the 25 pin connector into the slot provided on the upper surface of the ACTIVboard electronics pod. This is behind the upper left corner of the board. Two alternatives for housing the transceiver are illustrated below: Installing the software. You will need the diskette provided with the upgrade kit. Follow the instructions (either A or B depending on your PC set up), below to flash upgrade your ACTIVboard Plus system to ACTIVote: REAR VIEW TP1397 PRM-AVOTE-UPGRADE Installation instructions 3 A) Most computers are set up to boot from a floppy disk prior to booting from the hard disk drive. If the computer BIOS is configured to boot from the floppy drive then: 1) Make sure the ACTIVboard is attached to the serial port and is switched on. 2) Place floppy disk in drive. 3) Reboot the host PC. 4) The flash upgrade program will then automatically launch. If the program is unable to communicate with the ACTIVboard it will terminate with the message: ‘ActivBoard not found please ensure ActivBoard is attached to serial port 1 or 2 and is switched on’. If the program can communicate with the ACTIVboard it displays the version number of the firmware currently running in the ACTIVboard and also the firmware version to be updated. The user is asked if he/she wishes to continue. If the user presses ‘Y’ on the keyboard the update commences if ‘N’ is pressed then the program is aborted. N.B. If the firmware to be updated is earlier or the same as the firmware running in the ACTIVboard then a further warning is issued. IMPORTANT: AT NO POINT SHOULD THE POWER TO THE ACTIVBOARD OR THE PC BE TURNED OFF DURING THE UPDATE. THE KEYBOARD SHOULD NOT BE TOUCHED DURING THE UPDATE. The estimated total time of the update is displayed along with a continually updated bar displaying the percentage update completed. TP1397 PRM-AVOTE-UPGRADE Installation instructions 4 B) If the BIOS of the PC is not configured to boot from the floppy then either: The BIOS can be changed to boot from the floppy or the program can be launched from within windows 1) The BIOS can be configured to boot from the floppy by rebooting the PC whilst holding down the ‘boot key’ (for Award and AMI BIOS this is the delete key. For Phoenix BIOS this is the F2 key.) The boot sequence should be selected so the ‘A’ drive is first. 2) If the BIOS is password protected then the program will need to be launched from Windows. If this is done then the following steps should be taken. a. The PC has to be rebooted with the ACTIVboard switched off. (This is to ensure that the driver is not running.) b. Reconnect the ACTIVboard c. Insert floppy disk d. Find the program flashdl.exe on the floppy disk using Windows Explorer. e. Certain properties of the program flashdl.exe need to set. Right clicking on the icon enables you to set properties. The properties to be set are: i. Program – Run maximised. ii. Screen – Usage: Full Screen. iii. Misc. – Background: Always suspended. f. Double-click the icon to run the program. This device complies with Part 15 of the FCC Rules. Operation is subject to the following two conditions (1) this device may not cause harmful interference, and (2) this device must accept any interference received, including interference that may cause undesired operation.
Users Manual
For The ACTIVBOARD + Windows 95, 98, 2000 XP, Millenium or NT ® USER MANUAL Release 1.4 June 2002 English Edition PROMETHEAN LTD. TDS House, Lower Philips Road, Blackburn. BB1 5TH. United Kingdom TP 1336 Issue 1.4 June 2002 ACTIVslate User guide 2 © Promethean Ltd 2001 ACTIVslate User Guide 3 © Promethean Ltd 2001 The ACTIVslate User Manual Contents 1 The ACTIVslate 1.1 Concepts 1.2 Basic Operation 1.3 Changing ID of ACTIVslate 1.4 Mode Boxes 1.5 Recharging ACTIVslate 2 The ACTIVslate Control Program 2.1 Configuring Total ACTIVslates 2.2 Naming an ACTIVslate(s) 2.3 Enabling/Disabling ACTIVslate This device complies with Part 15 of the FCC Rules. Operation is subject to the following two conditions (1) this device may not cause harmful interference, and (2) this device must accept any interference received, including interference that may cause undesired operation. ACTIVslate User guide 4 © Promethean Ltd 2001 Chapter 1 - The ACTIVslate 1.1 Concepts The ACTIVslate provides remote control of your computer mouse pointer. By simply moving the pen over the ACTIVslate surface, you may move the mouse pointer around the desktop. Pressing the pen nib on the ACTIVslate surface produces a left mouse click at the computer. Clicking the button on the pen barrel produces a right mouse click. Pressing the pen nib on the ACTIVslate surface twice in quick succession produces a mouse double click (left button). The ACTIVslate is designed to be (and can ONLY be) used in conjunction with an ACTIVboard. Communication between the two devices takes place via infrared signals. When you use the pen on an ACTIVslate, the information is transmitted from the ACTIVslate (via a transceiver along its top edge) to the ACTIVboard (via the transceiver located at its top left corner). The data is then sent from the ACTIVboard to the PC (via the serial cable) and converted into mouse data. For this reason, both the ACTIVslate AND the ACTIVboard must be switched on. Also, the ACTIVboard driver software must be installed and working correctly on the computer. (See installation guide). It is important that the ACTIVslate has a ‘line of sight’ connection to the ACTIVboard, much in the same way as a TV remote control handset requires visibility of the TV. In other words, when using the ACTIVslate, its top edge must be pointing in the general direction of the ACTIVboard. The ACTIVboard can be considered the ‘master’ device and it is the ACTIVboard that dictates which ACTIVslate (if any) is enabled. NB. Only one ACTIVslate can be enabled at any one time. The decision as to which ACTIVslate is enabled is at the discretion of the user and is selected via the ACTIVslate Control software (see Chapter 2). ACTIVslate User Guide 5 © Promethean Ltd 2001 1.2 Basic Operation of the ACTIVslate To turn on the ACTIVslate press one of the two buttons located at either side of the top edge of the Slate case. Wait until you hear the ACTIVslate beep before releasing. To turn off the ACTIVslate press and hold the same button until the termination message appears on the LCD Panel. NB. In order to save battery power, the ACTIVslate will automatically turn itself off after two minutes of inactivity. If the ACTIVslate is functioning correctly, the LCD should look like this: The battery icon indicates the amount of power left. When the battery is empty OR a recharge message appears on the LCD, it is time to recharge the ACTIVslate. (See Recharging ACTIVslate). The ID number is the means by which the ACTIVboard distinguishes one ACTIVslate from another. If more than one ACTIVslate is being used in a room they should have different ID’s. (See Changing ID of ACTIVslate). The ACTIVslate name can be altered to any name comprising no more than 16 characters. It is altered using ACTIVstudio program (see Chapter two) Battery Icon ID Name State On/Off button (top edge) LCD Panel Mode boxes IR Transceiver (top edge) On/Off button (top edge) Charging /update socket (top edge) Drawing area ACTIVslate User guide 6 © Promethean Ltd 2001 The oval icon (on the LCD panel) represents the current state of the ACTIVslate. The four possible states are: The ACTIVslate pen is not in proximity of the ACTIVslate (i.e. the pen is not close to the drawing surface) and the Slate is not in communication (i.e. no ‘line of sight’ connection) with an ACTIVboard. This can occur when the ACTIVboard is not switched on OR when the ACTIVslate is facing away from the ACTIVboard. The ‘transmission ears’ indicate that the ACTIVslate has a ‘line of sight’ connection to the ACTIVboard and is effectively ‘listening’ to the ACTIVboard. The hollow oval indicates the pen is not yet on the ACTIVslate drawing surface. When you bring the pen into proximity of ACTIVslate, the oval will turn black. The ‘transmission ears’ then indicate that your pen movements are successfully transmitting to the ACTIVboard / computer. This situation can ONLY occur if the ID of the ACTIVslate matches that of the currently enabled Slate in the ACTIVslate Control program (see Chapter 2). If the transmission ears disappear when you bring the pen into proximity, this indicates EITHER there is no ‘line of sight’ between the ACTIVslate and the ACTIVboard OR the ID of the ACTIVslate does not match that of the currently enabled slate in the ACTIVslate Control program (see Chapter 2) 1.3 Changing ID of ACTIVslate. In order to change the ID of the ACTIVslate hold the pen directly over the ID on the LCD panel and press down. The ID number will then start flashing and display the following on the next line: Alter ID: Pressing the pen over the ‘UP’ triangle will increase the ID number. Pressing the pen over the ‘DOWN’ triangle will decrease the ID number. The minimum ID the ACTIVslate can have is 01 and the maximum ID is 63. To return to normal operation press the pen over the flashing ID number. The ID number will be stored permanently in the ACTIVslate. When you first receive your ACTIVslate, the ID number will be automatically pr…
Text truncated - open the document above for the full version.
Users Manual
Quick Start Guide © Promethean 2002 TP 1402 Issue 1.1 Aug 2002 P P r r e e p p a a r r i i n n g g t t h h e e A A C C T T I I V V b b o o a a r r d d On a Windows Based Computer a. Mount the ACTIVboard as described in th e User Guide on the CD and as detailed in the supplied drawing TP 1332 b. Attach the Latching plug-in connector on one end of the serial cable to the socket on the panel located on the rear of the ACTIVboard in the top right hand corner c. Connect the other end of the serial cable to the serial port on your computer d. Plug the connector on the end of the power lead from the ACTIVboard Universal Power Supply into the socket on the back of the serial connector that you just attached to your computer’s serial port e. Plug the Universal Power Supply into your power strip or wall outlet f. Connect and position your projector according to the instructions supplied with the projector unit On a Macintosh computer a. Mount the ACTIVboard as described in the User guide on the CD and as detailed in the supplied drawing TP 1332 b. Attach one end of the USB cable to the ACTIVboard USB adaptor cable, and then connect the latching plug-in connector to the socket on the panel located on the rear of the ACTIVboard in the top right hand corner c. Attach the other end of the USB cable to a free USB port on your computer d. Plug the connector on the end of the DC power lead of the ACTIVboard Universal Power Supply into the socket in the Adaptor you just attached to the ACTIVboard e. Plug the Universal Power Supply into your power strip or wall outlet f. Connect and position your projector according to the instructions supplied with the projector unit I I n n s s t t a a l l l l i i n n g g t t h h e e S S o o f f t t w w a a r r e e On a Windows Based Computer a. Place the Promethean CD into the CD ROM drive If Auto Play is enabled, the main menu screen will automatically appear. If this menu does not automatically appear, choose Run from the Start menu. In the Run dialog box, type the drive letter that contains the CD and type \menu.exe. For example d:\menu.exe b. Click on the document icon to access the product user guides. c. Click on the Driver icon to launch the Driver installation routine. Follow on-screen instructions to install the driver d. Click on the ACTIVstudio icon to launch the ACTIVstudio installation routine. Follow the on-screen instructions to install ACTIVstudio and associated resources Refer to the ACTIVboard User Guide on th e CD for full installation options and instructions. Promethean recommend that you to read the User guides for full product information On a Macintosh computer a. Place the Promethean CD into the CD ROM drive, shortly you will see the ACTIVstudio CD icon appear on your Mac Desktop b. Double click on the ACTIVstudio CD Icon c. Double click on the Promethean Installer icon d. Follow the on screen instructions to install the software Refer to the User Guide on the CD for full installation options and instructions. Promethean recommend that you to read th e online User guides for full product information. C C a a l l i i b b r r a a t t i i n n g g t t h h e e A A C C T T I I V V b b o o a a r r d d On a Windows based computer or a Macintosh Computer The projected image needs to be aligned with the computer screen image (orthographic correction) a. Ensure the projected image fits within the corner markings on the ACTIVboard b. Press the pen tip on the spot located at the bottom left-hand corner of the board c. Click on the board with the pen when prompted to do so Five crosses will appear on screen in succession. Click accurately on the centre of each cross in turn d. The calibration utility will automatically close, the system is now calibrated. Please refer to the ACTIVboard User guide or online help for full instructions on the calibration process R R u u n n n n i i n n g g A A C C T T I I V V s s t t u u d d i i o o On a Windows-based Computer a. Double click on the ACTIVstudio Icon on your desktop or a. Click on the Start button on the task bar b. From the menu select Programs then select ACTIVstudio group c. Within the ACTIVstudio group, locate and then click on d. Enter your License information and serial number – located on your Installation CD case (r equired first time only) e. Create a new user then login Refer to the User Guide on the CD for full instructions on creating users, choosing user profiles and how to log in. Refer to online help system for full ACTIVstudio user guide. On a Macintosh Computer a. Locate the ACTIVstudio Program folder – this should be displayed by default after installation b. Click on c. Enter your License information and serial number – located on your Installation CD case (required first time only) d. Create a new user and login Refer to the User Guide on the CD for full instructions on creating users, choosing user profiles and how to log in. Refer to online help system for full ACTIVstudio user guide. For More Information For more information about ACTIV products please consult the full User Guides which can be found on the Product CD. Please consult the ACTIVstudio online help system for a full guide to using ACTIVstudio’s entire feature set. Support Technical support can be obtained on the following nu mbers, alternatively you ma y contact us online. UK 0870 2413194 Monday - Friday 09.00 – 17.00 GMT [email protected] USA 1-888-652-2848 Monday – Friday 09.00 – 18.00 EST [email protected] France 01 42 26 40 11 Monday - Friday 09.00 – 17.00 CET [email protected] Germany +49 (0)201 85613 33 Monday - Friday 09.00 – 17.00 CET [email protected] Updates Please visit the Promethean website for updated driv ers, software, user guides and flipchart resources US www.activboard.com UK www.promethean.co.uk France www.promethean.fr Germany www.tds-promethean.de ACTIVboard User Group Forum We encourage users around the world to join the ACTIVboard User Group. This is an online forum and we would like to i…
Text truncated - open the document above for the full version.
Users Manual
The for Windows 95 /98 /NT4 /2000 /Me /XP ® USER MANUAL Release 3.4 June 2002 English Edition PROMETHEAN LTD. TDS House, Lower Philips Road, Blackburn. BB1 5TH. United Kingdom TP 1333 Issue 3.4 Jun 2002 ACTIVBOARD for Windows Users Guide ____________________________________________________________________ User Guide 2 ACTIVBOARD for Windows Users Guide _____________________________________________________________ User Guide 3 Promethean Ltd. TDS House Lower Philips Road Blackburn Lancashire. BB1 5TH UK If you experience any problems that cannot be resolved by referring to this manual please call the Promethean support team on 01254 676921 (UK only). © Copyright Promethean Ltd., 1997-2002 All rights reserved. All information contained in this document is subject to change without notice. This guide was prepared with the intention of being error free. The discussion of procedures and techniques, unintended errors in syntax or grammar may modify or prevent your understanding of certain topics. Any use of the contents of this User Manual other than for the purpose intended requires express written permission of Promethean Ltd. All trademarks noted with the ™ mark are the properties of their respective companies _____________________________________________________ NOTE: All utility and driver software provided to operate the ACTIVboard is the property of Promethean Ltd.. Use of this software is granted for the purpose of installation, set up and operation of the ACTIVboard and its standard feature set outlined in this guide. Promethean does not encourage or authorise any other use. Additional application software is provided from time to time as a service to our customers. This software is licensed to the end user by the supplier. Use, possession and upgrades are the responsibility of that supplier. Registered owners of Promethean product should contact those suppliers directly for support. _____________________________________________________ This device complies with Part 15 of the FCC Rules. Operation is subject to the following two conditions (1) this device may not cause harmful interference, and (2) this device must accept any interference received, including interference that may cause undesired operation. ACTIVBOARD for Windows Users Guide ____________________________________________________________________ User Guide 4 Contents Welcome About the ACTIVboard and This Guide 5 Registration and Warranty 6 Features 7 System Requirements 8 System Recommendations 9 Connection and Installation Electrical Connections 10 ACTIVboard Software Installation 11 De-installation (Uninstall) 14 Starting ACTIVstudio 16 User Profiles 17 Notebook & Portable Computers 23 E - Pen 24 Operation Mode Set Up 25 Calibrating the ACTIVboard 26 Maintenance and Cleaning appendix A Physical Installation appendix B ACTIVBOARD for Windows Users Guide _____________________________________________________________ User Guide 5 Welcome About the ACTIVboard and this guide Welcome to the presentation world of the ACTIVboard. The ACTIVboard is the computer peripheral that truly humanises the computer interface for effective presentations of all kinds. Your classroom, meeting or conference room now has one device that replaces your white board, paper FlipChart, electronic copyboard and projection screen. Set up your LCD projector and use it as you would a normal projection screen. Connect it to your computer and you have the electronic replacement for your paper FlipChart or an economical electronic copyboard. Save all that meeting data or notes as Flipchart files to your hard drive instead of reams of paper too large to handle comfortably or those curled up electrostatic sheets. Print them out when you are ready or pass them along the network to everyone as an e-mail attachment. Use the ACTIVboard in conjunction with an overhead projector and LCD panel or integrated LCD projector. You no longer have to run back and forth to the keyboard during presentations or use a clumsy remote control mouse or pointer to make your presentation. Stand in front of your meeting and control the presentation from the screen surface. Your ACTIVboard pen is your personal control device as you annotate or manipulate your slide show or create new data. With telecommunications or videoconferencing software you are able to have remote meetings and interact with multiple rooms of people instead of being limited to a small screen monitor. Imagine the possibilities—training, remote learning, collaborative design or even remote presentations. The ACTIVboard is designed to place you in control of your lessons, presentations and meetings and provide the basis for making you more effective. The ACTIVboard surface has been designed for optimal projection characteristics. We therefore do not recommend the use of dry-wipe marker pens. The information in this guide, and the contents of any help files or ReadMe.txt files associated with, or included in, the utility software provided with the ACTIVboard will enable you to operate this product effectively and efficiently. ACTIVBOARD for Windows Users Guide ____________________________________________________________________ User Guide 6 Registration and Warranty Your ACTIVboard will be registered by date of shipment. This product is warranted for Three year from date of sale for the main unit, one year from date of sale for the electronic pens, to be free of defects in material and workmanship and one year labour. You are also entitled to these benefits: • Service and support. UK only 0870 2413194 • Free upgrades or revisions via the Promethean website to keep you informed of the latest features. www.promethean.co.uk • Notification of related products or software releases that may enhance the capabilities and value of your system are available on the Promethean website. • In addition the ACTIVboard User group is now available for you to join. The User group allows you to post discussion topics surrounding the use…
Text truncated - open the document above for the full version.
ID Label/Location Info
0168
ID Label/Location Info
0168
ID Label/Location Info
0168
ID Label/Location Info
0168 0168
Test Report
REPORT ON EMC Testing of a Electronic Interactive Whiteboard & Student Interaction System FCC ID : QAM001 Report No OO609685August 2002 TUV Product Service Ltd, Segensworth Road, Titchfield Fareham, Hampshire, United Kingdom, PO15 5RH Tel: +44(0)1329 443459, Fax: +44(0)1329 443331 www.tuvps.co.uk Report No OO609685Page 1 of 17 REPORT ONEMC Testing of a Electronic Interactive Whiteboard & Student Interaction System. FCC ID : QAM001 Report No OO609685 August 2002 PREPARED FORPromethean Limited TDS House Lower Philips Road Blackburn Lancashire BB1 5TH APPROVED BY C H Gould Chief Engineer DATED 12-08-02 DISTRIBUTIONPromethean LimitedCopy 1 TÜV Product ServiceCopy 2 Copy No Total No of Pages 17 FCC ID : QAM001 Report No OO609685Page 2 of 17 STATUS OBJECTIVETo undertake measurements to determine the Equipment Under Test's (EUT's) compliance with the specification. MANUFACTURING DESCRIPTIONElectronic Interactive Whiteboard & Student Interaction System MANUFACTURERPromethean Limited SERIAL NUMBERNot Serialised TEST SPECIFICATION NUMBERFCC Part 15 Subpart C; 2000 REGISTRATION NUMBERY609685 QUANTITY OF ITEMS TESTEDOne SECURITY CLASSIFICATION OF EUTUnclassified INCOMING RELEASEDeclaration of Build Status SERIAL NUMBERY609685 DATE7 th July 2002 DISPOSALHeld Pending Disposal REFERENCE NUMBER DATE ORDER NUMBERPE 1231 DATE8 th May 2002 START OF TEST8 th July 2002 FINISH OF TEST19 th July 2002 TEST ENGINEERSB Bennett A R Hubbard RELATED DOCUMENTSANSI C63.4 1992. Methods of Measurement of Radio-Noise Emissions from Low-Voltage Electrical and Electronic Equipment in the Range of 10 kHz to 1 GHz. FCC ID : QAM001 Report No OO609685Page 3 of 17 SYSTEM CONFIGURATION DURING EMC TESTING The EUT together with all associated cabling, was set-up simulating a typical user installation on the Open Field Test Site, then tested in accordance with the specification. The EUT consisted of a Hand Held Voting Pad and a Whiteboard connected to a Laptop PC. The whiteboard was powered by a dedicated Power Supply Unit. The EUT was functioning correctly during all testing, and was running the Votetest 3a software which repeatedly caused a ‘voting’ signal to be transmitted from the Hand Held Voting Pad which was acknowledged by the PC via the Radio pod attached to the Whiteboard. FCC ID : QAM001 Report No OO609685Page 4 of 17 EMISSION TESTING Instrumentation used for Emission Testing: InstrumentManufacturerType NoEMC No Cal Due…
Text truncated - open the document above for the full version.
Contact Information
Applicant
John Harrison(Head of Product Compliance and Certification.)
Test Firm
TUV SUD Product ServiceDavid West
Technical Specifications
| # | Rule Parts | Frequency Range | Power Output |
|---|---|---|---|
| 1 | 15C | 915 MHz - 915 MHz | - |
Other Applications from Promethean Ltd

QAM027
Dec 05, 2024ActivPen 2
Equipment Class
DTS - Digital Transmission System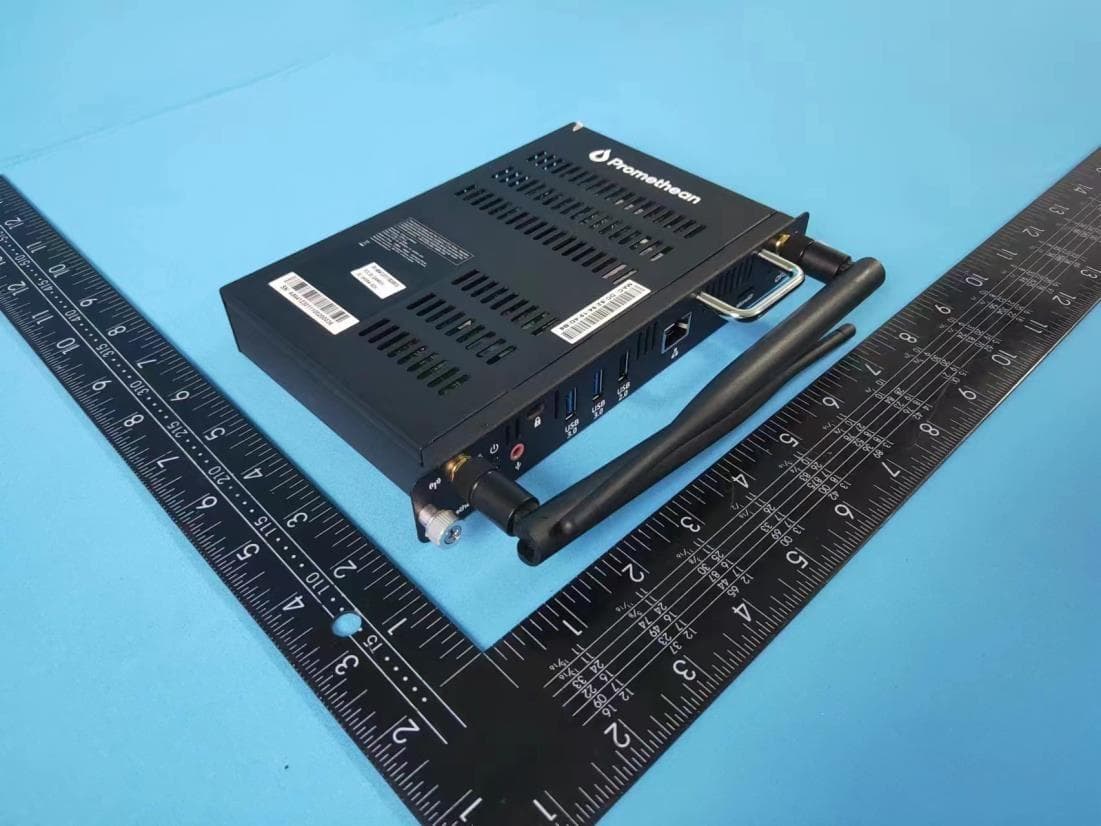
QAM024
May 03, 2023OPS-A
Equipment Class
DSS - Part 15 Spread Spectrum Transmitter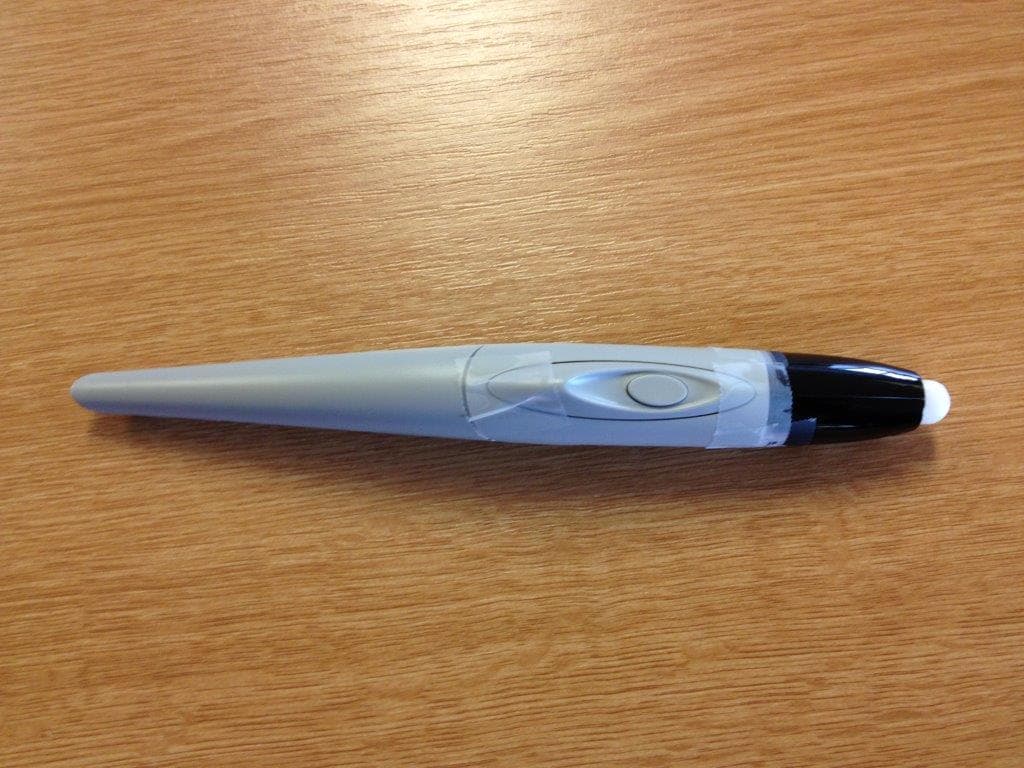
QAM017
Apr 21, 2015ActivBoard Pen
Equipment Class
DXX - Part 15 Low Power Communication Device Transmitter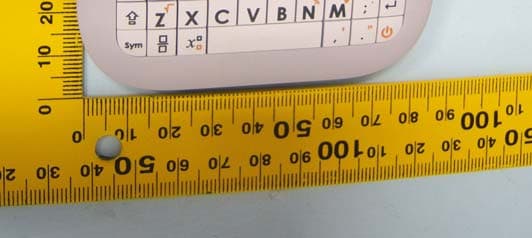
QAM014
Jul 31, 2011ActivExpression2 Student Response Unit
Equipment Class
DSS - Part 15 Spread Spectrum Transmitter
QAM016
Jan 24, 2011500 Pro Series Interactive Whiteboard
Equipment Class
DSS - Part 15 Spread Spectrum Transmitter