VNH-LRC-122RFRF Remote Control
Inkel Corporation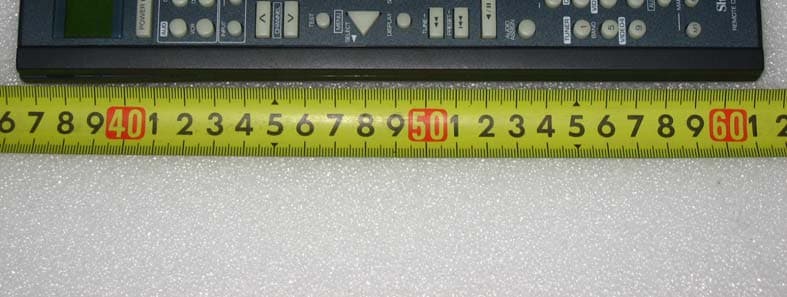
Click to zoom
Application Details
- Equipment Class
- DXX - Part 15 Low Power Communication Device Transmitter
- Date of Grant
- Nov 15, 2007
- Application Purpose
- Original Equipment
- Date of Application
- Nov 15, 2007
- Equipment Note
- RF Remote Control
- Frequency Range
- 2433.00000000 - 2433.00000000
- Company
- Inkel Corporation
- Country
- South Korea
Documents & Files
Document Text
Text extracted from the exhibit documents filed with the FCC. Open a document above to read the original.
Users Manual
LRC-122RF� 2007.11.1 11:24 AM 페이지 1 2 Introduction Information To The User This equipment has been tested and found to comply with the limits for a Class B digital device, pursuant to Part 15 of the FCC Rules. These limits are designed to provide reasonable protection against harmful interference in a residential installation. This equipment generates, uses and can radiate radio frequency energy and, if not installed and used in accordance with the instructions, may cause harmful interference to radio communications. However, there is no guarantee that interference will not occur in a particular installation. If this equipment does cause harmful interference to radio or television reception, which can be determined by turning the equipment off and on, the user is encouraged to try to correct the interference by one or more of the following measures: �Reorient or relocate the receiving antenna. �Increase the separation between the equipment and receiver. �Connect the equipment into an outlet on a circuit different from that to which the receiver is connected. �Consult the dealer or an experienced radio/TV technician for help. Caution : Any changes or modifications in construction of this device which are not expressly approved by the party responsible for compliance could void the user’s authority to operate the equipment. This Class B digital apparatus complies with Canadian ICES-003. Cet appareil numérique de la Classe B est conforme à la norme NMB-003 du Canada. CONTENTS • Specifications . . . . . . . . . . . . . . . . . . . . . . . . . . . . . . . . . . . . . . . . . . . . . . . . . . . . . . . . . . . . . . . . . . . . . . . . . . . . . . . . . .2 • RF Universal Remote Controls . . . . . . . . . . . . . . . . . . . . . . . . . . . . . . . . . . . . . . . . . . . . . . . . . . . . . . . . . . . . . . . . . . . .3 OPERATING COMPONENTS WITH REMOTE CONTROL . . . . . . . . . . . . . . . . . . . . . . . . . . . . . . . . . . . . . . . . . . . 5 REMOTE CONTROL OPERATION RANGE . . . . . . . . . . . . . . . . . . . . . . . . . . . . . . . . . . . . . . . . . . . . . . . . . . . . . . . .5 LOADING BATTERIES . . . . . . . . . . . . . . . . . . . . . . . . . . . . . . . . . . . . . . . . . . . . . . . . . . . . . . . . . . . . . . . . . . . . . . . 5 USING FUNCTIONS OF REMOTE CONTROL . . . . . . . . . . . . . . . . . . . . . . . . . . . . . . . . . . . . . . . . . . . . . . . . . . . . . 6 • Setup Code Table . . . . . . . . . . . . . . . . . . . . . . . . . . . . . . . . . . . . . . . . . . . . . . . . . . . . . . . . . . . . . . . . . . . . . . . . . . . . . .15 Specifications • Operating frequency | 2.433 GHz ±± 100 kHz • RF range | 15 ~ 30 meters (50~100 feet), depending on the environment • Sensitivity | Min. -90 dB Note: Design and specifications are subject to change without notice for improvements. ENGLISH LRC-122RF� 2007.11.1 11:24 AM 페이지 2 3 RF Remote Control This universal remote control can operate not only this receiver but also most popular brands of audio and video components such as CD players, tape decks, TVs, cable boxes, VCRs, DVD players, satellite receivers, etc. • To operate 7 components other than this receiver , you should enter the setup code for each component. (For details, refer to “USING FUNCTIONS OF REMOTE CONTROL” on page 6.) • The numbered buttons on the remote control have different functions in different device modes. For details, refer to "FUNCTION TABLE of the NUMBERED BUTTONS" on the next page. �About the transmission signal This remote control can emit not only the infrared beams which the conventional remote control(including the ROOM 2 remote control) uses but also the RF(Radio Frequency) beams which are stronger than those. To operate this receiver and other components, this remote control should emit the infrared beams. To operate this receiver only from longer distance even if there are obstacles such as walls, furniture, etc. in the way, this remote control should emit the RF beams. Therefore, depending on how to use this remote control, you should set the transmission signal mode to "IR"(default value) or "RF". (For details, refer to "Changing the transmission signal" on page 14.) �Notes : • To receive the RF beams, you should connect the RF remote antenna to this receiver. (For details, refer to "CONNECTING RF REMOTE ANTENNA" in the operating instructions of your receiver.) • If the transmission signal mode is set to "RF", this remote control cannot control other audio and video components. However, if the IR emitter is connected to the IR OUT jack, you can control other component via it. (For details, refer to "CONNECTING MULTI-ROOM SYSTEM KIT" in the operating instructions of your receiver.) ENGLISH LRC-122RF� 2007.11.1 11:24 AM 페이지 3 ENGLISH 4 �FUNCTION TABLE of the NUMBERED BUTTONS. �Notes : • Some functions for each component may not be available or may work differently. • Depending on other kinds of components that are available for each DEVICE button, some functions may not be available or may work differently, too. • For details about functions, refer to the operating instructions of each component. LRC-122RF� 2007.11.1 11:24 AM 페이지 4 ENGLISH 5 LOADING BATTERIES OPERATING COMPONENTS WITH REMOTE CONTROLREMOTE CONTROL OPERATION RANGE �In case that this remote control emits the infrared beams • Use the remote control within a range of about 7 meters (23 feet) and angles of up to 30 degrees aiming at the remote sensor. �In case that this remote control emits the RF beams • Use the remote control within a distance of about 15 meters (50 feet) toward this receiver. �Notes : • When you cannot operate any component, check if the transmission signal mode is set to "RF". (For details, refer to "Changing the transmission signal" on page 14.) • In this case, to operate the component, connect the IR emitter to the IR OUT jack and use the remote control toward this receiver. (For details, refer to "CONNECTING RF REMOTE ANTENNA" and "CONNECTING MULTI-ROOM SY…
Text truncated - open the document above for the full version.
Users Manual
21 ENGLISH • If any of buttons fails to operate as they should, start from the step 1again to enter the correct setup code. �Note : • Manufacturers may use different setup codes for the same product category. For that reason, it is important that you check to see if the code you have entered operates as many controls as possible. If only a few functions operate, check to see if another code will work with more buttons. 6. Operate the component using the corresponding function buttons. 4. While "PRESET" is displayed, press the ENTER button to store the setup code. 5. Operate the component using the corresponding function buttons. 6. Repeat the above steps 1 to 5 for each of your other components. 1. Turn on the component you want to operate. 2. Perform the steps 3 and 4 in "Entering a setup code" procedure on page 20 to select the setup code mode ("CODE"). 3. While "PRESET" is displayed, search a setup code, aiming the remote control at the remote sensor on the component. 7. Repeat the above steps 1 to 6 for each of your other components. Searching a setup code • Each time the CURSOR UP(▲)/DOWN(▼) buttons are pressed, the setup code is selected one by one. • If the selected code is correct, your component will be turned off. • When your component is not turned off, repeat this step until you find one that works. • In addition to enter a setup code using "Setup Code Table" on page 73, it is also possible to search through all the codes that are stored in the library of this remote control. • Then "OK" is displayed on the LCD screen. • If any of buttons fails to operate as they should, start from the step 1 again to find the correct setup code. R-772(A) 2007.8.16 5:21 PM 페이지 21 ENGLISH 22 • If the command has been learned successfully, "OK" is displayed and then "SEL" is flickering. • If "ERROR" is displayed and then "SEL" is flickering, it means that for some reason the command was not learned. In this case, repeat the above steps 4 and 5. �Notes : • If an incorrect signal has been sent or, in some cases, the command from other remote control simply cannot be learned. • In some "ERROR" cases, the remote controls just need to be moved closer together or farther apart. Programing the commands from other remote controls (LEARNING mode) • Then "SEL" is flickering. • If "SEL" goes off, start again from the above step 2. • If the setup codes are not available for your component or you want to program a missing or special function into one button of a device, the learning function enables this remote control to learn the commands from other remote controls. • Then "READY" is displayed. �Note: • You cannot program a function into some buttons such as DEVICE, MACRO and LIGHT buttons. �To exit from the setting mode, press any of the DEVICE buttons. • Then "LEARN" is displayed on the LCD screen for several seconds �Note : • During setting operation, to exit from the setting mode, press any of the DIVICE buttons. 1. Place this remote control and other remote control facing each other at a distance of 5 to 15 cm (2 to 6 inches ) apart. 2. Press and hold down the ENTER button and the desired one of the DEVICE buttons for more than 2 seconds. 3. While "LEARN" is displayed, press the ENTER button. 4. While "SEL" is flickering, on this remote control, press the button corresponding to the function to be learned. 5. While "READY" is displayed, on the other remote control, press the button of the function to be learned. 8. Operate the newly programmed buttons to make sure the learning function was performed properly. 7. Repeat the above steps 1 to 6 to program the commands from a different remote control. 6. While "SEL" is flickering, repeat the above steps 4 and 5 to program all the commands you want to the buttons on this remote control under the same device mode. Example: If the function to be learned is playback, press the PLAY(▶) button. R-772(A) 2007.8.16 5:21 PM 페이지 22 23 ENGLISH Erasing the programmed command from one button • "OK" is displayed and then "SEL" is flickering. • Then "BTTN" is displayed on the LCD screen for several seconds. Example: When the button for the command to be erased is PLAY button. • Each time the CURSOR UP(▲)/DOWN(▼) buttons are pressed, "BTTN" or "LEARN"(all command deleting mode) is selected. • Then "SEL" is flickering. • If "SEL" goes off, start again from the above step 1. 1. Perform the steps 3 and 4 in "Entering a setup code" procedure on page 20 to select the delecting mode ("DELETE"). 1. Perform the steps 3 and 4 in "Entering a setup code" procedure on page 20 to select the deleting mode ("DELETE"). 2. While "BTTN" is displayed, press the CURSOR UP(▲)/DOWN(▼) buttons to select the all command deleting mode ("LEARN"), then press the ENTER button. 3. While "SURE?" is displayed, press the ENTER button. 4. To erase all the commands programmed under other device mode, repeat the above steps 1 to 3. 2. While "BTTN" is displayed, press the CURSOR UP(▲)/DOWN(▼) buttons to select the one command deleting mode (BTTN), then press the ENTER button. 3. While "SEL" is flickering, press the button for the command you want to erase. 4. While "SEL" is flickering, repeat the above step 3 to erase other commands. Erasing all the commands programmed under a device mode • Then all the commands programmed are erased. • Then "BTTN" is displayed on the LCD screen for several seconds. • Then "SURE?" is displayed . • If "SURE?" goes off, start again from the above step 1. R-772(A) 2007.8.16 5:21 PM 페이지 23 ENGLISH 24 Programming a macro function Example: When playing a DVD on the DVD player connected to VIDEO 2 jacks of this receiver. ①. Press "AUDIO" button to control this receiver. ②. Press "POWER ON" button to turn this receiver on. ③. Press "VIDEO 2(7)" button to select the desired input source. ④. Press "DVD" button to control the DVD player. ⑤. Press "POWER ON" button to turn the DVD player on. ⑥. Press "PLAY (▶)" button to start playback. • Each time the operation buttons are pressed, …
Text truncated - open the document above for the full version.
Users Manual
ENGLISH 41 Examples: For "3": For " 27": For "124": • When "XM CH ���" disappears, repeat again from the above step 1. 1. In the XM mode, select the direct search mode. 2. While displaying "XM CH���", select the desired channel number with pressing the NUMERIC (0 ~ 9) buttons. • Each time this button is pressed, the search mode changes as follows: →XM CH ���→Category name→OFF (Direct search) (Category search) �Note: • When using channel search or preset search, press this button to select the search off. • Direct search is useful when you already know the channel number. Direct search 1. In the XM mode, select the category search mode. 2. While displaying a category name, select the desired category, then press the ENTER button. • Then a category name is displayed. • Each time these buttons are pressed, one of different categories is selected. • When a category name disappears, repeat again from the above step 1. • Category search allows you to select the desired channel by the selected category. Category search • In the XM mode, press the TUNING UP (+)/DOWN (-) buttons repeatedly to select the desired channel. Channel search R-772(A) 2007.8.16 5:21 PM 페이지 41 42 ENGLISH 1. Select the desired channel with preforming channel search, direct search or category search. 2. To memorize the channels, perform the steps 2 to 4 in "Manual presetting" procedure on page 39. • You can store up to 30 preferred channels in the memory. Presetting channels • In the XM mode, select the desired preset channel. Preset search �Note: • If the information on artist name, song title or category is not available, it will not be displayed correctly. �Signal strength display mode • If the reception is poor, you can check the signal strength of the XM radio signal and adjust the position of the XM antenna until "GOOD" is displayed. • You can display XM information such as channel name, artist name, song title and signal strength. Displaying XM information • In the XM mode, �Error message and status • If an operation takes longer than usual or an error occurs, one of the following messages may be displayed. MessageStatus ANTENNAThe XM antenna is not connected correctly. Check the antenna. UPDATINGThe XM user encryption code is being updated. Please wait. NO SIGNLThe signal is too weak. Check the antenna connection and reposition it for the best reception. LOADINGThis receiver is tuning or decoding audio or text data. Please wait. OFF AIRThe selected XM channel is not currently broadcasting. Select another channel. • Each time the DISPLAY button is pressed, the display mode changes as follows: →Channel number/name →Artist name →Song title →Category Volume ←Surround mode ←Input signal ←Signal strength("GOOD", "MARGINAL", "WEAK", "NO SIGNL") ← Continued 3. While displaying the selected category, select the desired channel. R-772(A) 2007.8.16 5:21 PM 페이지 42 43 Operating the sleep timer • The sleep timer allows the system to continue to operate for a specified period of time before automatically shutting off. • To set the receiver to automatically turn off after the specified period of time. • Each time this button is pressed, the sleep time changes as follows: →10 →20 →30 →--- →90 →OFF Unit : minutes • While operating the sleep timer, "" lights up. Displaying the audio information • You can check the audio information on the input source. • During playback, • Each time this button is pressed, the display mode changes as follows : • When the EXTERNAL IN is selected as an input source, the surround mode is not displayed. • When XM satellite radio function is available in your country, for details on the XM information, see "Displaying XM information" on page 42. • Each time this button is pressed, the brightness of the fluorescent display changes as follows: →ON →dimmer →OFF • In the display OFF mode, pressing any button will cancel the display OFF mode. Adjusting the brightness of the fluorescent display OTHER FUNCTIONS ENGLISH Input signal Surround mode Volume Input source →→ → → R-772(A) 2007.8.20 10:2 AM 페이지 43 44 • ROOM 2 ~ is displayed for several seconds. • Each time this button is pressed, the ROOM 2 mode changes as follows : OFF : To turn off the ROOM 2 function. ("R2" goes off .) � ON : To turn it on. ("R2" lights up.) �Note : • When the ROOM 2 mode is set to OFF, you cannot adjust the ROOM 2 volume. ROOM 2 SOURCE PLAYBACK ■When using the buttons on the remote control unit. • This function allows enjoying one source in the main room and playing another in a different room at the same time. • When you connect the multi-room system kit to the IR IN jack of this receiver, you can control this receiver with not only the universal remote control unit but also the ROOM 2 remote control unit in a different room, too. (For details, refer to "CONNECTING MULTI-ROOM SYSTEM KIT" on page 13 and "ROOM 2 Remote Controls" on page 29.) �Notes: • The analog signals from the EXTERNAL INs and the digital signals cannot be output to the different room, meaning no playback in a different room. • You cannot play the ROOM 2 source in any surround mode. ■When using the buttons on the front panel. • Each time the INPUT button on the universal remote control unit is pressed, the ROOM 2 input can be selected among MAIN source, TUNER, CD, AUX, TAPE, VIDEO 1 ~ VIDEO 4. • ROOM 2 ~ is displayed for several seconds. • When the ROOM 2 setting mode disappears, press the ROOM 2 button again. • Each time these buttons are pressed, the mode changes as follows : ROOM 2 ~ : To turn on or (ROOM 2 mode) off the ROOM 2 �function. IN ~ : To select the desired ROOM 2 source. (ROOM 2 input) � VOL ~ : To adjust the volume on the power (ROOM 2 volume) amplifier assigned to "BACK ←→ ROOM 2" or "ROOM 2". �Notes: • When the EXTERNAL IN is selected as a main input, if the MAIN source is selected as a ROOM 2 input, no audio signal can be heard in the different room (ROOM 2). • Even when this receiver enters the standby mode, in such a case that "R2" lights up still…
Text truncated - open the document above for the full version.
External Photos
Appendix C. External Photographs Report no. ETLE070822.576, Page C1 of C1 Head Office: # 371-51 Gasan-dong, Geumcheon-gu, Seoul, 153-803, Korea Tel : 82-2-858-0786 Fax : 82-2-858-0788 EMC Lab : #584 Sangwhal-ri, Ganam-myeon, Yoju-gun, Gyeonggi-do, 469-885, Korea ETLQP-21-F22-0 View of front View of rear
ID Label/Location Info
Appendix A. FCC ID Label and Location Report no. ETLE070822.576, Page A1 of A1 Head Office: # 371-51 Gasan-dong, Geumcheon-gu, Seoul, 153-803, Korea Tel: 82-2-858-0786 Fax: 82-2-858-0788 EMC Lab : #584 Sangwhal-ri, Ganam-myeon, Yoju-gun, Gyeonggi-do, 469-885, Korea ETLQP-21-F22-0 Product Label Sample with FCC Label information Following is a sample copy of the label that will be placed on the rear cabinet of the product. The FCC ID Label and compliance statement are marked in the product label. Inkel Corporation Acce RF Remote Control FCC ID : VNH-LRC-122RF Model No : LRC 122 RF Power : DC 6 V (AAA 4EA) Serial No : N/A This device complies with Part 15 of the FCC Rules. Operation is Subject to the following two conditions: (1) this device may not Cause harmful interference and (2) this device must accept any Interference received, including interference that may cause undesired Operation. Made in Korea Label Location The label shown shall be permanently affixed at a conspicuous location on the device and be readily visible to the user at the time purchase.(Labeling requirements per 2.925) Label here
Internal Photos
Appendix D. Internal Photographs Report no. ETLE070822.576, Page D1 of D3 Head Office: # 371-51 Gasan-dong, Geumcheon-gu, Seoul, 153-803, Korea Tel : 82-2-858-0786 Fax : 82-2-858-0788 EMC Lab : #584 Sangwhal-ri, Ganam-myeon, Yoju-gun, Gyeonggi-do, 469-885, Korea ETLQP-21-F22-0 Inside view of EUT Appendix D. Internal Photographs Report no. ETLE070822.576, Page D2 of D3 Head Office: # 371-51 Gasan-dong, Geumcheon-gu, Seoul, 153-803, Korea Tel : 82-2-858-0786 Fax : 82-2-858-0788 EMC Lab : #584 Sangwhal-ri, Ganam-myeon, Yoju-gun, Gyeonggi-do, 469-885, Korea ETLQP-21-F22-0 Top side view of main board Appendix D. Internal Photographs Report no. ETLE070822.576, Page D3 of D3 Head Office: # 371-51 Gasan-dong, Geumcheon-gu, Seoul, 153-803, Korea Tel : 82-2-858-0786 Fax : 82-2-858-0788 EMC Lab : #584 Sangwhal-ri, Ganam-myeon, Yoju-gun, Gyeonggi-do, 469-885, Korea ETLQP-21-F22-0 Bottom side view of main board
Operational Description
RF Remote Operating 1. Sync signal transmission protocol Frequency : 2.433GHz 1) Move from Remote Control to AUDIO Mode by entering key of AUDIO. 2) Enter the key that user wants function. 3) Arrange a data of relevant key to meet RF sync communications protocol below. (Data No.) +Frame No.+ R/C ID (L) + R/C ID (H) + sub ID + Model Name + Carrier(P) + Carrier(H) + Custom + Custom + Data + Data contentsdescription Data No.Amount of sent data. Frame No.Number of frame. R/C ID (L)Remote Control ID low R/C ID (H)Remote Control ID high sub ID Device number wanted to control in toolRemote Control. Model NameDevice which is selected in Remote Control, now Audio0x32 etc.0x33 ~0x39 Carrier(P)Cycle of Carrier Carrier(H)high length of Carrier Custom Nec Code(custom) Custom Nec Code(custom Bar) DataNec Code(Data) DataNec Code(Data Bar) 4) Send Arranged data by 2.433GHz frequency. 2. Asynchronous signal transmission protocol Frequency : 2.433GHz 1) Enter key of CD,AUX,DVD,CBL,SAT,TV,VCR Mode using Remote Control. 2) Enter the key which user wants function. 3) Arrange a data of relevant key to meet RF Asynchronous communications protocol below. Data No. +Frame No.+ R/C ID (L) + R/C ID (H) + sub ID + 0xBB + Carrier(P) + Carrier(H) + Time(L) + Time(H) contentsdescription Data No.Amount of sent data Frame No.Number of frame R/C ID (L)Remote Control ID low R/C ID (H)Remote Control ID high sub ID Device number wanted to control in toolRemote Control 0xBBCOMMAND to send data by nonsync Carrier(P)Cycle of Carrier in IR Remote Control Carrier(H)high length of Carrier in IR Remote Control Time(L) Time of Asynchronous conversion Time(H)Time of Asynchronous conversion 4) Send Arranged data by 2.433GHz frequency. 3. RF signal transmission 1. U1 - RFIC CC2500 : The CC2500 is a low-cost 2.4 GHz transceiver designed for very low-power wireless applications. The circuit is intended for the 2400-2483.5 MHz ISM (Industrial, Scientific and Medical) and SRD (Short Range Device) frequency band. The main operating parameters and the 64-byte transmit/receive FIFOs of CC2500 can be controlled via an SPI interface 2. Y1 - 26MHz XOSC : CC2500 creates wanted frequency through inner PLL using 26MHz XOSC frequency 3. C10, L3, C11 – LPF : Signal from CC2500 send Power Amplifier after filtering through LPF . 4. U2 – Power Amplifier : Low level signal comes through Signal of lowLPF will emit outside through antenna after amplified by approximately 10 dB 5. Procedure of transferring RF signal: The signal transferred from CPU is stored in TXFIFO and this signal will convert to analog signal through ADC after the process of alteration, and put on the desirable frequency by using frequency created through 26MHz XOSC. This signal will be transferred Outisde of CC2500 through Internal PA after amplified to desirable level. This transferred signal will emit through the antenna after filterd by LPF and amplified by outter PA 4. Receiving of RF Signal 1. U1 - RFIC CC2500 : The CC2500 is a low-cost 2.4 GHz transceiver designed for very low-power wireless applications. The circuit is intended for the 2400-2483.5 MHz ISM (Industrial, Scientific and Medical) and SRD (Short Range Device) frequency band. The main operating parameters and the 64-byte transmit/receive FIFOs of CC2500 can be controlled via an SPI interface 2. Y1 - 26MHz XOSC : CC2500 create the desirable frequency through internal PLL by using 26Mhz XOSC as frequency. 3. C10, L3, C11 – LPF : RF Signal comes from Antenna will transfer to CC2500 after removing high frequency noise by Low Pass Filter. 4. Procedure of receiving RF signal: Received RF signal incomes from outter antenna and this signal will transfer to CC2500 after filtering through LPF. The signal transferred to CC2500 will be amplified through LNA and down-converted to mixer with the frequency created by 26Mhz crystal This signal will be converted to digital signal through ADC and will transfer to CPU after demodulated and stored in RXFIFO. * Trnsfering and receiving are possile, but only used for receiving.
Operational Description
Key Input Key ? Sleep Mode Start End Key Data Usart Output Remote Flow 2.4333Ghz Output Usart Receive Sleep Mode End Tx Module Flow
Test Report
www.etl.re.kr This report only responds to the tested sample and may not be reproduced, except in full, without written approval of the ETL Inc. Electromagnetic Emission FCC MEASUREMENT REPORT CERTIFICATION OF COMPLIANCE FCC Part 15 Certification Measurement This is RF Remote Control; Model LRC-122 RF has been tested in accordance with the measurement procedures specified in ANSI C63.4-2003 at the ETL/EMC Test Laboratory and has been show to be complied with the electromagnetic radiated emission limits specified in FCC Rule Part15 Subpart C section 15.249. I attest to the accuracy of data. All measurement herein was performed by me or was made under my supervision and is correct to the best of my knowledge and belief. I assume full responsibility for the completeness of these measurements and vouch for the qualifications of all persons taking them. The results of testing in this report apply to the product/system which was tested only. Other similar equipment will not necessarily produce the same results due to production tolerance and measurement uncertainties. H.S, Lee / Chief Engineer ETL Inc. #584 Sangwhal-ri, Ganam-myeon, Yoju-gun, Gyeonggi-do, 469-885, Korea Tel : 82-2-858-0786 Fax : 82-2-858-0788 PRODUCT : RF Remote Control MODEL/TYPE NO : LRC-122 RF FCC ID : VNH-LRC-122RF APPLICANT : Inkel Corporation 345-50 Gasan-dong, Geumcheon, Seoul, 153-802, Korea. Attn.: Eun-Hwan, Shim/ Principal Reseach Engineer MANUFACTURE : Same as applicant FCC CLASSIFICATION : Part 15 Low Power Communication Device Transmitter FCC RULE PART(S) : FCC Part 15 Subpart C Section 15.249 FCC PROCEDURE : Certification TRADE NAME : Sherwood TEST REPORT No. : ETLE070822.576 DATES OF TEST : October 08, 2007 – October 10, 2007 DATES OF ISSUE : October 15, 2007 TEST LABORATORY : ETL Inc. ( FCC Registration Number : 95422) #584 Sangwhal-ri, Kanam-myon, Yoju-kun, Kyounggi-do, 469-885, Korea Tel : 82-2-858-0786 Fax : 82-2-858-0788 FCC TEST REPORT Report no. ETLE070822.576 / Page 2 of 18 Head Office: # 371-51 Gasan-dong, Geumcheon-gu, Seoul, 153-803, Korea Tel : 82-2-858-0786 Fax : 82-2-858-0788 EMC Lab : #584 Sangwhal-ri, Ganam-myeon, Yoju-gun, Gyeonggi-do, 469-885, Korea ETLQP-21-F22-0 Table of Contents FCC Measurement Report 1. Introduction 2. Product Information 3. Description of Tests 3.1 Restricted Bands of Operation (Section 15.205) 3.2 Conducted Emissions Measurement (Section 15.207) 3.3 Radiated Emissions Measurement (Section 15.209) 3.4 Fundamental Transmit Power and Spurious Radiated Power (Section 15.249) 3.5 Occupied Bandwidth measurement (Section 15.231) 3.6 Antenna Requirement (Section 15.203) 4. Test Condition 5. Test Results 5.1 Summary of Test Results 5.2 Conducted Emissions Measurement (Section 15.207) 5.3 Radiated Emissions Measurement (Section 15.209) 5.4 Fundamental Transmit Power and Spurious Radiated Power (Section 15.249) 5.5 Occupied Bandwidth measurement (Section 15.231) 6. Sample Calculation 7. List of test Equipment Appendix A. FCC ID Label and Location Appendix B. Test Setup Photographs Appendix C. External Photographs Appendix D. Internal Photographs Appendix E. Block Diagram Appendix F. Schematics Appendix G. User Manual FCC TEST REPORT Report no. ETLE070822.576 / Page 3 of 18 Head Office: # 371-51 Gasan-dong, Geumcheon-gu, Seoul, 153-803, Korea Tel : 82-2-858-0786 Fax : 82-2-858-0788 EMC Lab : #584 Sangwhal-ri, Ganam-myeon, Yoju-gun, Gyeonggi-do, 469-885, Korea ETLQP-21-F22-0 Applicant Name : Inkel Corporation Address : 345-50 Gasan-dong, Geumcheon, Seoul, 153-802, Korea. Attention : Eun-Hwan, Shim/ Principal Reseach Engineer FCC MEASUREMENT REPORT Scope – Measurement and determination of electromagnetic emission(EME) of radio frequency devices including intentional radiators and/or unintentional radiators for compliance with the technical rules and regulations of the U.S Federal Communications Commission(FCC) General Information z EUT Type : RF Remote Control z Model Number : LRC-122 RF z FCC ID : VNH-LRC-122RF z S/N : N/A z FCC Rule Part(s) : FCC Part 15 Subpart C Section 15.249 z Test Procedure : ANSI C63.4-2003 z FCC Classification : Part 15 Low Power Communication Device Transmitter z Dates of Tests : October 08, 2007 – October 10, 2007 z Place of Tests : ETL Inc. EMC Testing Lab (FCC Registration Number : 95422) 584, Sangwhal-Ri, Kanam-Myun, Yoju-Kun, Kyounggi-Do, Korea Tel : 82-2-858-0786 Fax : 82-2-858-0788 z Test Report No. : ETLE070822.576 FCC TEST REPORT Report no. ETLE070822.576 / Page 4 of 18 Head Office: # 371-51 Gasan-dong, Geumcheon-gu, Seoul, 153-803, Korea Tel : 82-2-858-0786 Fax : 82-2-858-0788 EMC Lab : #584 Sangwhal-ri, Ganam-myeon, Yoju-gun, Gyeonggi-do, 469-885, Korea ETLQP-21-F22-0 1. INTRODUCTION The measurement test for radiated and conducted emission test were conducted at the ETL Inc facility located at 584, Sangwhal-ri, Ganam-myun, Youju-kun, Kyoungki-do, Korea. The open area test site is constructed in conformance with the requirements of the ANSI C63.4-2003 and CISPR Publication 16. The ETL has site descriptions on file with the FCC for 3 and 10 meter site configurations. Detailed description of test facility was found to be in compliance with the requirements of Section 2.948 FCC Rules according to the ANSI C63.4-2003 and registered to the Federal Communications Commission(Registration Number : 95422 ). The measurement procedure described in American national standard for method of measurement of radio-noise emission from low-voltage electrical and elec…
Text truncated - open the document above for the full version.
Contact Information
Applicant
Eun-HWan Shim(R&D Strategy Team Principal Research Engineer)
Test Firm
E-RAE Testing LaboratoryYo Han Park
Technical Specifications
| # | Rule Parts | Frequency Range | Power Output |
|---|---|---|---|
| 1 | 15C | 2.43 GHz - 2.43 GHz | - |
Other Applications from Inkel Corporation

VNH-IK8ARS
Dec 03, 2015Bluetooth module
Equipment Class
DSS - Part 15 Spread Spectrum Transmitter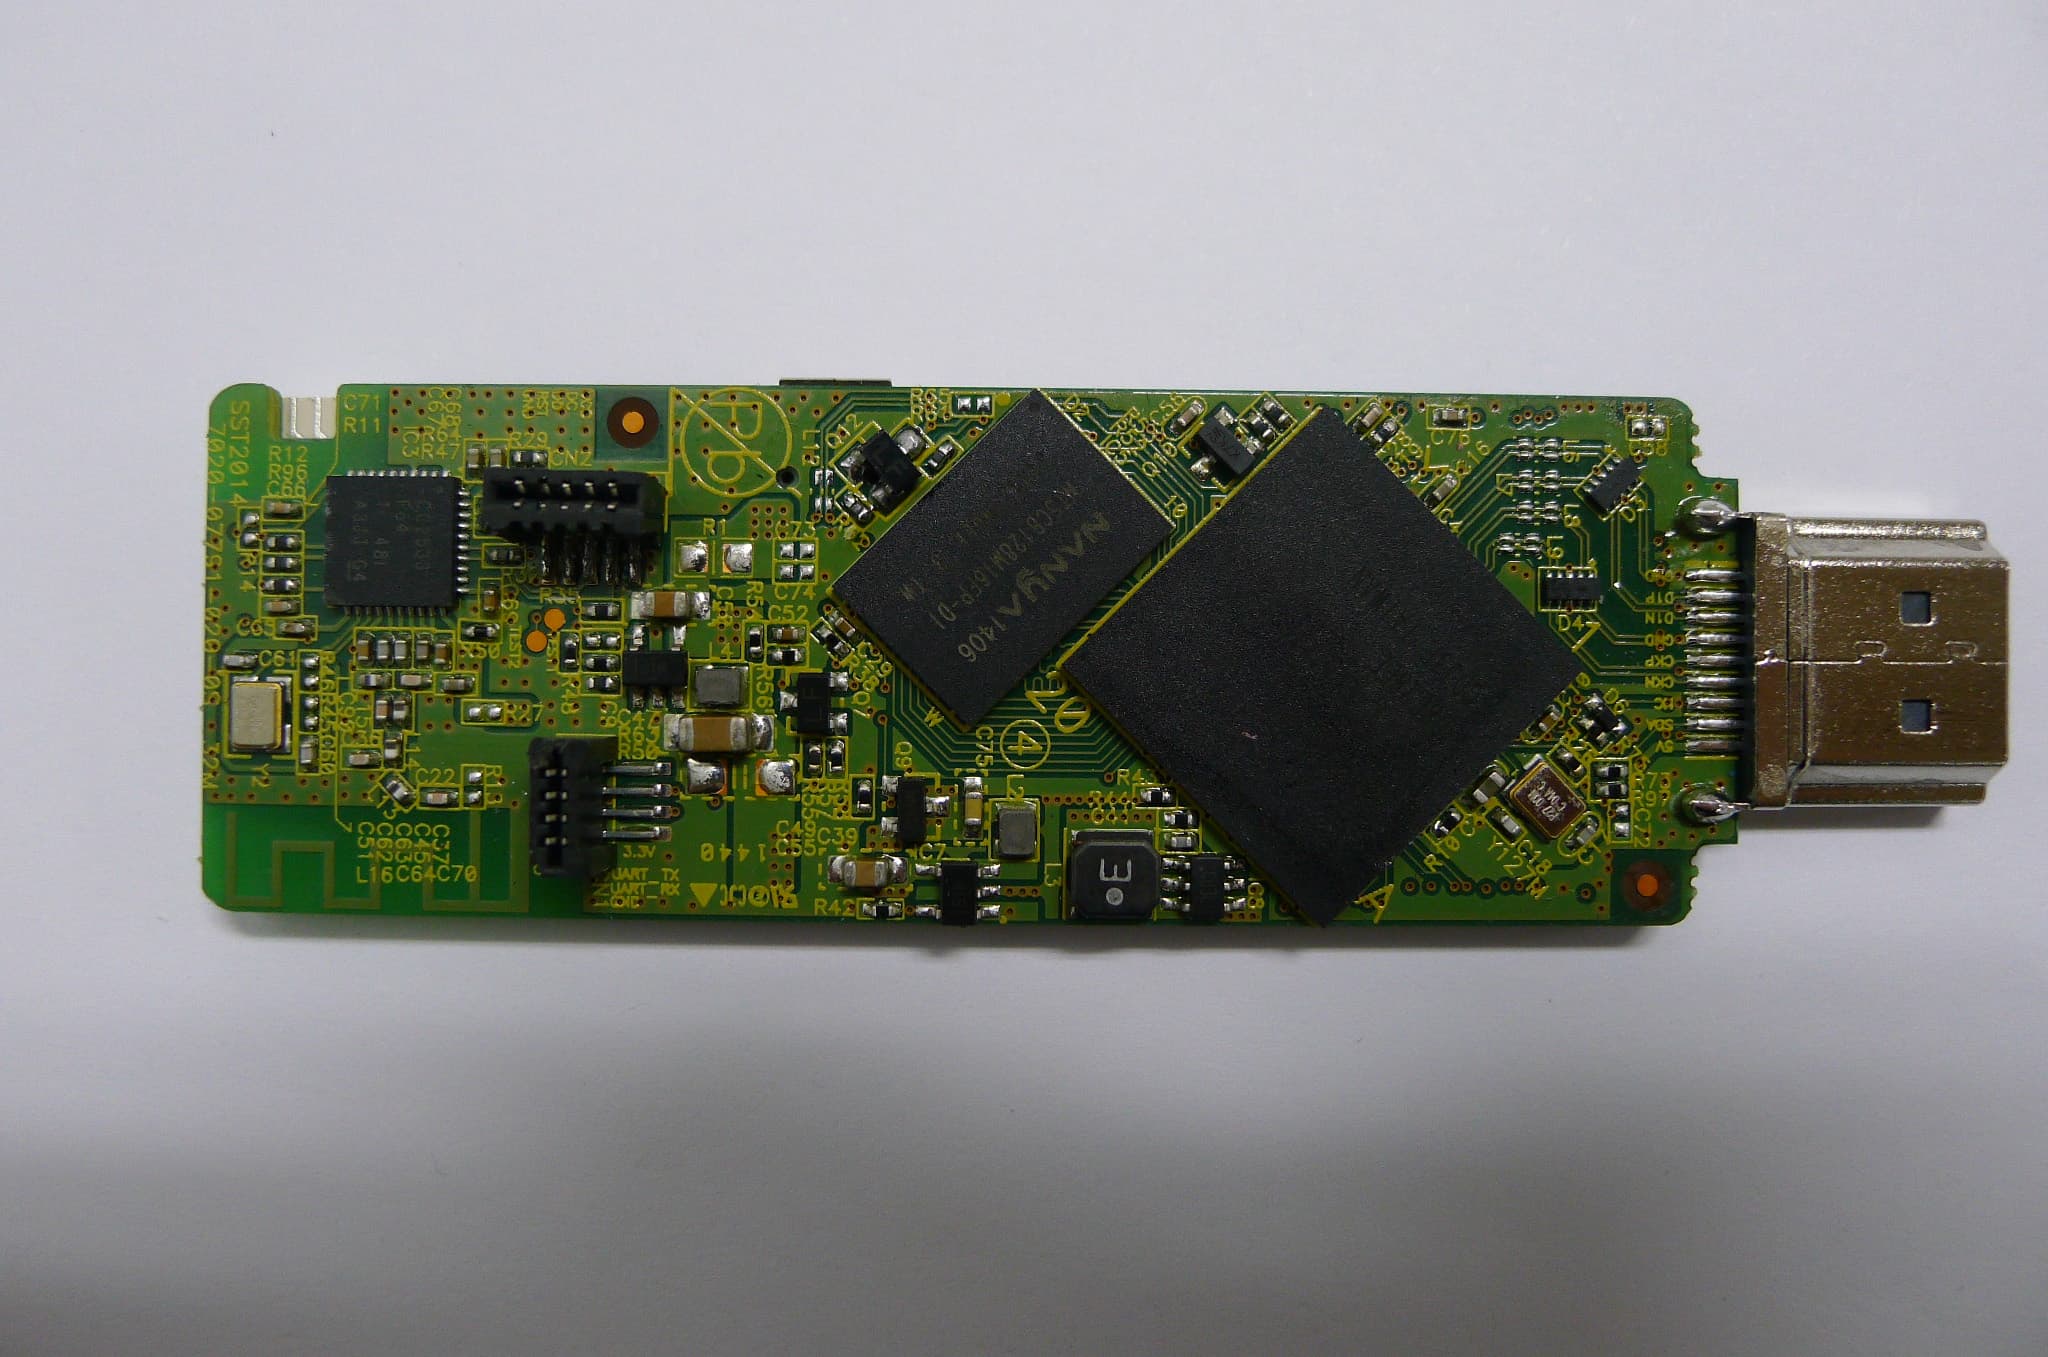
VNH-T001M
Nov 03, 2014HDMI Dongle
Equipment Class
DTS - Digital Transmission SystemVNH-T001R
Oct 28, 2014REMOTE CONTROLLER
Equipment Class
DTS - Digital Transmission System
VNH-IK-CSRBC05
Sep 22, 2014Bluetooth module
Equipment Class
DSS - Part 15 Spread Spectrum Transmitter
VNH-IK-CSR8645
Feb 17, 2014BLUETOOTH MODULE
Equipment Class
DSS - Part 15 Spread Spectrum Transmitter