WS311KC2AC00LCD Projector
SANYO Electronics (Dongguan) Co., Ltd.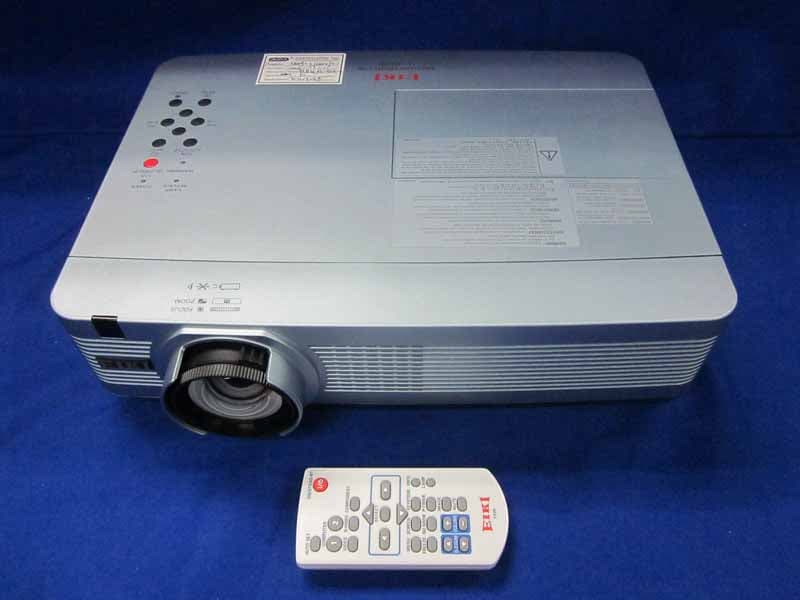
Click to zoom
Application Details
- Equipment Class
- JBP - Part 15 Class B Computing Device Peripheral
- Date of Grant
- May 31, 2011
- Application Purpose
- Original Equipment
- Date of Application
- May 25, 2011
- Equipment Note
- LCD Projector
- Country
- China
Documents & Files
Document Text
Text extracted from the exhibit documents filed with the FCC. Open a document above to read the original.
Users Manual
MULTIMEDIA PROJECTOR User’s Manual 2 Features and Design This Multimedia Projector is designed with the most advanced technology for portability, durability, and ease of use. This projector utilizes built-in multimedia features, a palette of 16.77 million colors, and matrix liquid crystal display (LCD) technology. ♦ Compact Design This projector is designed compact in size and weight. It is easy to carry and installed anywhere you wish to use. ♦ Simple Computer System Setting The projector has the Multi-scan system to conform to almost all computer output signals quickly (p.30). Up to WUXGA resolution can be accepted. ♦ Useful Functions for Presentations - The digital zoom function allows you to focus on the crucial information during a presentation (p.37) - The MIC function and 10W audio output allows you to make a presentation without any external audio equipment (p.26). ♦ Lamp mode Brightness of the projection lamp can be selected (pp.27, 56). ♦ Direct Power Off Function With the Direct Power Off function, you can disconnect the power cord from the wall outlet or turn off the breaker even during projection (p.22). ♦ Logo Function The Logo function allows you to customize the screen logo (pp.48-50). You can capture an image for the screen logo and use it for the starting-up display or between presentations. ♦ Picture in Picture Function This projector is capable of projecting two images simultaneously by using either built-in P in P mode or P by P mode. (pp.28, 52) ♦ Multilanguage Menu Display Operation menu is available in 22 languages: English, German, French, Italian, Spanish, Portuguese, Dutch, Swedish, Finnish, Polish, Hungarian, Romanian, Czech, Russian, Turkish, Arabic, Kazakh, Vietnamese, Chinese, Korean, Japanese and Thai (p.46). ♦ Security Function The Security function helps you to ensure security of the projector. With the Key lock function, you can lock the operation on the top control or remote controller (p.57). PIN code lock function prevents unauthorized use of the projector (pp.21, 57-58). ♦ Helpful Maintenance Functions Lamp and filter maintenance functions provide for better and proper maintenance of the projector. ♦ LAN Network Function This projector is loaded with the Wired LAN network function. You can operate and manage the projector via network. For details, refer to the user’s manual of “Network Set-up and Operation.” ♦ Auto Setup Function This function enables Auto input, Auto Keystone correction and Auto PC adjustment by pressing the AUTO SET button (p.47). ♦ Colorboard Function At the time of simple projection on the colored wall, you can get the close color image to the color image projected on a white screen by selecting the similar color to the wall color from the preset four colors. ♦ Switchable Interface Terminal The projector provides a switchable interface terminal. You can use the terminal as computer input or monitor output conveniently (p.51). ♦ Power Management Mode The Power management mode function reduces power consumption and maintains the lamp life (p.53). ♦ Closed caption This is a printed version of the program sound or other information displayed on the screen. You can turn on the feature and switch the channels. (p.55) 3 Table of Contents Trademarks Each name of corporations or products in this book is either a registered trademark or a trademark of its respective corporation. Features and Design . . . . . . . . . . . . . .2 Table of Contents . . . . . . . . . . . . . . . . .3 To the Owner . . . . . . . . . . . . . . . . . . . . .4 Safety Instructions . . . . . . . . . . . . . . . .5 Air Circulation 8 Installing the Projector in Proper Position 8 Moving the Projector 8 Compliance . . . . . . . . . . . . . . . . . . . . . .9 Part Names and Functions . . . . . . . .10 Front 10 Back 10 Bottom 10 Rear Terminal 11 Top Control 12 Remote controller 13 Remote controller Battery Installation 14 Remote controller Operating Range 14 Remote Control Code 14 Installation . . . . . . . . . . . . . . . . . . . . . .15 Positioning the Projector 15 Adjustable Feet 15 Connecting to a Computer 16 Connecting to VIDEO Equipment 17 Connecting to COMPONENT VIDEO and SCART Equipment 18 Connecting the AC Power Cord 19 Basic Operation . . . . . . . . . . . . . . . . .20 Turning On the Projector 20 Turning Off the Projector 22 How to Operate the On-Screen Menu 23 Main Menu 24 Zoom and Focus Adjustment 25 Auto Setup Function 25 Keystone Correction 25 Sound Adjustment 26 Remote controller Operation 27 Computer Input . . . . . . . . . . . . . . . . .29 Input Source Selection (ANALOG PC: COMPUTER 1/COMPUTER 2) 29 Computer System Selection 30 Auto PC Adjustment 31 Manual PC Adjustment 32 Image Mode Selection 34 Image Adjustment 35 Aspect Setting 36 VIDEO Input . . . . . . . . . . . . . . . . . . . . .38 Input Source Selection (VIDEO, S-VIDEO) 38 Input Source Selection (COMPONENT, SCART, HDMI) 39 VIDEO System Selection 40 Image Mode Selection 41 Image Adjustment 42 Aspect Setting 44 Setting . . . . . . . . . . . . . . . . . . . . . . . . .46 Setting 46 Information . . . . . . . . . . . . . . . . . . . . .61 Input Source Information Display 61 Maintenance and Cleaning . . . . . . . .62 WARNING indicator 62 Replacing the Filters 63 Resetting the Filter Counter 63 Attaching the Lens Cap 64 Cleaning the Projection Lens 64 Cleaning the Projector Cabinet 64 Lamp Replacement 65 Appendix . . . . . . . . . . . . . . . . . . . . . . .67 Troubleshooting 67 Menu Tree 70 Indicators and Projector Condition 72 Compatible Computer Specifications 73 Technical Specifications 75 Optional Parts 76 PJ Link Notice 77 Attaching the Filter Cover to the Projector 77 Configurations of Terminals 78 List of Picture in Picture 79 PIN Code Protection 79 Dimensions 80 4 To the Owner CAUTION: TO REDUCE THE RISK OF ELECTRIC SHOCK, DO NOT REMOVE COVER (OR BACK). NO USER-SERVICEABLE PARTS INSIDE EXCEPT LAMP REPLACEMENT. REFER SERVICING TO QUALIFIED SERVICE PERSONNEL. THIS SYMBOL INDICATES THAT DANGEROUS …
Text truncated - open the document above for the full version.
Users Manual
Computer Input 31 Computer Input Auto PC Adjustment function is provided to automatically adjust Fine sync, Total dots, Horizontal position and Vertical position to conform to your computer. PC adjust Menu Auto PC Adjustment To store adjustment parameters The adjusted parameters from the Auto PC Adjustment can be stored in the projector. Once the parameters are stored, the setting can be done just by selecting a Mode (1–10) in the PC System Menu (p.30). See also “Store” on page 33. Note: • Fine sync, Total dots, Horizontal position and Vertical position of some computers cannot be fully adjusted with the Auto PC Adjustment function. When the image is not provided properly with this operation, manual adjustments are required (pp. 32-33). • The Auto PC Adjustment cannot be operated when 480i, 575i, 480p, 575p, 720p, 1035i or 1080i is selected in the PC System Menu (p. 30), or when the signal is coming from the HDMI terminal. Press the MENU button to display the On-Screen Menu. Use the Point ▲▼ buttons to select PC adjust and then press the Point ► button or the OK button. 1 2 Use the Point ▲▼ buttons to select Auto PC and then press the OK button. Auto PC Menu Operation Use Point ▲▼ buttons to select Auto PC and press the OK button. Please wait... appears while the Auto PC adjustment is in process. 32 Computer Input PC adjust Menu Manual PC Adjustment Some computers employ special signal formats which may not be tuned by Multi-scan system of this projector. Manual PC Adjustment enables you to precisely adjust several parameters to match those signal formats. The projector has 10 independent memory areas to store those parameters manually adjusted. It allows you to recall the setting for a specific computer. 1 2 Use the Point ◄► buttons to adjust the value, eliminating a flicker from the image displayed (from 0 to 31). Fine sync Use the Point ◄► buttons to adjust the number of total dots in one horizontal period to match your PC image. Total dots Use the Point ◄► buttons to adjust the horizontal picture position. Horizontal position Use the Point ◄► buttons to adjust the vertical picture position. Vertical position Use the Point ◄► buttons to adjust the clamp level. When the image has dark bars, try this adjustment. Clamp Press the MENU button to display the On-Screen Menu. Use the Point ▲▼ buttons to select PC adjust and then press the Point ► button or the OK button. Use the Point ▲▼ buttons to select the desired item and then press the OK button to display the adjustment dialog box. Use the Point ◄► buttons to adjust the setting value. Use the Point ◄► buttons to adjust the vertical area displayed by this projector. Display area V Use the Point ◄► buttons to adjust the horizontal area displayed by this projector. Display area H Press the OK button to show H-sync freq. and V-sync freq. of the connected computer. Current mode Computer Input 33 Computer Input Store To store the adjusted data, select Store and then press the Point ► button or the OK button. Move the highlight to one of the Mode 1 to 10 in which you want to store, and then press the OK button. Mode free To clear the stored data, select Mode free and then press the Point ► button or the OK button. Move the highlight to the Mode that you want to clear and then press the OK button. Note: • Display area (H/V) cannot be selected when 480i, 575i, 480p, 575p, 720p, 1035i or 1080i is selected in the PC System Menu (p.30). • When input computer signal to the projector, PC adjust will become available. Reset To reset the adjusted data, select Reset and press the OK button. A confirmation box appears and then select Yes. All adjustments will return to their previous figures. This Mode has stored parameters. Values of Total dots, Horizontal position, Vertical position, Display area H, and Display area V. Vacant Press the OK button to store the data. Press the MENU button to close this dialog box. Mode free Store 34 Computer Input Image select Menu IMAGE button Presentation High contrast User 1 User 2 User 3 Image Mode Selection User 4 Blackboard (Green) Standard Remote controller IMAGE button Select the desired image mode among Presentation, Standard, High contrast, Cinema, Blackboard (Green), Colorboard, User 1, User 2, User 3 and User 4 by pressing the IMAGE button on the remote controller. Standard Picture mode with improved halftone for graphics. High contrast Blackboard (Green) User 1-4 For the image projected on a blackboard. This mode helps enhance the image projected on a blackboard. This is mainly effective on a green colored board, not truly effective on a black colored board. Presentation Direct Operation For viewing pictures in a bright room. Normal picture mode preset on the projector. For viewing with the user preset image mode in the Image Adjust Menu (see page 35). 1 2 Menu Operation Colorboard Colorboard At the time of simple projection on the colored wall, you can get the close color image to the color image projected on a white screen by selecting the similar color to the wall color from the preset four colors. Press the MENU button to display the On-Screen Menu. Use the Point ▲▼ buttons to select Image select and then press the Point ► button or the OK button. Use the Point ▲▼ buttons to select the desired item and then press the OK button. Picture mode adjusted with fine tone. Cinema Cinema Computer Input 35 Computer Input Image Adjust Menu Image Adjustment Reset Press the MENU button to display the On-Screen Menu. Use the Point ▲▼ buttons to select Image adjust and then press the Point ► button or the OK button. 1 2 Use the Point ▲▼ buttons to select the desired item and then press the OK button to display the adjustment dialog box. Use the Point ◄► buttons to adjust the setting value. Note: • When White balance Red, Green or blue is adjusted, Color temp. will change to User. • When Blackboard(Green) or Colorboard is selected in Image select, Color temp. will change to Blackboard or Colorboard. Press the Point ◄ …
Text truncated - open the document above for the full version.
Users Manual
56 Setting Remote control This projector provides two different remote control codes: the factory-set initial code (Code 1) and the secondary code (Code 2). This switching function prevents remote controller interference when operating several projectors or video equipment at the same time. When operating the projector in Code 2, both the projector and the remote controller must be switched to Code 2. To change the code for the projector: Select either Code 1 or Code 2 in this Setting Menu. To change the code for the remote controller: Press and hold both the MENU and IMAGE buttons together for 5 seconds or more. After changing the code, make sure the remote controller operates properly. Note: • When different codes are set on the projector and on the remote controller, any operation cannot be made. In that case, switch the code on the remote controller to fit the code on the projector. • If the batteries are removed from the remote controller for a long period of time, the remote control code will be reset. Remote control This function allows you to change brightness of the screen. Lamp mode Note: • Lamp mode can not be changed for a while after turning on the projector. Lamp needs some time to stabilize after the power is turned on. Stored lamp mode will be active after the lamp is stabilized. • If Mode 2 has been selected and the projection lamp exceeds the recommended total hours of use, the replacement icon will be displayed at the time of power-on. Then the projector will turn off after 3 minutes. • The Lamp replacement icon will not appear when the Display function is set to Off (p.48), during Freeze (p.27), or Blank (p.28). Auto.......Brightness according to the input signal. Normal..Normal brightness Eco 1.....70%-80% of the normal brightness. Eco 2.....50% of the normal brightness. Lamp mode Lamp life control Select the lamp operation when the total lighting time of a lamp exceeds the recommended total hours of use. Mode 1........ The lamp can be turned on even after exceeding the recommended total hours of use. Mode 2.........The lamp can be turned on even after exceeding the recommended total hours of use. But the projector turns off automatically after 3 minutes. Lamp replacement icon Lamo mode Setting 57 Setting Key lock Key lock Security (Key lock and PIN code lock) PIN code lock This function locks the top control and remote controller buttons to prevent operation by unauthorized persons. Select Key lock and then press the OK button and select the desired item by pressing the Point ▲▼ buttons. .... Unlocked. .... Lock the operation of the top control. To unlock, use the remote controller. .... Lock the operation of the remote controller. To unlock, use the top control. If the top control accidentally becomes locked and you do not have the remote controller nearby or there is something wrong with your remote controller, contact the dealer where you purchased the projector or the service center. This function allows you to use the Key lock and PIN code lock function to set the security for the projector operation. This function prevents the projector from being operated by unauthorized persons and provides the following setting options for security. Off .......... Unlocked. On 1 ....... Enter the PIN code every time turning on the projector. On 2 ....... Enter the PIN code to operate the projector once the power cord is disconnected; as long as the AC power cord is connected, the projector can be operated without a PIN code. Whenever you change the PIN code lock setting or the PIN code (the four-digit number), you are required to enter the PIN code. The “1234” is set as the initial PIN code at the factory. If you want to change the PIN code lock setting, press the OK button and the PIN code dialog box appears. When the projector is locked with the PIN code, the Security icon appears on the guide. PIN code lock When the projector is locked with the PIN code, the Security icon appears on the guide. 58 Setting Use the Point ▲▼ buttons to select Off, On 1 or On 2, and then press the OK button to make a choice. Change the PIN code lock setting Enter a PIN code Use the Point ▲▼ buttons to enter a number. Press the Point ◄ ► buttons to fix the number and move the red frame pointer to the next box. The number changes to . If you fixed an incorrect number, use the Point ◄ ► buttons to move the pointer to the number you want to correct, and then enter the correct number. Repeat this step to complete entering a four-digit number. After entering the four-digit number, move the pointer to Set. Press the OK button so that you can change the following PIN code lock setting. If you entered an incorrect PIN code, PIN code and the number () will turn red for a moment. Enter the correct PIN code all over again. Enter a PIN code Change the PIN code Change the PIN code CAUTION: WHEN YOU HAVE CHANGED THE LOGO PIN CODE, WRITE DOWN THE NEW PIN CODE AS A REMINDER. IF YOU FORGET YOUR PIN CODE, THE PROjECTOR CAN NO LONGER BE STARTED. The PIN code can be changed to your desired four-digit number. Press the OK button to select PIN code change. Pin code dialog box appears, use the Point ▲▼ buttons to enter the current code. The New PIN code input dialog box appears. Set a new PIN code. Note: If you forget your PIN code and unable to change it, the PIN code can be reset to the factory default setting (1234) according to the following procedures. When you reset the PIN code, the Logo PIN code and Key lock will be reset, as well. 1. Unplug the AC Power Cord from the AC outlet. 2. Hold down the OK button on the projector and connect the AC Power Cord into the outlet again. Keep holding down the OK button until the POWER indicator lights. The PIN code returns to the factory default setting while the PIN code lock state will remain the same as the previous set state. This function provides the following options in the cooling fans’ operation when the projector is turned off (p.22). L 1 .... Normal ope…
Text truncated - open the document above for the full version.
Block Diagram
LV-8320 BLOCK PW392C-30L 10Bit input(10Bit output)With A/Dconverter PJ NET PIC18F67J60 HDMI SIL9127 PC1RGB/YCbCr/SCART PC2RGB-IN/RGB-OUT ADCQXXAVC650M QXXAVD127P HS1VS1 R2G2B2SOG2 R1G1B1SOG1 LE24C023M-EP HS2VS2 QXXAVC697P Audio IN1Audio IN2/MICAudio OUT AUDIO SELECTOR TC4052BFTP LV49152 S-VIDEOVIDEOAUDIO_INService PORT SP3232ECYP L3E07111K0A M 620062006200 PANEL PANELPANEL RGB RG B FLASHMEMORY TEMP SENSOR TEMP SENSORTEMP SENSOR FANAFANBFANC X880225.0MHZ X133127.000MHz X800127.0MH Z SUB CPU LAMP BALLAST LAMP X98858MHZ IC9001L3E08030F0A X900116MHZ
External Photos
R AUDIX Technology (Shenzhen) Co., Ltd. FCC ID:WS311KC2AC00 page Audix Technology (Shenzhen) Co., Ltd. Report No. ACS-F11080 7-1 7. PHOTOGRAPH OF EUT Figure 1 General Appearance of the EUT Figure 2 General Appearance of the EUT R AUDIX Technology (Shenzhen) Co., Ltd. FCC ID:WS311KC2AC00 page Audix Technology (Shenzhen) Co., Ltd. Report No. ACS-F11080 7-2 Figure 3 General Appearance of the EUT Figure 4 General Appearance of the EUT
ID Label/Location Info
Label
Internal Photos
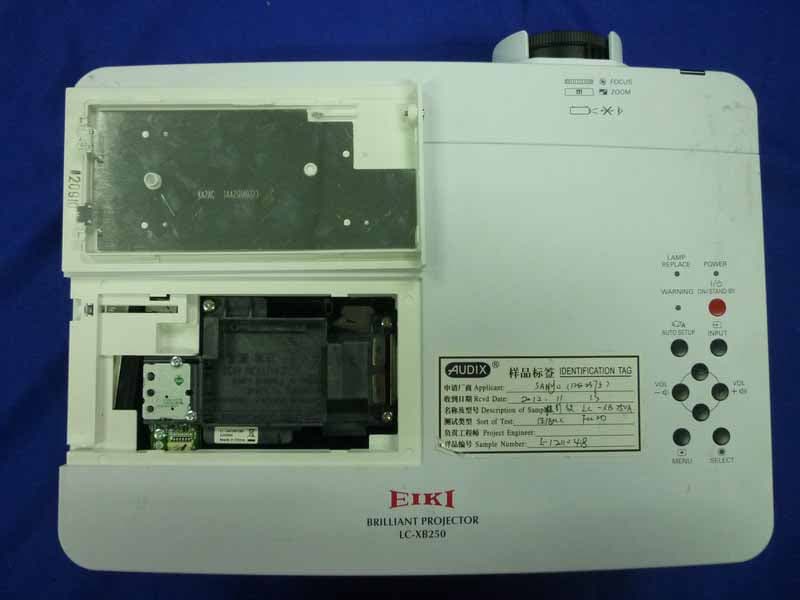
R AUDIX Technology (Shenzhen) Co., Ltd. FCC ID:WS311KC2AC00 page Audix Technology (Shenzhen) Co., Ltd. Report No. ACS-F11080 7-3 Figure 5 Inside of the EUT Figure 6 Inside of the EUT R AUDIX Technology (Shenzhen) Co., Ltd. FCC ID:WS311KC2AC00 page Audix Technology (Shenzhen) Co., Ltd. Report No. ACS-F11080 7-4 Figure 7 Inside of the EUT Figure 8 Inside of the EUT R AUDIX Technology (Shenzhen) Co., Ltd. FCC ID:WS311KC2AC00 page Audix Technology (Shenzhen) Co., Ltd. Report No. ACS-F11080 7-5 Figure 9 Inside of the EUT Figure 10 Inside of the EUT R AUDIX Technology (Shenzhen) Co., Ltd. FCC ID:WS311KC2AC00 page Audix Technology (Shenzhen) Co., Ltd. Report No. ACS-F11080 7-6 Figure 11 Inside of the EUT Figure 12 Inside of the EUT R AUDIX Technology (Shenzhen) Co., Ltd. FCC ID:WS311KC2AC00 page Audix Technology (Shenzhen) Co., Ltd. Report No. ACS-F11080 7-7 Figure 13 Inside of the EUT Figure 14 Inside of the EUT R AUDIX Technology (Shenzhen) Co., Ltd. FCC ID:WS311KC2AC00 page Audix Technology (Shenzhen) Co., Ltd. Report No. ACS-F11080 7-8 Figure 15 Inside of the EUT Figure 16 Inside of the EUT R AUDIX Technology (Shenzhen) Co., Ltd. FCC ID:WS311KC2AC00 page Audix Technology (Shenzhen) Co., Ltd. Report No. ACS-F11080 7-9 Figure 17 Inside of the EUT Figure 18 Inside of the EUT R AUDIX Technology (Shenzhen) Co., Ltd. FCC ID:WS311KC2AC00 page Audix Technology (Shenzhen) Co., Ltd. Report No. ACS-F11080 7-10 Figure 19 Inside of the EUT Figure 20 Inside of the EUT R AUDIX Technology (Shenzhen) Co., Ltd. FCC ID:WS311KC2AC00 page Audix Technology (Shenzhen) Co., Ltd. Report No. ACS-F11080 7-11 Figure 21 Inside of the EUT Figure 22 Inside of the EUT R AUDIX Technology (Shenzhen) Co., Ltd. FCC ID:WS311KC2AC00 page Audix Technology (Shenzhen) Co., Ltd. Report No. ACS-F11080 7-12 Figure 23 Inside of the EUT Figure 24 Inside of the EUT R AUDIX Technology (Shenzhen) Co., Ltd. FCC ID:WS311KC2AC00 page Audix Technology (Shenzhen) Co., Ltd. Report No. ACS-F11080 7-13 Figure 25 Inside of the EUT Figure 26 Inside of the EUT R AUDIX Technology (Shenzhen) Co., Ltd. FCC ID:WS311KC2AC00 page Audix Technology (Shenzhen) Co., Ltd. Report No. ACS-F11080 7-14 Figure 27 Inside of the EUT Figure 28 Inside of the EUT R AUDIX Technology (Shenzhen) Co., Ltd. FCC ID:WS311KC2AC00 page Audix Technology (Shenzhen) Co., Ltd. Report No. ACS-F11080 7-15 Figure 29 Inside of the EUT Figure 30 Inside of the EUT R AUDIX Technology (Shenzhen) Co., Ltd. FCC ID:WS311KC2AC00 page Audix Technology (Shenzhen) Co., Ltd. Report No. ACS-F11080 7-16 Figure 31 Inside of the EUT Figure 32 Inside of the EUT R AUDIX Technology (Shenzhen) Co., Ltd. FCC ID:WS311KC2AC00 page Audix Technology (Shenzhen) Co., Ltd. Report No. ACS-F11080 7-17 Figure 33 Inside of the EUT Figure 34 Inside of the EUT R AUDIX Technology (Shenzhen) Co., Ltd. FCC ID:WS311KC2AC00 page Audix Technology (Shenzhen) Co., Ltd. Report No. ACS-F11080 7-18 Figure 35 Inside of the EUT Figure 36 Inside of the EUT R AUDIX Technology (Shenzhen) Co., Ltd. FCC ID:WS311KC2AC00 page Audix Technology (Shenzhen) Co., Ltd. Report No. ACS-F11080 7-19 Figure 37 Inside of the EUT Figure 38 Inside of the EUT R AUDIX Technology (Shenzhen) Co., Ltd. FCC ID:WS311KC2AC00 page Audix Technology (Shenzhen) Co., Ltd. Report No. ACS-F11080 7-20 Figure 39 Inside of the EUT Figure 40 Inside of the EUT R AUDIX Technology (Shenzhen) Co., Ltd. FCC ID:WS311KC2AC00 page Audix Technology (Shenzhen) Co., Ltd. Report No. ACS-F11080 7-21 Figure 41 Inside of the EUT Figure 42 Inside of the EUT R AUDIX Technology (Shenzhen) Co., Ltd. FCC ID:WS311KC2AC00 page Audix Technology (Shenzhen) Co., Ltd. Report No. ACS-F11080 7-22 Figure 43 Inside of the EUT Figure 44 VGA Cable
Operational Description
Operational Description The projector operates below 180 MHz. All input video signals are processed to corresponding R, G, B signals by IC301(PW392C), Input Gamma IC produces timing and screen driver IC (S/HS L3E07111K0A) drives corresponding screen (EPSON 0.59") to display the images. All input audio signals are output from the speaker or Audio out terminal being controlled and amplified. RS232C is used to update and debug the projector. KEY SW controls and operates the projector by control buttons. Auto controlling of the fan is realized by two DAC circuits. Flash ROM and EEPROM are used to store and run the software.PW392 is MCU, which is the key component to control and operate the projector. POWER UNIT provides power to insure the projector runs normally.
Schematics
COM NO NC 1AV4S10B8270N SW901 1 2 3 FN901 1AV4M10B51701 FN902 1AV4M10B51701 FN905 1AV4M10B52300 FN903 1AV4M10B51701 1 2 FN904 1AV4M10B52200 J10B1010N CN1 1 2 J10EG085G K8D 1 2 3 4 5 6 7 8 J10WB020G K8S 1 2 FN906 1AV4M10B52100 J10EP031G K8F 1 SP+ 2 N.C. 3 SP- J10EG065G K8I 1 2 3 4 5 6 J10EZ050G CN02 1 5 J10XF050G K8H 1 5 DRAWN DESIGNED CHECKED CHECKED APPROVED 1997/3 CR5000 D N P S SANYO ELECTRIC CO.,LTD. JIS A1 SCL CHASSIS RUN NO. LOT NO. PLOT DATE ORIGINAL MODEL PAGE CIR EI NO. REVISED DATE CHASSIS/CIRCUIT NAME MK SD CODE MODEL NO./FACTORY MODEL NO. 1 TV. DIVISION Z0NE D.........N.........99,99,99 OSDKC2PC---01 LV-8320 PUM 1 2 1 2 S10B02700 SW902 J10EG115G K8R 1 K6A_G J11B8790N LF601 1 23 K6B_1B GND3 K6B_1A K6A_1A SCB3 1 2 3 4 5 67 8 9 10 11 12 1314 250KK470XH C604 250 J10EM024N K6B :J10EM029N 12 GND2 K6A_2B GND1 1GJ200K R602 SCB2 1 2 3 4 5 67 8 9 10 11 12 1314 GND2 SCB1 1 2 3 4 5 67 8 9 10 11 12 1314 VA601 ;DVXAVB010 1 2 K6B_2A 250KK470XH C603 250 K6B_2B 275GK1VBB C601 275 :CGXAVB00100 K6A_2A 1GJ200K R601 275GK1VBB C602 275 :CGXAVB00100 GND3 K6A_1B F35B1680N L601 1 2 3 4 J10EG035G K8N 1 2 3 J10EG035G K8M 1 2 3 J10EG035G K8L 1 2 3 J10EG037G K8G 1 2 3 J10EG036G K8K 1 FAN_B 2 FAN ID 3 GND J10EG036G K8J 1 2 3 J10ES106G K200 1 TXD_EXT S_Y_EXT VIDEO_EXT K20A_3 RXD_EXT RXD_EXT GND VIDEO_EXT 1/3GJ75 R2015 K20A_11 Z30B0220G SC2051 K300_1 TXD_EXT K300_3 GND K300_4 GND K300_2 CJ100CM C2052 :CJ100DAX :CJ100DAY 1/3GJ75 R2001 VIDEO_R 1/16GJ100KA R2051 GND J10EG105G K300 1 Z30B0220G SC2061 K50A_3 K50A_5 K20A_2 K300_10 K50A_1 VIDEO_L K20B_4 J12B3541N K50A 1 2 3 4 5 6 9 Z30B0220G SC2052 S_C_EXT K20B_1 K300_6 K20B_3 VIDEO_R GND Z30B 0220G SC2011 1 2 S_C_EXT Z30B0220G SC2021 1 2 VIDEO_L GND CJ100CM C2051 :CJ100DAX :CJ100DAY K300_9 S_Y_EXT J11B4700N K20B ;J11B4701N 7 1 2 3 4 5 6 Z30B0220G SC2001 Z30B0220G SC2062 K300_7 1/3GJ75 R2025 K50A_2 1/16GJ100KA R2052 B4J10B0190N K20A 1 2 3 4 5 6 7 8 9 10 11 6.3KK10MB C2903 ;6.3KK10BA SCREW_10 X SCREW5 1 2 3 4 5 6 7 8 9 10 K29D_3 REGND REGND K29D_7 K29D_6 KK470MN C2902 :CK1H471KAYHNG :CK1H471KAXHNG REGND 1/16GJ10A R8848 K29D_2 SCREW_10 X SCREW1 1 2 3 4 5 6 7 8 9 10 X SC2092 1 2 QXXAVC978P IC8811 1 SDA 2 SCL 3 OS/ALERT 4 GND 5 A2 6 A1 7 A0 8 VDD REGND U20B04750 A2901 1 2 3 SCREW_10 X SCREW4 1 2 3 4 5 6 7 8 9 10 1/16GJ47A R2901 10KK1MN C2901 X SC2091 1 2 K29D_4 K29D_8 REGND GND 1/16GJ10A R8847 1/16GJ100A R2903 REGND K29D_1 GND J10EG085G K29D 1 2 3 4 5 6 7 8 16KK0.1MN C8836 :16KK0.1AYH :16KK0.1AXY SCREW_10 X SCREW2 1 2 3 4 5 6 7 8 9 10 REGND J10EG065G K87A 1 2 3 4 5 6 L3BE331PGL8733 K87A_1 K87B_4 K87A_4 L3BE331PGL8731 L3BE331PG L8737 GND GND K87A_5 K87B_6 J10RR060G K87B 4 5 6 1 2 3 K87B_2 K87A_7 T_12V_ID K87B_5 L3BE331PGL8732 K87A_2 K87A_3 K87B_1 T_5V_ID 1/16GZ0A R8738 K87A_6 K87B_3 L3BE331PGL8734 GND LAMP_12V_ID K87C_6 K87C_4 CJ33CGQ C8744 QXXAVD045P IC8741 1 VDD 2 RA5/T1CKI/OSC1/CLKIN 3 RA4/AN3/%%oT1G%%o/OSC2/CLKOUT 4 RA3/%%oMCLR%%o/VPP 5 RC5/RX/DT 6 RC4/C2OUT/TX/CK 7 RC3/AN7 8 RC2/AN6 9 RC1/AN5/C21N+ 10 RC0/AN4/C21N- 11 RC2/AN2/T0CKI/INT/C1OUT 12 RA1/AN1/C1IN-/VREF/ICSPCLK 13 RA0/AN0/C1IN+/ICSPDAT/ULPWU 14 VSS LAMP_12V_ID 1/16GZ0A R8761 1/16GZ0A R8760 K87C_3 1/16GJ100A R8756 GND LAMP1_ID_B CJ33CGQ C8743 K87C_1 ICSPCLK LAMP1_ID_B C8741 :16KK0.1AYH:16KK0.1AXH GND LAMP1_ID_C GND CJ33CGQ C8742 1/16GJ100A R8744 1/16GJ100A R8757 LAMP_5V_ID LAMP_5V_ID GND LAMP_5V_ID LAMP1_ID_A J11UR060G K87C 4 5 6 1 2 3 1/16GJ10KA R8753 ICSPDATA 1/16GJ100A R8749 1/16GJ4.7KA R8759 K87C_2 LAMP1_ID_A LAMP1_ID_C K87C_5 J10EG045G K8Q 1 4 J20B0040N F601A J20B0040N F601B GND CJ1000CGQ C629 K6C_2A 2SK3934 Q611 1 G 2 D 3 S EG01C D666 1SS355 D631 1/10GJ47C R625 FMW-2106 D662 ;DDSG10SC6M--N 1/10GJ47KC R613 GND1 SCB7 1 2 3 4 5 6 7 8 9 10 1/10GJ11KC R631 Z20051--- L613 25EM1500QY C661 1/10GF390C R683 KK2200 LBYAG C627 1/10GD470C R623 1/10GD330C R622 1/10GJ330C R662 GND K6C_1B KK0.1LBYAG C641 K6R_10 1SS355 D613 GND1 KK2200LBYAG C634 C615_B K6R_8 K6C_2B CE1E102M5EANN C666 1/4GJ680KB R616 2SJ100KLBYAS R665 1000KK 1000NH C612 :1000KK1000LBZB Z20051--- L614 10EM15005F C664 K6R_1 SFPL-52P D663 ;RF101L2SP TLP421F-GBP PC663 :TLP421F-GRP :TLP781F-GBP 1 2 3 4 K6R_5 C615_A 25KK11D C626 25KK4.7BB C644 GND 1/10GJ47KC R617 CJ1000CGQ C633 FA5550NG IC621 1 FB 2 COMP 3 MUL 4 IS 5 SLOPE 6 GND 7 OUT 8 VCC 1/10GJ 10KC R651 C662_2 J10EM024N K6A :J10EM029N 1 2 KK0.1LBYAG C671 GND AJ Q651 C661_2 L26B3470G L663 CEXAVB03900 C615 1 2 1/10GF3.3KC R684 2SK4085LS Q643 1/10GJ10KC R644 C661_1 J10AU115N K6R 1 1 2 3 4 5 6 7 8 9 10 11 11 SCB10 1 2 3 4 5 6 7 8 9 10 1SJ0.39LBAS R635 G2J103JDVAAN C674 SCB6 1 2 3 4 5 6 7 8 9 10 GND KK0.1GQ C663 :KK0.1LBYAG 25EM220LBVE C651 DHXAVB028G PTH641 DHXAVB003 PTH611 KK0.047 LBYAG C622 EG01C D633 KK0.1GQ C662 :KK0.1LBYAG 1/10GJ10KC R641 X R653 AH Q621 TLP421F-GBP PC661 :TLP421F-GRP :TLP781F-GBP 1 2 3 4 FFXAVB001SGJ F631 GND 450GK1BS C613 AH Q642 1/10GJ18KC R646 1/3GJ750K R618 1AV4L51B7230N T651 2 3 5 6 7 8 10 9 11 112 450GK1BS C614 250KK1500XH C692 K6R_11 1/10GJ18KC R648 1/10GZ 0C R633 1/3GJ750K R632 1/10GJ20KC R637 1/2GJ22 R652 250KK 2200XH C693 L26B5410N L612 12 34 GND K6R_3 1/10GJ10KC R627 1/10GJ47C R620 FMXA-1106S D611 K6A_2A F35B1470N L611 K6A_1A 5XK0.075VBE R614 K6A_2B KK1000LBYAG C625 MR4010 IC631 Z/C1 FB 2 GND 3 VCC 4 EM 5 7 Vin 9 CO 1/3GJ360K R612 K6A_1B 1000KK 1000NH C611 :1000KK1000LBZB DDFMEN-210A-N D661 :DDSG10SC9M--N KK0.1LZB C653 KK0.01 LBYAG C623 2SK3934 Q612 1 G 2 D 3 S 1/10GF2.7KC R674 1SS355 D612 GND CJ220 CGQ C631 1/10GZ0C R619 AH Q641 TA76L431FBP IC671 ZZ0122 L631 1/10GJ1.2KC R693 J10EM024N K6C :J10EM029N 1 2 1/10GJ220C R624 D10XB60 DB611 1 2 3 4 1/10GJ10KC R628 Z20051--- L661 C662_1 1/10GJ 10KC R643 Z20051--- L662 UDZS8.2BG ZD631 SFPL-52P D651 ;RF101L2SP GND GND 250KK1500XH C691 1/10GJ220KC R642 1/10GJ510KC R629 AH Q661 1/10GJ33KC R634 SFPL-52P D632 ;RF101L2SP 2000KK 470NH C632 1/10GF1.2KC R676 1/10GJ4.7KC R675 1/10GZ0C R626 1/10GJ1KC R672 1/10GJ3.9KC R671 1/10GJ47KC R638 K6C_1A 1/10GJ1KC R692 1/10GD8.2KC R621 16EM4705D C665 16KK0.47 GQ C621 1/10GJ22KC R636 PTZ13BG ZD632 RB551V…
Text truncated - open the document above for the full version.
Schematics
COM NO NC 1AV4S10B8270N SW901 1 2 3 FN901 1AV4M10B51701 FN902 1AV4M10B51701 FN905 1AV4M10B52300 FN903 1AV4M10B51701 1 2 FN904 1AV4M10B52200 J10B1010N CN1 1 2 J10EG085G K8D 1 2 3 4 5 6 7 8 J10WB020G K8S 1 2 FN906 1AV4M10B52100 J10EP031G K8F 1 SP+ 2 N.C. 3 SP- J10EG065G K8I 1 2 3 4 5 6 J10EZ050G CN02 1 5 J10XF050G K8H 1 5 DRAWN DESIGNED CHECKED CHECKED APPROVED 1997/3 CR5000 D N P S SANYO ELECTRIC CO.,LTD. JIS A1 SCL CHASSIS RUN NO. LOT NO. PLOT DATE ORIGINAL MODEL PAGE CIR EI NO. REVISED DATE CHASSIS/CIRCUIT NAME MK SD CODE MODEL NO./FA…
Text truncated - open the document above for the full version.
Contact Information
Applicant
Zhao Yan(Technician)
Technical Contact
AUDIX Technology (Shenzhen) Co., Ltd.Ken Lu
[email protected]86-755-26639497
52 Block, Shenzhen Science & Industrial Park, · Shenzhen · China
Non-Technical Contact
AUDIX Technology (Shenzhen) Co., Ltd.Sunny Zhao
[email protected]86-755-26639497
Test Firm
Audix Technology (Shenzhen) Co., Ltd.Smart Tsai
Technical Specifications
| # | Rule Parts | Frequency Range | Power Output |
|---|---|---|---|
| 1 | 15B | - | - |
Other Applications from SANYO Electronics (Dongguan) Co., Ltd.
WS312WA2BC00
Dec 12, 2012Multimedia Projector
Equipment Class
JBP - Part 15 Class B Computing Device Peripheral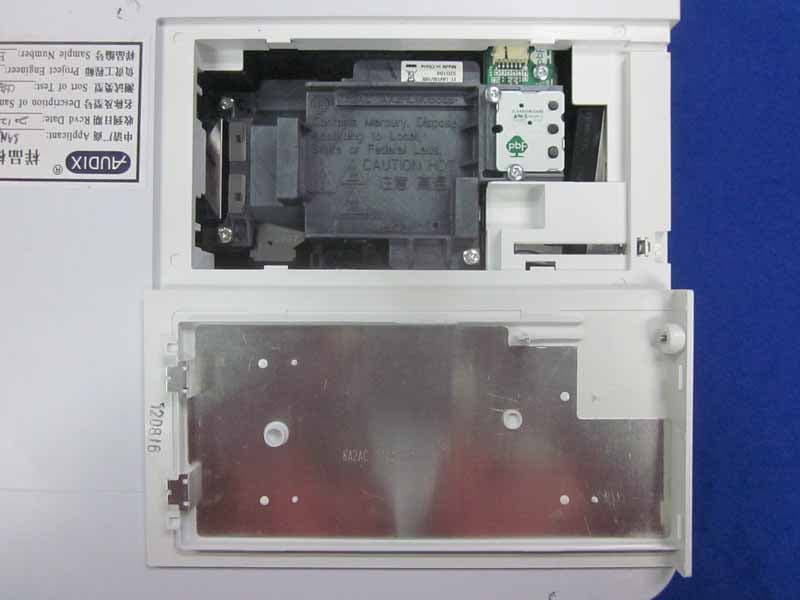
WS312WB2BC00
Dec 12, 2012Multimedia Projector
Equipment Class
JBP - Part 15 Class B Computing Device Peripheral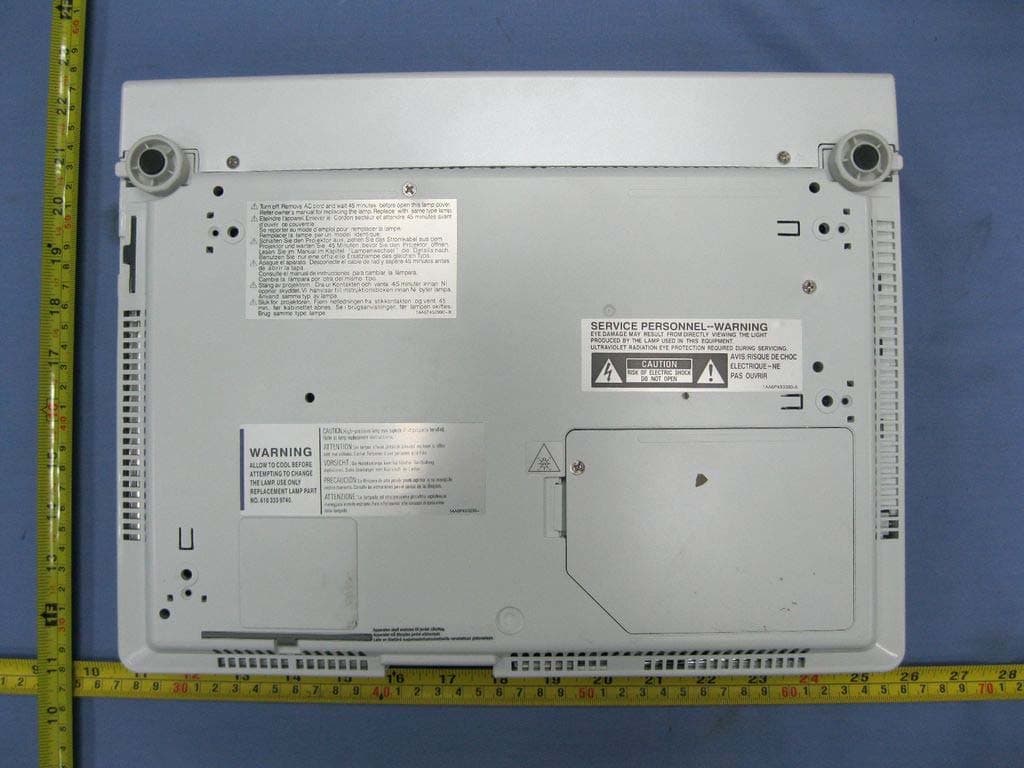
WS311KY7AF00
Jun 07, 2011Multimedia Projector
Equipment Class
JBP - Part 15 Class B Computing Device Peripheral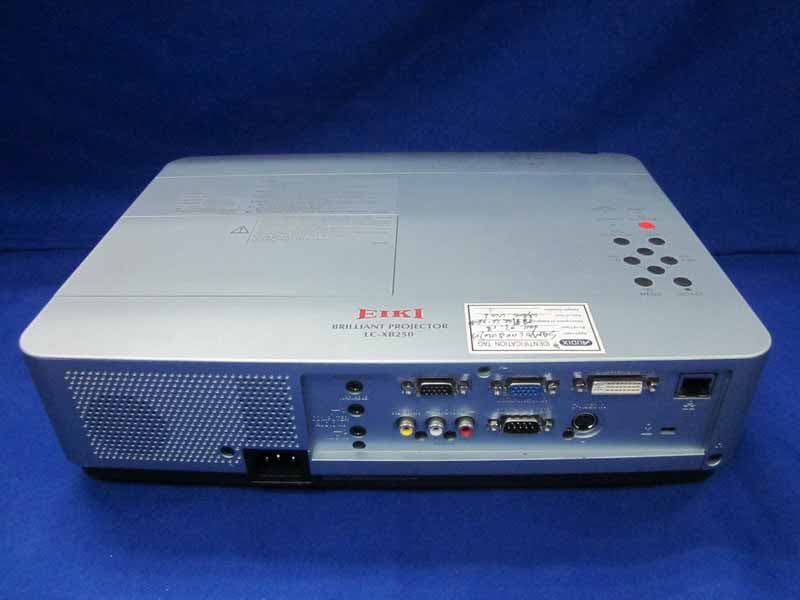
WS311KA2BC00
May 25, 2011LCD Projector
Equipment Class
JBP - Part 15 Class B Computing Device Peripheral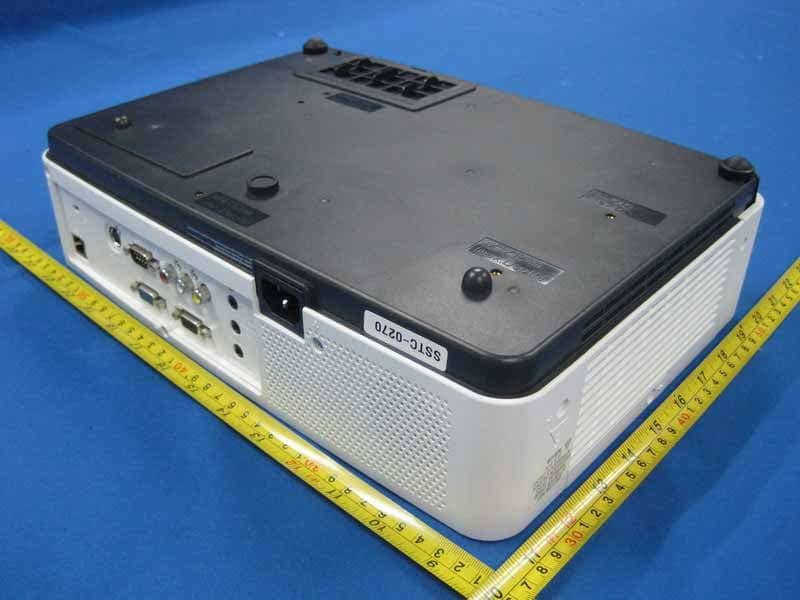
WS310KA2AC00
Dec 05, 2010LCD Projector
Equipment Class
JBP - Part 15 Class B Computing Device Peripheral