XJN-PA1042XMobile Internet Devices
SHUOYING INDUSTRIAL (SHENZHEN) CO., LTD.
Click to zoom
Application Details
- Equipment Class
- JBP - Part 15 Class B Computing Device Peripheral
- Date of Grant
- Sep 12, 2013
- Application Purpose
- Original Equipment
- Date of Application
- Sep 12, 2013
- Equipment Note
- Mobile Internet Devices
- Country
- China
Documents & Files
Document Text
Text extracted from the exhibit documents filed with the FCC. Open a document above to read the original.
Users Manual
PA1042 Mobile Internet Device User’s Manual Version-01-20130606 1 Appearance ..................................................................................................................................... 2 2 Power Switch ................................................................................................................................. 2 3 Touch Screen ................................................................................................................................. 3 4 Using SD Card ............................................................................................................................... 3 5 Getting Started ............................................................................................................................... 3 8 Reinstalled applications ................................................................................................................. 6 9 Desktop menu function .................................................................................................................. 9 10 Managing Applications .............................................................................................................. 10 11 Clock .......................................................................................................................................... 11 12 Installing Software Online ......................................................................................................... 12 13 Browser ...................................................................................................................................... 13 14 Calendar ..................................................................................................................................... 13 15 Camera ....................................................................................................................................... 14 16 Calculator ................................................................................................................................... 15 17 Sound Recorder .......................................................................................................................... 15 18 Email and Gmail ........................................................................................................................ 16 19 File Manager .............................................................................................................................. 19 20 Music.......................................................................................................................................... 21 21 4K Video player ......................................................................................................................... 22 22Settings ........................................................................................................................................ 22 FAQ ................................................................................................................................................ 25 Battery management ....................................................................................................................... 26 Important safety instruction ............................................................................................................ 27 1 Appearance 2 Power Switch Switch on: press and hold the power switch for 3 seconds and wait for startup. Switch off: press and hold the power switch for 3 seconds → click Power off → click OK. Lock/unlock screen: briefly press the power switch to lock/unlock the screen. Forced shout down: if the device has no response, press and hold the power switch for 7 seconds to switch off the device by force. Warning: forced shut down may cause unexpected errors of the system! 3 Touch Screen The touch screen is easy and convenient to use. You can use the touch screen in the following methods: Single click: briefly touch the screen with the finger and then move away. Click and hold: click the screen with the finger and hold for about 2 seconds. Drag: click a certain icon in the screen and hold, then move the finger, the icon will move accordingly. ☆ To avoid damage the screen, never put anything on the it. 4 Using SD Card ☆ The device supports up to 32GB storage card. Insert the card into the card slot, and push it in with your finger until a “click” is heard. Now the card is ready for use. Removing SD card Close all programs or files on the card first. Click Settings → Storage → Remove SD card → OK. Then press the card with your finger, and simply remove it when it is ejected. ☆ Do not insert and remove the card repeatedly in a short time, this may cause damage to the card. ☆ We suggest you use the card of famous brand to ensure compatibility. 5 Getting Started Charging the device ☆Charge the device with USB cable is not recommended. ☆You may operate the device while charging it, but this may prolong the charging time. Connect one end of the AC adaptor to the mains supply and the other end to the power jack on the device to charge it (it may take about 5 hours to fully charge the device). Starting the device Press and hold the power switch for 3 seconds and wait for system startup. Wi-Fi setting We suggest you configure your Wi-Fi network before using, as many functions require for it to work normally. 1. Click Settings→ Wireless and Network 2. Switch the Wi-Fi on. The device will search and list all available Wi-Fi network. If an icon is displayed, you need to enter a password to connect to such Wi-Fi network. 3. Click the desired Wi-Fi network → Enter the password (if any) → Click Connect. 4. Click to return to desktop. ☆ The Wi-Fi set as hidden will not be searched automatically. In this case you need to click Add Wi-Fi Network and enter necessary information to add your Wi-Fi. 6 Desktop ○ 1 ○ 2 ○ 3 ○ 4 ○ 5 ○ 6 ○ 7 ○ 8 ⑨ ○ 1 Search ○ 2 B…
Text truncated - open the document above for the full version.
Block Diagram
5 5 4 4 3 3 2 2 1 1 DD CC BB AA BLOCK DIAGRAM DRAM A31s Sensor Class D AMP CTP AXP221s WIFIBT Power System 24MHz32768Hz LRADCTWI2 Audio Codec MIC HeadSet USB1 USB0 USB OTG NDFCDRAMCSDC0 TF Card SDC1 TWI1 RGB/LVDS HDMI TWI0 CSI LCD HDMI Socket Battery Voltage Supply 3.55V-4.20V CSI Socket PMIC-TWI OSC Flash AC Adapter ~ AC Line Key Title SizeDocument NumberRev Date:Sheetof DESIGN CHECKAPPROVESUNKINGSUNKING BLOCK DIAGRAM A31s Phablet A3 215 W ednesday, September 11, 2013 Title SizeDocument NumberRev Date:Sheetof DESIGN CHECKAPPROVESUNKINGSUNKING BLOCK DIAGRAM A31s Phablet A3 215 W ednesday, September 11, 2013 Title SizeDocument NumberRev Date:Sheetof DESIGN CHECKAPPROVESUNKINGSUNKING BLOCK DIAGRAM A31s Phablet A3 215 W ednesday, September 11, 2013
External Photos
EXHIBIT B - EUT EXTERNAL PHOTOGRAPHS EUT—Top View EUT—Bottom View EUT—Left Side View EUT—Right Side View EUT- Port View EUT—Adapter View EUT—Adapter Label View
ID Label/Location Info
EXHIBIT A - FCC ID LABELING AND LOCATION FCC ID Label FCC ID Label Location The label shown shall be permanently affixed at a conspicuous location on the device and be readily visible to the user at the time purchase (Labeling requirements per 2.925) Label Here
Internal Photos
EXHIBIT B - EUT EXTERNAL PHOTOGRAPHS EUT- Back Cover Off View EUT- Battery Off View Wifi Antenna EUT-Main Board Top View EUT-Main Board Bottom View EUT- BT&Wifi Antenna View EUT- Main Chip View EUT- LED Display Off View EUT- LED Display Top View EUT- LED Display Bottom View EUT- Battery Top View EUT-Battery Bottom View
Operational Description
Product Diagram Information 1. Product function introduce Q10S is an Android MID device with capacitive touch screen. It have functions of visiting internet with WiFi, playing audio and video in NAND flash or TF card, audio/video recorder, alarm clock, calendar, real-time clock, camera and so on. 2. Structure 2.1 Structure Introduce The system is consist of SOC( A31S allwinner),one piece of NAND Flash, 2 pieces of DDR3 RAM, 10.1” TFT panel, WiFi and BT module (AP6210 ) TF socket, 30W front camera(GC0308) ,200W real camera(GC2035) PMU(AXP221S), and some other power conversions IC. 2.2 Description When you stir the switch of power about 3 seconds, the system is powered on. When you choose any icon in the GUI of Android 4.2 using your finger or others, A31S first judge what happened and then give it to the ARM or DSP in the core of A31S proceeding. The AP6210 is a Bluetooth V4.0 + EDR with integrated Class 1.5 PA Concurrent Bluetooth and WLAN Operation controller compatible with the 802.11b/g/n specification. It combines a MAC, a 1T1R Capable baseband, and 802.11b/g/n single-band radio Bluetooth V4.0 + EDR with integrated Class 1.5 PA Concurrent Bluetooth and WLAN operation Simultaneous BT / WLAN receive with single antenna WLAN host interface options: - SDIO v2.0 — up to 50 MHz clock rate BT host digital interface: - UART (up to 4 Mbps) IEEE Co-existence technologies are integrated die solution 2.3 Power It can use adaptor of 5V*3A when the system display the battery remain a little of power or exhaust.
Schematics
5 5 4 4 3 3 2 2 1 1 DD CC BB AA DRAM DDR3 2X16 Please copy DRAM PCB template and follow PCB layout guide. The circuit is only for single-side PCB layout. DDR3 8bit x 4ea SVREF SCK# SCK DSCK# DSCK SVREF SWE# SCAS# SRAS# SCS0# SDQS1 SDQS0 SDQS0# SDQS1#SDQS1# SDQ15 SDQ12 SDQ4 SDQ10 SDQ0 SDQ11 SDQ14 SDQ1 SDQ7 SDQ3 SDQ2 SDQ13 SDQ8 SDQ9 SDQ5 SDQ6 SA15 SDQM0 SDQM1 SVREFSVREF SVREF SODT0 DSCK DSCK# SA0 SA1 SA2 SA3 SA4 SA5 SA6 SA7 SA8 SRST SA9 SA10 SA11 SA12 SA13 SA14 SBA0 SBA1 SBA2 SCKE0 SWE# SCAS# SRAS# SCS0# SDQS3 SDQS2 SDQS2# SDQS3# SDQ19 SDQ18 SDQ27 SDQ24 SDQ17 SDQ23 SDQ29 SDQ25 SDQ31 SDQ30 SDQ20 SDQ28 SDQ21 SDQ22 SDQ26 SDQ16 SA15 SDQM3 SDQM2 DSCK DSCK# SVREFSVREF SVREF SODT0 SA0 SA1 SA2 SA3 SA4 SA5 SA6 SA7 SA8 SRST SA9 SA10 SA11 SA12 SA13 SA14 SBA0 SBA1 SBA2 SCKE0 SDQ6 SDQ7 SDQ16 SDQ17 SDQ18 SDQ19 SDQ20 SDQ21 SDQ22 SDQ23 SDQ25 SDQ26 SDQ27 SDQ24 SDQ31 SDQ29 SDQ28 SDQ30 SDQS0 SDQS1 SDQS2 SDQS3 SDQS0# SDQS1# SDQS2# SDQS3# SDQM0 SDQM1 SDQM2 SDQM3 SDQ8 SDQ9 SDQ10 SDQ11 SDQ12 SDQ13 SDQ14 SDQ15 SDQ0 SDQ1 SDQ2 SDQ3 SDQ4 SDQ5 SBA0 SBA1 SBA2 SODT0 SCK SCK# SCKE0 SWE# SRAS# SCAS# SCS0# SRST SA0 SA1 SA2 SA3 SA4 SA5 SA6 SA7 SA8 SA9 SA10 SA11 SA12 SA13 SA14 SA15 VCC-DRAM VDD-DLL GND GND GND GND VCC-DRAM VCC-DRAM GND VCC-DRAM GNDGND VCC-DRAM VCC-DRAM GND GND VCC-DRAM GNDGND GND VCC-DRAM GNDGND Title SizeDocument NumberRev Date:Sheet of DESIGN CHECKAPPROVESUNKINGSUNKING DDR3 256*8*4 PAD_APP4_STD A2 415 Monday, May 06, 2013 Title SizeDocument NumberRev Date:Sheetof DESIGN CHECKAPPROVESUNKINGSUNKING DDR3 256*8*4 PAD_APP4_STD A2 415 Monday, May 06, 2013 Title SizeDocument NumberRev Date:Sheetof DESIGN CHECKAPPROVESUNKINGSUNKING DDR3 256*8*4 PAD_APP4_STD A2 415 Monday, May 06, 2013 R3 240R 1% R3 240R 1% C12 0.1uF C12 0.1uF C38 0.1uF C38 0.1uF C18 0.1uF C18 0.1uF C39 0.1uF C39 0.1uF U3 DDR3-FBGA96 FBGA96C80P9X13 U3 DDR3-FBGA96 FBGA96C80P9X13 A0 N3 A1 P7 A2 P3 A3 N2 A4 P8 A5 P2 A6 R8 A7 R2 A8 T8 A9 R3 A10 L7 A11 R7 A12 N7 A13 T3 A14 T7 A15 M7 BA0 M2 BA1 N8 BA2 M3 DQL0 E3 DQL1 F7 DQL2 F2 DQL3 F8 DQL4 H3 DQL5 H8 DQL6 G2 DQL7 H7 DQU0 D7 DQU1 C3 DQU2 C8 DQU3 C2 DQU4 A7 DQU5 A2 DQU6 B8 DQU7 A3 CK J7 CK# K7 W E L3 RAS# J3 CAS# K3 CS# L2 CKE K9 VREFCA M8 VREFDQ H1 ODT K1 VDDQ#1 A1 VDDQ#2 C1 VDDQ#3 F1 VDDQ#4 D2 VDDQ#5 H2 VDDQ#6 A8 VDDQ#7 H9 VDDQ#8 E9 VDDQ#9 C9 VDD#2 R1 VDD#1 N1 VDD#3 B2 VDD#4 K2 VDD#5 G7 VDD#6 K8 VDD#7 D9 VDD#8 N9 VDD#9 R9 VSSQ#1 B1 VSSQ#2 D1 VSSQ#3 G1 VSSQ#4 E2 VSSQ#5 D8 VSSQ#6 E8 VSSQ#7 B9 VSSQ#8 F9 VSSQ#9 G9 VSS#1 E1 VSS#2 M1 VSS#3 P1 VSS#4 T1 VSS#5 J2 VSS#6 B3 VSS#7 G8 VSS#8 J8 VSS#9 A9 VSS#10 M9 VSS#11 P9 VSS#12 T9 DQSL F3 DQSL# G3 DQSU C7 DQSU# B7 DML E7 DMU D3 NC#1 J1 NC#2 L1 NC#3 J9 NC#4 L9 ZQ L8 RESET T2 R524.9R 1%R524.9R 1% C11 0.1uF C11 0.1uF DRAMC APP5-BGA460i U1C DRAMC APP5-BGA460i U1C SDQ0 K3 SDQ1 M3 SDQ2 J1 SDQ3 M2 SDQ4 K2 SDQ5 L3 SDQ6 J2 SDQ7 M1 SDQ8 P2 SDQ9 U1 SDQ10 N3 SDQ11 R3 SDQ12 P1 SDQ13 P3 SDQ14 N2 SDQ15 T2 SDQ16 AB2 SDQ17 Y5 SDQ18 AB1 SDQ19 AA5 SDQ20 AA2 SDQ21 AB5 SDQ22 AA1 SDQ23 AA4 SDQ24 AB6 SDQ25 AB8 SDQ26 Y7 SDQ27 AA9 SDQ28 AA6 SDQ29 AA8 SDQ30 Y6 SDQ31 Y9 SDQS0 L1 SDQS0# L2 SDQS1 R1 SDQS1# R2 SDQS2 AA3 SDQS2# AB3 SDQS3 AA7 SDQS3# Y8 SDQM0 L4 SDQM1 P4 SDQM2 Y4 SDQM3 AB9 SCK V3 SCK# W 3 SCKE0 T5 SCKE1 Y3 SW E# V1 SRAS# L5 SCAS# N5 SCS0# R4 SCS1# N4 SODT0 M4 SODT1 M5 SRST U4 SA0 U3 SA1 W 4 SA2 R5 SA3 T3 SA4 W 9 SA5 V2 SA6 V9 SA7 W 2 SA8 V8 SA9 Y1 SA10 U5 SA11 V10 SA12 W 6 SA13 Y2 SA14 W 8 SA15 V4 SBA0 U2 SBA1 V5 SBA2 T4 SZQ K4 SVREF W 5 SDLLVDD U9 SVCC0 P6 SVCC1 R6 SVCC2 T6 SVCC3 T7 SVCC4 U6 SVCC5 U7 SVCC6 U8 SVCC7 V6 SVCC8 V7 SVCC9 W 7 C27 0.1uF C27 0.1uF R1 240 1% R1 240 1% C22 0.1uF C22 0.1uF C16 0.1uF C16 0.1uF U2 DDR3-FBGA96 FBGA96C80P9X13 U2 DDR3-FBGA96 FBGA96C80P9X13 A0 N3 A1 P7 A2 P3 A3 N2 A4 P8 A5 P2 A6 R8 A7 R2 A8 T8 A9 R3 A10 L7 A11 R7 A12 N7 A13 T3 A14 T7 A15 M7 BA0 M2 BA1 N8 BA2 M3 DQL0 E3 DQL1 F7 DQL2 F2 DQL3 F8 DQL4 H3 DQL5 H8 DQL6 G2 DQL7 H7 DQU0 D7 DQU1 C3 DQU2 C8 DQU3 C2 DQU4 A7 DQU5 A2 DQU6 B8 DQU7 A3 CK J7 CK# K7 W E L3 RAS# J3 CAS# K3 CS# L2 CKE K9 VREFCA M8 VREFDQ H1 ODT K1 VDDQ#1 A1 VDDQ#2 C1 VDDQ#3 F1 VDDQ#4 D2 VDDQ#5 H2 VDDQ#6 A8 VDDQ#7 H9 VDDQ#8 E9 VDDQ#9 C9 VDD#2 R1 VDD#1 N1 VDD#3 B2 VDD#4 K2 VDD#5 G7 VDD#6 K8 VDD#7 D9 VDD#8 N9 VDD#9 R9 VSSQ#1 B1 VSSQ#2 D1 VSSQ#3 G1 VSSQ#4 E2 VSSQ#5 D8 VSSQ#6 E8 VSSQ#7 B9 VSSQ#8 F9 VSSQ#9 G9 VSS#1 E1 VSS#2 M1 VSS#3 P1 VSS#4 T1 VSS#5 J2 VSS#6 B3 VSS#7 G8 VSS#8 J8 VSS#9 A9 VSS#10 M9 VSS#11 P9 VSS#12 T9 DQSL F3 DQSL# G3 DQSU C7 DQSU# B7 DML E7 DMU D3 NC#1 J1 NC#2 L1 NC#3 J9 NC#4 L9 ZQ L8 RESET T2 C315 10uF C315 10uF C37 0.1uF C37 0.1uF C4 0.1uF C4 0.1uF C17 240R 1% C17 240R 1% C1 1uF C1 1uF C9 0.1uF C9 0.1uF C8 0.1uF C8 0.1uF C7 1uF C7 1uF C34 1uF C34 1uF C13 0.1uF C13 0.1uF C21 0.1uF C21 0.1uF C6 1uF C6 1uF C33 1uF C33 1uF R9 2K 1% R9 2K 1% C2 0.1uF C2 0.1uF R8 2K 1% R8 2K 1% C10 0.1uF C10 0.1uF C3 0.1uF C3 0.1uF R424.9R 1%R424.9R 1% C20 1uF C20 1uF R2 240R 1% R2 240R 1% C316 10uF C316 10uF C5 0.1uF C5 0.1uF C314 10uF C314 10uF C36 0.1uF C36 0.1uF C14 0.1uF C14 0.1uF C15 0.1uF C15 0.1uF C19 10uF C19 10uF C35 0.1uF C35 0.1uF 5 5 4 4 3 3 2 2 1 1 DD CC BB AA CPUS Debug Must be preserved! Vpp=1.5V Crystal LAYOUT V01 Value Can Not be Changed B Close to A. A B CPU CPUS-UTX CPUS-URX HPBP AP-RESET# LRADC0 AP-CK32KO CPU-VDDFB X24MIX32KI X32KO X24MO VRA2VRPVRA1 AP-CK32KO X24MO X24MI X32KO X32KI CPUS-URX HPBP VRP VRA1 VRA2 CPU-VDDFB CPUS-UTX GND GND GND VDD-DLL GND GND VDD-CPUS GND GND VDD-CPU GND VDD-CPU VDD-GPU GND VCC-PB VCC-PB GND AVCC-AP EARGND GND GND GND VCC-RTC VCC-PB GNDGND GND VCC-3V3 USB-VCC AVCC-AP AVCC-AP VCC-3V3 GND GND VDD-GPU VDD-CPUSVDD-CPU GND VDD-DLL GND GND VCC-3V3 CPU-VDDFB6 3G_RI15 PMU-SDA6 PMU-SCK6 3G-RST15 AP-NMI#6 UBOOT14 AP-RESET#6 3G-ON-OFF15 W -W AKE-HOST11 BT-W AKE-HOST11 PA-SHDN13 HTX0P8 HTX1P8 HTX0N8 HTX1N8 HTX2P8 HTX2N8 HTXCP8 HTXCN8 HSCL8 HHPD8 HSDA8 USB-DM08 USB-DP08 LRADC014 3G_MIC_P15 3G_MIC_N15 LINEIN_L15 LINEIN_R15 MIC-HBIAS13 MIC-MBIAS13 MIC1P13 MIC1N13 MIC2P13 MIC2N13 HPR13 HPL13 SPKR13 SPKL13 USB-DP215 USB-DM215 USB-DM111 USB-DP111 CTP-INT10 CTP-RST10 SDC0-DET8 GS-INT12 GY-INT12 CP-INT12 USB…
Text truncated - open the document above for the full version.
Test Report
Note: This test report is prepared for the customer shown above and for the device described herein. It may not be duplicated or used in part without prior written consent from Bay Area Compliance Laboratories Corp. This report must not be used by the customer to claim product certification, approval, or endorsement by NVLAP*, or any agency of the Federal Government. * This report may contain data that are not covered by the NVLAP accreditation and shall be marked with an asterisk “★” (Rev.2). This report is valid only with a valid digital signature. The digital signature may be available only under the Adobe software above version 7.0. FCC PART 15B TEST REPORT For SHUOYING INDUSTRIAL (SHENZHEN) CO., LTD. NO.1 Shuoying Rd., Hebei Industry Area, Dalang, Longhua Town, Baoan, Shenzhen, China Report Type: Original Report Product Type: Mobile Internet Devices Test Engineer: Ares Liu Report Number: R2DG130801001-00C Report Date: 2013-09-03 Reviewed By: Ivan Cao RF Leader Test Laboratory: Bay Area Compliance Laboratories Corp. (Dongguan) No.69 Pulongcun, Puxinhu Industrial Zone, Tangxia, Dongguan, Guangdong, China Tel: +86-769-86858888 Fax: +86-769-86858891 www.baclcorp.com.cn FCC ID: XJN-PA1042X Bay Area Compliance Laboratories Corp. (Dongguan) Report No.: R2DG130801001-00C FCC Part15B, Class B Page 2 of 25 TABLE OF CONTENTS GENERAL INFORMATION ....................................................................................................................................... 3 PRODUCT DESCRIPTION FOR EQUIPMENT UNDER TEST (EUT) ..................................................................................... 3 OBJECTIVE ................................................................................................................................................................... 3 RELATED SUBMITTAL(S)/GRANT(S) ............................................................................................................................. 3 TEST FACILITY ............................................................................................................................................................. 4 SYSTEM TEST CONFIGURATION .......................................................................................................................... 5 JUSTIFICATION ............................................................................................................................................................. 5 EUT EXERCISE SOFTWARE .......................................................................................................................................... 5 EQUIPMENT MODIFICATIONS ....................................................................................................................................... 5 LOCAL SUPPORT EQUIPMENT LIST AND DETAILS ........................................................................................................ 5 EXTERNAL I/O CABLE .................................................................................................................................................. 5 BLOCK DIAGRAM OF TEST SETUP ................................................................................................................................ 6 SUMMARY OF TEST RESULTS ............................................................................................................................... 7 FCC §15.107 – AC LINE CONDUCTED EMISSIONS ............................................................................................. 8 MEASUREMENT UNCERTAINTY .................................................................................................................................... 8 EUT SETUP .................................................................................................................................................................. 8 EMI TEST RECEIVER SETUP ......................................................................................................................................... 9 TEST PROCEDURE ........................................................................................................................................................ 9 CORRECTED AMPLITUDE & MARGIN CALCULATION ................................................................................................... 9 TEST EQUIPMENT LIST AND DETAILS ......................................................................................................................... 10 TEST RESULTS SUMMARY .......................................................................................................................................... 10 TEST DATA ................................................................................................................................................................ 10 FCC §15.109 - RADIATED EMISSIONS ................................................................................................................. 15 MEASUREMENT UNCERTAINTY .................................................................................................................................. 15 EUT SETUP ................................................................................................................................................................ 15 EMI TEST RECEIVER SETUP ....................................................................................................................................... 16 TEST PROCEDURE ...................................................................................................................................................... 16 CORRECTED AMPLITUDE & MARGIN CALCULATION ................................................................................................. 17 TEST EQUIPMENT LIST AND DETAILS ......................................................................................................................... 17 TEST RESULTS SUMMAR…
Text truncated - open the document above for the full version.
Test Setup Photos
EXHIBIT D - TEST SETUP PHOTOGRAPHS Conducted Emissions - Front View (USB Downloading) Conducted Emissions – Side View (USB Downloading) Conducted Emissions - Front View (HDMI Playing) Conducted Emissions – Side View (HDMI Playing) Radiated Emission -Front View (USB Downloading) (Below 1GHz) Radiated Emission - Rear View (USB Downloading) (Below 1GHz) Radiated Emission -Front View (HDMI Playing) (Below 1GHz) Radiated Emission - Rear View (HDMI Playing) (Below 1GHz) Radiated Emission -Front View (USB Downloading) (Above 1GHz) Radiated Emission - Rear View (USB Downloading) (Above 1GHz) Radiated Emission -Front View (HDMI Playing) (Above 1GHz) Radiated Emission - Rear View (HDMI Playing) (Above 1GHz)
Contact Information
Applicant
Tony Pan
Test Firm
Bay Area Compliance Laboratories Corp. (Dongguan)John Chan
[email protected]86-769-86858888
Technical Specifications
| # | Rule Parts | Frequency Range | Power Output |
|---|---|---|---|
| 1 | 15B | - | - |
Other Applications from SHUOYING INDUSTRIAL (SHENZHEN) CO., LTD.
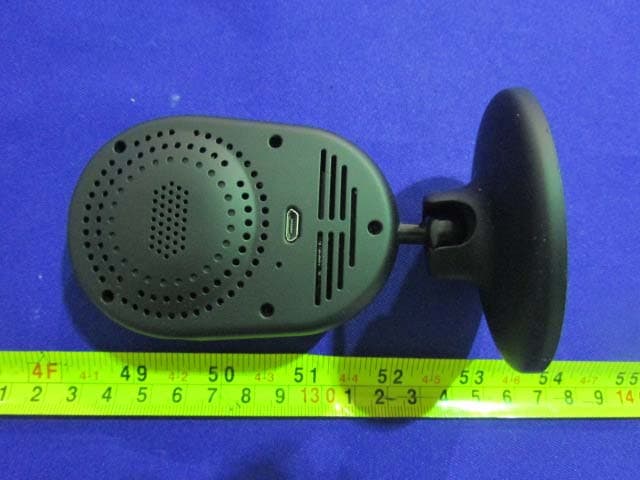
XJN-IPC019
Sep 07, 2015IP Camera
Equipment Class
DTS - Digital Transmission System
XJN-PA7062X
Dec 27, 2014Mobile Internet Devices
Equipment Class
JBP - Part 15 Class B Computing Device PeripheralXJN-PX4032
Sep 20, 2014Mobile internet device
Equipment Class
DTS - Digital Transmission System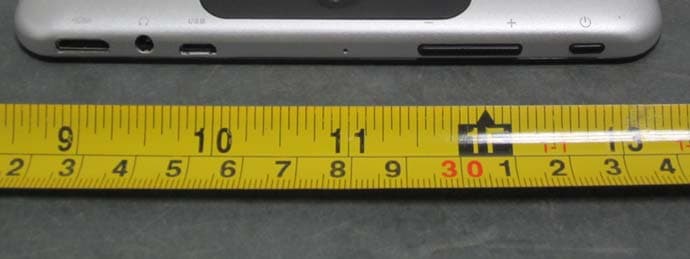
XJN-PA7810X
Jun 26, 2014Mobile Internet Devices
Equipment Class
DSS - Part 15 Spread Spectrum Transmitter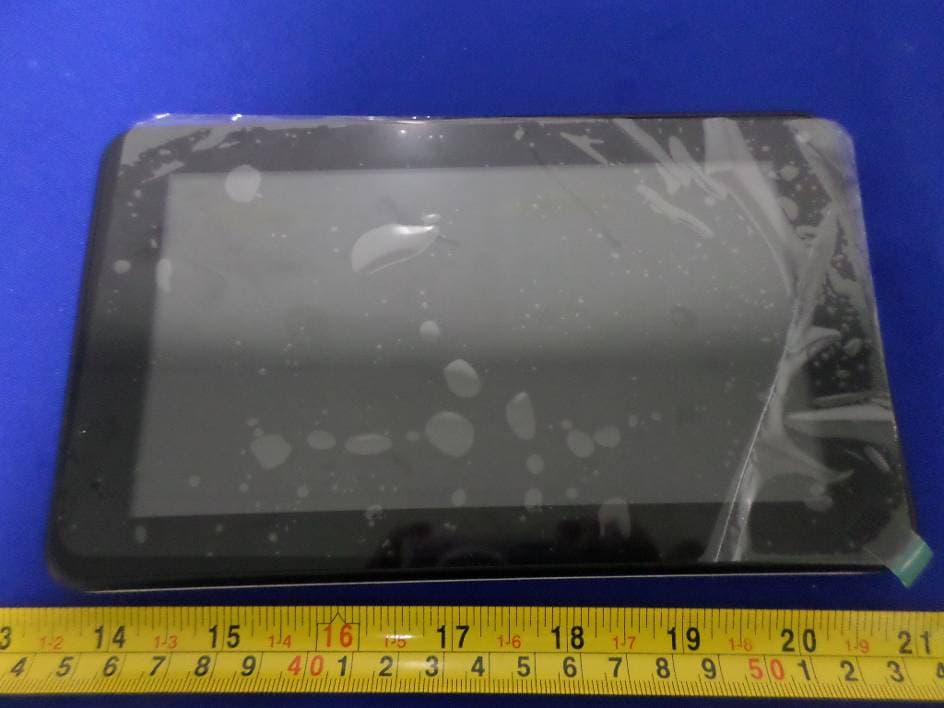
XJN-PR7062X
May 06, 2014Mobile Internet Device
Equipment Class
DTS - Digital Transmission System