E675JS0078Multi-Carrier RF Power Amplifier
Powerwave Technologies Inc
Click to zoom
Application Details
- Equipment Class
- AMP - Amplifier
- Date of Grant
- Nov 27, 2005
- Application Purpose
- Original Equipment
- Date of Application
- Nov 27, 2005
- Equipment Note
- Multi-Carrier RF Power Amplifier
- Frequency Range
- 851.50000000 - 868.50000000
- Company
- Powerwave Technologies Inc
- Country
- United States
Documents & Files
Document Text
Text extracted from the exhibit documents filed with the FCC. Open a document above to read the original.
Users Manual
Installation and Service Manual G3H-851-80 Multi-Carrier Power Am plifier 044-05xxx Rev A November 2005 044-05xxx Rev A © 2005 Powerwave Technologies, Incorporated. All rights reserved. Powerwave Technologies and the Powerwave logo are registered trademarks Powerwave Technologies, Inc. reserves the right to make changes to the documentation and equipment including, but not limited to, component substitution and circuitry changes. Changes that impact this manual may subsequently be incorporated in a later revision of this manual. This Powerwave product is designed to operate within the Normal Operating (typical operating) ranges or conditions specified in this document. Operation of this equipment beyond the specified ranges in this document may cause (1) spurious emissions that violate regulatory requirements; (2) the equipment to be automatically removed from service when maximum thresholds are exceeded; or (3) the equipment to not perform in accordance with its specifications. It is the Operator's responsibility to ensure this equipment is properly installed and operated within Powerwave operating specifications to obtain proper performance from the equipment and to comply with regulatory requirements. 044-05xxx Rev Ai Warnings, Cautions, and Notes Warnings, cautions, and notes are found throughout this manual. The associated icons in warnings and cautions are used to quickly identify a potential condition that could result in the consequences described below if precautions are not taken. Notes clarify and provide additional information to assist the user. WARNING This warning symbol means danger. You are in a situation that could cause bodily injury. Before you work on any equipment, be aware of the hazards involved with electrical and RF circuitry and be familiar with standard practices for preventing accidents. CAUTION This caution symbol means reader, be careful. In this situation, the user might do something that could result in equipment damage or loss of data. Note This note symbol means reader, take note. Notes contain helpful suggestions or references to material not covered in the document. Procedures are not contained in notes. ii044-05xxx Rev A Revision Record Revision Record Revision LetterDate of EntryReason for Change ANovember, 2005Original version of product 044-05xxx Rev Aiii Table of Contents Chapter NumberTitlePage Chapter 1General Description1-1 1-1Introduction................................................................................................................................1-1 1-2General Description................................................................................................................... 1-1 1-3Functional and Physical Specifications..................................................................................... 1-4 1-4Ordering Information.................................................................................................................. 1-5 1-5General Safety..............................................................................Error! Bookmark not defined. 1-5.1Electronic Modules.......................................................................Error! Bookmark not defined. Chapter 2Installation2-1 2-1Introduction................................................................................................................................2-1 2-2Unpacking and Inspection......................................................................................................... 2-1 2-3Air Conditioning......................................................................................................................... 2-1 2-4Electrical Load........................................................................................................................... 2-2 2-5Installation Instructions.............................................................................................................. 2-3 2-5.1Installing the Amplifier into the Sub-rack................................................................................... 2-3 2-5.2Combo Connector...................................................................................................................... 2-4 Chapter 3Operating Instructions3-1 3-1Introduction................................................................................................................................3-1 3-2Controls and Indicators.............................................................................................................. 3-1 3-2.1RESET Switch........................................................................................................................... 3-1 3-2.2LED Status Indicator and RESET/On/Off Toggle Switch.......................................................... 3-1 3-2.3RJ-11 PC Interface.................................................................................................................... 3-2 3-3Initial Start-Up and Operating Procedures................................................................................. 3-2 Chapter 4Principles of Operation................................................................... 4-1 4-1Introduction................................................................................................................................4-1 4-2RF Input Signal.......................................................................................................................... 4-1 4-3RF Output Load......................................................................................................................... 4-1 4-4Functional Description............................................................................................................... 4-1 4-4.1Preamplifier................................................................................................................................4-2 4-4.2Main and Error Amplifiers.......................................…
Text truncated - open the document above for the full version.
External Photos
Top and Front Bottom and Back
Operational Description
Chapter 1 General Description 1-1 Introduction This manual contains information and procedures for installation and servicing of Powerwave’s G3H-851-80 Amplifier. The manual is organized into two chapters as follows: Chapter 1 General Description Chapter 4 Principles of Operation Chapter 2 Installation Chapter 5 Maintenance Chapter 3 Operating Instruction Appendix A Glossary of Terms 1-2 General Description The G3H-851-80 Power Amplifier, shown in Figure 1-1through Figure 1-4, operates in the 18 MHz frequency band from 851 MHz to 869 MHz with an instantaneous bandwidth of not more than 18 MHz. The instantaneous bandwidth is the maximum frequency band in which any two or more signals can occupy .The amplifier’s instantaneous bandwidth is set automatically and does not require any manual setup. Front Rear Figure 1-1. Model G3H-851-80 Amplifier Front and Rear Isometric View Figure 1-2. Model G3H-851-80 Amplifier Side View Figure 1-3. Model G3H-851-80 Amplifier Bottom View 0.389 in. (0.99 cm) 17.06 in. (43.33 cm) 1.59 in. (4.03 cm) 13.96 in. (35.45 cm) 19.58 in. (49.73 cm) 12.09 in. (30.70 cm) 1.90 in. (4.82 cm) 3.86 in. (9.80 cm) Figure 1-4. Model G3H-851-80 Amplifier Front Panel ition Switch: n/RESET Combo Connector – Power. Alarms, and RF I/O RS-232 Port 1-3 Specifications Electrical, mechanical, and environmental specifications for the G3H-851-80 amplifier are listed in Table 1-1. Table 1-1. G3H-851-80 Amplifier Specifications Frequency Range 851-869 MHz; Maximum Instantaneous Bandwidth 18 MHz bandwidth (lowest to highest transmitted frequency) Carrier Types IDEN, 1X-EVDO/IS-95 Minimum Channel Spacing 1.25 MHz for 1X-EVDO/IS-95, 30 kHz for iDEN Total Maximum Input Power -11.69 dBm @ 80 Watts (to achieve rated power); -11.01 dBm max. –5.7 dBm or greater causes input overdrive shutdown. Total Average Output Power 80 Watts @27Vdc, @+25 °C DC/RF Conversion Efficiency > 16% Intermodulation Distortion and In-Band Spurious: -63 dBc (Min) @ +26 to +28 Vdc @ 80 Watts; 600 KHz channel spacing within 25 MHz bandwidth* RF Gain at 869 to 894 MHz 63 dB +1 dB Gain Flatness: +0.5 dB @ 26 – 28 Vdc Gain Variation Over Temperature: + 0.5 dB from 26 Vdc to 28 Vdc over -20 to +50 °C Output Protection: Mismatch protected Input Port Return Loss: 11 dB Out of Band Spurious: Better than –60 dBc, +26 Vdc to +28 Vdc Spurious Performance ITU-R SM329-9, Category A, non-carrier related Duty Cycle: Continuous DC Input Voltage: DC Input Current: +27 Vdc ± 1 Vdc, operational range +21.0 Vdc to 30 Vdc amplifier will disable at < 20.5 Vdc or > +30.5 Vdc. 26.5 Amps typical @ 80 W out, 28 A max @ 80 Watts (over temperature or over voltage); Operating Temperature: -33 ºC. to +50 ºC. Storage Temperature: -40 ºC. to +85 ºC. Operating Humidity: 5 % to 95 % relative humidity (non-condensing) Storage Humidity: 5 % to 95 % relative humidity (non-condensing) Altitude -50 to +4000 M (-164 to 13,125 ft.) RF Input / Output / Status / Alarm / Control / DC Input Connectors: 21-Pin D-Subminiature combo connector Maintenance Port RJ-11, RS-232 (for factory use only) Continued next page Switches Reset/On/Off Switch Indicators: STATUS LED; Green (normal), Yellow (minor alarm), Red (critical alarm) Dimensions: 35.46 cm wide, 9.56 cm high, 45.0 cm deep (including handles) Weight: 13 kg (28.6 lb.) Note This Powerwave product is designed to operate within the normal operating (typical operating) ranges or conditions specified in this document. Operation of this equipment beyond the specified ranges may cause (1) spurious emissions that violate regulatory requirements; (2) the equipment to be automatically removed from service when maximum thresholds are exceeded; or (3) the equipment to not perform in accordance with its specifications. It is the operator's responsibility to ensure this equipment is properly installed and operated within Powerwave operating specifications to obtain proper performance from the equipment and to comply with regulatory requirements. Industry Canada: The Manufacturer's rated output power of this equipment is for single carrier operation. For situations when multiple carrier signals are present, the rating would have to be reduced by 3.5 dB, especially where the output signal is re-radiated and can cause interference to adjacent band users. This power reduction is to be by means of input power or gain reduction and not by an attenuator at the output of the device. 1-4 Ordering Information Table 1-2 lists major system component numbers and descriptions for use in ordering. Table 1-2. Major System Components Model Number Description G3H-851-80 80-Watt Amplifier, +27 Vdc *Amplifier sub-racks sold and described separately
Parts List/Tune Up Info
Chapter 1 Maintenance 1-1 Introduction This chapter contains periodic maintenance and performance test procedures for the G3H-851-80 Multi-Carrier Power Amplifier (MCPA). Note Do not break the seals on equipment under warranty or the warranty will be null and void. Do not return equipment for warranty or repair service until proper shipping instructions are received from the factory. 1-2 Periodic Maintenance Periodic maintenance requirements and the intervals at which the tasks should be performed are listed in Table 1-1. Table 1-1. Periodic Maintenance Task Interval Action Inspection: Connectors 12 Months C C h h e e c c k k R R F F c c o o n n n n e e c c t t o o r r s s t t o o e e n n s s u u r r e e t t h h a a t t t t h h e e y y a a r r e e t t i i g g h h t t . . P P e e r r f f o o r r m m a a n n c c e e T T e e s s t t s s 12 Months P P e e r r f f o o r r m m a a n n n n u u a a l l t t e e s s t t p p e e r r p p a a r r a a g g r r a a p p h h 5 5 - - 4 4 . . C C l l e e a a n n F F a a n n s s / / H H e e a a t t S S i i n n k k s s 3 Months I I n n s s p p e e c c t t f f o o r r d d e e b b r r i i s s . . R R e e m m o o v v e e d d u u s s t t w w i i t t h h a a s s o o f f t t c c l l o o t t h h / / b b r r u u s s h h o o r r v v a a c c u u u u m m c c l l e e a a n n e e r r . . C C l l e e a a n n t t h h e e f f a a n n b b l l a a d d e e s s i i n n t t h h e e a a s s s s o o c c i i a a t t e e d d s s u u b b - - r r a a c c k k . . 1-3 Test Equipment Required For Test Test equipment required to test the amplifier is listed in Table 1-2. Equivalent test equipment may be substituted for any item, keeping in mind that a thermistor type power meter is required. Note All RF test equipment required must be calibrated to 0.05 dB resolutions. Any deviation from the nominal attenuation must be accounted for and factored into all output readings. Table 1-2. Test Equipment Required Nomenclature Manufacturer Model Signal Generator Agilent 8656B 20 dB Attenuator, 250 Watt Bird 20 dB Attenuator, 20 Watt (2 each) Bird Tenuline Spectrum Analyzer Agilent 8560E Coax Directional Coupler Agilent 778D Power Meter / Sensor Agilent 437B / 8481A Arbitrary Waveform Generator Sony AWG2021 Network Analyzer Agilent 8753C * Any equipment substituted should have equivalent specifications. 1-4 Amplifier Performance Test Performance testing should be conducted every 12 months to ensure that the amplifier system meets the operational specifications listed in Table 1-3. Also verify system performance after any amplifier module is replaced in the field. The test equipment required to perform the testing is listed in Table 1-2, and the test setup is shown in Figure 1-1 and Figure 1-2. Note The frequencies used in this test are typical for an amplifier with a 18 MHz band from 851 MHz to 869 MHz. Select evenly spaced F1, F2, F3, and F4 frequencies that cover the instantaneous bandwidth of your system. To check amplifier performance, proceed as follows: WARNING Do not apply any RF signals to the amplifier input until instructed to do so. CAUTION Ensure that the correct amount of attenuation is used between the amplifier RF connections and the test equipment to prevent overdrive of the amplifier or the test equipment. 1-4.1 Amplifier Spurious Emissions Test: 1. Connect the test equipment as shown in Figure 1-1. 2. Configure the signal source to produce four frequencies evenly spaced across the instantaneous bandwidth to be used for the amplifier under test. 3. Adjust the output of the signal source to excite the amplifier to its rated output. 4. Use the spectrum analyzer to measure the spurious emissions performance. 5. Record test data in Table 5-3. Verify that the data are within the specifications shown in Error! Reference source not found.. 6. Reduce the output of the signal source to minimum. 7. Switch off the Main Power Switch on the amplifier under test. G3H-851-80 PYTHON Multi- Channel Power Amplifier Gain = 63 dB Output = 80 W = +49.03 dBm 27 Vdc RF Out RF In 20 dB Directional Coupler 30 dB Attn 250 W High Pwr 04-0262B-A Sensor Head 8482A 30 dB Attn 20 W 20 dB Directional Coupler Sensor Head 8482A Power Meter INPUT HP 8560 E +1.3 dBm* * Example. Ensure that sufficient attenuation is present between the amplifier output and your test equipment to avoid overdrive or damage. Refer to test equipment specifications. Spectrum Analyzer HP 8648 A HP 437B Signal Source Power Meter TEST CONFIGURATION A 20 dB Attn Figure 1-1. Amplifier Test Setup Diagram – Configuration A 1-4.2 Gain Test: 8. Disconnect: 1. Spectrum analyzer 2. Signal source. 3. Power Meter and Sensor Head. 9. Connect the network analyzer as shown in Figure 1-2. 10. Set network analyzer as follows: 4. Power output to -11 dBm max. 5. Frequency start to 851 MHz. 6. Frequency stop to 869 MHz. 7. Normalize the network analyzer for gain and return loss. 11. Switch on the amplifier under test, and ensure that the STATUS switch is in the center position. 12. Check the amplifier gain across the band from 851 MHz to 869 MHz. Gain should be as specified in Error! Reference source not found.. Record test data in Table 1-3. G3H-851-80 PYTHON Multi- Channel Power Amplifier Gain = 63 dB Output = 80 W = +49.03 dBm 27 Vdc RF Out RF In 40 dB Attn 250 W +1.3 dBm* * Example. Ensure that sufficient attenuation is present between the amplifier output and your test equipment to avoid overdrive or damage. Refer to test equipment specifications. Network Analyzer TEST CONFIGURATION B 04-0263B-A PORT 1 HP 8753 D PORT 2 Figure 1-2. Amplifier Test Setup – Configuration B 1-4.3 Input Return Loss: 13. Retain the test configuration shown in Figure 1-2. 14. Read and record the S 11 return loss measurement on network analyzer. Record test data in Table 1-3. 15. Switch off the amplifier under test. 16. Disconnect the test equipment. 1-4.4 Test Data Sheet Record the amplifier’s performance test data below. DATE MODULE S/N Test Conditions: Load and Source Impedance:…
Text truncated - open the document above for the full version.
Test Report
DC Voltages 27 Vdc, 3A into the output devices.
Test Report
Page 1 of 46 Report No.: FC05-071 POWERWAVE TECHNOLOGIES, INC. TEST REPORT FOR THE RF AMPLIFIER, G3H-851-80 FCC PART 90 COMPLIANCE DATE OF ISSUE: OCTOBER 25, 2005 PREPARED FOR: Powerwave Technologies, Inc. 1801 E. St. Andrew Place Santa Ana, CA 92705 PREPARED BY: Mary Ellen Clayton CKC Laboratories, Inc. 5046 Sierra Pines Drive Mariposa, CA 95338 P.O. No.: 103166 W.O. No.: 84232 Date of test: September 15 – October 24, 2005 Report No.: FC05-071 This report contains a total of 46 pages and may be reproduced in full only. Partial reproduction may only be done with the written consent of CKC Laboratories, Inc. The results in this report apply only to the items tested, as identified herein. Page 2 of 46 Report No.: FC05-071 TABLE OF CONTENTS Administrative Information .............................................................................................3 Conditions for Compliance ..............................................................................................4 Approvals .........................................................................................................................4 Equipment Under Test (EUT) Description ......................................................................5 Equipment Under Test .....................................................................................................5 Peripheral Devices ...........................................................................................................5 Temperature and Humidity During Testing.....................................................................6 FCC 2.1033(c)(3) User’s Manual ....................................................................................6 FCC 2.1033(c)(4) Type of Emissions ..............................................................................6 FCC 2.1033(c)(5) Frequency Range................................................................................6 FCC 2.1033(c)(6) Operating Power.................................................................................6 FCC 2.1033(c)(7) Maximum Power Rating ....................................................................6 FCC 2.1033(c)(8) DC Voltages .......................................................................................6 FCC 2.1033(c)(9) Tune-Up Procedure ............................................................................6 FCC 2.1033(c)(10) Schematics and Circuitry Description..............................................6 FCC 2.1033(c)(11) Label and Placement ........................................................................6 FCC 2.1033(c)(12) Submittal Photos ..............................................................................6 FCC 2.1033(c)(13) Modulation Information ...................................................................6 FCC 2.1033(c)(14)/2.1046/90.635 - RF Power Output ...................................................7 FCC 2.1033(c)(14)/2.1047(b) - Audio Frequency Response...........................................9 FCC 2.1033(c)(14)/2.1047(b) - Modulation Limiting Response.....................................9 FCC 2.1033(c)(14)/2.1049(i) - Occupied Bandwidth......................................................9 Input Plots ........................................................................................................................12 Output Plots .....................................................................................................................19 Bandedge Plots ................................................................................................................26 Intermodulation Plots.......................................................................................................31 FCC 2.1033(c)(14)/2.1051/90.210(a)(2) - Spurious Emissions at Antenna Terminal ....34 FCC 2.1033(c)(14)/2.1053/90.210(a)(2) - Field Strength of Spurious Radiation ...........41 Page 3 of 46 Report No.: FC05-071 ADMINISTRATIVE INFORMATION DATE OF TEST: September 15 – October 24, 2005 DATE OF RECEIPT: September 15, 2005 FREQUENCY RANGE TESTED: 9 kHz-9 GHz MANUFACTURER: Powerwave Technologies, Inc. 1801 E. St. Andrew Place Santa Ana, CA 92705 REPRESENTATIVE: Jeffrey Dale TEST LOCATION: CKC Laboratories, Inc. 110 Olinda Place Brea, CA 92621 TEST METHOD: FCC Part 90 PURPOSE OF TEST: To demonstrate the compliance of the RF Amplifier, G3H-851-80 with the requirements for FCC Part 90 devices. Page 4 of 46 Report No.: FC05-071 CONDITIONS FOR COMPLIANCE No modifications to the EUT were necessary to comply. APPROVALS Steve Behm, Director of Engineering Services QUALITY ASSURANCE:TEST PERSONNEL: Joyce Walker, Quality Assurance Administrative Manager Eddie Wong, EMC Engineer Page 5 of 46 Report No.: FC05-071 EQUIPMENT UNDER TEST (EUT) DESCRIPTION The customer declares the EUT tested by CKC Laboratories was representative of a production unit. EQUIPMENT UNDER TEST RF Amplifier Manuf: Powerwave Technologies Model: G3H-851-80 Serial: NA FCC ID: pending PERIPHERAL DEVICES The EUT was tested with the following peripheral device(s): Power Meter Manuf: Agilent Model: E4419A Serial: US38260914 ESG Manuf: Agilent Model: E4433B Serial: US40051477 ESG Manuf: Agilent Model: E4433B Serial: GB40051459 ESG Manuf: Agilent Model: E4433B Serial: US40052296 Page 6 of 46 Report No.: FC05-071 TEMPERATURE AND HUMIDITY DURING TESTING The temperature during testing was within +15°C and + 35°C. The relative humidity was between 20% and 75%. FCC 2.1033(c)(3) USER’S MANUAL The necessary information is contained in a separate document. FCC 2.1033 (c)(4) TYPE OF EMISSIONS D7W, D9W FCC 2.1033 (c)(5) FREQUENCY RANGE 851.5 MHz – 868.5 MHz FCC 2.1033 (c)(6) OPERATING POWER iDEN – 110 Watts, 1X-EVDO(IS95) – 120 Watts. FCC 2.1033 (c)(7) MAXIMUM POWER RATING 500 Watts FCC 2.1033 (c)(8) DC VOLTAGES The necessary information is contained in a separate document. FCC 2.1033 (c)(9) TUNE-UP PROCEDURE The necessary information is contained in a separa…
Text truncated - open the document above for the full version.
Test Setup Photos
PHOTOGRAPH SHOWING RF OUTPUT POWER PHOTOGRAPH SHOWING DIRECT CONNECT TEST SETUP PHOTOGRAPH SHOWING RADIATED EMISSIONS Radiated Emissions - Front View PHOTOGRAPH SHOWING RADIATED EMISSIONS Radiated Emissions - Back View PHOTOGRAPH SHOWING RADIATED EMISSIONS Radiated Emissions - Loop Antenna
Contact Information
Applicant
Jeff Dale(Principal Reliability Engineer)
Technical Contact
CKC Laboratories, Inc.Mary Ellen Clayton
[email protected]800-500-4362
5046 Sierra Pines Drive · Mariposa, California · United States
Test Firm
CKC Laboratories, Inc.Steve Behm
Technical Specifications
| # | Rule Parts | Frequency Range | Power Output | Emission | Tolerance |
|---|---|---|---|---|---|
| 2 | 9 | 851.5 MHz - 868.5 MHz | 110 W | GXW | Amp |
Other Applications from Powerwave Technologies Inc
E675JS0123
Nov 03, 2011Multi-carrier RF Power Amplifier
Equipment Class
AMP - Amplifier
E675JS0120
Aug 26, 2010Nexus Dual Band Repeater
Equipment Class
TNB - Licensed Non-Broadcast Station Transmitter
E675JS0119
Aug 01, 2010Nexus Dual Band Repeater
Equipment Class
PCB - PCS Licensed Transmitter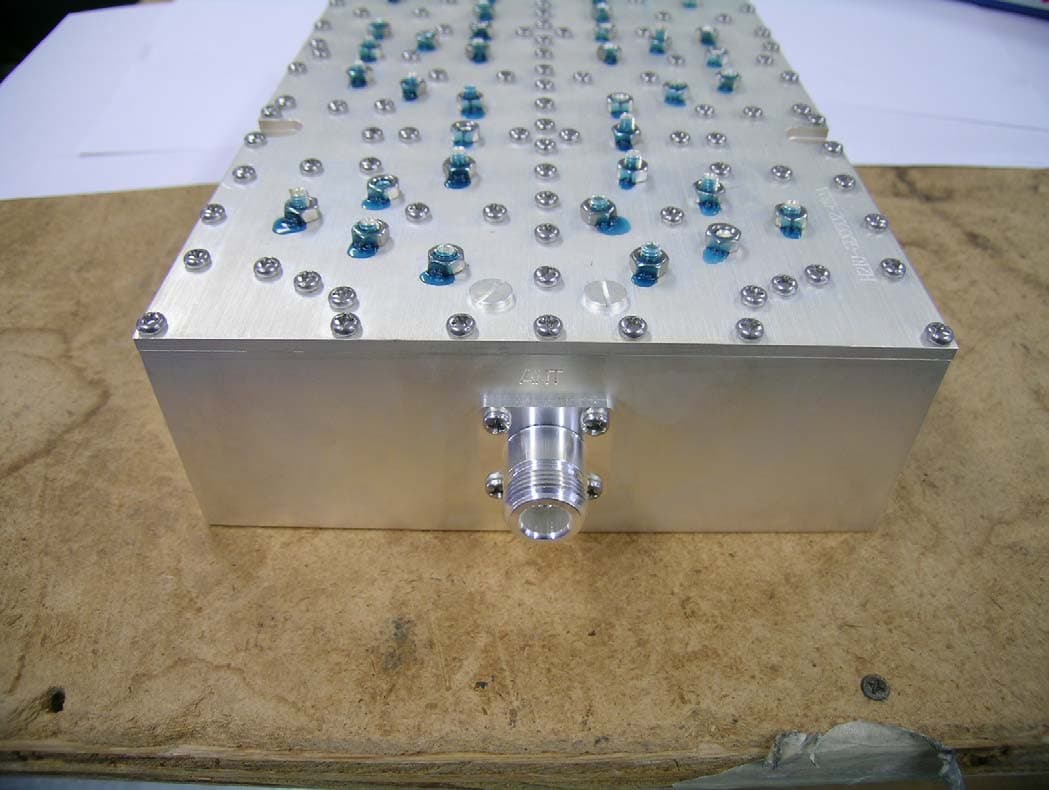
E675JS0118
Jul 26, 2010Nexus Dual Band Repeater
Equipment Class
PCB - PCS Licensed Transmitter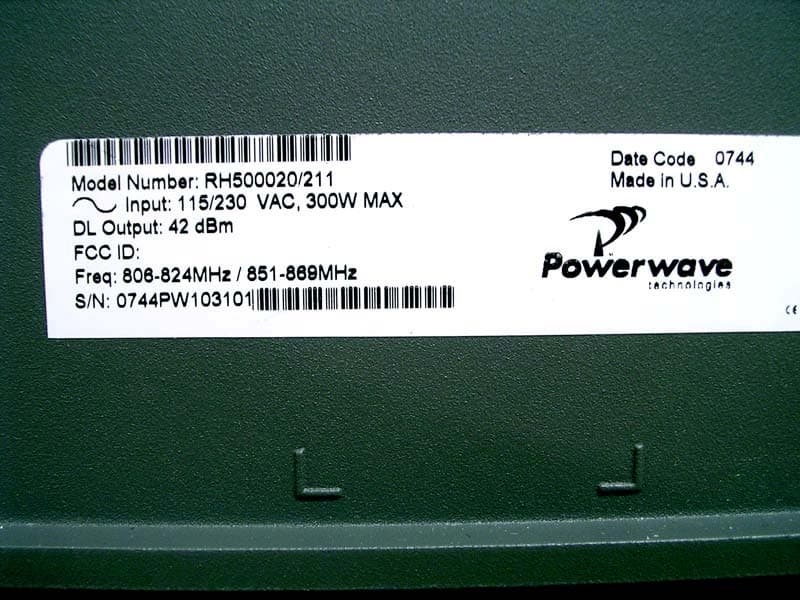
E675JS0096
Jan 10, 2008Wideband Radio Head
Equipment Class
TNB - Licensed Non-Broadcast Station Transmitter