EHA-08CN3CN3 with DHIB and MC75
Intermec Technologies Corporation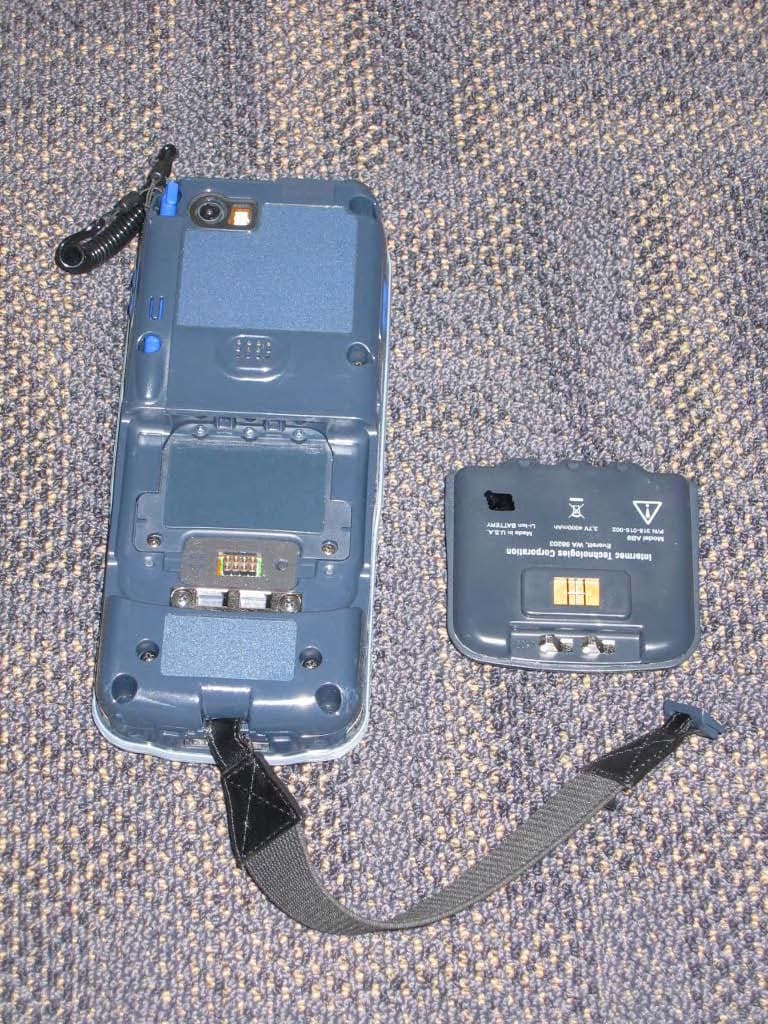
Click to zoom
Application Details
- Equipment Class
- PCE - PCS Licensed Transmitter held to ear
- Date of Grant
- Oct 10, 2007
- Application Purpose
- Original Equipment
- Date of Application
- Aug 23, 2007
- Equipment Note
- CN3 with DHIB and MC75
- Frequency Range
- 1850.20000000 - 1909.80000000
- Country
- United States
Documents & Files
Document Text
Text extracted from the exhibit documents filed with the FCC. Open a document above to read the original.
Users Manual
1 CN3 Compliance Insert For Users in the United States and Canada This product conforms to the following approvals. The users of this product are cautioned to use accessories and peripherals approved by Intermec Technologies Corporation. The use of accessories other than those recommended, or changes to this product that are not approved by Intermec Technologies Corporation, may void the compliance of this product and may result in the loss of the user’s authority to operate the equipment. FCC Digital Emissions Compliance This equipment has been tested and found to comply with the limits for a Class B digital device, pursuant to Part 15 of the FCC Rules. These limits are designed to provide reasonable protection against harmful interference in a residential installation. This equipment generates, uses, and can radiate radio frequency energy and, if not installed and used in accordance with the instructions, may cause harmful interference to radio communications. However, there is no guarantee that interference will not occur in a particular installation. If this equipment does cause harmful interference to radio or television reception, which can be determined by turning the equipment off and on, the user is encouraged to try to correct the interference by one or more of the following measures: •Reorient or relocate the radio or television receiving antenna. •Increase the separation between the computer equipment and receiver. •Connect the equipment into an outlet on a circuit different from that to which the radio or television receiver is connected. •Consult the dealer or an experienced radio television technician for help. Canadian Digital Apparatus Compliance This Class B digital apparatus meets all requirements of the Canadian Interference-Causing Equipment Regulations. Conformité aux normes canadiennes sur les appareils numériques Cet appareil numérique de la classe B respecte toutes les exigences du Réglement sur le matériel brouilleur du Canada. Battery Information Battery Recycling Information Note: In the U.S.A., the EPA does not consider spent Li-ion batteries as hazardous waste. Caution: This marking indicates that the user should read all included documentation before use. Attention: Ce marquage indique que l’usager doit, avant l’utilisation, lire toute la documentation incluse. Caution: The battery pack used in this device may ignite, create a chemical burn hazard, explode, or release toxic materials if mistreated. Do not incinerate, disassemble, or heat above 100°C (212°F). Charge only with Intermec Models AC14, AD10, AD11, AD12, and AV6. Do not short circuit; may cause burns. Keep away from children. Use only Intermec battery pack Model AB8 or AB9. Use of incorrect battery pack may present risk of fire or explosion. Promptly dispose of used battery pack according to the instructions. Attention: Le bloc-piles utilisé dans cet appareil peut prendre feu, constituer un risque de brûlure chimique, exploser ou dégager des substances toxiques s’il est manipulé de façon inappropriée. Ne pas jeter au feu, démonter ou chauffer à plus de 100 °C (212 °F). Ne charger qu’avec les dispositifs Intermec AC14, AD10, AD11, AD12, et AV6. Ne pas court-circuiter; cela pourrait causer des brûlures. Garder hors de la portée des enfants. N’utiliser que le modèle de bloc-piles Intermec AB8 ou AB9. L’utilisation d’un mauvais bloc-piles pourrait constituer un risque d’incendie ou d’explosion. Mettre rapidement au rebut tout bloc-piles usé, conformément aux instructions. Li-ionLi-ion This product contains or uses a lithium ion (Li-ion) main battery. When the battery reaches the end of its useful life, the spent battery should be disposed of by a qualified recycler or hazardous materials handler. Do not mix this battery with the solid waste stream. Contact your Intermec Technologies Service Center for recycling or disposal information. Ce produit contient une batterie principale d’ions de lithium (Li-ion) et une batterie. Lorsque la batterie atteint la fin de sa durée de vie utile, la batterie usées doivent être mises aux rebuts par un agent de recyclage ou un manipulateur de matériaux dangereux agréé. Il ne faut pas mélanger la batterie aux autres déchets solides. Pour plus d’informations sur le recyclage ou la mise aux rebuts, contacter votre centre de services Intermec Technologies. 2 Specific Absorption Rate (SAR) Radio Wave Exposure and Specific Absorption Rate (SAR) Information for Model CN3 Configurations with 802.11g Radio The FCC permits a maximum SAR value of 1.6 W/kg. For use at the ear, the highest SAR value for the Model CN3 as tested by BABT, is 0.036 W/kg. For body worn operation, the highest SAR value for the Model CN3, as tested by BABT, is 0.087 W/kg. For head worn operation, the highest SAR value for the Model CN3, as tested by BABT, is 1.031 W/kg. Pour une utilisation à l’oreille, le TAS limite pour le modèle CN3, tel que testé par le BABT, est de 0,036 W/kg. Pour une utilisation au corps, le TAS limite pour le CN3, tel que testé par le BABT est de 0,087 W/kg. This product has been tested and meets the FCC RF exposure guidelines when used with the Intermec accessories supplied or designated for this product. Use of other accessories may not ensure compliance with FCC RF exposure guidelines. Ce produit a été testé et répond aux directives de la FCC en matière d’exposition aux radiofréquences lorsqu’il est utilisé avec les accessoires Intermec fournis ou conçus pour ce produit. L’utilisation d’autres accessoires pourrait contrevenir aux directives de la FCC en matière d’exposition aux radiofréquences. Radio Wave Exposure and Specific Absorption Rate (SAR) Information for Model CN3 Configurations with GSM/GPRS Radio For residents of Canada and the United States and other countries/regions that have adopted the SAR limit recommended by Industry Canada RSS-102 and Federal Communications Commission Office of Engineering and Technology (OET) Bulletin 65, the maximum allowed SAR value is 1…
Text truncated - open the document above for the full version.
Users Manual
CN3 Mobile Computer User's Manual CN3 Mobile Computer User's Manual iiCN3 Mobile Computer User’s Manual Intermec Technologies Corporation Worldwide Headquarters 6001 36th Ave.W. Everett, WA 98203 U.S.A. www.intermec.com The information contained herein is provided solely for the purpose of allowing customers to operate and ser- vice Intermec-manufactured equipment and is not to be released, reproduced, or used for any other purpose without written permission of Intermec Technologies Corporation. Information and specifications contained in this document are subject to change without prior notice and do not represent a commitment on the part of Intermec Technologies Corporation. © 2006-2007 by Intermec Technologies Corporation. All rights reserved. The word Intermec, the Intermec logo, Norand, ArciTech, Beverage Routebook, CrossBar, dcBrowser, Durath- erm, EasyADC, EasyCoder, EasySet, Fingerprint, i-gistics, INCA (under license), Intellitag, Intellitag Gen2, JANUS, LabelShop, MobileLAN, Picolink, Ready-to-Work, RoutePower, Sabre, ScanPlus, ShopScan, Smart Mobile Computing, TE 2000, Trakker Antares, and Vista Powered are either trademarks or registered trade- marks of Intermec Technologies Corporation. There are U.S. and foreign patents as well as U.S. and foreign patent applications pending. Wi-Fi is a registered certification mark of the Wi-Fi Alliance. Microsoft, Windows, and the Windows logo are registered trademarks of Microsoft Corporation in the United States and/or other countries. Bluetooth is a trademark of Bluetooth SIG, Inc., U.S.A. This product includes software developed by the OpenSSL Project for use in the OpenSSL Toolkit (www.openssl.org). This product includes cryptographic software written by Eric Young ([email protected]). Bluetooth is a trademark of Bluetooth SIG, Inc., U.S.A. miniSD is a trademark of the SD Card Association. The SD logo is a trademark. SiRF and the SiRF logo are registered trademarks of SiRF Technology, Inc. SiRFstarIII is a trademark of SiRF Technology, Inc. iiilaunaM s’resU retupmoC eliboM 3NC Document Change Record This page records changes to this document. The document was originally released as Version -001. Version NumberDateDescription of Change 00201/2007Added information about the InstallSelect application, the clean boot method, the color camera, and CDMA radios. 00304/2007•Added information about GPS on the CN3. •Added information about using the FTP server. •Created an appendix for specifications and accessories information. ivCN3 Mobile Computer User’s Manual Contents CN3 Mobile Computer User’s Manualv Contents Before You Begin . . . . . . . . . . . . . . . . . . . . . . . . . . . . . . . . . . . . . . . . . . . . . . . . . . . . . . . . .xi Safety Information . . . . . . . . . . . . . . . . . . . . . . . . . . . . . . . . . . . . . . . . . . . . . . . . . xi Global Services and Support . . . . . . . . . . . . . . . . . . . . . . . . . . . . . . . . . . . . . . . . . . xi Who Should Read This Manual . . . . . . . . . . . . . . . . . . . . . . . . . . . . . . . . . . . . . . xii Related Documents . . . . . . . . . . . . . . . . . . . . . . . . . . . . . . . . . . . . . . . . . . . . . . . xii Patent Information . . . . . . . . . . . . . . . . . . . . . . . . . . . . . . . . . . . . . . . . . . . . . . . . xiii 1 Using the Computer. . . . . . . . . . . . . . . . . . . . . . . . . . . . . . . . . . . . . . . . . . . . . . . . . . . . . . . . . 1 Introducing the CN3 Mobile Computer . . . . . . . . . . . . . . . . . . . . . . . . . . . . . . . . . . . . . . . 2 Front View . . . . . . . . . . . . . . . . . . . . . . . . . . . . . . . . . . . . . . . . . . . . . . . . . . . . . . . . . . . . . . 2 Rear View . . . . . . . . . . . . . . . . . . . . . . . . . . . . . . . . . . . . . . . . . . . . . . . . . . . . . . . . . . . . . . 3 Features . . . . . . . . . . . . . . . . . . . . . . . . . . . . . . . . . . . . . . . . . . . . . . . . . . . . . . . . . 4 Learning Software Build Versions . . . . . . . . . . . . . . . . . . . . . . . . . . . . . . . . . . . . . . . . . . . . 4 Resetting Your Computer . . . . . . . . . . . . . . . . . . . . . . . . . . . . . . . . . . . . . . . . . . . . . . . . . . 5 Preferred Reset Method . . . . . . . . . . . . . . . . . . . . . . . . . . . . . . . . . . . . . . . . . . . . . 5 Secondary Reset Method . . . . . . . . . . . . . . . . . . . . . . . . . . . . . . . . . . . . . . . . . . . . 5 Clean Boot Process . . . . . . . . . . . . . . . . . . . . . . . . . . . . . . . . . . . . . . . . . . . . . . . . . 5 Scanning Bar Codes. . . . . . . . . . . . . . . . . . . . . . . . . . . . . . . . . . . . . . . . . . . . . . . . . . . . . . . 6 Scanning with the Area Imager . . . . . . . . . . . . . . . . . . . . . . . . . . . . . . . . . . . . . . . . 6 Improving the Performance of the Area Imager . . . . . . . . . . . . . . . . . . . . . . . . . . . 7 Reading Distances . . . . . . . . . . . . . . . . . . . . . . . . . . . . . . . . . . . . . . . . . . . . . . . . . 8 Using the Batteries. . . . . . . . . . . . . . . . . . . . . . . . . . . . . . . . . . . . . . . . . . . . . . . . . . . . . . . . 9 Charging the Battery . . . . . . . . . . . . . . . . . . . . . . . . . . . . . . . . . . . . . . . . . . . . . . . 9 Maximizing Battery Life . . . . . . . . . . . . . . . . . . . . . . . . . . . . . . . . . . . . . . . . . . . . 10 Removing and Installing the Battery . . . . . . . . . . . . . . . . . . . . . . . . . . . . . . . . . . . 10 Checking the Battery Status . . . . . . . . . . . . . . . . . . . . . . . . . . . . . . . . . . . . . . . . . 11 Understanding the Low Battery Warnings . . . . . . . . . . . . . . . . . . . . . . . . . . . . . . 12 Adjusting the Beeper . . . . . . . . . . . . . . . . . . . . . . . . . . . . . . . . . . . . . . . . . . . . . . . . . . . . . 12 Using the Color Camera . . . . . . . . . . . . . . . . . . . . . . . . . . . . . . . . . . . . . . . . . . . . . . . . . . 14 Using the Intermec Settings A…
Text truncated - open the document above for the full version.
Users Manual
CN3 Mobile Computer User’s Manual1 1 Using the Computer This chapter introduces the CN3 Mobile Computer, developed by Intermec to enhance wireless connectivity needs and contains hardware and software configuration information to assist you in making the most out of your CN3. Note: Desktop icons and applet icons are shown to the left. Any place that Start is mentioned, tap the following Windows icon in the top, left corner of your CN3 desktop. Chapter 1 — Using the Computer 2CN3 Mobile Computer User’s Manual Introducing the CN3 Mobile Computer The Intermec CN3 Mobile Computer is a small, ergonomically designed mobile computer built on the Microsoft® Windows® Mobile 5.0 operating system. It is lightweight, easy-to-use, and runs most software developed for the Windows Mobile platform, including stand-alone, client-server, and browser-based applications. Front View Note that the QWERTY keypad is on the left and the numeric keypad is on the right. Battery Status LED Scan LED and Intermec Ready-to-Work Indicator Front Speaker 2 remappable buttons Notification LED 2 remappable buttons Power switch Chapter 1 — Using the Computer CN3 Mobile Computer User’s Manual3 Rear View Note that the scanner and the color camera cannot be on the same CN3. Scanner With miniSD/SIM card door open Battery Color camera and flash Remappable scan buttons Rear Speaker Microphone Connector Stylus in holder Chapter 1 — Using the Computer 4CN3 Mobile Computer User’s Manual Features The CN3 is available with the following: • 802.11b/g or WLAN radio • Bluetooth • 128MB RAM • QWERTY or numeric keypad • Imaging Options: • EA11 Standard Area Imager • EA11 High-Density (HD) Area Imager • Color Camera • Wireless Wide Area Network Options: • GSM/GPRS/EDGE • CDMA/1xRTT/EV-DO Use this manual to understand how to use the features and options available on the CN3. Learning Software Build Versions CN3s with an IEEE 802.11b/g radio installed are Wi-Fi certified for interoperability with other 802.11b/g wireless LAN devices. To check to see if your CN3 has the latest SSPB or operating system build, select Start > Internet Explorer > the Intermec logo, then note the information beneath the CN3 Version Information title. Chapter 1 — Using the Computer CN3 Mobile Computer User’s Manual5 Resetting Your Computer When the CN3 completely stops responding, an application is locked up and does not respond, when you upgrade the firmware, or when you reflash the CN3, it may be necessary to perform a reset. Preferred Reset Method The recommended method for recovering the CN3 is to press and hold the power switch on the front of the CN3 for about 10 seconds. This performs a graceful system shutdown and no data is lost in the process. Secondary Reset Method If performing the preferred reset method does not restore system operation, it may be necessary to press the reset button inside the battery compartment of the CN3. This method does not guarantee that cached disk data will be saved, so transactional data may be lost during the reset. All other data is preserved. To press the reset button 1Press the power switch to suspend the CN3. 2Remove the battery pack from the back of the CN3. 3With a stylus, press the reset button in the battery cavity in the back. 4Press and hold the power switch as you put the battery back in the CN3. Clean Boot Process If performing either reset method fails to restore system operation, it may be necessary to perform a clean-boot. This is a boot method which formats the object store to clean data and registry information from the CN3 system and restores them to their factory-default state. Do not use force or a sharp object when pressing the reset button. You may damage the reset button. Note: This will erase the memory in the CN3, including all applications and data files found in the object store (user store). See “Packaging Applications for the Computer” on page 76 for more information. Reset button Chapter 1 — Using the Computer 6CN3 Mobile Computer User’s Manual To perform a clean-boot 1Press the power switch to suspend the CN3. 2Remove the battery pack from the back of the CN3. 3With a stylus, press the reset button in the battery cavity in the back. 4Press and hold the power switch as you put the battery back in the CN3. 5Continue to hold the power switch until a Warning message appears on the display, release the power switch, then read the message. 6To continue with the clean-boot, press either right side button. To cancel the clean-boot, press either left side button. Scanning Bar Codes Use the area imager to scan and enter bar code data. The CN3 supports reading 1D and 2D images. These bar code symbologies are enabled by default on the CN3: Code 39, Code 128, UPC-A, UPC-E, EAN-8, EAN-13, and Datamatrix. If you are using bar code labels that are encoded in a different symbology, you need to enable the symbology on the computer. Use the Intermec Settings applet to enable and disable symbologies. See the Intermec Computer Command Reference Manual (P/N 073529) available from the Intermec web site at www.intermec.com. Scanning with the Area Imager The CN3 has an area imager that can scan 1D and 2D bar code symbologies. It also supports omni-directional (360°) scanning where you can position the CN3 in any orientation to scan a bar code label. Using the 2D imager is like taking a picture with a digital camera. To use the area imager 1Press the power switch to turn on the CN3, point the scanner window a few inches from the bar code label, and hold steady. 2Press the Scan button and center the red aiming beam over the bar code label. The aiming beam is smaller when the imager is closer to the bar code and larger when it is further away. Scan button Chapter 1 — Using the Computer CN3 Mobile Computer User’s Manual7 When a bar code label is successfully read, a high beep is emitted and the Good Scan LED lights briefly. Release the Scan button. Improving the Performance of the Area Imager If you have problems scanning a …
Text truncated - open the document above for the full version.
Users Manual
CN3 Mobile Computer User’s Manual29 2 Windows Mobile This chapter introduces Microsoft Windows Mobile 5.0 for Pocket PC. While using the CN3 Mobile Computer, keep these key points in mind: •Tap Start on the navigation bar, located at the top of the screen, to quickly move to programs, files, and settings. Use the command bar at the bottom of the screen to perform tasks in programs. The command bar includes menus, icons, and the onscreen keyboard. • Tap and hold an item to see a pop-up menu containing a list of actions you can perform. Pop-up menus give you quick and easy access to the most common actions. Below is a list of Windows Mobile components described in this chapter. Ta p Start > Help, then select a topic on your CN3 to find additional information on Windows Mobile components. Windows Mobile 5.0 Components Microsoft ActiveSync (page 44) Microsoft Outlook Mobile (page 45) Word Mobile (page 66) Excel Mobile (page 69) PowerPoint Mobile (page 70) Windows Media Player for Windows Mobile (page 71) Using Internet Explorer Mobile (page 74) Chapter 2 — Windows Mobile 30CN3 Mobile Computer User’s Manual Software Builds See “Learning Software Build Versions” on page 4 to determine which Intermec build of Windows Mobile 5.0 is on your CN3. Where to Find Information This chapter describes your CN3 hardware, provides an overview of the programs on your CN3, and explains how to connect your CN3 to a desktop, a network, or the Internet. For instructions on setting up your CN3 and installing ActiveSync, see the Quick Start Guide. The following is a guide to more information to assist you use your CN3. Use these URLs for additional information about Microsoft Windows Mobile (Pocket PC): •msdn2.microsoft.com/en-us/support/default.aspx •support.microsoft.com/ •http://msdn.microsoft.com/newsgroups/ (a free support option) And, most importantly, the Intermec front-line support personnel can help assist you work with many of the Windows Mobile and technologies that you find on the CN3. See “Global Services and Support” on page xi for more information. Basic Usage Learning to use your CN3 is easy. This section describes the basic concepts of using and customizing your CN3. Today Screen When you turn on your CN3 for the first time each day (or after four hours of inactivity), you see the To d a y screen. You can also display it by tapping the Start flag at the top left of your display and then To d a y. On the Today screen, you can see important information for the day. For information on:See this source: Programs on your mobile computer.This chapter and mobile computer Help. To view Help, tap Start > Help, then select a topic. Additional programs that can be installed on the mobile computer. The Windows Mobile Companion CD. Connecting to and synchronizing with a desktop.The Quick Start Guide or ActiveSync Help on your desktop. To view Help, click Help > Microsoft ActiveSync Help. Last-minute updates and detailed technical information. The Read Me files, located in the Microsoft ActiveSync folder on the desktop and on the Windows Mobile Companion CD. Up-to-date information on your Windows Mobile.www.microsoft.com/windowsmobile/resources/communi- ties/default.mspx Chapter 2 — Windows Mobile CN3 Mobile Computer User’s Manual31 To customize what is displayed on the Today screen including the background Programs You can switch from one program to another by selecting it from the Start menu. (You can customize which programs you see on this menu. For information, see “Adjusting Settings” on page 41.) To access some programs, tap Start > Programs, and then the program name. You can also switch to some programs by pressing a program icon. Your CN3 has one or more program icons located on the front or side of the computer. The icons identify the programs to which they switch. The following is a partial list of programs that are on your CN3, in the order they appear in the Start menu. Look on the Windows Mobile Companion CD for additional programs that you can install onto the CN3. 1Ta p Start > Settings > the Personal tab > the To d a y icon. 2Status icons display information such as low batteries or when the CN3 is connected to a desktop or to the Internet. You can tap an icon to open the associated setting or program. Note: Some programs have abbreviated labels for check boxes and drop- down menus. To see the full spelling of an abbreviated label, tap and hold the stylus on the label. Drag the stylus off the label so that the command is not carried out. Keep track of your appointments and create meeting requests. Keep track of your friends and colleagues. Browse web sites, and download new programs, files from the Internet. Send and receive e-mail messages. Keep track of your tasks. Tap to start a programTap and hold to change time format Tap to change date and time Tap to change owner information Tap to review your email Your day at a glance. Tap to open an associated program Chapter 2 — Windows Mobile 32CN3 Mobile Computer User’s Manual Navigation Bar and Command Bar The navigation bar is located at the top of the screen. It displays the active program and current time, switch to programs, and close screens. Use the command bar at the bottom of the screen to perform tasks in programs. The command bar includes menu names, functions, and the Input Panel icon, when needed. To create a new item in the current program, tap New. To see the name of a icon, tap and hold the stylus on the icon. Drag the stylus off the icon so the command is not carried out. Pop-up Menus Use pop-up menus to quickly perform an action on an item. For example, you can use a pop-up menu to delete or make a copy of an item. To access a pop-up menu, tap and hold the item on which you want to perform the action. When the menu appears, tap the action you want to perform, or tap anywhere outside the menu to close the menu without doing the action. Notifications When you have something to do, your CN3 notifies you in a variety of ways. For exa…
Text truncated - open the document above for the full version.
Users Manual
CN3 Mobile Computer User’s Manual99 4 Maintaining the Computer Use this chapter to solve problems you may encounter and perform routine maintenance on your CN3 Mobile Computer. Chapter 4 — Maintaining the Computer 100CN3 Mobile Computer User’s Manual Upgrading the Operating System on your Computer You can use the SmartSystems™ Foundation application from Intermec to perform upgrades on your CN3, versions 3.0 or later. Contact your Intermec representative for more information about the SmartSystems Foundation software. When you upgrade the operating system, you erase the current configuration and replace it with the new default configuration. You will need to reset the network parameters on the CN3 to reestablish communications with other devices in the network. In other words, if you upgrade the operating system and the default registry from the operating system has changed, the registry is rolled back to the new default. When you upgrade your CN3, you are updating the operating system (OS) and the SmartSystems Platform Bundle (SSPB) files. The SSPB files are stored on the DiskOnChip, and deliver Intermec value- added functionality such as data collection, unit configuration and diagnostics, and Intermec’s wireless security suite. As new features are added to these components, you can upgrade your SSPB files without needing to upgrade the operating system image. Similarly, features added to the operating system images do not affect the functionality of the SSPB, and you can choose to upgrade only the operating system image. There are two ways to upgrade the CN3: • You can use a miniSD card to upgrade the CN3. For help, see the next page. • You can use the SmartSystems Console to upgrade the CN3. For help, see “Using the SmartSystems Console to Upgrade the Computer” on page 98. You need to download the latest upgrade files from the Intermec web site to your desktop or laptop computer, then determine if you want to upgrade both the operating system and SSPB files, just the operating system files, or just the SSPB files. To download the latest upgrade files 1Start your web browser and go to the Intermec web site at www.intermec.com. 2Go to Service & Support > Downloads. 3Select Computers: CN3 Mobile Computer from the drop-down list. 4Select which download you need. Make sure the download you select is for the CN3. 5Look at the description (or the ReadMe file) to determine if this download will upgrade both the operating system and SSPB files, just the operating system, or just the SSPB. You will need this information later. Chapter 4 — Maintaining the Computer CN3 Mobile Computer User’s Manual101 6Close the link and download the .zip file to your desktop computer or your laptop computer. 7If you are using the SmartSystems Console to upgrade the CN3, go to page 102, otherwise go to the next paragraph. Using a Storage Card to Upgrade the Computer To use a miniSD storage card to upgrade the CN3, you need a Secure Digital card reader and a miniSD storage card formatted as FAT16. Upgrading Both Operating System and SSPB Files 1Extract the upgrade files to a folder on your desktop or laptop computer. Make sure to select the option to use folder names when extracting files. 2Place all individual root files onto your miniSD card, this will update your operating system only. Ignore the SSPB files at that point. 3Insert the miniSD card in the CN3. 4Remove the battery pack from the CN3 and place the CN3 in a dock connected to external power. With a stylus, press the reset button in the battery cavity in the back. 5When the Installation Complete menu appears, remove the miniSD card. Remove the existing files from the miniSD card and place all of the files from the SSPB folder into your miniSD card. The number of files will vary from version to version. 6Insert the miniSD card in the CN3. With a stylus, press the reset button in the battery cavity in the back, and press and hold the power switch as you put the battery back in the CN3. 7Continue to hold the power switch until a Warning message appears on the display, release the power switch, then read the message. Press either right-side button to continue with the clean-boot. 8Perform the pen calibration, then wait for the CN3 to load files from the miniSD card. This progress is shown via the orange banner near the Start menu in the display. Note: Intermec offers miniSD cards for sale which have been tested and certified to work with the CN3. Intermec cannot guarantee that other miniSD cards will work with CN3s. Reset button Chapter 4 — Maintaining the Computer 102CN3 Mobile Computer User’s Manual 9When progress is complete, the CN3 performs a warm-boot to reset its configuration. Remove the miniSD card and delete its files. Set the date, time, and network communication parameters to reestablish communications with the other devices in the wireless network. Upgrading the SSPB Files 1Extract the SSPB upgrade files to a miniSD card. 2Insert the miniSD card in the CN3, then press the reset button in the battery cavity in the back to wipe the current SSPB and load the new SSPB over the old in the persistent storage. 3Do the pen calibration, then wait for the CN3 to load files from the miniSD card. This progress is shown via the orange banner near the Start menu in the display. 4When the progress is complete, remove the miniSD card, delete its files. 5When progress is complete, the CN3 performs a warm-boot to reset its configuration. Remove the miniSD card and delete its files. 6Set the date, time, and network communication parameters to reestablish communications with the other devices in the wireless network. Using the SmartSystems Console to Upgrade the Computer Use the SmartSystems Console to upgrade the CN3 operating system. The console is part of SmartSystems Foundation and is available from the Intermec web site via the IDL. Before upgrading the CN3, you need: • the SmartSystems Foundation. To download SmartSystems Foundation, go to www.intermec.com/…
Text truncated - open the document above for the full version.
Contact Information
Applicant
Brian Rudick(VP & GC, Honeywell Scanning & Mobility)
Test Firm
Northwest EMC, Inc.Greg Kiemel
Technical Specifications
| # | Rule Parts | Frequency Range | Power Output | Emission | Tolerance |
|---|---|---|---|---|---|
| 4 | 24E | 1.85 GHz - 1.91 GHz | 646.00 mW | 300KG7W | 2.5 ppm |
Other Applications from Intermec Technologies Corporation
EHA-1015CP01X1
Sep 29, 20131015CP01
Equipment Class
NII - Unlicensed National Information Infrastructure TX
EHA-1015CP01SX1
Sep 08, 20131015CP01S
Equipment Class
PCE - PCS Licensed Transmitter held to ear
EHA-RC12ABGN
Aug 19, 2013WLAN board
Equipment Class
DSS - Part 15 Spread Spectrum Transmitter
EHA-1000CP01F
Feb 19, 20131000CP01F9, 1000CP02F9, 1001CP01F9
Equipment Class
DTS - Digital Transmission System
EHA-INBT02
Dec 11, 2012BT Board
Equipment Class
DSS - Part 15 Spread Spectrum Transmitter