LNQR3010SUWEthernet Router
Actiontec Electronics Inc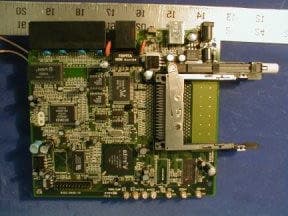
Click to zoom
Application Details
- Equipment Class
- DSS - Part 15 Spread Spectrum Transmitter
- Date of Grant
- Jan 13, 2002
- Application Purpose
- Original Equipment
- Date of Application
- Jan 13, 2002
- Equipment Note
- Ethernet Router
- Frequency Range
- 2412.41000000 - 2462.90000000
- Company
- Actiontec Electronics Inc
- Country
- United States
Documents & Files
Document Text
Text extracted from the exhibit documents filed with the FCC. Open a document above to read the original.
Users Manual
1 Table of Contents Introduction2 Package Contents2 System Requirements2 Contacting Technical Support3 Introduction to the Wireless Cable/DSL Router4 Before you Connect the Wireless Cable/DSL Router6 Connecting the Actiontec Wireless Cable/DSL Router17 Installing the USB Drivers 18 Configuring the Actiontec Wireless Cable/DSL Router30 Basic Setup30 Status Screen33 Advanced Configuration of the Wireless Cable/DSL Router36 WAN IP Address38 Wireless Settings40 LAN IP Address42 DHCP Server42 DHCP Server Configuration43 Services Blocking43 Website Blocking44 Remote Management44 Port Forwarding45 DMZ Hosting45 MAC Address Cloning46 Utilities47 Troubleshooting49 Glossary50 Specifications53 Environmental54 Appendix A55 Appendix B68 Appendix C78 Appendix D81 Table of Contents 0530-????-000 Page 23 Contacting Technical SupportIntroduction Actiontec Electronics prides itself on making high-quality, durable, high-performance products. If you should need assistance, the Actiontec Technical Support Department is available 6 am to 11pm Mon - Sun (Mountain Time), to provide professional support. Contacting Technical Support Actiontec Electronics, Inc. 760 N. Mary Avenue Sunnyvale, CA94086 T echnical Support Phone:1-719-884-8300 E-mail: [email protected] Website: www.actiontec.com/support Thank you for purchasing the Actiontec Wireless Cable/DSL Router. The Wireless Cable/DSL Router is the simplest way to connect a small number of PC’s to a single high speed Broadband modem. This easy to use product is perfect for the home office or small business. If you would like to take your computing to the next level then the Actiontec Wireless Cable/DSL Router is the key to your success. Package Contents One Actiontec Wireless Cable/DSL Router 4-Port Ethernet/USB One Actiontec Wireless Cable/DSL Router 1-Port Ethernet/USB One power adapter One RJ-45 Ethernet cable One USB Cable Installation CD This User’s Manual and Quick Start Guide Warranty & Registration Card Minimum System Requirements Broadband Internet connection using an external Ethernet modem PC with an 10Mbps or 10/100Mbps Ethernet connection Microsoft Windows 95, Microsoft Windows 98, Microsoft Windows Second Edition (SE), Microsoft Windows Millennium (ME), Microsoft Windows NT4, Microsoft Windows 2000, Microsoft Windows XP, MacOS 7.1+, MacOS 8.0+, MacOS 9.0+, or MacOS X+ (Note: USB LAN port is not supported on Microsoft Windows 95, Microsoft Windows NT 4.0and MacOS) Internet Explorer 4.0 or higher (5.x recommended) or Netscape Navigator 4.0 or higher (4.7 recommended) TCP/IP Network Protocol installed on each computer Introduction 5 Introduction to the Wireless Cable/DSL Router 4 Introduction to the Wireless Cable/DSL Router Description of the LEDs and Reset Switch for the Wireless Cable/DSL Router 4- Port Ethernet/USB (GE144000-01) Power LED: The Power LED displays the Gateway’s current status. If the LED is solid green the Gateway is powered and fully operational. When the LED is rapidly flashing, the Gateway is initializing. If the LED is not illuminated when the power adapter is plugged in, the Gateway has suffered a critical error and you should con- tact Technical Support. Internet LED: When the Internet LED is steadily illuminated, the Gateway is con- nected to your broadband modem. Wireless LED:When the Wireless LED is steadily illuminated, the Gateway is ready for wireless networking. Ethernet Network LED:The Ethernet Network LEDs illuminate when a network link is established with a computer. A flashing LED signifies network traffic across that specific Ethernet connection. Reset Switch:Depressing the reset switch for 1-2 seconds will reset the Home DSL Gateway. To restore the default configuration settings inside the Gateway, depress and hold the reset switch for 10 seconds. Description of the LEDs and Reset Switch for the Wireless Cable/DSL Router 1-Port Ethernet/USB (GE344000-01) Power LED: The Power LED displays the Gateway’s current status. If the LED is solid green the Gateway is powered and fully operational. When the LED is rapid- ly flashing, the Gateway is initializing. If the LED is not illuminated when the power adapter is plugged in, the Gateway has suffered a critical error and you should contact Technical Support. Internet LED: When the Internet LED is steadily illuminated, the Gateway is con- nected to your broadband modem. Wireless LED:When the Wireless LED is steadily illuminated, the Gateway is ready for wireless networking. Introduction to the Wireless Cable/DSL Router LAN LED:The LAN LED will illuminate when a network link is established with a computer. A flashing LED signifies network traffic across the Ethernet connection. USB LED:The USB LED will illuminate when you connect the router to your com- puter using a USB cable. Reset Switch:Depressing the reset switch for 1-2 seconds will reset the Wireless Cable/DSL Router. To restore the default configuration settings inside the Gateway, depress and hold the reset switch for 10 seconds. 7 Before you Connect the Wireless Cable/DSL Router 6 Before you Connect the Wireless Cable/DSL Router 3. The following screen will appear. Click Detailsto continue. You will need specific information from your ISP to configure the Wireless Cable/DSL Router. You can obtain most of this information from your broadband configured PC by following these 4 steps. (Windows XP instructions shown below. For all other Operating Systems please see Apendix A at the back of this manual) Note: If you have previously installed Internet Connection Sharing (Ex. Microsoft ICS) or Proxy Server software (Ex. WINPROXY) you will need to uninstall them now. 1. Click Start, then Settings and finally Network Connections. Before you Connect the Wireless Cable/DSL Router 2. On the right hand side of the screen, left click once on you the LAN or high speed interenet connection that is listed. Then on the left hand side of the screen click View status of this Connection. 9 Before you Connect the Cable/DSL Router 8…
Text truncated - open the document above for the full version.
Block Diagram
5 5 4 4 3 3 2 2 1 1 DD CC BB AA RJ45 WAN VIRATA NETWORK PROCESSOR 2MB FLASH DEVICE RELATEK ETHERNET PHY 802.11b WIRELESS PORT EPB BUS 8MB SDRAM USB PORT MII KENDIN 5 PORT SWITCH LAN PORT1 LAN PORT2 LAN PORT3 LAN PORT4 ANTENNA R3010SUW DIAGRAM POWER SUPPLY SYSTEM PCMCIA SLOT http://www.actiontec.com ACTIONTEC ELECTRONICS, INC Wednesday, December 12, 2001 A3 760 N. MARY AVE. SUNNYVALE, CA94086 DW-07/24/2001 DIAGRAM Size Scale CAGE Code DWG NO Rev Sheet of Modified:
External Photos
EUT - Front View EUT - Rear View EUT - Top View EUT – Component View EUT- Transmitter Solder View EUT-Power Adapter View
ID Label/Location Info
FCC PRODUCT LABELING AND WARNING STATEMENT FCC ID Label Specifications: Text is black or white in color and is left justified. Labels are silk-screened and shall be “permanently affixed” at a conspicuous location on the EUT. Proposed Label Location on EUT FCC ID Label Location FCC ID: LNQR3010SUW This device complies with Part 15 of the FCC Rules. Operation is subject to the following two conditions: (1) this device may not cause harm- ful interference, and (2) this device must accept any interference received, including interference that may cause undesired operation. 1.0" 2.1875 FCC ID: LNQR3010SUW
Internal Photos
EUT - Top View EUT – Component View EUT – Solder View EUT – Transmitter View EUT- Transmitter Solder View EUT-Power Adapter View
Operational Description
Mathias Siegel, 1/22/02 1. Technical Specifications Interface Ports R3010SUW Internet (WAN) 1x 10Base-T Ethernet port Network (LAN) - 4x 10/100 Base-T Ethernet ports (switched) - 1x USB port - Integrated 802.11b wireless networking PC Card 1x PCMCIA expansion slot for additional home networking applications Standards Compliance RFC 2516 IEEE 802.3 10 BASE-T Ethernet IEEE 802.3u 100 BASE-Tx Fast Ethernet USB 1.1/1.0 IEEE 802.11b Protocols Supported RFC 2516 (PPPoE) TCP IP, UDP NAT, PAT DHCP (client, server) DNS (client) TFTP (client, server) FTP, Telnet, HTTP SMTP, POP3 VPN Support L2TP, PPTP (all pass-through) Security IP Masquerading (NAT) Web site blocking Web service blocking Internet activity logging Setup and Management Web based Maximum Computer Users Supported 253 Mathias Siegel, 1/22/02 Minimum System Requirements Microsoft Windows 98 / 98SE / ME / 2000 / XP TCP/IP network protocol installed Internet Explorer 4.0 (or newer) or Netscape 4.0 (or newer) Package Contents Actiontec Cable/DSL Router Power supply Quick start guide and user manual Ethernet network cable (RJ 45) USB cable Installation CD R3010SUW SPECIFICATION R3010SUW is based on Virata Network processor, Kendin five port switch, Realtek Ethernet PHY and Intersil 802.11b technology. R3010SUW has one Ethernet port connected to WAN, four Ethernet LAN port, one USB slave port and build in 802.11b wireless LAN port, also has one PCMCIA slot for custom flexible configuration.
Schematics
5 5 4 4 3 3 2 2 1 1 DD CC BB AA Five PORTS ETHERNET TO ETHERNET ROUTER. 1.VIRATA HELIUM/NITROGEN210-80 ARM CONTROLLER; 2.REALTEK RTL8019AS; 3.KENDIN KS8995; 03/21/2001: With 2 PCMCIA Connectors; 05/07/01 1. Change PCMCIA signal decode. 2. Change flash device address decode. 3. Add EPB Bus pWAIT# latch. http://www.actiontec.com 5A.. ACTIONTEC ELECTRONICS, INC RENO 00-0405 Wednesday, December 12, 2001112 A3 760 N. MARY AVE. SUNNYVALE, CA94086 Ethernet Router RENO R3010SUW DW-15/02/2001 COVER Size Scale CAGE Code DWG NO Rev Sheet of Modified: 5 5 4 4 3 3 2 2 1 1 DD CC BB AA MII configeration http://www.actiontec.com 5A.. ACTIONTEC ELECTRONICS, INC RENO 00-0405 Wednesday, December 12, 2001212 A3 760 N. MARY AVE. SUNNYVALE, CA94086 Ethernet Router RENO R3010SUW DW-15/02/01 EPB/GPIO/MII/ICE Size Scale CAGE Code DWG NO Rev Sheet of Modified: GPIO27 GPIO0 GPIO4 GPIO12 GPIO[27..0] GPIO10 GPIO2 GPIO7 GPIO3 GPIO9 GPIO25 GPIO26 GPIO16 GPIO20 GPIO24 GPIO27 GPIO5 GPIO14 GPIO23 GPIO19 GPIO6 GPIO22 GPIO1 GPIO11 GPIO21 GPIO13 GPIO17 GPIO8 GPIO15 GPIO18 MII_TXD0 MII_RXD1 MII_TXD1 MII_RXD3 MII_TXD3 MII_RXD2 MII_RXD0 MII_TXD2 XDTB XRDP XDTA XRDM PA[7..0] PAD[15..8] PA3 PA4 PD4 PA5 PD0 PA7 PD3 PA2 PD7 PD2 PA1 PA6 PD1 PD5 PD6 PA0 PAD9 PAD12 PAD13 PAD10 PAD11 PAD15 PAD8 PAD14 GPIO27 ICE_TDI ICE_TDO ICE_TCLK ICE_TRST ICE_TMS ICE_SEL JTAG_TDI JTAG_TDO JTAG_TCLK JTAG_TRST JTAG_TMS GPIO[27..0] MII_RXD[3..0] MII_CRS MII_COL MII_TXD[3..0] PHYCLK MII_CLK MII_TXEN MII_RXDV ICE_TDI ICE_TDO ICE_TCLK ICE_TRST ICE_TMS ICE_SEL JTAG_TDI JTAG_TDO JTAG_TCLK JTAG_TRST JTAG_TMS GPIO7 GPIO6 GPIO8 GPIO9 GPIO10 BCS# BCS# HETX+ HETX- HERX+ HERX- HECMT MII_MDC MII_MD MII_RXER MII_RXER MII_MD MII_MDC HCMTR PAD[15..8] PCS3# PCLK PA[7..0] ALE PCS0# PD[7..0] RD# PWAIT# WR# PCS1# MII_TRXCLK MII_TRXCLK 3V3 VCC DD 3V3 D 3V3 3V3 D 3V3 D 3V3 D D D 3V3 D R209 10R_NL C143 0.022UF_NL R207 82R_1%_NL R208 82R_1%_NL HELIUM 210 - DEBUG JTAG ICE U2FHelium210-80 B1 A2 B2 B3 A1 F18 E18 E19 E20 F20 F19 JTAG_TDI JTAG_TDO JTAG_TCLK JTAG_TMS JTAG_TRST ICE_TDI ICE_TDO ICE_TCLK ICE_TMS ICE_TRST ICE_SEL R293 10K R292 10K J5 CON24A 1 3 5 7 9 11 13 15 17 19 21 23 2 4 6 8 10 12 14 16 18 20 22 24 R17410K R17510K R2733R TP4 R20433R TP2 R1730R T2 H1102_NL 1 2 3 4 5 6 7 89 10 11 12 13 14 15 16 1 2 3 4 5 6 7 89 10 11 12 13 14 15 16 R19333R R19433R R19633R R19533R R1660R R18933R R19133R R19033R R19233R R162 10K_NL R2810K R2586.8NF_NL R2576.8NF_NL HELIUM 210 -ETHERNET ETH PHY ETHERNET MEDI A INDEPENDENT INTERFACE U2EHelium210-80 U3 U5 U4 V3 V4 W3 Y2 V5 Y4 W4 Y3 V7 W5 Y5 V6 Y6 W6 W7 V9 V8 W8 Y7 Y8 W9 Y9 Y11 W11 V11 Y10 REXT XRDM XRDP XDTB XDTA MII_TXCLK MII_TXEN MII_TXD0 MII_TXD1 MII_TXD2 MII_TXD3 MII_RXCLK MII_RXER MII_RXD3 MII_RXD2 MII_RXD1 MII_RXD0 MII_RXDV MII_CRS MII_COL MII_MDC MII_MD PHY_TEST0 PHY_TEST1 PHY_TEST2 PHY_TEST3 PHY_TEST4 PHY_TEST5 PHYCLK R205 49.9R_1%_NL R206 49.9R_1%_NL C144 0.01UF_NL R294 0R_NL R2950R R1870R_NL R18812.4K_1%_NL R20333R R20133R R20233R R20033R R19833R R19733R R19933R HELIUM 210 - GPIO PCMCIA ADSL U2GHelium210-80 B20 C20 A4 B4 C6 C5 E1 E2 G2 G3 F1 F2 A20 A18 A19 B18 A16 F3 E3 D1 D2 D3 D4 C1 C2 C3 A3 C4 G1 GPIO0 GPIO1 GPIO2 GPIO3 GPIO4 GPIO5 GPIO6/UARTTX GPIO7/UARTRX GPIO8/PA16/BDO GPIO9/PA17/BDI GPIO10/PA18/BCLK GPIO11/PA19 GPIO12/TXCLKEN GPIO13/RXCLKEN GPIO14/8KHZ GPIO15/TXBYTE GPIO16/RXBYTE GPIO17/PA20 GPIO18PA21 GPIO19/nCE0 GPIO20/nCE1 GPIO21/nOE GPIO22/nIOIS16 GPIO23/nWE GPIO24 GPIO25 GPIO26 GPIO27 BCS C148 0.01UF_NL R3000R R3010R HELIUM 210 - EPB U2BHelium210-80 W1 Y1 V1 V2 T3 T1 W2 U1 U2 T2 R1 R2 R3 P1 P2 P3 N1 N2 N3 M1 M2 M3 L1 L2 L3 K1 K2 K3 J1 J2 J3 J4 H1 PCS0 PCS1 PCS2 PCS3 PCLK PWAIT PSTROBE0 PSTROBE1 PSTROBE2 PD0 PD1 PD2 PD3 PD4 PD5 PD6 PD7 PA8(PD8) PA9(PD9) PA10(PD10) PA11(PD11) PA12(PD12) PA13(PD13) PA14(PD14) PA15(PD15) PA0 PA1 PA2 PA3 PA4 PA5 PA6 PA7 R261 0R_NL R18610K_NL 5 5 4 4 3 3 2 2 1 1 DD CC BB AA Reset R305, LED8 are for USB Port, Only For Sonoma II, and Reno_Jr. projects. http://www.actiontec.com 5A.. ACTIONTEC ELECTRONICS, INC RENO 00-0405 Wednesday, December 12, 2001312 A3 760 N. MARY AVE. SUNNYVALE, CA94086 Ethernet Router RENO R3010SUW DW-15/02/01 CLOCK/RST/UTOPIA Size Scale CAGE Code DWG NO Rev Sheet of Modified: PWRUP_RESET# SYSTEM_RESET# GPIO12 PCMCIA_RST REALTEK_RST GPIO27 SYSTEM_RESET# PWRUP_RESET# RESET_OUT# RESET_OUT# GPIO8 D D 3V3 D D DD VCC 3V3 D DD Vcore 3V3 Vcore D DD 3V3 D D 3V3 3V3 3V3 D VCC DD D 3V3 3V3 D D DD D 3v3 U11B 74HCT04/SO 34 U11C 74HCT04/SO 56 HELIUM 210 - UTOPIA U2CHelium210-80 C8 D7 A7 C7 B6 A6 A5 B5 C10 C11 A10 B7 A9 B9 A8 C9 A13 B12 C13 A12 A11 B11 C12 D11 A15 B16 C18 C15 B15 C16 A14 B14 B13B8 C14 C17 B10 D9 URXDATA0 URXDATA1 URXDATA2 URXDATA3 URXDATA4 URXDATA5 URXDATA6 URXDATA7 URXSOC URXEN URXCLAV URXCLK URXADDR0 URXADDR1 URXADDR2 URXADDR3 UTXDATA0 UTXDATA1 UTXDATA2 UTXDATA3 UTXDATA4 UTXDATA5 UTXDATA6 UTXDATA7 UTXSOC UTXEN UTXCLAV UTXCLK UTXADDR0 UTXADDR1 UTXADDR2 UTXADDR3 UTXADDR4URXADDR4 UTXEN_L1 UTXCLAV_L1 URXEN_L1 URXCLAV_L1 72Mhz_NLU27 12 34 OUT1GND OUT2VCC U19 LM555_NL 2 5 3 7 6 4 TR CV Q DIS THR R R246470R C200.1UF L1 200mA FB HELIUM 210 - POWER Helium210-80 U2H U12D6D12D16F4H17L4M17U7U10D8D13F17H4U8U14 U11D5D10D14D15D17E4E17G4J17K4M4U6U9U13 P4P17U15T4T17 U16U17N4N17R4R17J9J10J11J12K9K10K11K12L9L10L11L12M9M10M11M12 PLL_AVDD1 IO_DVDD1IO_DVDD2IO_DVDD3IO_DVDD4IO_DVDD5IO_DVDD6IO_DVDD7IO_DVDD8IO_DVDD9 CORE_DVDD1CORE_DVDD2CORE_DVDD3CORE_DVDD4CORE_DVDD5CORE_DVDD6 PLL_AGND1DGND1DGND2DGND3DGND4DGND5DGND6DGND7DGND8DGND9DGND10DGND11DGND12DGND13DGND14 CORE_DVDD7CORE_DVDD8 IO_DVDD10IO_DVDD11IO_DVDD12 DGND15DGND16DGND17DGND18DGND19DGND20DGND21DGND22DGND23DGND24DGND25DGND26DGND27DGND28DGND29DGND30DGND31DGND32DGND33DGND34DGND35DGND36 R248 200K_NL U17D 74LCX08 12 13 11 R2901K_NL U11A 74HCT04/SO 12 C147 DNF C146 DNF C145 DNF R247 10K_NL TR5 BC846BL/2N3904 3 1 2 TR4 BC856BL/2N3906 3 1 2 R181 15K R180 33K USB HDLC CLOCKS HELIUM 210 - UCH U2DHelium210-80 H2 H3 W10 V10 Y13 W13 V13 V12D20 D19 D18 B17 A17 B19 C19 W12 Y12 RESETIN RESETOUT XTALM XTALP CCLK PLL1 PLL0 TESTEN0USBEN USBM USBP HRXCLK …
Text truncated - open the document above for the full version.
Test Report
Note: This test report is specially limited to the above client company and the product model only. It may not be duplicated without prior written consent of Bay Area Compliance Laboratory Corporation. This report must not be used by the client to claim product endorsement by NVLAP or any agency of the U.S. Government. FCC PART 15 SUBPART C EMI MEASUREMENT AND TEST REPORT For Actiontec Electronics, Inc. 760 North Mary Avenue Sunnyvale, CA 94086 FCC ID: LNQR3010SUW January 6, 2001 This Report Concerns: Original Report Equipment Type: Ethernet Router Test Engineer: Jeff Lee Test Date: December 5, 2001 Reviewed By: John Y. Chan – Engineering Manager Prepared By: Bay Area Compliance Laboratory Corporation 230 Commercial Street Sunnyvale, CA 94085 Tel: (408) 732-9162 Fax: (408) 732 9164 Actiontec Electronics, Inc. FCC ID: LNQR3010SUW Report # R0112051(R3010SUW)R3010SUW_Rpt FCC Part 15.247 Test Report Page 2 of 41 TABLE OF CONTENTS 1 - GENERAL INFORMATION..................................................................................................................................4 1.1 P RODUCT DESCRIPTION FOR EQUIPMENT UNDER TEST (EUT) ..............................................................................4 1.2 O BJECTIVE.............................................................................................................................................................4 1.3 R ELATED SUBMITTAL(S)/GRANT(S).......................................................................................................................4 1.4 T EST METHODOLOGY............................................................................................................................................4 1.5 T EST FACILITY.......................................................................................................................................................4 1.6 T EST EQUIPMENT LIST AND DETAILS.....................................................................................................................5 1.7 H OST SYSTEM CONFIGURATION LIST AND DETAILS..............................................................................................6 1.8 L OCAL SUPPORT EQUIPMENT LIST AND DETAILS...................................................................................................6 1.9 E XTERNAL I/O CABLING LIST AND DETAILS.........................................................................................................6 2 - SYSTEM TEST CONFIGURATION.....................................................................................................................7 2.1 J USTIFICATION.......................................................................................................................................................7 2.2 EUT E XERCISE SOFTWARE....................................................................................................................................7 2.3 S PECIAL ACCESSORIES...........................................................................................................................................7 2.4 S CHEMATICS / BLOCK DIAGRAM...........................................................................................................................7 2.5 E QUIPMENT MODIFICATIONS.................................................................................................................................7 2.6 C ONFIGURATION OF TEST SYSTEM.........................................................................................................................8 2.7 T EST SETUP BLOCK DIAGRAM...............................................................................................................................8 3 - SUMMARY OF TEST RESULTS..........................................................................................................................9 4 - CONDUCTED OUTPUT POWER MEASUREMENT......................................................................................10 4.1 S TANDARD APPLICABLE......................................................................................................................................10 4.2 M EASUREMENT PROCEDURE................................................................................................................................10 4.3 M EASUREMENT RESULT......................................................................................................................................10 5 – SPURIOUS EMISSION ........................................................................................................................................13 5.1 STANDARD APPLICABLE.......................................................................................................................................13 5.2 M EASUREMENT PROCEDURE................................................................................................................................13 5.3 M EASUREMENT DATA..........................................................................................................................................13 6 – POWER DENSITY ...............................................................................................................................................20 6.1 S TANDARD APPLICABLE......................................................................................................................................20 6.2 M EASUREMENT PROCEDURE................................................................................................................................20 6.3 T EST RESULTS.....................................................................................................................................................20 7 – 6 DB BANDWIDTH ..............................................................................................................................................24 7.1 S TANDARD APPLICABLE.....…
Text truncated - open the document above for the full version.
Test Setup Photos
Conducted Emission – Front View Conducted Emission – Rear View Radiated Emission – Front View Radiated Emission – Rear View
Contact Information
Applicant
Brian Henrichs(President)
Test Firm
Bay Area Compliance LaboratoryJohn Chan
Technical Specifications
| # | Rule Parts | Frequency Range | Power Output |
|---|---|---|---|
| 1 | 15C | 2.41 GHz - 2.46 GHz | 57.00 mW |
Other Applications from Actiontec Electronics Inc
LNQWF672
Dec 26, 2025Wi-Fi 7 Outdoor Mesh AP
Equipment Class
DTS - Digital Transmission System
LNQ-WF670G
Dec 09, 2025Wi-Fi 7 Outdoor Mesh AP
Equipment Class
DTS - Digital Transmission SystemLNQ-WF815-2
Apr 14, 2024Tri-band Wi-Fi 6E Wireless AP
Equipment Class
DTS - Digital Transmission System
LNQ-WF825
Mar 24, 2024Tri-band Wi-Fi 7 Wireless AP
Equipment Class
6ID - 15E 6 GHz Low Power Indoor Access Point
LNQ-WF810G-2
Mar 23, 2024Wi-Fi 6E Mesh Extender
Equipment Class
DTS - Digital Transmission System