NCMOMO0201GSM/GPRS/UMTS/HSDPA QUAD BAND PCI MINI CARD
Option (Crescent NV)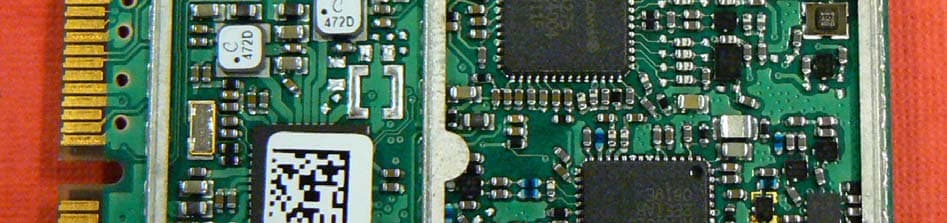
Click to zoom
Application Details
- Equipment Class
- PCB - PCS Licensed Transmitter
- Date of Grant
- Jan 23, 2007
- Application Purpose
- Original Equipment
- Date of Application
- Jan 23, 2007
- Equipment Note
- GSM/GPRS/UMTS/HSDPA QUAD BAND PCI MINI CARD
- Frequency Range
- 1852.40000000 - 1907.60000000
- Company
- Option (Crescent NV)
- Country
- Belgium
Documents & Files
Document Text
Text extracted from the exhibit documents filed with the FCC. Open a document above to read the original.
Users Manual
GLOBETROT TER PCI EXPRESS MINI CARD OPTION NV, GASTON GEENSLAAN 14, 3001 LEUVEN - BELGIUM - WWW.OPTION.COM QUICK START GUIDE CONNECT ANYTIME , ANYWHERE ABOUT THIS DOCUMENT Overview and Purpose This document describes the Module Development Kit hardware, software and installation instructions. Confidentiality All data and information contained or disclosed by this document is confidential and proprietary of Option NV, and all rights therein are expressly reserved. By accepting this document, the recipient agrees that this information is held in confidence and in trust and will not be used, copied, reproduced in whole or in part, nor its contents revealed in any manner to others without prior and written permission of Option NV. Version history Date Version Author(s) Revision(s) Remarks Aug 8, 2006 V01-D1 R. Biesemans Initial version June 26, 2006 V01-D2 G. Van Overbeke S. Lodewijckx Generic document and revision July 3, 2006 Vo1-D3 G. Van Overbeke S. Lodewijckx Revision changes July 13, 2006 V01-D4 G. Van Overbeke Small corrections July 13, 2006 V01-F1 G. Van Overbeke Final Version Aug 8, 2006 V01-F3 G. Van Overbeke Revision changes GLOBETROTTER QUICK START GUIDE PAGE: 1 of 30 AUTHOR: G. Van Overbeke | CREATION DATE: Aug 8, 2006 | VERSION: v01-f3 [ OPTION CONFIDENTIAL ] TABLE OF CONTENTS 1 Introduction 3 2 Overview 4 3 Package content 6 4 Hardware installation 7 5 Driver installation 9 5.1 Installation procedure 9 6 Dashboard application: GT Connect 13 7 HyperTerminal 16 8 Set up a data call 21 9 Set up a voice call 28 GLOBETROTTER QUICK START GUIDE PAGE: 2 of 30 AUTHOR: G. Van Overbeke | CREATION DATE: Aug 8, 2006 | VERSION: v01-f3 [ OPTION CONFIDENTIAL ] 1 INTRODUCTION For evaluation purposes the GlobeTrotter PCI Express mini cards modules are housed in a cradle, offering a convenient evaluation and development platform. This document further describes the Module Development Kit hardware and software installation and basic usage instructions for Windows XP English edition. This Module Development Kit can be used for all Option modules with the PCI Express interface: • GTM351 • GTM353 • GTM378 Design specific information for the Modules is outside of the scoop of this document and can be found in the respectively Integration Manuals instead. To make a successful connection to the Internet following prerequisites are assumed: • Module Development Kit • Live Network connection (GPRS and/or EDGE and/or 3G and/or HSDPA) • Activated (U)SIM for the available network • Host platform with an USB host controller (e.g. laptop or PC desktop) GLOBETROTTER QUICK START GUIDE PAGE: 3 of 30 AUTHOR: G. Van Overbeke | CREATION DATE: Aug 8, 2006 | VERSION: v01-f3 [ OPTION CONFIDENTIAL ] 2 OVERVIEW The Module Development Kit consists of a main PEPIJN Cradle board which provides a standard USB interface, a SIM card holder and an external power supply for the GlobeTrotter Modules. With this cradle it is possible to connect the GTM card to any standard USB host controller. Points of interest: 1. Option PCI Express Mini Card 2. PCI Express connector 3. 8/16 bit CODEC jumper: see section 9 4. 1.8 Volt LED indication 5. USB power LED: indicates that USB is connected and powered 6. Power LED: indicates that the GTM module is powered with 3.3 Volts 7. Registration and USB activity LED: indicates that the module has registered to the mobile network when it burns continuously. Also indicates USB communication activity when the LED is blinking 8. USB connector and cable 9. Power plug and cable 10. Audio jack and headset 11. RF connector and cable 12. Module locking mechanism 13. External antenna Figure 1: Pepijn Cradle with module and accessories 8 9 10 5 13 12 11 1 2 3 4 6 7 GLOBETROTTER QUICK START GUIDE PAGE: 4 of 30 AUTHOR: G. Van Overbeke | CREATION DATE: Aug 8, 2006 | VERSION: v01-f3 [ OPTION CONFIDENTIAL ] And for the bottom view: 1. SIM card holder 3. Audio CODEC chip reset button 2. SIM card eject mechanism 4. Small USB connector 1 Figure 2: Pepijn Cradle bottom view To get your module working correctly, please follow the installation instruction carefully and in the order of Chapter 4 and 5. After which you can proceed with Chapter 6, 7, 8 and 9. Prerequisite: Host Live Network Activated (U)SIM Module Development Kit Chapter 4 Hardware installation Chapter 5 Driver installation Chapter 6Chapter 7Integration Manual Applications (e.g. GT Connect - Dial) HyperTerminal AT commands Engineering tools Chapter 8Chapter 9 DataVoice Debug Figure 3: Module Development Kit overview 1 The small and big USB connector both work for the same USB interface 1 2 3 4 GLOBETROTTER QUICK START GUIDE PAGE: 5 of 30 AUTHOR: G. Van Overbeke | CREATION DATE: Aug 8, 2006 | VERSION: v01-f3 [ OPTION CONFIDENTIAL ] 3 PACKAGE CONTENT Your Module Development Kit comes with the following items: • PCI Express Mini Card module(s) • Pepijn Cradle main board(s) • USB cable(s) • Power adaptors (5VDC / min 1A @ 100-240V – European plug) • External antenna(s) • RF cable(s) with SMA connector(s) • Headset(s) • CD-ROM with dashboard installation and driver package The software package consist of Windows XP, Windows 2000 and Windows XP x64 bit edition drivers. Also a dashboard application and engineering tools are provided. These tools can be used to set up a connection to a network provider. To set up a successful data connection to the Internet you will need to have mobile network coverage and an activated SIM card from your local operator. Figure 4: Module Development Kit GLOBETROTTER QUICK START GUIDE PAGE: 6 of 30 AUTHOR: G. Van Overbeke | CREATION DATE: Aug 8, 2006 | VERSION: v01-f3 [ OPTION CONFIDENTIAL ] 4 HARDWARE INSTALLATION Step-by-step instructions: (1) Insert the module skew into the cradle and (2) push the module down, so it makes proper contact in the PCI Express connector. (3) Secure the module with the locking mechanism. Remark: Fasten the screw of the locking mechanism when it becomes too loose by holding one finger on top of the sc…
Text truncated - open the document above for the full version.
Users Manual
(7) When you launch the GT connect application it looks like Figure 22. For detailed application description and usage, refer to the release notes on the CD-ROM provided with the package. Figure 22: GT Connect application With this application you can easily connect to the internet. (8) To close GT Connect completely, go with your mouse pointer to the title bar and choose “Exit” from the context menu. Figure 23: Exit GT Connect GLOBETROTTER QUICK START GUIDE PAGE: 15 of 30 AUTHOR: G. Van Overbeke | CREATION DATE: Aug 8, 2006 | VERSION: v01-f3 [ OPTION CONFIDENTIAL ] 7 HYPERTERMINAL This section describes briefly how to setup HyperTerminal to communicate with the PCI Express Mini Card by AT commands. (1) Go to device manager, and check which port is the Application port. In this example, the application port is COM6. It also important to know is that GT Connect takes hold of the Application port. So before going any further, exit GT Connect completely. Refer to the previous chapter. Figure 24: Device manager To get to device manager go to “Start” menu and select “Run”. In the next dialogue type “devmgmt.msc” as shown on the next screenshot: Figure 25: Run to device manager GLOBETROTTER QUICK START GUIDE PAGE: 16 of 30 AUTHOR: G. Van Overbeke | CREATION DATE: Aug 8, 2006 | VERSION: v01-f3 [ OPTION CONFIDENTIAL ] (2) Open HyperTerminal with the “Start” menu in Windows: Start > Programs > accessories > Communication > HyperTerminal (3) Normally, you have to do the following two steps only once. If you already have done so in the past you can skip to step 5. If not, choose a country and an area code. For use with the module, it does not matter, so just enter anything. Figure 26: Location information (4) Just “OK” the next “Phone and Modem Options” screen. Figure 27: Phone and Modem Options GLOBETROTTER QUICK START GUIDE PAGE: 17 of 30 AUTHOR: G. Van Overbeke | CREATION DATE: Aug 8, 2006 | VERSION: v01-f3 [ OPTION CONFIDENTIAL ] (5) Enter a name for your HyperTerminal Connection and press OK. Figure 28: Location information (6) In the next window, change the “Connect using:” field to the Application Port (COM6 in this example). Click OK. Figure 29: Phone and Modem Options GLOBETROTTER QUICK START GUIDE PAGE: 18 of 30 AUTHOR: G. Van Overbeke | CREATION DATE: Aug 8, 2006 | VERSION: v01-f3 [ OPTION CONFIDENTIAL ] (7) Now the next window will appear. Modify the Bit per second field to 115200 and click OK. Figure 30: Connection Properties HyperTerminal is configured and you are now ready issue AT commands to the PCI Express Mini Card module. Figure 31 shows a typical HyperTerminal session. If you don’t have visual feedback of what you are typing, you need to turn echo on by typing ATE1 followed by enter first as shown in below example. GLOBETROTTER QUICK START GUIDE PAGE: 19 of 30 AUTHOR: G. Van Overbeke | CREATION DATE: Aug 8, 2006 | VERSION: v01-f3 [ OPTION CONFIDENTIAL ] Figure 31: Typical HyperTerminal session When you close HyperTerminal, you have the opportunity to save your HyperTerminal profile. Saved profiles can be found under Start > Programs > accessories > Communication > HyperTerminal GLOBETROTTER QUICK START GUIDE PAGE: 20 of 30 AUTHOR: G. Van Overbeke | CREATION DATE: Aug 8, 2006 | VERSION: v01-f3 [ OPTION CONFIDENTIAL ] 8 SET UP A DATA CALL Besides using dashboard applications, it is also possible to set up a data call using windows dial-up networking. This section explains how to set up a dial-up connection. (1) Go to Start > Control Panel > Network Connections and click on the icon “New Connection Wizard”. The next screen will appear: Figure 32: Network connections (2) Click ‘Next’ and Figure 33 will appear. Select “Connect to the Internet” and click “Next” again. Now Figure 34 will appear. Figure 33: New network connection GLOBETROTTER QUICK START GUIDE PAGE: 21 of 30 AUTHOR: G. Van Overbeke | CREATION DATE: Aug 8, 2006 | VERSION: v01-f3 [ OPTION CONFIDENTIAL ] Figure 34: Manual connection setup (3) Select “Set up the connection manually”, and click the “Next” button. Choose the “Connect using a dial-up modem” option, and click the “Next” button. Figure 35: Connection with dial-up modem GLOBETROTTER QUICK START GUIDE PAGE: 22 of 30 AUTHOR: G. Van Overbeke | CREATION DATE: Aug 8, 2006 | VERSION: v01-f3 [ OPTION CONFIDENTIAL ] (4) Select the correct modem (Modem - Globetrotter 3G+ modem interface), and click the ‘Next’ button. Figure 36: Select modem (5) Type a name for the connection, which you will select the next time you need this dial-up connection, and click the ‘Next’ button. Figure 37: Connection Name GLOBETROTTER QUICK START GUIDE PAGE: 23 of 30 AUTHOR: G. Van Overbeke | CREATION DATE: Aug 8, 2006 | VERSION: v01-f3 [ OPTION CONFIDENTIAL ] (6) Type in the Phone number to dial, which is *99#, and click the ‘Next’ button. Figure 38: Number to dial (7) Choose the option you like, and then click the ‘Next’ button. Figure 39: Connection availability GLOBETROTTER QUICK START GUIDE PAGE: 24 of 30 AUTHOR: G. Van Overbeke | CREATION DATE: Aug 8, 2006 | VERSION: v01-f3 [ OPTION CONFIDENTIAL ] (8) If your service provider requests to enter username and password for setting up a PS data call connection, please enter it using the screen below. Figure 40: Internet Account Information (9) The connection is set up and ready to use. Click the ‘Finish’ button to close the wizard. Figure 41: Connection complete GLOBETROTTER QUICK START GUIDE PAGE: 25 of 30 AUTHOR: G. Van Overbeke | CREATION DATE: Aug 8, 2006 | VERSION: v01-f3 [ OPTION CONFIDENTIAL ] (10) Before attempting to make the dial-up connection, make sure you are registered to the network. Observe that the Registration LED in Figure 1 is on. Also, the APN for your operator should be set correctly in the module. This can be done with the following AT command: AT+CGDCONT=1,,”your APN here” You have to set this command only once for each module as this setting is stored in non-volatile memory of the module. Use the explanation from the …
Text truncated - open the document above for the full version.
Users Manual
OPTION WIRELESS Technologies,Gaston Geenslaan 14, B-3001 Leuven Tel +32 16 317 411 Fax +32 16 207 164 http://www.option.com Option Confidential Safety manual: Option Globetrotter Modules Integration Manual Author: Roeland Timmermans Version: 2 Creation Date: January 5, 2007 Page: 1 of 1 Option Confidential: This document is Option Confidential - it may not be duplicated, neither distributed externally without prior and written permission of Option NV. About this document Overview and Purpose This document describes the safety measurements that have to be taken into account when using a product with an embedded Option module. Confidentiality All data and information contained or disclosed by this document is confidential and proprietary of Option NV, and all rights therein are expressly reserved. By accepting this document, the recipient agrees that this information is held in confidence and in trust and will not be used, copied, reproduced in whole or in part, nor its contents revealed in any manner to others without prior and written permission of Option NV Version History Date Release Version Author(s) Revision(s) Remarks Phase 15/09/05 1.0 – Draft 1 RoelT Initial version 1.0.0 5/01/07 2.0 - 1 JoeriB Adaption for Scorpion Integration Manual Author: Roeland Timmermans Version: 2 Creation Date: January 5, 2007 Page: 2 of 2 Option Confidential: This document is Option Confidential - it may not be duplicated, neither distributed externally without prior and written permission of Option NV. Table of contents 1. Introduction............................................................................................................... 3 2. Safety Measurements................................................................................................ 3 General recommendations for use....................................................................... 3 Extreme temperatures.......................................................................................... 3 Explosive atmosphere........................................................................................... 3 Blasting areas – construction sites....................................................................... 4 Do not use on aircraft........................................................................................... 4 Do not use in hospitals.......................................................................................... 4 Interference from radio signals........................................................................... 4 Immunity to interference..................................................................................... 4 Cardiac pacemakers, implanted defibrillators & other medical...................... 5 Hearing devices..................................................................................................... 5 Children................................................................................................................. 5 Driving................................................................................................................... 5 SIM cards............................................................................................................... 5 Accessories............................................................................................................. 5 Traveling................................................................................................................ 6 Safe distance.......................................................................................................... 6 Supply voltage....................................................................................................... 6 Clearance and creepage distances....................................................................... 6 Integration Manual Author: Roeland Timmermans Version: 2 Creation Date: January 5, 2007 Page: 3 of 3 Option Confidential: This document is Option Confidential - it may not be duplicated, neither distributed externally without prior and written permission of Option NV. 1. Introduction When using the Option Globetrotter modules it is necessary to pay attention to all safety aspects described in this document. Using these guidelines is mandatory to provide certainty of the safe use of the card for the end-user. Breaking these rules may be dangerous or illegal. 2. Safety Measurements Following items contain simple recommendations relevant to the use of the Option modules, please read them carefully. Not following these guidelines can cause harm to the module, yourself or other persons in your immediate environment. General recommendations for use ¾ Always treat your product with care and keep in a clean and dust-free place. Do not expose your product to open flames or lit tobacco products. ¾ Do not expose to liquid, moisture or humidity. Do not expose the module to rain, or other liquids. Do not drop, throw or try to bend your product. ¾ Do not paint your product. ¾ Do not attempt to disassemble your product. Doing so will void the warranty. Only authorised personnel should do so. ¾ Do not touch the antenna unnecessarily. Extreme temperatures Do not expose the module or the antenna to extreme temperatures i.e. outside of minimum -25 and maximum +35 degrees Celsius. Explosive atmosphere Turn off your electronic equipment in any area with a potentially explosive atmosphere. It is rare, but electronic equipment could generate sparks. Sparks in such areas could cause an explosion or fire resulting in bodily injury or even death. Areas with a potentially explosive atmosphere are often but not always, clearly marked. They include fuelling areas (petrol filling stations), below deck on boats, fuel or chemical transfer or storage facilities, and areas where the air contains chemicals or particles, such as grain, dust, or metal powders. Do not transport or store flammable gas, liquid, or …
Text truncated - open the document above for the full version.
Users Manual
OPTION NV, Gaston Geenslaan 14, B-3001 Leuven Tel +32 16 317 411 Fax +32 16 207 164 http://www.option.com Option Confidential Option Quick Start Guide Option Quick Start Guide Author: R. Biesemans Version: V01 –D1 Creation Date: Dec 05, 2006 Page: 1 of 18 Option Confidential: This document is Option Confidential - it may not be duplicated, neither distributed externally without prior and written permission of Option NV. About this document Overview and Purpose This document describes how to use the hardware, software and gives some installation instructions. Confidentiality All data and information contained or disclosed by this document is confidential and proprietary of Option NV, and all rights therein are expressly reserved. By accepting this document, the recipient agrees that this information is held in confidence and in trust and will not be used, copied, reproduced in whole or in part, nor its contents revealed in any manner to others without prior and written permission of Option NV. Version History Date Version Author(s) Revision(s) Remarks May 31, 2006 V01 – D1 R. Biesemans Initial version August 21, 2006 V02 J. Boeckx Adapted to use for certification December 1,2006 V03 J. Elebaut Added some information Option Quick Start Guide Author: R. Biesemans Version: V01 –D1 Creation Date: Dec 05, 2006 Page: 2 of 18 Option Confidential: This document is Option Confidential - it may not be duplicated, neither distributed externally without prior and written permission of Option NV. Table of contents 1 Driver installation ................................................................................................................................. 3 2 Hyperterminal ....................................................................................................................................... 6 3 Set up a data call ................................................................................................................................... 9 4 Set up a voice call ............................................................................................................................... 15 5 When card doesn’t register ................................................................................................................. 15 6 Additonal AT commands .................................................................................................................... 17 7 cradle mode......................................................................................................................................... 18 Option Quick Start Guide Author: R. Biesemans Version: V01 –D1 Creation Date: Dec 05, 2006 Page: 3 of 18 Option Confidential: This document is Option Confidential - it may not be duplicated, neither distributed externally without prior and written permission of Option NV. 1 DRIVER INSTALLATION Note: depending on the actual product you are trying to install the names may differ in some parts ! Following drivers are available for WinXP, Win2K and Win XP x64 edition: Multifunction Adapter : Globetrotter Module 3G+ Bus Modem : Globetrotter Module 3G+ Modem Network : Globetrotter Module 3G+ Network Card Ports : Globetrotter Module 3G+ Application Port Ports : Globetrotter Module 3G+ Diagnostics Port Smart Card : Globetrotter Module 3G+ Smart Card Interface (if applicable) Installation procedure: 1. If you have not already done so, install and connect the cradle. The unit shall be connected correctly only if the "Welcome to the Found New Hardware Wizard" appears. 2. By connecting the unit to the PC, Windows will detect new hardware and will ask to install the drivers. Insert the CD and install the drivers following the windows driver installation wizard. As there are 4 drivers the "Found new hardware" wizards needs to run 4 times. Further installation instructions will be given for Windows XP. 3. For Windows XP: on the first dialog ("connect to Windows Update ?") select No, not this time: Figure 1: Hardware wizard 4. On the next dialog, select "Install software automatically": Option Quick Start Guide Author: R. Biesemans Version: V01 –D1 Creation Date: Dec 05, 2006 Page: 4 of 18 Option Confidential: This document is Option Confidential - it may not be duplicated, neither distributed externally without prior and written permission of Option NV. Figure 2: automatic search for driver If Windows does not automatically find the correct driver, you should select Install from a list or specific location and browse to the folder "DriverXP_2000" on the CD 5. For the driver signing warning, click "Continue Anyway": Figure 3: Not signed driver warning 6. In total, five or six devices will be detected: • Globetrotter Module 3G+ Bus • Globetrotter Module 3G+ Modem • Globetrotter Module 3G+ Network Card • Globetrotter Module 3G+ Application Interface • Globetrotter Module 3G+ Diagnostics Interface • Globetrotter Module 3G+ Smart Card Interface (if available) Repeat steps 3 through 5 for the 3 remaining devices to complete the installation. On successful installation of the drivers, the four GT devices should show up in the device manager: Option Quick Start Guide Author: R. Biesemans Version: V01 –D1 Creation Date: Dec 05, 2006 Page: 5 of 18 Option Confidential: This document is Option Confidential - it may not be duplicated, neither distributed externally without prior and written permission of Option NV. Figure 4: Device manager Option Quick Start Guide Author: R. Biesemans Version: V01 –D1 Creation Date: Dec 05, 2006 Page: 6 of 18 Option Confidential: This document is Option Confidential - it may not be duplicated, neither distributed externally without prior and written permission of Option NV. 2 HYPERTERMINAL This section describes briefly how to setup HyperTerminal to enter AT commands. 1. Go to device manager, and check which port is the Application port. On my PC, the application port is COM6 Figure 5: Device manager 2. Open HyperTerminal Therefore yo…
Text truncated - open the document above for the full version.
Users Manual
--------- - - -- - - - - - - - - - - - - - - - - - - - - - - - --- globetrotter mobilitymanager manual in cn / d / e / f / i / nl / p on cd Warning ! Do not insert the card ! Registering your card is of great value to you. As soon as you register, you will qualify for: > Validation of warranty, which includes repair or replacement if faulty > After-sales customer care > Advanced bulletins on product updates and software upgrades During the installation process, you will have the possibility to register online or via e-mail. You may also register on-line at: http://www.option.com/registration/4_3_registration.shtml 3 register with option do not print this page Register with Option3 Introduction4 System Requirements5 Installation8 Getting Started10 Trouble shooting33 Safety Information34 contents Congratulations on your purchase of the Option GlobeTrotter card. GlobeTrotter together with the GlobeTrotter Mobility Manager software is the ultimate high performance solution for providing mobile wireless connectivity to Laptops and Notebooks. The GlobeTrotter solution enables users to browse the Internet, send and receive e-Mails, send and receive SMS text messages and all with SIM management seamlessly integrated with Microsoft Outlook™. The technology in your Option GlobeTrotter card supports real time remote connectivity and is ideal for the synchronization of mobile devices with the office or home computer. GlobeTrotter is designed to support IPsec client software providing secure remote IP mobile access to corporate networks. This guide describes how to install the GlobeTrotter Mobility Manager (GTMM) software on your PC and how to start using it. For more detailed information, consult the GTMM Online Help Guide. Contents of the sales package In the sales package, you will find the following items: > Option GlobeTrotter card > A CD-Rom containing the software To overcome any installation and usage barriers and to enhance the user experience, the following documentation is also included: > This Quick Start Guide, which gives the installation of the GlobeTrotter Mobility Manager Software in a limited number of steps, and assists the user in making his/her first data call > Online User Manual, which describes a number of common usage scenarios. The online User manual can be accessed at all times through the Help menu of the software. introduction 4 The GlobeTrotter Mobility Manager software requires: Processor > Client (a computer not working in a server capacity): Min. 90-megahertz (MHz) Intel Pentium II-class processor or higher > Server (a computer working in a server capacity): Min.133-MHz Intel Pentium- class processor Operating System > Windows XP Professional > Windows XP Home Edition > Windows 2000 > Windows ME > Windows 98SE Memory > Client: 64 megabytes (MB) of RAM, 96 MB recommended > Server: 128 MB of RAM, 256 MB recommended Hard Disk Min. 40 MB for installation of SW & Drivers Display 800 x 600 or higher-resolution display with 256 colors Input Device Microsoft mouse or compatible pointing device system requirements (minimum requirements) 5 Communications software When you run the installation program, the following programs will be installed on your computer: > Windows GlobeTrotter device drivers > The GlobeTrotter Mobility Manager The GlobeTrotter Mobility Manager The GlobeTrotter Mobility Manager GTMM simplifies SMS messaging and the configuration of GPRS settings for applications such as downloading e-mail or browsing the Internet. It also gives the possibility to manage a WLAN connection. The GTMMapplication incorporates a powerful SMS editor and a viewer for reading SMS messages. Incoming and outgoing messages are listed in Outlook™-style directories. The Setup pagegives users a quick and easy way to set up any type of connection (GSM, GPRS or 3G). The WLAN pagegives users a quick and easy way to scan and connect on a WLAN network. system requirements (minimum requirements) 7 Other requirements > Microsoft Internet Explorer 6.00 or later > The latest Windows service packs and critical updates from the Windows Update site. > The target system may not have any version of the ‘Funk Odyssey’ WLAN client installed, otherwise the installation will fail Please refer to the GlobeTrotter datacard Product Sheet for datacard system requirements. Network services To use your Option GlobeTrotter card, you must first activate an account with a mobile phone Service Provider and have received a Subscriber Identity Module (SIM) card. Often the GlobeTrotter is supplied as a package with an airtime agreement. If you do not already have an airtime agreement, please ask your supplier about obtaining one for a compatible network. Please refer to the GlobeTrotter datacard Product Sheet which will detail the types of network and services it is compatible with. Some service providers may not provide all communications services. Contact your service provider for further information about the availability and details of the services in your home network. Additional information may be required from your service provider to activate the data functionality of the Option GlobeTrotter card such as: > User Name - if applicable > Password - if applicable > Access Point Name (APN) > IP Address - if not dynamic > DNS Address - if not dynamic system requirements (minimum requirements) 6 10.At the end of the installation you will have to reboot the PC and if you have selected automatic start up, the GTMM application will start up after the reboot. 11. Insert the Option GlobeTrotter card into the PCMCIA slot of your PC. 12. Wait until the system has recognized the card. 13. You will now be asked to register the product. Registration is required to benefit from the warranty and customer care. By connecting to the Internet you can register online immediately athttp://www.option.com/registration/4_3_registration.shtml Choose Cancelif you want to register later. You will be able to start the registration from the h…
Text truncated - open the document above for the full version.
Contact Information
Applicant
Joost van der Velden(CEO)
Technical Contact
Test Firm
7layers AGRobert Machulec
Technical Specifications
| # | Rule Parts | Frequency Range | Power Output | Emission | Tolerance |
|---|---|---|---|---|---|
| 6 | 24E | 1.85 GHz - 1.91 GHz | 257.00 mW | 4M20F9W | 2.5 ppm |
Other Applications from Option (Crescent NV)

NCM-CG2132
Sep 21, 2022LoRaWAN 86x/9xx Expansion card
Equipment Class
DTS - Digital Transmission System
NCM-WT500
Jun 06, 2021Water and Temperature Sensor
Equipment Class
DSS - Part 15 Spread Spectrum Transmitter
NCMOCG2101
Feb 27, 2013CloudGate 802.11abgn Wireless LAN Card
Equipment Class
NII - Unlicensed National Information Infrastructure TX
NCMOMO6792
Feb 24, 2013GTM679W
Equipment Class
JBP - Part 15 Class B Computing Device PeripheralNCMOGI0644
Jun 17, 2012GSM/UMTS/WLAN USB Modem GI0644
Equipment Class
PCB - PCS Licensed Transmitter