NLMDIGIMAXU-CA4Digital Camera
Hanwha Techwin Co., Ltd.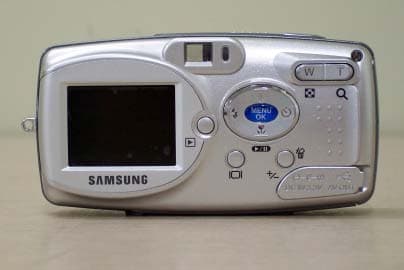
Click to zoom
Application Details
- Equipment Class
- JBP - Part 15 Class B Computing Device Peripheral
- Date of Grant
- Jul 13, 2004
- Application Purpose
- Original Equipment
- Date of Application
- Jul 13, 2004
- Equipment Note
- Digital Camera
- Company
- Hanwha Techwin Co., Ltd.
- Country
- South Korea
Documents & Files
Document Text
Text extracted from the exhibit documents filed with the FCC. Open a document above to read the original.
Users Manual
Thank you for buying a Samsung Camera. This manual will guide you through using the camera, including capturing images, downloading images and using the application software. Please read this manual carefully before using your new camera. User's Manual ENGLISH 2 Instructions Use this camera in the following order Insert the USB cable Set up the camera driver Before connecting the camera to a PC, via the USB cable, you will need to set up the camera driver. Install the camera driver that is contained in the Application S/W CD-ROM.(p.95) Take a picture (p.21) Insert the supplied USB cable into the PC’s USB port and the camera’s USB connection terminal.(p.83) Check the camera’s power If the power is turned off, press the camera button to power it on.(p.24) Take a picture Check the camera’s power Check [Removable Disk] Open Windows EXPLORER and search for [Removable Disk].(p.84) To play back a video shot with this camera, be sure to use the QuickTime player supplied on the software CD-ROM. Applications that do not support the MPEG-4 codec (e.g., Windows Media Player) may not be able to play back the video. If you use a card reader to copy the images on the memory card to your PC, the images could be damaged. When transferring the images taken with the camera to your PC, be sure to use the supplied USB cable to connect the camera to your PC. Please note that the manufacturer holds no responsibility for loss or damage of images on the memory card due to the use of a card reader. 3 Getting to know your camera5 About the icons5 Danger6 Warning6 Caution7 An FCC warning7 This digital camera can be used for8 Manufacturer's contents10 Identification of features11 Front & Top11 Back & Bottom11 Side/ 5-function button12 Mode switch12 Lamp13 Connecting to a Power Source13 Connecting to a Power Source14 Using the batteries15 Removing the battery15 Using the Digimax battery pack ( Optional : SBP-3603, 3.3V)15 Precautions on Using the Memory Stick Duo16 Inserting the memory card18 Removing the memory card18 When Using the Camera for the First Time 19 LCD monitor indicator20 Starting the recording mode21 Things to watch out for when taking pictures 23 Using the camera buttons to adjust the camera24 POWER button24 SHUTTER button24 WIDE/TELE button24 Voice memo/UP button26 Recording a voice memo26 Macro/Down button (Focusing)27 Focus lock28 FLASH/LEFT button28 Self-timer/Right button30 MENU/OK button31 +/- button 31 LCD button35 Using the LCD monitor to adjust the camera settings36 How to use the menu37 Mode38 Size38 Quality39 Metering40 Effect40 Sharpness41 Starting play mode42 Playing back a still image42 Playing back a movie clip43 Playing back a recorded voice43 LCD monitor indicator44 Using the camera buttons to adjust the camera45 Thumbnail/Enlargement button45 Voice memo/Up button46 Play & Pause/Down button47 Contents READY RECORDING PLAY 4 LEFT/RIGHT/MENU/OK button48 LCD button48 Delete button49 Setting up the play back function using the LCD monitor50 Deleting all images52 Protecting images52 Starting the slide show53 Resize54 Rotating an image55 DPOF: PRINT ORDER55 DPOF: STANDARD56 DPOF: INDEX56 DPOF: PRINT SIZE57 DPOF: CANCEL57 PictBridge58 PictBridge: Picture Selection59 PictBridge: Print Setting60 PictBridge: Picture Printing61 PictBridge: DPOF AUTO PRINT62 PictBridge: RESET62 Setup menu63 File name64 Auto power off65 Language66 Formatting a memory card66 Setting up the Date/Time/Date type67 Imprinting the recording date67 Function lamp68 Sound69 LCD brightness69 Selecting Video out type70 Quick view71 Connecting an External Device(USB)72 Initialization(RESET ALL)72 Setting up the MYCAM menu73 Avatar73 Start up image75 Start up sound76 Shutter sound76 List of camera functions77 Starting PC mode83 Important notes85 Warning indicator87 Before contacting a service center88 Specifications91 Software Notes93 About the software93 Setting up the application software95 DigiStudio Installation guide103 DigiStudio Installation105 Removing the USB Driver for Windows 98SE108 Removable Disk109 Removing the removable disk110 Setting up the USB Driver for MAC111 Using the USB Driver for MAC111 Digimax Viewer 2.1112 MGI PhotoSuite III SE113 FAQ123 Contents SOFTWARE SETUP 5 Thank you for buying a Samsung Digital Camera. Prior to using this camera, please read the user manual thoroughly. When you require After Sales service, please bring the camera and the cause of the camera malfunction (such as Batteries, Memory card etc.) to the A/S center. Please check that the camera is operating properly prior to when you intend to use it (e.g. for a trip or an important event) to avoid disappointment. Samsung camera takes no responsibility for any loss or damages that may result from camera malfunction. Keep the manual in a safe place. Microsoft, Windows and Windows logo are registered trademarks of Microsoft Corporation incorporated in the United States and/or other countries. Apple, Mac and QuickTime logo are registered trademarks of Apple computer. Memory Stick Duo is a registered trademark of Sony Corporation. All brand and product names appearing in this manual are registered trademarks of their respective companies. Getting to know your camera This manual contains instructions on using this camera that will help you to use this camera safely and correctly. This will help prevent danger and injury to others. About the icons DANGER DANGER indicates an imminently hazardous situation which, if not avoided, will result in death or serious injury. WARNING WARNING indicates a potentially hazardous situation, which, if not avoided, could result in death or serious injury. CAUTION CAUTION indicates a potentially hazardous situation, which, if not avoided, may result in a minor or moderate injury. 6 Do not attempt to modify this camera in any way. This may result in fire, injury, electric shock or severe damage to you or your camera. Internal inspection, maintenance and repairs should be carried out by your dealer or Samsung C…
Text truncated - open the document above for the full version.
Users Manual
49 Delete( ) button This deletes images stored on the memory card. Before deleting images from the camera, you should protect or download images to your computer that you wish to keep. INFORMATION Deleting Images in Thumbnail Display Mode 1. Use the UP, DOWN, LEFT, and RIGHT buttons to select the image you want to delete, and then press the DELETE ( ) button. 2. The following message will be displayed on the LCD monitor. 3. Select the submenu values by pressing the UP/DOWN button and then press the OK button. [DELETE] when enabled: deletes the selected images. [CANCEL] when enabled: cancels “Delete Image” - Deleting Multiple Images You can only delete the image displayed on the LCD monitor. If you press the LCD button with an image displayed on the LCD monitor selected, the image will maintain its selected state ( mark) as shown in the following illustration. Use the UP, DOWN, LEFT, RIGHT and LCD buttons to select multiple images(i.e., press the LCD button each time you select the image you want to delete), and then press the DELETE button to delete all selected images. If you want to de-select the image, press the LCD button again. The image over which the cursor is placed will be deleted simultaneously. Deleting Images in Play Mode 1. Select an image that you want to delete by pressing the LEFT / RIGHT button and press the DELETE( ) button. 2. A message will display as shown alongside on the LCD monitor. 3. Select the submenu values by pressing the UP/DOWN button and then press the OK button. [DELETE] when enabled: deletes the selected images. [CANCEL] when enabled: cancels “Delete Image” Press the DELETE button. 50 Setting up the play back function using the LCD monitor PLAY mode functions can be changed by using the LCD monitor. In the PLAY mode, pressing the MENU button displays the menu on the LCD monitor. The menus you can set up in Play mode are as follows. To capture an image after setting up the play menu, press the PLAY button. The items indicated by are default settings. Menu tabMain menuSub menuSecondary menuPage - - - - - - - - - - - - - - - - SLIDE PROTECT RESIZE ROTATE DEL. ALL STANDARD INDEX SIZE CANCEL D P O F ON p. 54 p. 52 p. 53 p. 55 p. 52 p. 56 p. 56 p. 57 p. 57 OFF ~ 10 SEC 0 ~ 30 PRINTS - REPEAT ONE PIC UNLOCK LOCK UNLOCK LOCK ALL PICS 2048X1536 1600X1200 1024X768 640X480 LOGO OFF ON NO YES NO YES DEFAULT 3X5 4X6 5X7 8X10 STANDARD INDEX SIZE ONE PIC ALL PICS OFF 51 Setting up the play back function using the LCD monitor Menu tabMain menuSub menuSecondary menuPage ONE PIC- ALL PICS- DEFAULT- POSTCARD 4X6, 8X10 A6, A4, B5 FULL 1, 2, 4, 6, 8 INDEX PLAIN PHOTO FASTPHO. DRAFT NORMAL FINE ON OFF ON OFF - - NO- YES- Menus are subject to change without prior notice. P I C T B R I D G E C U S T O M p. 59 p. 60 p. 58 p. 58 p. 58 SETUP PRINT IMAGES DPOF PRN RESET SIZE LAYOUT PAPER QUALITY DATE FILENAME 52 Deleting all images Of all the files stored in the memory card, the unprotected files in the DCIM subfolder will be deleted. (The files that were stored in the AVATAR folder will not be deleted.) Deleting all images 1. Press the play mode button and press the menu button. 2. Press the LEFT/ RIGHT button and select the [DEL.ALL] menu tab. 3. Select a desired sub menu by pressing the UP/ DOWN button and press the OK button. Selecting [NO]: The display returns to the initial menu. [YES] when enabled: Displays the dialogue box to confirm the delete. Select the submenu values by pressing the UP/DOWN button and then press the OK button. -[DELETE] when enabled: the [PLEASE WAIT] message appears and all unprotected pictures are deleted. If no pictures are protected, the [NO IMAGE] message is displayed. -[CANCEL] when enabled: cancels “Delete All” Remember that this will permanently delete unprotected images. Important shots should be stored on a computer before deletion takes place. The startup image is stored in the camera's internal memory (i.e., not on the memory card) and it will not be deleted even if you delete all files on the memory card. INFORMATION Protecting images This is used to protect specific shots from being accidentally erased (LOCK). It also unprotects images that have been previously protected (UNLOCK). Protecting Images 1. Press the play mode button and press the menu button. 2. Press the LEFT/ RIGHT button and select the [PROTECT] menu tab. 3. Select a desired sub menu by pressing the UP/ DOWN button and press the OK button. [ONE PIC] : Only an image that is displayed on the LCD monitor is protected or unprotected. [ALL PICS] : All of the stored images are protected or unprotected. DEL.ALL NO YES MOVE:SET:OK PROTECT ONE PIC ALL PICS MOVE:SET:OK 53 Protecting images 4. Select the desired secondary menu by pressing the UP/DOWN button and press the OK button. [UNLOCK] : Cancels the protect function. [LOCK]: Sets up the protect function. - If you select the[ONE PIC] sub menu at step 3, you can protect or unprotect another image by pressing the LEFT/ RIGHT button. If you press the SHUTTER button, the Image Protection menu will disappear. - If you selected [ALL] in Step 3, the Image Protection menu will disappear. - If you protect an image, the protect icon( ) will be displayed on the LCD monitor. (An unprotected image has no indicator) - An image in LOCK mode will be protected from [DELETE] or [DELETE ALL] functions, but will NOT be protected from the [FORMAT] function. Images can be displayed continuously at pre-set intervals. You can view the slide show by connecting the camera to an external monitor. 1. Press the play mode button and press the menu button. 2. Press the LEFT/ RIGHT button and select the [SLIDE] menu tab. 3. Use the UP and DOWN buttons to select the desired submenu value, and then press the RIGHT button. - Slide Show Display Interval: OFF, 1 ~10 seconds 4. Use the UP and DOWN buttons to set whether to repeat the slide show. [ON] : Even once a cycle(from the first image to the last image) is completed, the slide show will continue to repeat itself.…
Text truncated - open the document above for the full version.
Users Manual
99 Setting up the application software 23. The Software License Agreement window will be displayed. If you agree to this, click [Yes], the window will then move to the next step. If you disagree, click [No] and the installation program will be canceled. [Click!] 24. A destination selection window will open. Click [Next >]. To copy to the files to another folder, click [Browse...] and choose a folder you want. [Click!] 25. The [Select Components] window will appear. Click [Next >] button. [Click!] 26. A window will open, asking you to choose a folder to which program icons will be added. Click [Next >] button. If you want to add the program icons to a different folder, choose another folder, and then click [Next >] button. [Click!] 100 Setting up the application software 27. PhotoImpression Installation is complete. Click the [Finish] button to install VideoImperssion 2.0. * The system will not reboot even the [Yes, I want to restart the computer now] option is selected. [Click!] 101 Setting up the application software 28. The VideoImpression 2.0 installation window will be displayed as shown alongside. Click the [OK] button. 29. [VideoImpression InstallShield Wizard] window will be displayed. Click the [Next >] button and a window will be displayed for the next step. 30. The Software License Agreement window will be displayed. If you agree to this, click [Yes], the window will then move to the next step. If you disagree, click [No] and the installation program will be canceled. 31. A destination selection window will open. Click [Next >]. To copy to the files to another folder, click [Browse...] and choose a folder you want. 32. A window will open, asking you to choose a folder to which program icons will be added. Click [Next >] button. If you want to add the program icons to a different folder, choose another folder, and then click [Next >] button. [Click!] [Click!] [Click!] 33. VideoImperssion 2.0 Installation is completed. Click the [Finish] button and DirectX 9.0 installation will be started. [Click!] 102 Setting up the application software 34. The Software License Agreement window will be displayed. If you agree to this, select [I accept the agreement] and click the [Next >] button , the window will then move to the next step. If you disagree, select [I don’t accept the agreement] and click the [Next >] button. The installation program will be canceled. 35. Installation is complete. Click the [Next >] button. 36. To apply changes, you must restart the computer. Select [Yes, I want to restart my computer now], and then click [Finish]. 37. The frame 39 may be displayed according to the system requirements. Click the [Finish] button to restart the computer. [Click!] [Click!] [Click!] 103 Setting up the application software 38. After restarting the computer, connect the PC to the camera with the USB cable. 40. If you can see [Removable Disk] under [My computer], the camera driver installation was successful. Now you can transfer image files from the camera to PC via the USB cable. 39. Turn the camera power on. [Found New Hardware Wizard] will open and the computer will recognize the camera. If you have ever installed an image viewer program or your OS is Windows XP, an image viewer program will open. If the image viewer program opens, the camera driver was setup successfully. 104 Setting up the application software If you have installed the camera driver, [Found New Hardware Wizard] may not open. On a Windows 98 or 98 SE system, the Found New Hardware Wizard dialog box opens and a window asking you to select a driver file may appear. In this case, specify "USB Driver" in the CD supplied. (for Windows 98 and 98 SE). When connecting the camera to your PC, it is recommended that you use an AC power adapter. Before connecting the camera to the PC, You should first install the camera driver. After installing the camera driver, you have to restart your PC. If you connect the camera to the PC before installing the camera driver, the [Found New Hardware Wizard] will open. In this case, cancel the [Found New Hardware Wizard] and disconnect the camera. Install the camera driver and connect the camera to the PC again. Should the computer not find the camera driver after installation, please try one or more of the following measures. 1. Delete the camera driver (p.112), and re-install the driver. 2. Refer to FAQ (p.119) to check for a possible solution to the problem. 3. If your PC’s central processing unit is VIA chip (This is shown in the USB Host Controller), download the patch file from the Samsung Camera web page. (http://www.samsungcamera.com) INFORMATION 105 DigiStudio Installation guide System Requirements for DirectX 9.0 1. If your PC does not have DirectX (version 9.0 or later) installed, follow the instructions provided during the installation process to install DirectX. 2. If you are asked to confirm the installation of DirectX, click [Next >]. 3. You will be asked to reboot after DirectX is installed. Once the installation of DigiStudio is complete, be sure to reboot your PC. System Requirements for QuickTime 1. In order to view 3D avatars you created with DigiStudio in MOV format from the camera or PC, you must follow the instructions provided during the installation process and install the QuickTime Player (version 6.0 or later). 2. If you are asked to confirm the installation of QuickTime, click [Next >]. 3. Please select the [Recommended] installation type.(p.106) System Requirements for DigiStudio DigiStudio requires the following minimum system configuration for smooth 3D performance. If your system does not meet the requirements, you will receive error messages and the installation will not continue. DigiStudio Recommended System RequirementsMinimum System Requirements CPUPentium III 500Mhz Pentium II 400Mhz RAM128MB 64MB Graphic Card Sound Card Hard Disk Operating System Web Browser Graphic card with 3D acceleration and at least 8MB of video RAM Graphic card with 3D accelerati…
Text truncated - open the document above for the full version.
Block Diagram
ٛٛ
External Photos
CERTiTEK Standards Laboratory Co., Ltd. 386-1, Ho-Dong, Yongin-City, Kyungki-Do, Korea 449-100 Tel: +82-31-339-9970 Fax: +82-31-339-9855 http://www.certitek.com/ CERTiTEK EUT External Photographs Test Report No.: 2004060044 Date: June 29, 2004 Page 1 of 2 This Report shall not be reproduced except in full without the written approval of CERTiTEK Form No.: CTK-FF1.2 CERTiTEK Standards Laboratory Co., Ltd. 386-1, Ho-Dong, Yongin-City, Kyungki-Do, Korea 449-100 Tel: +82-31-339-9970 Fax: +82-31-339-9855 http://www.certitek.com/ CERTiTEK Test Report No.: 2004060044 Date: June 29, 2004 Page 2 of 2 This Report shall not be reproduced except in full without the written approval of CERTiTEK Form No.: CTK-FF1.2
ID Label/Location Info
CERTiTEK Standards Laboratory Co., Ltd. 386-1, Ho-Dong, Yongin-City, Kyungki-Do, Korea 449-100 Tel: +82-31-339-9970 Fax: +82-31-339-9855 http://www.certitek.com/ CERTiTEK Photographs related to Label Test Report No.: 2004060044 Date: June 29, 2004 Page 1 of 1 This Report shall not be reproduced except in full without the written approval of CERTiTEK Form No.: CTK-FF1.2
Internal Photos
CERTiTEK Standards Laboratory Co., Ltd. 386-1, Ho-Dong, Yongin-City, Kyungki-Do, Korea 449-100 Tel: +82-31-339-9970 Fax: +82-31-339-9855 http://www.certitek.com/ CERTiTEK EUT Internal Photographs Test Report No.: 2004060044 Date: June 29, 2004 Page 1 of 9 This Report shall not be reproduced except in full without the written approval of CERTiTEK Form No.: CTK-FF1.2 CERTiTEK Standards Laboratory Co., Ltd. 386-1, Ho-Dong, Yongin-City, Kyungki-Do, Korea 449-100 Tel: +82-31-339-9970 Fax: +82-31-339-9855 http://www.certitek.com/ CERTiTEK PCB Test Report No.: 2004060044 Date: June 29, 2004 Page 2 of 9 This Report shall not be reproduced except in full without the written approval of CERTiTEK Form No.: CTK-FF1.2 CERTiTEK Standards Laboratory Co., Ltd. 386-1, Ho-Dong, Yongin-City, Kyungki-Do, Korea 449-100 Tel: +82-31-339-9970 Fax: +82-31-339-9855 http://www.certitek.com/ CERTiTEK Test Report No.: 2004060044 Date: June 29, 2004 Page 3 of 9 This Report shall not be reproduced except in full without the written approval of CERTiTEK Form No.: CTK-FF1.2 CERTiTEK Standards Laboratory Co., Ltd. 386-1, Ho-Dong, Yongin-City, Kyungki-Do, Korea 449-100 Tel: +82-31-339-9970 Fax: +82-31-339-9855 http://www.certitek.com/ CERTiTEK Test Report No.: 2004060044 Date: June 29, 2004 Page 4 of 9 This Report shall not be reproduced except in full without the written approval of CERTiTEK Form No.: CTK-FF1.2 CERTiTEK Standards Laboratory Co., Ltd. 386-1, Ho-Dong, Yongin-City, Kyungki-Do, Korea 449-100 Tel: +82-31-339-9970 Fax: +82-31-339-9855 http://www.certitek.com/ CERTiTEK Test Report No.: 2004060044 Date: June 29, 2004 Page 5 of 9 This Report shall not be reproduced except in full without the written approval of CERTiTEK Form No.: CTK-FF1.2 CERTiTEK Standards Laboratory Co., Ltd. 386-1, Ho-Dong, Yongin-City, Kyungki-Do, Korea 449-100 Tel: +82-31-339-9970 Fax: +82-31-339-9855 http://www.certitek.com/ CERTiTEK Test Report No.: 2004060044 Date: June 29, 2004 Page 6 of 9 This Report shall not be reproduced except in full without the written approval of CERTiTEK Form No.: CTK-FF1.2 CERTiTEK Standards Laboratory Co., Ltd. 386-1, Ho-Dong, Yongin-City, Kyungki-Do, Korea 449-100 Tel: +82-31-339-9970 Fax: +82-31-339-9855 http://www.certitek.com/ CERTiTEK Test Report No.: 2004060044 Date: June 29, 2004 Page 7 of 9 This Report shall not be reproduced except in full without the written approval of CERTiTEK Form No.: CTK-FF1.2 CERTiTEK Standards Laboratory Co., Ltd. 386-1, Ho-Dong, Yongin-City, Kyungki-Do, Korea 449-100 Tel: +82-31-339-9970 Fax: +82-31-339-9855 http://www.certitek.com/ CERTiTEK Test Report No.: 2004060044 Date: June 29, 2004 Page 8 of 9 This Report shall not be reproduced except in full without the written approval of CERTiTEK Form No.: CTK-FF1.2 CERTiTEK Standards Laboratory Co., Ltd. 386-1, Ho-Dong, Yongin-City, Kyungki-Do, Korea 449-100 Tel: +82-31-339-9970 Fax: +82-31-339-9855 http://www.certitek.com/ CERTiTEK Test Report No.: 2004060044 Date: June 29, 2004 Page 9 of 9 This Report shall not be reproduced except in full without the written approval of CERTiTEK Form No.: CTK-FF1.2
Test Report
CERTiTEK Standards Laboratory Co., Ltd. 386-1, Ho-Dong, Yongin-City, Kyungki-Do, Korea 449-100 Tel: +82-31-339-9970 Fax: +82-31-339-9855 http://www.certitek.com/ CERTiTEK EMC TEST REPORT For FCC Test Report No. : 2004060044 Date of Issue : June 29, 2004 FCC ID : NLMDIGIMAXU-CA4 Model/Type No. : Digimax U-CA4 Kind of Product : Digital Camera Applicant : Samsung Techwin Co., Ltd. Applicant Address : 145-3, Sangdaewon 1-Dong, Jungwon-Gu, Sungnam-City, Kyungki-Do, Korea Manufacturer : 1) Samsung Techwin Co., Ltd. 2) Tianjin Samsung Opto-Electronics Co., Ltd. Manufacturer Address : 1) 42, Sungju-dong, Changwon City, Kyungnam, Korea 2) 7 Pingchang Road, Nankai Dist., Tianjin, China Contact Person : Kun-Sop, Kim (Manager) Telephone : +82-31-740-8253 Received Date : June 16, 2004 Test period : Start : June 22, 2004 End : June 23, 2004 Test Results : In Compliance Not in Compliance The test results presented in this report relate only to the object tested. CERTiTEK Standards Laboratory Co., Ltd. is accredited by Korea Laboratory Accreditation Scheme (KOLAS) which signed the International Laboratory Accreditation Cooperation (ILAC) Mutual Recognition Arrangement (MRA) for the above test item(s) and test method(s). Tested by Reviewed by Young-Joon, Park EMC Test Engineer James Hong EMC Technical Manager Date: June 29, 2004 Date: June 29, 2004 Test Report No.: 2004060044 Date: June 29, 2004 Page 1 of 14 This Report shall not be reproduced except in full without the written approval of CERTiTEK Form No.: CTK-FF1.2 CERTiTEK Standards Laboratory Co., Ltd. 386-1, Ho-Dong, Yongin-City, Kyungki-Do, Korea 449-100 Tel: +82-31-339-9970 Fax: +82-31-339-9855 http://www.certitek.com/ CERTiTEK REPORT REVISION HISTORY Date Revision Page No June 29, 2004 Issued (2004060044) All This report shall not be reproduced except in full, without the written approval of CERTiTEK Standards Laboratory Co., Ltd. This document may be altered or revised by CERTiTEK Standards Laboratory Co., Ltd. Personnel only, and shall be noted in the revision section of the document. Any alteration of this document not carried out by CERTiTEK Standards Laboratory Co., Ltd. will constitute fraud and shall nullify the document. Test Report No.: 2004060044 Date: June 29, 2004 Page 2 of 14 This Report shall not be reproduced except in full without the written approval of CERTiTEK Form No.: CTK-FF1.2 CERTiTEK Standards Laboratory Co., Ltd. 386-1, Ho-Dong, Yongin-City, Kyungki-Do, Korea 449-100 Tel: +82-31-339-9970 Fax: +82-31-339-9855 http://www.certitek.com/ CERTiTEK TABLE OF CONTENTS 1.0 General Product Description.....................................................................................4 1.1 Model Differences...................................................................................................4 1.2 Device Modifications................................................................................................4 1.3 EUT Configuration(s) ...............................................................................................5 1.4 Test Software .........................................................................................................5 1.5 EUT Operating Mode(s)............................................................................................5 1.6 Calibration Details of Equipment Used for Measurement...............................................6 1.7 Test Facility............................................................................................................6 1.8 Measurement Procedure..........................................................................................6 1.9 Laboratory Accreditations and Listings .......................................................................7 2.0 Emissions Test Regulations.......................................................................................8 2.1 Conducted Voltage Emissions...................................................................................9 2.2 Radiated Electric Field Emissions.............................................................................10 Configurations ...........................................................................................................11 APPENDIX A - TEST DATA ............................................................................................12 Conducted Voltage Emissions (Quasi-Peak reading) ...................................................12 Radiated Electric Field Emissions (Quasi-Peak reading)...............................................14 Test Report No.: 2004060044 Date: June 29, 2004 Page 3 of 14 This Report shall not be reproduced except in full without the written approval of CERTiTEK Form No.: CTK-FF1.2 CERTiTEK Standards Laboratory Co., Ltd. 386-1, Ho-Dong, Yongin-City, Kyungki-Do, Korea 449-100 Tel: +82-31-339-9970 Fax: +82-31-339-9855 http://www.certitek.com/ CERTiTEK 1.0 General Product Description 1.0.1 Tested Equipment Unless otherwise indicated, all tests were conducted on Model Digimax U-CA4. Tests performed on Model were considered to be representative of Model(s) . 1.0.2 Equipment Size, Mobility and Identification Dimensions: 102(W) by 53.8(H) by 31.6(D) mm in Mobility: Hand-Held Table-top Floor-standing Serial No.: Prototype 1.0.3 Electrical Ratings Adaptor Input: 100-250Vac, 50/60Hz, 0.3A Output: 3.3Vdc, 2.0A EUT Input: 3.3Vdc Output: - 1.0.4 Test Voltage & Frequency (Using the adaptor) Unless indicated otherwise on the individual data sheet or test results, the test voltage and frequency was as indicated below. Voltage: 120Vac Frequency: 60Hz 1.0.5 Clock & Other Frequencies Utilized 32.768kHz, 11.2896MHz, 27.00MHz, 48.00MHz, 54MHz 1.1 Model Differences Not applicable 1.2 Device Modifications The following modifications were necessary for compliance: Not applicable Test Report No.: 2004060044 Date: June 29, 2004 Page 4 of 14 This Report shall not be reproduced except in full without the written approval of CERTiTEK Form No.: C…
Text truncated - open the document above for the full version.
Test Setup Photos
CERTiTEK Standards Laboratory Co., Ltd. 386-1, Ho-Dong, Yongin-City, Kyungki-Do, Korea 449-100 Tel: +82-31-339-9970 Fax: +82-31-339-9855 http://www.certitek.com/ CERTiTEK APPENDIX B - Test Setup Photos and Configuration Conducted Voltage Emissions Test Report No.: 2004060044 Date: June 29, 2004 Page 1 of 2 This Report shall not be reproduced except in full without the written approval of CERTiTEK Form No.: CTK-FF1.2 CERTiTEK Standards Laboratory Co., Ltd. 386-1, Ho-Dong, Yongin-City, Kyungki-Do, Korea 449-100 Tel: +82-31-339-9970 Fax: +82-31-339-9855 http://www.certitek.com/ CERTiTEK Radiated Electric Field Emissions Test Report No.: 2004060044 Date: June 29, 2004 Page 2 of 2 This Report shall not be reproduced except in full without the written approval of CERTiTEK Form No.: CTK-FF1.2
Contact Information
Applicant
JEISOON KANG(Principal Research Engineer)
Test Firm
CTK Co., Ltd.Jang-Hee Hong
Technical Specifications
| # | Rule Parts | Frequency Range | Power Output |
|---|---|---|---|
| 1 | 15B | - | - |
Other Applications from Hanwha Techwin Co., Ltd.
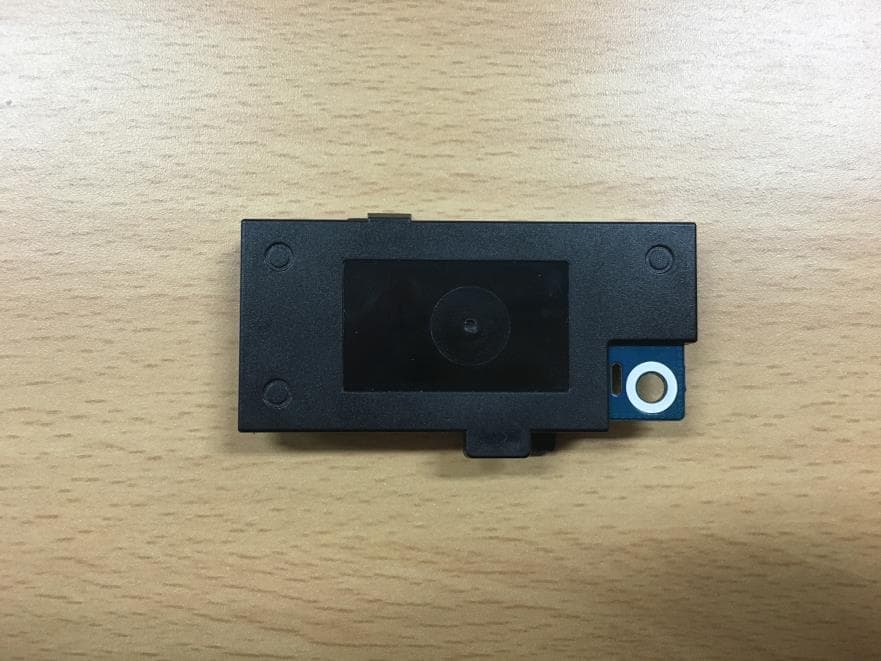
NLMSWLQ93T
Dec 22, 2015WiFi Module
Equipment Class
NII - Unlicensed National Information Infrastructure TX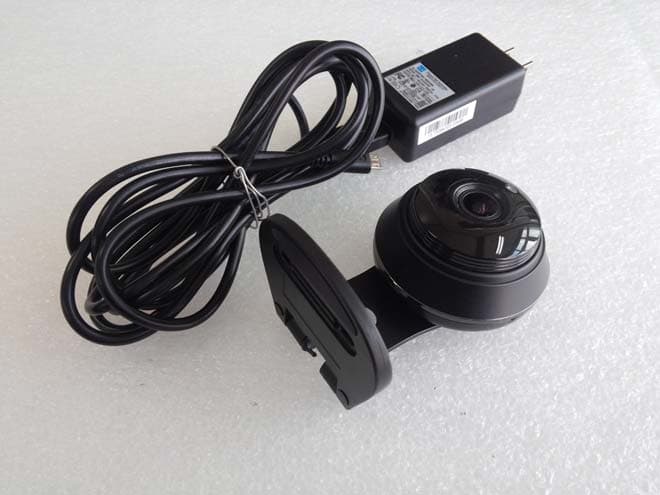
NLMSNHV6414BN
Nov 19, 2015SMART HOME CAMERA
Equipment Class
DTS - Digital Transmission System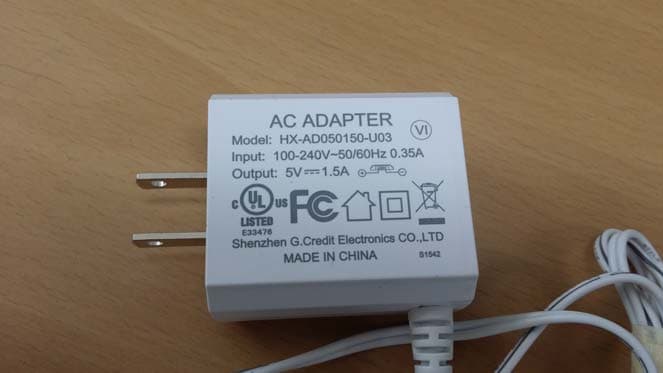
NLMSEP1003RWN
Nov 16, 2015Wireless Baby Camera
Equipment Class
DSS - Part 15 Spread Spectrum Transmitter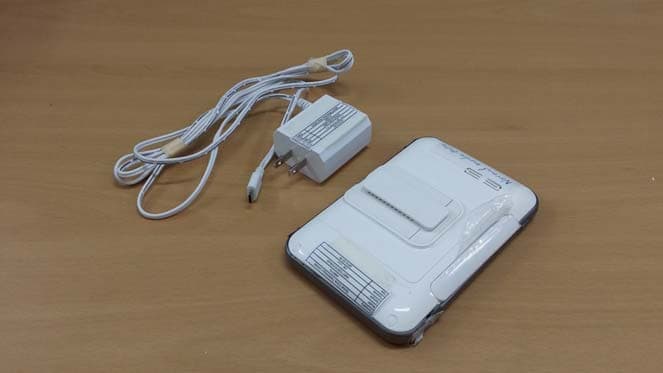
NLMSEW3043WN
Nov 16, 2015Wireless Baby Monitor
Equipment Class
DSS - Part 15 Spread Spectrum Transmitter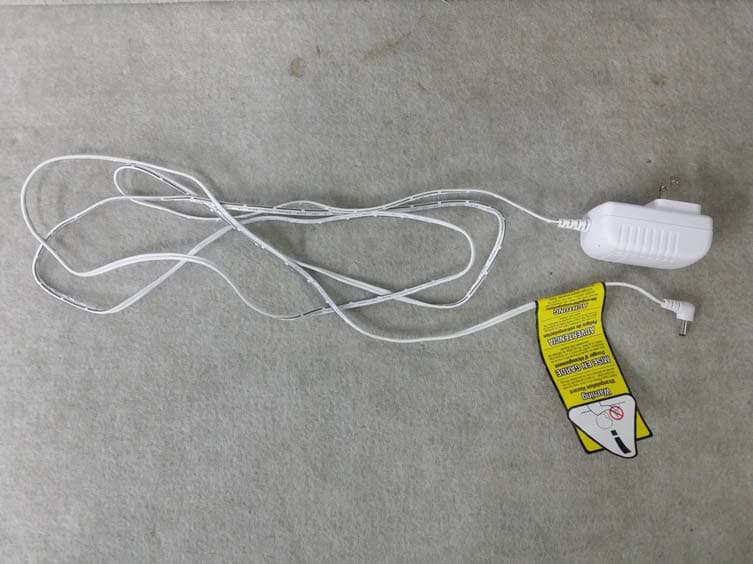
NLMSEW3036W
Jun 16, 2015Baby Monitor
Equipment Class
DSS - Part 15 Spread Spectrum Transmitter