NLMDIGIMAXV50Digital Camera
Hanwha Techwin Co., Ltd.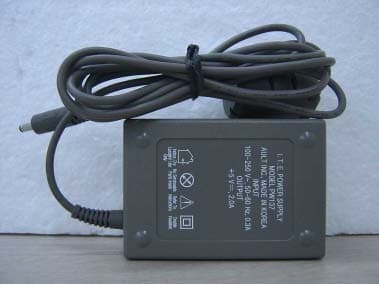
Click to zoom
Application Details
- Equipment Class
- JBP - Part 15 Class B Computing Device Peripheral
- Date of Grant
- Jun 20, 2004
- Application Purpose
- Original Equipment
- Date of Application
- Jun 20, 2004
- Equipment Note
- Digital Camera
- Company
- Hanwha Techwin Co., Ltd.
- Country
- South Korea
Documents & Files
Document Text
Text extracted from the exhibit documents filed with the FCC. Open a document above to read the original.
Users Manual
6806-1998 SAMSUNG TECHWIN CO., LTD.OPTICS & DIGITAL IMAGING DIVISION 145-3, SANGDAEWON 1-DONG, JUNGWON-GU,SUNGNAM-CITY, KYUNGKI-DO, KOREA462-121TEL : (82) 31-740-8086,8088, 8090, 8092, 8099FAX : (82) 31-740-8398, 8111 SAMSUNG OPTO-ELECTRONICS AMERICA, INC. HEADQUARTERS 40 SEAVIEW DRIVE, SECAUCUS, NJ07094, U.S.A.TEL : (1) 201-902-0347FAX : (1) 201-902-9342WESTERN REGIONAL OFFICE18600 BROADWICK ST., RANCHO DOMINGUEZ, CA 90220, U.S.A.TEL : (1) 310-537-7000 FAX : (1) 310-537-1566 SAMSUNG OPTO-ELECTRONICS UK LIMITED SAMSUNG HOUSE1000 HILLSWOOD DRIVEHILLSWOOD BUSINESS PARKCHERTSEY KT16 OPS U.K. TEL : +44 (0) 1932 455300FAX : +44 (0) 1932 455325 SAMSUNG OPTO-ELECTRONICS GMBH AM KRONBERGER HANG 6D-65824 SCHWALBACH/TS., GERMANYTEL : (49) 6196 66 53 03FAX : (49) 6196 66 53 66 SAMSUNG FRANCE S.A.S. BP 51 TOUR MAINE MONTPARNASSE 33, AV .DU MAINE 75755, PARIS CEDEX 15, FRANCEHOTLINE PHOTO NUMÉRIQUE : 00 800 22 26 37 27(Numéro Vert-Appel Gratuit)TEL : (33) 1-4279-2282/5 FAX : (33) 1-4320-4510 SAMSUNG TECHWIN MOSCOW OFFICE RUSSIA,125167,Moscow Lenningradsky,PR-KT,37-A,Korp 14TEL : (7)095-258-9299/96/98FAX : (7)095-258-9297http : //www.samsungcamera.ru TIANJIN SAMSUNG OPTO-ELECTRONICS CO.,LTD. 7 PINGCHANG ROAD NANKAI DIST., TIANJINP.R CHINAPOST CODE:300190TEL : (86) 22-2761-8867FAX : (86) 22-2761-8864 Internet address - http : //www.samsungcamera.com/ The CE Mark is a Directive conformitymark of the European Community (EC) Thank you for buying a Samsung Camera.This manual will guide you through using the camera, including capturing images, downloading images andusing the application software. Please read this manual carefully before using your new camera. Figures (Images) used for the manual are based on model Digimax V50. ENGLISH User's Manual 2 Instructions Use this camera in the following order Insert the USB cable Set up the camera driver Before connecting the camera to a PC, via the USB cable, you will need to set up the camera driver. Install the camera driver that is contained in the Application S/W CD-ROM.(p.101) Take a picture (p.23) Insert the supplied USB cable into the PC’s USB port and the camera’s USB connection terminal.(p.109) Check the camera’s power If the power is turned off, press the camera button to power it on.(p.29) Take a picture Check the camera’s power Check [Removable Disk] Open Windows EXPLORER and search for [Removable Disk].(p.110) To play back a video shot with this camera, be sure to use the QuickTime player supplied on the software CD-ROM. Applications that do not support the MPEG-4 codec (e.g., Windows Media Player) may not be able to play back the video. If you use a card reader to copy the images on the memory card to your PC, the images could be damaged. When transferring the images taken with the camera to your PC, be sure to use the supplied USB cable to connect the camera to your PC. Please note that the manufacturer holds no responsibility for loss or damage of images on the memory card due to the use of a card reader. 3 Getting to know your camera5 About the icons5 Danger6 Warning6 Caution7 An FCC warning7 This digital camera can be used for8 Manufacturer's contents10 Identification of features11 Front & Top11 Back & Bottom12 Side/ 5-function button13 Mode dial13 Connecting to a Power Source16 Using the batteries16 Removing the battery16 Using the AC power adapter (SAC-51, 5.0V) 17 Instructions on how to use the memory card18 Inserting the memory card20 Removing the memory card20 When Using the Camera for the First Time21 LCD monitor indicator22 Starting the recording mode23 Things to Watch Out for When Taking Pictures28 Using the camera buttons to adjust the camera29 POWER button29 SHUTTER button/ Jog dial 29 ZOOM W/T button29 TELE Zoom30 WIDE Zoom30 Voice memo/ UP button32 Recording a voice memo32 Macro/ Down button (Focusing)33 Focus lock34 FLASH/ LEFT button35 Self-timer / Remote / Right button37 MENU/ OK button39 S button39 MF button45 LCD button46 AEL button (Automatic Exposure Lock)46 Using the LCD monitor to adjust the camera settings47 How to use the menu49 Size49 Quality50 Metering51 Effect51 Sharpness52 Continuous shot52 Save / Load the camera configuration (MySET)53 Scene51 Starting play mode55 Playing back a still image55 Playing back a movie clip56 Playing back a recorded voice56 LCD monitor indicator57 Using the camera buttons to adjust the camera58 Thumbnail/ Enlargement button58 Voice memo/ Up button59 Contents READY RECORDINGPLAY 4 Play & Pause/ Down button60 LEFT/ RIGHT/ MENU/ OK button61 LCD button61 Delete button62 COPY button 63 Setting up the play back function using the LCD monitor64 Deleting images66 Copy Pictures67 Protecting images68 Starting the slide show69 Resize70 Rotating an image71 DPOF71 DPOF : STANDARD72 DPOF : INDEX72 DPOF : PRINT SIZE73 DPOF : CANCEL73 PictBridge74 PictBridge: Picture Selection75 PictBridge: Print Setting76 PictBridge: Picture Printing77 PictBridge : DPOF AUTO PRINT78 PictBridge : RESET78 Setup menu79 File name80 Auto power off81 Language82 Formatting a memory card82 Setting up the Date/ Time/ Date type83 Imprinting the recording date83 Function lamp84 Sound85 LCD brightness85 Selecting Video out type86 Quick view87 Connecting an External Device (USB)87 Initialization(RESET ALL)88 Select card88 Setting up the MYCAM menu89 Start up image89 Start up sound90 Shutter sound90 Important notes91 Warning indicator93 Before contacting a service center94 Specifications97 Software Notes99 System Requirements99 About the software100 Setting up the application software101 Starting PC Mode109 Removing the USB Driver for Windows 98SE112 Removable Disk113 Removing the removable disk114 Setting up the USB Driver for MAC115 Using the USB Driver for MAC115 Digimax Viewer 2.1116 Using PhotoImpression117 FAQ119 Contents SOFTWARE SETUP 5 Getting to know your camera Thank you for buying a Samsung Digital Camera. Prior to using this camera, please read the user manual thoroughly. When you require After Sales service, please bring t…
Text truncated - open the document above for the full version.
Users Manual
41 S button Selecting a White Balance 1. Press the S button, and then use the UP and DOWN buttons to select the white balance icon ( ). The white balance menu bar will appear as shown. 2. Use the LEFT and RIGHT buttons to set the white balance to the desired value. The value you set will be displayed on the LCD monitor. AUTO : The camera automatically selects the appropriate white balance settings, depending on the prevailing lighting conditions. DAYLIGHT : For taking images outside. CLOUDY : For taking images under a cloudy and overcast sky. Fluorescent H : For shooting under daylight fluorescent types of three-way fluorescent lighting. Fluorescent L : Shooting under white fluorescent lighting TUNGSTEN : For shooting under tungsten (standard light bulb) lighting. CUSTOM : Allows the user to set the white balance according to the shooting condition. Different lighting conditions may cause a colour cast on your images. 3. Press the OK button. The value you set will be saved and White Balance setup mode will end. White balance : The white balance control allows you to adjust the colours to appear more natural looking. Using the Custom White Balance White balance settings may vary slightly depending on the shooting environment. You can select the most appropriate white balance setting for a given shooting environment by setting up the custom white balance. 1. Select the CUSTOM( ) menu of the White Balance. 2. Place a sheet of white paper in front of the camera so that the LCD monitor shows only white, and then press the shutter button. 3. Your custom white balance value is stored. - The custom white balance value will be applied, starting with the next picture you take. - The user configured white balance will remain effective until it is overwritten. [ White paper ] 42 S button Selecting an ISO Sensitivity 1. Press the S button, and then use the UP and DOWN buttons to select the ISO icon ( ). The ISO menu bar will appear as shown. 2. Use the LEFT and RIGHT buttons to select the desired ISO sensitivity value. - AUTO : The camera's sensitivity is automatically changed by variables such as lighting value or subject brightness. - 50, 100, 200, 400 : You can increase the shutter speed while the same amount of light is present, by increasing the ISO sensitivity. However, the image may be saturated in high luminance. The higher the ISO value, the higher the camera’s sensitivity to light is and therefore the greater its capacity to take pictures in dark conditions. However, the noise level in the image will increase as the ISO value increases, making the image appear coarse. 3. When you press the OK button, the value you set will be saved and ISO setup mode will end. ISO : You can select the ISO sensitivity when taking pictures. The speed or specific light-sensitivity of a camera is rated by ISO numbers. RGB : Allows the user to adjust the R (Red), G (Green), and B (Blue) values of the images to be captured. Setting RGB Values 1. Press the S button, and then use the UP and DOWN buttons to select the RGB icon ( RGB). The RGB menu bar will appear as shown. 2. Use the UP/ DOWN/ LEFT and RIGHT buttons to select the desired RGB value. - Up/ Down Button : Navigates between R, G, and B icons. - Left/ Right Button : Changes value of each icon. 3. When you press the OK button, the value you set will be saved and RGB setup mode will end. 43 S button A/S/M : The user can manually set shutter speed or aperture value in the menu. Selecting the A/S/M shooting mode. 1. Turn the mode dial to select the ASM shooting mode. 2. Press the S button and use the Up and Down buttons to select the A/S/M shooting mode icon ( ) to open the A/S/M shooting mode menu as shown in the picture. 3. Press the Left and Right buttons to select desired option for the A/S/M shooting mode and press the S button. - A (Aperture priority) shooting mode : Set the aperture value for automatic exposure depends on the brightness of the object by automatic shutter speed setting in the camera. Turn the jog dial to the left or right to change the aperture value. - S (Shutter priority) shooting mode : Set the shutter speed for automatic exposure depends on the brightness of the object by automatic aperture value setting in the camera. Turn the jog dial to the left or right to change the shutter speed. - M (Manual) shooting mode : The user can manually set both the aperture value and the shutter speed. Press the AEL button to select shutter speed or aperture value. Rotate the jog dial to change the values. 4. Press the OK button to save the setting and close the A/S/M selection menu. If the set aperture value or shutter speed is out of supported range, the information is displayed red in the LCD. Please adjust the shutter speed and aperture value so that the red warning message becomes white. 44 S button Aperture values and shutter speeds that can be selected for each zoom position are as follows : - Aperture range: AUTO, F2.7 ~ F11 - Shutter speed range : AUTO, 1/2,000 ~ 15S Long Time shutter : This camera automatically adjusts the shutter speed and aperture values to the shooting environment. However, in NIGHT SCENE mode, you can set the shutter speed and aperture values to your preference. Adjusting the shutter speed and aperture values 1. Select the NIGHT SCENE mode by rotating the mode dial. 2. Press S button and Long Time shutter menu (LT, For selecting shutter speed and aperture value) will be displayed. 3. Configure the Long Time shutter value with the up/ down/ left/ right button. Up/ Down Button : Select the Aperture value / shutter speed Left/ Right Button : Change the value. Available aperture value options, depending on zoom step will be displayed on the menu. 4. Press the OK button. The value you set will be saved and the mode will switch to NIGHT SCENE mode. Press the SHUTTER button to take the picture. (Press left button) Aperture ValueSmallLarge (Press right button) Shutter Speed Fast (Press left button) Slow (Press right button) F …
Text truncated - open the document above for the full version.
Users Manual
81 File name The first stored folder name is 100SSCAM, and the first file name is SA500001. Whenever you store an image, the file number is increased by 1. The file numbers are named from SA500001 to SA509999 automatically, 9999 files will be stored in a folder. The folder number is assigned sequentially from 100 to 999 as follows: 100SSCAM 101SSCAM ~ 999SSCAM. The files used with the memory card conform to the DCF(Design rule for Camera File systems) format. INFORMATION Even if the batteries or AC adapter are removed and inserted again, the power off setting will be preserved. Note that the automatic power off function will not operate if the camera is in PC mode, slide show, playing back a voice recording or movie clip. INFORMATION Auto power off Setting Power Off 1. In any mode other than Voice Recording mode, press the MENU button. 2. Press the LEFT/ RIGHT button and select the [SETUP] menu tab. 3. Select the [PWR OFF] menu by pressing the UP/ DOWN button and press the RIGHT button. 4. Select a desired sub menu by pressing the UP/ DOWN button and press the OK button. Selecting [CANCEL] : The power off function will not operate. Selecting [ON]: A menu will be displayed on the LCD monitor as shown alongside. Select the desired time by pressing the UP/DOWN button. This function switches the camera off after a set amount of time in order to prevent unnecessary battery drainage. SET UP FILE PWR SAVE LANGUAGE FORMAT DATE.TIME BACK:SET:OK 2592 OFF 82 Language Setting Language 1. In any mode other than Voice Recording mode, press the MENU button. 2. Press the LEFT/ RIGHT button and select the [SETUP] menu tab. 3. Select the [LANGUAGE] menu by pressing the UP/ DOWN button and press the RIGHT button. 4. Select a desired sub menu by pressing the UP/ DOWN button and press the OK button. LANGUAGE sub menu : Korean, English, French, German, Spanish, Italian, T.Chinese, S.Chinese, Japanese, Russian, Portuguese, Dutch, Danish, Swedish, Finnish, Thai. Formatting a Memory Card 1. In any mode other than Voice Recording mode, press the MENU button. 2. Press the LEFT/ RIGHT button and select the [SETUP] menu tab. 3. Select the [FORMAT] menu by pressing the UP/ DOWN button and press the RIGHT button. 4. Press the Up/Down button to select desired sub menu. 5. Press the OK button. The [PLEASE WAIT!] message is displayed while the memory card is being formatted. There is a choice of languages that can be displayed on the LCD monitor. Even if the batteries or AC adapter are removed and inserted again, the language setting will be preserved. Formatting a memory card This is used for formatting the memory card. If you run [FORMAT] on the memory card, all images, including the protected images, will be deleted. Be sure to download important images to your PC before formatting the memory card. SET UP FILE PWR SAVE LANGUAGE FORMAT DATE.TIME BACK:SET:OK 2592 ENGLISH DANSK LANGUAGE & BACK:SET:OK 2592 MS SD/MMC 83 Setting up the Date/ Time/ Date type You can change the date and time that will be displayed on the captured images and set up the date type. There is an option to include DATE/TIME on still images. Date Imprinting 1. In any mode other than Voice Recording mode, press the MENU button. 2. Press the LEFT/ RIGHT button and select the [SETUP] menu tab. 3. Select the [IMPRINT] menu by pressing the UP/ DOWN button and press the RIGHT button. 4. Use the UP and DOWN buttons to select the desired date imprint type, and then press the OK button. [OFF]: The DATE & TIME will not be imprinted on the image file. [DATE]: Only the DATE will be imprinted on the image file. [DATE&TIME]: The DATE & TIME will be imprinted on the image file. Imprinting the recording date Setting Date/Time & Selecting Date type 1. In any mode other than Voice Recording mode, press the MENU button. 2. Press the LEFT/ RIGHT button and select the [SETUP] menu tab. 3. Select the [DATE] menu by pressing the UP/ DOWN button and press the RIGHT button. 4. Use the UP, DOWN, LEFT, and RIGHT buttons to select the desired submenu value, and then press the OK button. RIGHT button : Selects the year/month/day/hour/minute/date type. LEFT button : Moves the cursor to the [DATE/TIME] main menu if the cursor is at the first item of the date and time setup. In all other cases, the cursor will be shifted to the left of its current position. UP and DOWN buttons: Changes the setting value. - Date type [YY/MM/DD] : year/ month/ day[MM/DD/YY] : month/ day/ year [DD/MM/YY] : day/ month/ year SET UP FILE PWR SAVE LANGUAGE FORMAT DATE.TIME BACK:SET:OK 2592 04/ 05/ 01 00:00 YY/MM/DD SET UP FILE PWR SAVE LANGUAGE FORMAT DATE.TIME BACK:SET:OK 2592 OFF DATE DATE & TIME 84 Imprinting the recording date Function lamp You can turn on and off the function lamp located on the front of the camera. Setting the function lamp 1. In any mode other than Voice Recording mode, press the MENU button. 2. Press the LEFT/ RIGHT button and select the [SETUP] menu tab. 3. Select the [LAMP] menu by pressing the UP/ DOWN button and press the RIGHT button. 4. Select a desired sub menu by pressing the UP/ DOWN button and press the OK button. If [OFF] is selected: The fucntion lamp will not light up. If [ON] is selected: The function lamp will light up. Description of the Function lamp FunctionDescription Power onBlue light blinks and then turns off when the camera is ready to take a picture After taking a picture Blue lamp blinks once While movie recordingBlue lamp blinks at a 1-second interval While voice recordingBlue lamp blinks at a 1-second interval After selecting the remote mode Blue lamp blinks at a 1-second interval * The lamp will function while using the self-timer even if the configuration is set to off the lamp. (See p. 26) The Date & Time are imprinted at the bottom right side of the still image. The date will be imprinted as a DATE TYPE setting. TIME is imprinted in the following way : [Hour : Minute: Second] and hours are shown using the 24 hour clock. The imprint function is appli…
Text truncated - open the document above for the full version.
External Photos
CERTiTEK Standards Laboratory Co., Ltd. 386-1, Ho-Dong, Yongin-City, Kyungki-Do, Korea 449-100 Tel: +82-31-339-9970 Fax: +82-31-339-9855 http://www.certitek.com/ CERTiTEK EUT External Photographs Test Report No.: 2004050015 Date: June 4, 2004 Page 1 of 2 This Report shall not be reproduced except in full without the written approval of CERTiTEK Form No.: CTK-FF1.2 CERTiTEK Standards Laboratory Co., Ltd. 386-1, Ho-Dong, Yongin-City, Kyungki-Do, Korea 449-100 Tel: +82-31-339-9970 Fax: +82-31-339-9855 http://www.certitek.com/ CERTiTEK Test Report No.: 2004050015 Date: June 4, 2004 Page 2 of 2 This Report shall not be reproduced except in full without the written approval of CERTiTEK Form No.: CTK-FF1.2
ID Label/Location Info
CERTiTEK Standards Laboratory Co., Ltd. 386-1, Ho-Dong, Yongin-City, Kyungki-Do, Korea 449-100 Tel: +82-31-339-9970 Fax: +82-31-339-9855 http://www.certitek.com/ CERTiTEK Photographs related to Label Test Report No.: 2004050015 Date: June 4, 2004 Page 1 of 1 This Report shall not be reproduced except in full without the written approval of CERTiTEK Form No.: CTK-FF1.2
Internal Photos
CERTiTEK Standards Laboratory Co., Ltd. 386-1, Ho-Dong, Yongin-City, Kyungki-Do, Korea 449-100 Tel: +82-31-339-9970 Fax: +82-31-339-9855 http://www.certitek.com/ CERTiTEK EUT Internal Photographs Test Report No.: 2004050015 Date: June 4, 2004 Page 1 of 9 This Report shall not be reproduced except in full without the written approval of CERTiTEK Form No.: CTK-FF1.2 CERTiTEK Standards Laboratory Co., Ltd. 386-1, Ho-Dong, Yongin-City, Kyungki-Do, Korea 449-100 Tel: +82-31-339-9970 Fax: +82-31-339-9855 http://www.certitek.com/ CERTiTEK PCB Test Report No.: 2004050015 Date: June 4, 2004 Page 2 of 9 This Report shall not be reproduced except in full without the written approval of CERTiTEK Form No.: CTK-FF1.2 CERTiTEK Standards Laboratory Co., Ltd. 386-1, Ho-Dong, Yongin-City, Kyungki-Do, Korea 449-100 Tel: +82-31-339-9970 Fax: +82-31-339-9855 http://www.certitek.com/ CERTiTEK Test Report No.: 2004050015 Date: June 4, 2004 Page 3 of 9 This Report shall not be reproduced except in full without the written approval of CERTiTEK Form No.: CTK-FF1.2 CERTiTEK Standards Laboratory Co., Ltd. 386-1, Ho-Dong, Yongin-City, Kyungki-Do, Korea 449-100 Tel: +82-31-339-9970 Fax: +82-31-339-9855 http://www.certitek.com/ CERTiTEK Test Report No.: 2004050015 Date: June 4, 2004 Page 4 of 9 This Report shall not be reproduced except in full without the written approval of CERTiTEK Form No.: CTK-FF1.2 CERTiTEK Standards Laboratory Co., Ltd. 386-1, Ho-Dong, Yongin-City, Kyungki-Do, Korea 449-100 Tel: +82-31-339-9970 Fax: +82-31-339-9855 http://www.certitek.com/ CERTiTEK Test Report No.: 2004050015 Date: June 4, 2004 Page 5 of 9 This Report shall not be reproduced except in full without the written approval of CERTiTEK Form No.: CTK-FF1.2 CERTiTEK Standards Laboratory Co., Ltd. 386-1, Ho-Dong, Yongin-City, Kyungki-Do, Korea 449-100 Tel: +82-31-339-9970 Fax: +82-31-339-9855 http://www.certitek.com/ CERTiTEK Test Report No.: 2004050015 Date: June 4, 2004 Page 6 of 9 This Report shall not be reproduced except in full without the written approval of CERTiTEK Form No.: CTK-FF1.2 CERTiTEK Standards Laboratory Co., Ltd. 386-1, Ho-Dong, Yongin-City, Kyungki-Do, Korea 449-100 Tel: +82-31-339-9970 Fax: +82-31-339-9855 http://www.certitek.com/ CERTiTEK Test Report No.: 2004050015 Date: June 4, 2004 Page 7 of 9 This Report shall not be reproduced except in full without the written approval of CERTiTEK Form No.: CTK-FF1.2 CERTiTEK Standards Laboratory Co., Ltd. 386-1, Ho-Dong, Yongin-City, Kyungki-Do, Korea 449-100 Tel: +82-31-339-9970 Fax: +82-31-339-9855 http://www.certitek.com/ CERTiTEK Test Report No.: 2004050015 Date: June 4, 2004 Page 8 of 9 This Report shall not be reproduced except in full without the written approval of CERTiTEK Form No.: CTK-FF1.2 CERTiTEK Standards Laboratory Co., Ltd. 386-1, Ho-Dong, Yongin-City, Kyungki-Do, Korea 449-100 Tel: +82-31-339-9970 Fax: +82-31-339-9855 http://www.certitek.com/ CERTiTEK Test Report No.: 2004050015 Date: June 4, 2004 Page 9 of 9 This Report shall not be reproduced except in full without the written approval of CERTiTEK Form No.: CTK-FF1.2
Test Report
CERTiTEK Standards Laboratory Co., Ltd. 386-1, Ho-Dong, Yongin-City, Kyungki-Do, Korea 449-100 Tel: +82-31-339-9970 Fax: +82-31-339-9855 http://www.certitek.com/ Test Report No.: 2004050015 Date: June 4, 2004 Page 1 of 14 This Report shall not be reproduced except in full without the written approval of CERTiTEK Form No.: CTK-FF1.2 CERTiTEK EMC TEST REPORT For FCC Test Report No. : 2004050015 Date of Issue : June 4, 2004 Model/Type No. : Digimax V50 Kind of Product : Digital Camera Applicant : Samsung Techwin Co., Ltd. Applicant Address : 145-3 Sangdaewon 1 dong, Chungwon-ku, Sungnam City, Kyungki-do, Korea Manufacturer : 1) Samsung Techwin Co., Ltd. 2) Tianjin Samsung Opto-Electronics Co., Ltd. Manufacturer Address : 1) 42, Sungju-dong, Changwon City, Kyungnam, Korea 2) 7 Pingchang Road, Nankai Dist., Tianjin, China Contact Person : Hyung-Moo, Huh (Engineer) Telephone : +82-31-740-8274 Received Date : May 15, 2004 Test period : Start: May 26, 2004 End: May 26, 2004 Test Results : In Compliance Not in Compliance The test results presented in this report relate only to the object tested. CERTiTEK Standards Laboratory Co., Ltd. is accredited by Korea Laboratory Accreditation Scheme (KOLAS) which signed the International Laboratory Accreditation Cooperation (ILAC) Mutual Recognition Arrangement (MRA) for the above test item(s) and test method(s). Tested by Reviewed by Young-Joon, Park EMC Test Engineer James Hong EMC Technical Manager Date: June 4, 2004 Date: June 4, 2004 CERTiTEK Standards Laboratory Co., Ltd. 386-1, Ho-Dong, Yongin-City, Kyungki-Do, Korea 449-100 Tel: +82-31-339-9970 Fax: +82-31-339-9855 http://www.certitek.com/ Test Report No.: 2004050015 Date: June 4, 2004 Page 2 of 14 This Report shall not be reproduced except in full without the written approval of CERTiTEK Form No.: CTK-FF1.2 CERTiTEK REPORT REVISION HISTORY Date Revision Page No June 4, 2004 (2004050015) Issued All This report shall not be reproduced except in full, without the written approval of CERTiTEK Standards Laboratory Co., Ltd. This document may be altered or revised by CERTiTEK Standards Laboratory Co., Ltd. Personnel only, and shall be noted in the revision section of the document. Any alteration of this document not carried out by CERTiTEK Standards Laboratory Co., Ltd. will constitute fraud and shall nullify the document. CERTiTEK Standards Laboratory Co., Ltd. 386-1, Ho-Dong, Yongin-City, Kyungki-Do, Korea 449-100 Tel: +82-31-339-9970 Fax: +82-31-339-9855 http://www.certitek.com/ Test Report No.: 2004050015 Date: June 4, 2004 Page 3 of 14 This Report shall not be reproduced except in full without the written approval of CERTiTEK Form No.: CTK-FF1.2 CERTiTEK TABLE OF CONTENTS 1.0 General Product Description .....................................................................................4 1.1 Model Differences ...................................................................................................4 1.2 Device Modifications................................................................................................4 1.3 EUT Configuration(s) ...............................................................................................5 1.4 Test Software .........................................................................................................5 1.5 EUT Operating Mode(s)............................................................................................5 1.6 Calibration Details of Equipment Used for Measurement ...............................................5 1.7 Test Facility............................................................................................................6 1.8 Measurement Procedure ..........................................................................................6 1.9 Laboratory Accreditations and Listings .......................................................................7 2.0 Emissions Test Regulations.......................................................................................8 2.1 Conducted Voltage Emissions ...................................................................................9 2.2 Radiated Electric Field Emissions ............................................................................. 10 Configurations ........................................................................................................... 11 APPENDIX A - TEST DATA ............................................................................................ 12 Conducted Voltage Emissions (Quasi-Peak reading) ................................................... 12 Radiated Electric Field Emissions (Quasi-Peak reading)............................................... 14 CERTiTEK Standards Laboratory Co., Ltd. 386-1, Ho-Dong, Yongin-City, Kyungki-Do, Korea 449-100 Tel: +82-31-339-9970 Fax: +82-31-339-9855 http://www.certitek.com/ Test Report No.: 2004050015 Date: June 4, 2004 Page 4 of 14 This Report shall not be reproduced except in full without the written approval of CERTiTEK Form No.: CTK-FF1.2 CERTiTEK 1.0 General Product Description 1.0.1 Tested Equipment Unless otherwise indicated, all tests were conducted on Model Digimax V50. Tests performed on Model were considered to be representative of Model(s) . 1.0.2 Equipment Size, Mobility and Identification Dimensions: 105.5 (W) by 54.6 (H) by 38.0 (D) mm in Mobility: Hand-Held Table-top Floor-standing Serial No.: Proto-type 1.0.3 Electrical Ratings Input: Adapter – AC 100-250V, 50/60Hz EUT - DC 5V Output: Adapter – DC 5V, 2.0A EUT - Not applicable 1.0.4 Test Voltage & Frequency (Using the adapter) Unless indicated otherwise on the individual data sheet or test results, the test voltage and frequency was as indicated below. Voltage: 120Vac Frequency: 60Hz 1.0.5 Clock & Other Frequencies Utilized 12.0MHz, 27.0MHz, 54.0MHz, 32.768KHz 1.1 Model Differences Not applicable 1.2 Device Modifications The following modifications were necessary for compliance: Not applicable CERTiTEK Stand…
Text truncated - open the document above for the full version.
Test Setup Photos
CERTiTEK Standards Laboratory Co., Ltd. 386-1, Ho-Dong, Yongin-City, Kyungki-Do, Korea 449-100 Tel: +82-31-339-9970 Fax: +82-31-339-9855 http://www.certitek.com/ CERTiTEK APPENDIX B - Test Setup Photos and Configuration Conducted Voltage Emissions Test Report No.: 2004050015 Date: June 4, 2004 Page 1 of 2 This Report shall not be reproduced except in full without the written approval of CERTiTEK Form No.: CTK-FF1.2 CERTiTEK Standards Laboratory Co., Ltd. 386-1, Ho-Dong, Yongin-City, Kyungki-Do, Korea 449-100 Tel: +82-31-339-9970 Fax: +82-31-339-9855 http://www.certitek.com/ CERTiTEK Radiated Electric Field Emissions Test Report No.: 2004050015 Date: June 4, 2004 Page 2 of 2 This Report shall not be reproduced except in full without the written approval of CERTiTEK Form No.: CTK-FF1.2
Contact Information
Applicant
JEISOON KANG(Principal Research Engineer)
Test Firm
MOVON CorporationDanny Kim
Technical Specifications
| # | Rule Parts | Frequency Range | Power Output |
|---|---|---|---|
| 1 | 15B | - | - |
Other Applications from Hanwha Techwin Co., Ltd.
NLMSWLQ93T
Dec 22, 2015WiFi Module
Equipment Class
NII - Unlicensed National Information Infrastructure TX
NLMSNHV6414BN
Nov 19, 2015SMART HOME CAMERA
Equipment Class
DTS - Digital Transmission System
NLMSEP1003RWN
Nov 16, 2015Wireless Baby Camera
Equipment Class
DSS - Part 15 Spread Spectrum Transmitter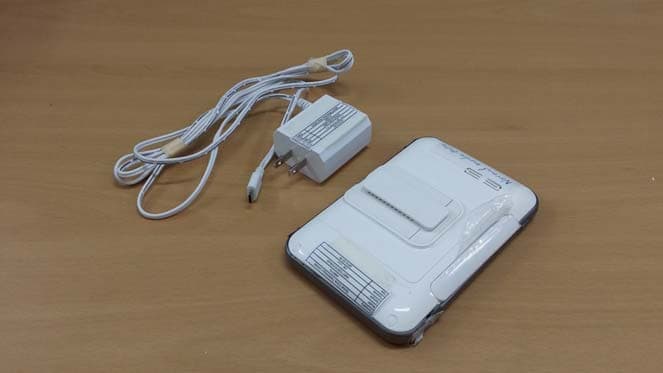
NLMSEW3043WN
Nov 16, 2015Wireless Baby Monitor
Equipment Class
DSS - Part 15 Spread Spectrum Transmitter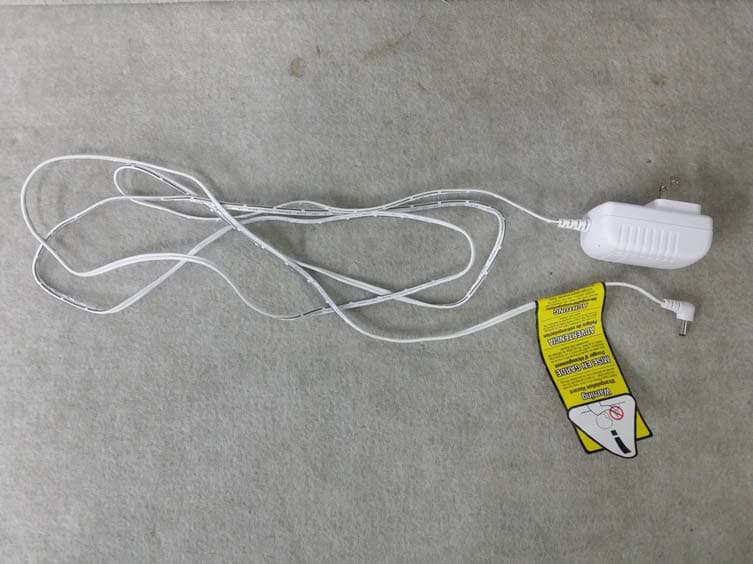
NLMSEW3036W
Jun 16, 2015Baby Monitor
Equipment Class
DSS - Part 15 Spread Spectrum Transmitter