ODMGW300R-NASWireless 2T2R 300Mbps Giga NAS Router
OvisLink Corp.
Click to zoom
Application Details
- Equipment Class
- DTS - Digital Transmission System
- Date of Grant
- Feb 15, 2011
- Application Purpose
- Original Equipment
- Date of Application
- Feb 15, 2011
- Equipment Note
- Wireless 2T2R 300Mbps Giga NAS Router
- Frequency Range
- 2422.00000000 - 2452.00000000
- Company
- OvisLink Corp.
- Country
- Taiwan
Documents & Files
Document Text
Text extracted from the exhibit documents filed with the FCC. Open a document above to read the original.
Users Manual
AirLive GW-300NAS User’s Manual GW-300NAS Wireless 2T2R 300Mbps Giga NAS Router User’s Manual Copyright and Disclaimer AirLive GW-300NAS User’s Manual Copyright & Disclaimer The contents of this publication may not be reproduced in any part or as a whole, stored, transcribed in an information retrieval system, translated into any language, or transmitted in any form or by any means, mechanical, magnetic, electronic, optical, photocopying, manual, or otherwise, without the prior written permission. Trademarks All products, company, brand names are trademarks or registered trademarks of their respective companies. They are used for identification purpose only. Specifications are subject to be changed without prior notice. Copyright and Disclaimer AirLive GW-300NAS User’s Manual CE Declaration of Conformity This equipment complies with the requirements relating to electromagnetic compatibility, EN 55022/A1 Class B. Table of contents AirLive GW-300NAS User’s Manual Table of contents 1.INTRODUCTION............................................................................................................... 1 1.1 Package List............................................................................................................ 2 1.2 Hardware Installation ............................................................................................... 3 1.2.1 Hardware configuration................................................................................. 3 1.2.2 LED indicators............................................................................................... 4 2.GETTING STARTED......................................................................................................... 7 2.1 Easy Setup by Windows Utility ................................................................................ 7 2.2 Easy Setup by Configuring Web UI ....................................................................... 12 3.MAKING CONFIGURATION........................................................................................... 16 3.1 Basic Setting.......................................................................................................... 17 3.1.1 Network Setup............................................................................................. 18 3.1.2 DHCP Server ............................................................................................... 23 3.1.3 Wireless Settings......................................................................................... 26 3.1.4 Change Password....................................................................................... 29 3.2 Forwarding Rules................................................................................................... 38 3.3 Security Setting...................................................................................................... 41 3.4 Advanced Setting................................................................................................... 47 4.TROUBLESHOOTING.................................................................................................... 60 APPENDIX A. SPEC SUMMARY TABLE.......................................................................... 63 APPENDIX B. LICENSING INFORMATION...................................................................... 65 1. Introduction AirLive GW-300NAS User’s Manual 1 1 1.Introduction Congratulations on your purchase of this outstanding product: WiFi Broadband Router. This product is specifically designed for those who need to have the file sharing and P2P download services beyond his home and office. It provides a complete solution for Internet surfing and broadband sharing. Instructions for installing and configuring this product can be found in this manual. Before you install and use this product, please read this manual carefully for fully exploiting the functions of this product. 1. Introduction AirLive GW-300NAS User’s Manual 2 1.1 Package List ItemsDescriptionContents Quantity 1WiFi Broadband Router 1 2Antenna2 3Power adapter1 4CD1 1. Introduction AirLive GW-300NAS User’s Manual 3 1.2 Hardware Installation 1.2.1 Hardware configuration 1. Introduction AirLive GW-300NAS User’s Manual 4 1.2.2 LED indicators LED Status Description Status LED GreenPower ON GreenUSB storage attached Green in flash Data access USB LED Green in flash then stop Press ‘USB off’ button till LED flashing, then can remove USB storage when LED stop flashing. Green It is connected to local Ethernet. WAN LED Green in flash Data access GreenRJ45 cable is plugged Ethernet LED Green in flash Data access GreenWLAN is on WiFi LED Green in flash Data access Power LED GreenPower ON 1. Introduction AirLive GW-300NAS User’s Manual 5 How to Operate DO NOT connect WiFi Broadband Router to power before performing the installation steps below. Step 1. Screw the antenna in a clockwise direction to the back panel of the unit. Step 2. Plug the RJ45 cable into LAN port 1~4 and connect with your PC or NB. Step 3. Plug your RJ-45 into the WAN port and connect with your xDSL modem. 1. Introduction AirLive GW-300NAS User’s Manual 6 Step 4. Plug the power jack into it. Step 5. Power ON. Step 6. Prepare a USB Storage and then plug into the USB port. 2. Getting Started AirLive GW-300NAS User’s Manual 7 2 2.Getting Started Please use windows EZ setup utility or Web UI wizard to enter the setup process. 2.1 Easy Setup by Windows Utility Step 1. Install the Easy Setup Utility from the provided CD then follow the steps to configure the device. Step 2. Select Language then click “Next” to continue. 2. Getting Started AirLive GW-300NAS User’s Manual 8 Step 3. Then click the “Wizard” to continue. Step 4. Click “Next” to continue. 2. Getting Started AirLive GW-300NAS User’s Manual 9 Step 5. One free DDNS account ‘ MAC address.ezguard.net’ for end user to access the NAS router remotely, you can rename an alias name to remember it easily. Once you type in a…
Text truncated - open the document above for the full version.
Users Manual
3. Making Configuration AirLive GW-300NAS User’s Manual 37 Download Status At this page, you could check the download jobs of HTTP and FTP. How to access data on the NAS? Windows User By network place Then start your “file manager”, type the IP with “\\” on the beginning, as follow picture shown. Then press enter. You could find a folder named “Storage”. It is what you are looking for. 3. Making Configuration AirLive GW-300NAS User’s Manual 38 By Web HDD This Web HDD can allow you to enter HDD by web UI, and also can allow you to let ‘guest’ to enter the ‘public’ area only. Unix User We do not provide NFS support, so the only way for UNIX to get files is FTP. Use your FTP client to connect the FTP server. 3.2 Forwarding Rules 3. Making Configuration AirLive GW-300NAS User’s Manual 39 Virtual Server This product’s NAT firewall filters out unrecognized packets to protect your Intranet, so all hosts behind this product are invisible to the outside world. If you wish, you can make some of them accessible by enabling the Virtual Server Mapping. A virtual server is defined as a Service Port, and all requests to this port will be redirected to the computer specified by the Server IP. Virtual Server can work with Scheduling Rules, and give user more flexibility on Access control. For the details, please refer to Scheduling Rule. For example, if you have an FTP server (port 21) at 192.168.1.1, a Web server (port 80) at 192.168.1.2, and a VPN server at 192.168.1.6, then you need to specify the following virtual server mapping table: Service Port Server IP Enable 21192.168.1.1V 80192.168.1.2V 1723192.168.1.6V Afterwards, click on “Save” to store your settings or click “Undo” to give up the changes. 3. Making Configuration AirLive GW-300NAS User’s Manual 40 Special AP Some applications require multiple connections, like Internet games, Video conferencing, Internet telephony, etc. Because of the firewall function, these applications cannot work with a pure NAT router. The Special Applications feature allows some of these applications to work with this product. If the mechanism of Special Applications fails to make an application work, try setting your computer as the DMZ host instead. This device provides some predefined settings. Select your application and click “Copy to” to add the predefined setting to your list. Trigger: The outbound port number issued by the application. Incoming Ports: When the trigger packet is detected, the inbound packets sent to the specified port numbers are allowed to pass through the firewall. Afterwards, Click on “Save” to store your settings or click “Undo” to give up the changes. Miscellaneous 3. Making Configuration AirLive GW-300NAS User’s Manual 41 IP Address of DMZ Host DMZ (Demilitarized Zone) Host is a host without the protection of firewall. It allows a computer to be exposed to unrestricted 2-way communication for Internet games, Video conferencing, Internet telephony and other special applications. UPnP Setting The device supports the UPnP function. If the OS of your client computer supports this function, and you enabled it, like Windows XP, you can see the following icon when the client computer gets IP from the device. Afterwards, click on “Save” to store your settings or click “Undo” to give up the changes. 3.3 Security Setting 3. Making Configuration AirLive GW-300NAS User’s Manual 42 Packet Filters Packet Filter includes both outbound filter and inbound filter. And they have same way to setting. It enables you to control what packets are allowed to pass the router. Outbound filter applies on all outbound packets. However, inbound filter applies on packets that destined to Virtual Servers or DMZ host only. You can select one of the two filtering policies: Allow all to pass except those match the specified rules. Deny all to pass except those match the specified rules. You can specify 8 rules for each direction: inbound or outbound. For each rule, you can define the following: Source IP address Source port Destination IP address Destination port Protocol: TCP or UDP or both. Use Rule# For source or destination IP address, you can define a single IP address (4.3.2.1) or a range of IP addresses (4.3.2.1-4.3.2.254). An empty implies all IP addresses. 3. Making Configuration AirLive GW-300NAS User’s Manual 43 For source or destination port, you can define a single port (80) or a range of ports (1000-1999). Add prefix "T" or "U" to specify TCP or UDP protocol. For example, T80, U53, U2000-2999, No prefix indicates both TCP and UDP are defined. An empty implies all port addresses. Packet Filter can work with Scheduling Rules, and give user more flexibility on Access control. For Detail, please refer to Scheduling Rule. Each rule can be enabled or disabled individually. Afterwards, click on “Save” to store your settings or click “Undo” to give up the changes. Domain Filters Domain Filter prevents users under this device from accessing specific URLs. Domain Filter: Check if you want to enable Domain Filter. Log DNS Query: Check if you want to log the action when someone accesses the specific URLs. 3. Making Configuration AirLive GW-300NAS User’s Manual 44 Privilege IP Address Range: Setting a group of hosts and privilege these hosts to access network without restriction. Domain Suffix: A suffix of URL can be restricted, for example, ".com", "xxx.com". Action: When someone is accessing the URL met the domain-suffix, what kind of action you want. Check “Drop” to block the access. Check “Log” to log these access. Enable: Check to enable each rule. Afterwards, click on “Save” to store your settings or click “Undo” to give up the changes. URL Blocking URL Blocking will block LAN computers to connect with pre-define Websites. The major difference between “Domain filter” and “URL Blocking” is Domain filter requires user to input suffix (like .com or .org, etc), while URL Blocking requires user to input a keyword only. In other words, Domain filter can block specific we…
Text truncated - open the document above for the full version.
Users Manual
Copyright and Disclaimer AirLive GW-300R User’s Manual 1 GW-300R Wireless 2T2R 300Mbps Giga Router User’s Manual Copyright and Disclaimer AirLive GW-300R User’s Manual Copyright & Disclaimer The contents of this publication may not be reproduced in any part or as a whole, stored, transcribed in an information retrieval system, translated into any language, or transmitted in any form or by any means, mechanical, magnetic, electronic, optical, photocopying, manual, or otherwise, without the prior written permission. Trademarks All products, company, brand names are trademarks or registered trademarks of their respective companies. They are used for identification purpose only. Specifications are subject to be changed without prior notice. Copyright and Disclaimer AirLive GW-300R User’s Manual CE Declaration of Conformity This equipment complies with the requirements relating to electromagnetic compatibility, EN 55022/A1 Class B. The specification is subject to change without notice. Table of Contents AirLive GW-300R User’s Manual Table of Contents 1.Introduction........................................................................................................................ 1 1.1 Packing List............................................................................................................. 2 1.2 Spec Summary Table ............................................................................................... 3 1.3 Hardware Configuration........................................................................................... 4 1.4 LED indicators......................................................................................................... 5 1.5 Procedure for Hardware Installation........................................................................ 6 2.Getting Start ..................................................................................................................... 8 3.Making Configuration.................................................................................................... 14 3.1 Login to Configure from Wizard............................................................................. 15 3.2 System Status........................................................................................................ 19 3.3 Advanced............................................................................................................... 20 3.3.1 Basic Setting................................................................................................ 20 3.3.2 Forwarding Rules........................................................................................ 36 3.3.3 Security Settings.......................................................................................... 39 3.3.4 Advanced Settings....................................................................................... 56 3.3.5 Toolbox........................................................................................................ 67 Appendices and Index...................................................................................................... 70 802.1x Setting.............................................................................................................. 70 WPA Settings ............................................................................................................... 75 FAQ and Troubleshooting................................................................................................ 84 What can I do when I have some trouble at the first time? .......................................... 84 How do I connect router by using wireless?................................................................ 87 1. Introduction AirLive GW-300R User’s Manual 1 1 1.Introduction Congratulations on your purchase of this outstanding Wireless Broadband Router. This product is specifically designed for Small Office and Home Office needs. It provides a complete SOHO solution for Internet surfing, and is easy to configure and operate even for non-technical users. Instructions for installing and configuring this product can be found in this manual. Before you install and use this product, please read this manual carefully for fully exploiting the functions of this product. 1. Introduction AirLive GW-300R User’s Manual 2 1.1 Packing List itemsDescriptionContents Quantity 1WiFi Gigabit Router 1 2Power adapter1 3CD1 1. Introduction AirLive GW-300R User’s Manual 3 1.2 Spec Summary Table Device Interface Ethernet WAN RJ-45 port, 10/100/1000Mbps, auto-MDI/MDIX 1 Ethernet LAN RJ-45 port, 10/100/1000Mbps, auto-MDI/MDIX 4 Antenna3.23 dBi detachable antenna 2 WPS Button For WPS connection 1 Wireless Enable/disable To enable or disable Wireless Radio 1 LED Indication Power/Status / WAN / LAN1 ~ LAN4/ WiFi Ɣ Power Jack DC Power Jack, powered via external switching power adapter 1 Wireless LAN (WiFi) Standard IEEE 802.11b/g/n compliance Ɣ SSIDSSID broadcast or in stealth mode Ɣ ChannelAuto-selection, manuallyƔ SecurityWEP, WPA, WPA-PSK, WPA2, WPA2-PSK Ɣ WPSWPS (Wi-Fi Protected Setup) Ɣ WMMWMM (Wi-Fi Multimedia)Ɣ Functionality Ethernet WAN PPPoE, DHCP client, Static IP, PPTP, L2TP Ɣ WAN Connection Auto-reconnect, dial-on-demand, manually Ɣ One-to-Many NAT Virtual server, special application, DMZ, Super DMZ (IP Passthrough) Ɣ NAT Session Support NAT session 20000 SPI Firewall IP/Service filter, URL blocking, MAC control Ɣ DoS Protection DoS (Deny of Service) detection and protection Ɣ Routing Protocol Static route, dynamic route (RIP v1/v2) Ɣ ManagementSNMP, UPnP IGD, syslog, DDNS Ɣ AdministrationWeb-based UI, remote login, backup/restore setting Ɣ PerformanceNAT up to 700Mbps and Wireless up to150Mbps 1. Introduction AirLive GW-300R User’s Manual 4 Environment & Certification Package dimension (mm) Package Information Package weight (g) Operation Temp. Temp.: 0~40oC, Humidity 10%~90% non-condensing Ɣ Storage Temp. Temp.: -10~70oC, Humidity: 0~95% non-…
Text truncated - open the document above for the full version.
Users Manual
3. Making Configuration AirLive GW-300R User’s Manual 17 Step 3: Setup the LAN IP and WAN Type. Step 4: Please fill in PPPoE service information which is provided by your ISP. Example: Step 5: Set up your Wireless. 3. Making Configuration AirLive GW-300R User’s Manual 18 Set up your Authentication and Encryption. Step 6: Then click Apply Setting. And then the device will reboot. Step 7: Click Finish to complete it. 3. Making Configuration AirLive GW-300R User’s Manual 19 3.2 System Status This option provides the function for observing this product’s working status: WAN Port Status. If the WAN port is assigned a dynamic IP, there may appear a “Renew” or “Release” button on the Sidenote column. You can click this button to renew or release IP manually. Statistics of WAN: enables you to monitor inbound and outbound packets 3. Making Configuration AirLive GW-300R User’s Manual 20 3.3 Advanced 3.3.1 Basic Setting Please Select “Advanced Setup” to Setup 3. Making Configuration AirLive GW-300R User’s Manual 21 3.3.1.1 Primary Setup – WAN Type, Virtual Computers Press “Change” This option is primary to enable this product to work properly. The setting items and the web appearance depend on the WAN type. Choose correct WAN type before you start. LAN IP Address: the local IP address of this device. The computers on your network must use the LAN IP address of your product as their Default Gateway. You can change it if necessary. WAN Type: WAN connection type of your ISP. You can click Change button to choose a correct one from the following four options: Static IP Address: ISP assigns you a static IP address. Dynamic IP Address: Obtain an IP address from ISP automatically. PPP over Ethernet: Some ISPs require the use of PPPoE to connect to their services. PPTP: Some ISPs require the use of PPTP to connect to their services. F. L2TP: Some ISPs require the use of L2TP to connect to their services 3. Making Configuration AirLive GW-300R User’s Manual 22 Static IP Address: ISP assigns you a static IP address: WAN IP Address, Subnet Mask, Gateway, Primary and Secondary DNS: enter the proper setting provided by your ISP. Dynamic IP Address: Obtain an IP address from ISP automatically. Host Name: optional. Required by some ISPs, for example, @Home. Renew IP Forever: this feature enables this product to renew your IP address automatically when the lease time is expiring-- even when the system is idle. 3. Making Configuration AirLive GW-300R User’s Manual 23 PPP over Ethernet: Some ISPs require the use of PPPoE to connect to their services. PPPoE Account and Password: the account and password your ISP assigned to you. For security, this field appears blank. If you don't want to change the password, leave it empty. PPPoE Service Name: optional. Input the service name if your ISP requires it. Otherwise, leave it blank. Maximum Idle Time: the amount of time of inactivity before disconnecting your PPPoE session. Set it to zero or enable Auto-reconnect to disable this feature. Maximum Transmission Unit (MTU): Most ISP offers MTU value to users. The most common MTU value is 1492. Connection Control: There are 3 modes to select: Connect-on-demand: The device will link up with ISP when the clients send outgoing packets. Auto-Reconnect(Always-on):The device will link with ISP until the connection is established. Manually : The device will not make the link until someone clicks the connect-button in the Staus-page. 3. Making Configuration AirLive GW-300R User’s Manual 24 PPTP: Some ISPs require the use of PPTP to connect to their services First, Please check your ISP assigned and Select Static IP Address or Dynamic IP Address. 1. My IP Address and My Subnet Mask: the private IP address and subnet mask your ISP assigned to you. 2. Server IP Address: the IP address of the PPTP server. 3. PPTP Account and Password: the account and password your ISP assigned to you. If you don't want to change the password, keep it empty. 4. Connection ID: optional. Input the connection ID if your ISP requires it. 5. Maximum Idle Time: the time of no activity to disconnect your PPTP session. Set it to zero or enable Auto-reconnect to disable this feature. If Auto-reconnect is enabled, this product will connect to ISP automatically, after system is restarted or connection is dropped. Connection Control: There are 3 modes to select: Connect-on-demand: The device will link up with ISP when the clients send outgoing packets. Auto-Reconnect(Always-on):The device will link with ISP until the connection is established. Manually: The device will not make the link until someone clicks the connect-button in the Staus-page. 3. Making Configuration AirLive GW-300R User’s Manual 25 L2TP: Some ISPs require the use of L2TP to connect to their services First, Please check your ISP assigned and Select Static IP Address or Dynamic IP Address. For example: Use Static 1. My IP Address and My Subnet Mask: the private IP address and subnet mask your ISP assigned to you. 2. Server IP Address: the IP address of the PPTP server. 3. PPTP Account and Password: the account and password your ISP assigned to you. If you don't want to change the password, keep it empty. 3. Connection ID: optional. Input the connection ID if your ISP requires it. 4. Maximum Idle Time: the time of no activity to disconnect your PPTP session. Set it to zero or enable Auto-reconnect to disable this feature. If Auto-reconnect is enabled, this product will connect to ISP automatically, after system is restarted or connection is dropped. 3. Making Configuration AirLive GW-300R User’s Manual 26 Connection Control: There are 3 modes to select: Connect-on-demand: The device will link up with ISP when the clients send outgoing packets. Auto-Reconnect(Always-on):The device will link with ISP until the connection is established. Manually :The device will not make the link until someone clicks the connect-button in the Staus-page. 3. Making Configuration AirLive GW-300R User’s Manual 27 Virtual Co…
Text truncated - open the document above for the full version.
Users Manual
3. Making Configuration AirLive GW-300R User’s Manual 67 3.3.5 Toolbox 3.3.5.1 View Log You can View system log by clicking the View Log button 3. Making Configuration AirLive GW-300R User’s Manual 68 3.3.5.2 Firmware Upgrade You can upgrade firmware by clicking Firmware Upgrade button. 3.3.5.3 Backup Setting You can backup your settings by clicking the Backup Setting button and save it as a bin file. Once you want to restore these settings, please click Firmware Upgrade button and use the bin file you saved. 3.3.5.4 Reset to default You can also reset this product to factory default by clicking the Reset to default button. 3. Making Configuration AirLive GW-300R User’s Manual 69 3.3.5.5 Reboot You can also reboot this product by clicking the Reboot button. 3.3.5.6 Miscellaneous Items MAC Address for Wake-on-LAN Wake-on-LAN is a technology that enables you to power up a networked device remotely. In order to enjoy this feature, the target device must be Wake-on-LAN enabled and you have to know the MAC address of this device, say 00-11-22-33-44-55. Clicking "Wake up" button will make the router to send the wake-up frame to the target device immediately. Domain Name or IP Address for Test Allow you to configure an IP, and ping the device. You can ping a secific IP to test whether it is alive. Appendices and Index AirLive GW-300R User’s Manual 70 Appendices and Index 802.1x Setting 1 Equipment Details Figure 1: Testing Environment (Use Windows 2000 Radius Server) PC1: Microsoft Windows XP Professional without Service Pack 1. AirLive WN-200USB Driver version: PC2: Microsoft Windows XP Professional with Service Pack 1a or latter. AirLive WN-200USB Driver version: 1.7.29.0 (Driver date: 10.20.2001) Authentication Server: Windows 2000 RADIUS server with Service Pack 3 and HotFix Q313664. Note. Windows 2000 RADIUS server only supports PEAP after upgrade to service pack 3 and HotFix Q313664 (You can get more information from HH Hhttp://support.microsoft.com/default.aspx?scid=kb; en-us;313664UHH) Appendices and Index AirLive GW-300R User’s Manual 71 2 DUT Configuration: Enable DHCP server. WAN setting: static IP address. LAN IP address: 192.168.1.254/24. Set RADIUS server IP. Set RADIUS server shared key. Configure WEP key and 802.1X setting. The following test will use the inbuilt 802.1X authentication method such as ,EAP_TLS, PEAP_CHAPv2(Windows XP with SP1 only), and PEAP_TLS(Windows XP with SP1 only) using the Smart Card or other Certificate of the Windows XP Professional. 3. DUT and Windows 2000 Radius Server Setup Setup Windows 2000 RADIUS Server We have to change authentication method to MD5_Challenge or using smart card or other certificate on RADIUS server according to the test condition. Setup DUT Enable the 802.1X (check the “Enable checkbox“). Enter the RADIUS server IP. Enter the shared key. (The key shared by the RADIUS server and DUT). We will change 802.1X encryption key length to fit the variable test condition. Setup Network adapter on PC 1.Choose the IEEE802.1X as the authentication method. (Fig 2) Note. Figure 2 is a setting picture of Windows XP without service pack 1. If users upgrade to service pack 1, then they can’t see MD5-Challenge from EAP type list any more, but they will get a new Protected EAP (PEAP) option. Choose MD5-Challenge or Smart Card or other Certificate as the EAP type. 3.If choosing use smart card or the certificate as the EAP type, we select to use a certificate on this computer. (Fig 3) Appendices and Index AirLive GW-300R User’s Manual 72 4. We will change EAP type to fit the variable test condition. Figure 2: Enable IEEE 802.1X access control Figure 3: Smart card or certificate properties 4. Windows 2000 RADIUS server Authentication testing: 4.1 DUT authenticate PC1 using certificate. (PC2 follows the same test procedures.) Download and install the certificate on PC1. (Fig 4) PC1 choose the SSID of DUT as the Access Point. Set authentication type of wireless client and RADIUS server both to EAP_TLS. Disable the wireless connection and enable again. The DUT will send the user's certificate to the RADIUS server, and then send the message of authentication result to PC1. (Fig 5) Windows XP will prompt that the authentication process is success or fail and end the authentication procedure. ( Fig 6) Appendices and Index AirLive GW-300R User’s Manual 73 Terminate the test steps when PC1 get dynamic IP and PING remote host successfully. Figure 4: Certificate information on PC1 Appendices and Index AirLive GW-300R User’s Manual 74 Figure 5: Authenticating Figure 6: Authentication success 4.2 DUT authenticate PC2 using PEAP-TLS. PC2 choose the SSID of DUT as the Access Point. Set authentication type of wireless client and RADIUS server both to PEAP_TLS. Disable the wireless connection and enable again. The DUT will send the user's certificate to the RADIUS server, and then send the message of authentication result to PC2. Windows XP will prompt that the authentication process is success or fail and end the authentication procedure. Terminate the test steps when PC2 get dynamic IP and PING remote host successfully. Support Type: The router supports the types of 802.1x Authentication: PEAP-CHAPv2 and PEAP-TLS. Note. PC1 is on Windows XP platform without Service Pack 1. PC2 is on Windows XP platform with Service Pack 1a. PEAP is supported on Windows XP with Service Pack 1 only. Windows XP with Service Pack 1 allows 802.1x authentication only when data encryption function is enable. Appendices and Index AirLive GW-300R User’s Manual 75 WPA Settings Wireless Router: LAN IP: 192.168.1.254 WAN IP: 192.168.122.216 Radius Server: 192.168.122.1 UserA : XP Wireless Card:Ti-11g Tool: Odyssey Client Manager Refer to: HH HUwww.funk.comUHH Download: HHUhttp://www.funk.com/News&Events/ody_c_wpa_preview_pn.aspU Or Another Configuration: Appendices and Index AirLive GW-300R User’s Manual 76 WPA: For this function, we need the server to authenticate. This function is like 802.1x.…
Text truncated - open the document above for the full version.
Contact Information
Applicant
Sammy Chiu(Product Manager)
Test Firm
Compliance Certification ServicesThu Chan
Technical Specifications
| # | Rule Parts | Frequency Range | Power Output |
|---|---|---|---|
| 3 | 15C | 2.42 GHz - 2.45 GHz | 321.00 mW |
Other Applications from OvisLink Corp.
ODMAC1200R
Jun 04, 20151200Mbps 802.11AC AP Router
Equipment Class
DTS - Digital Transmission System
ODMAIRMAX5X
Apr 18, 20155G High Throughput Outdoor CPE with PoE Pass through
Equipment Class
NII - Unlicensed National Information Infrastructure TX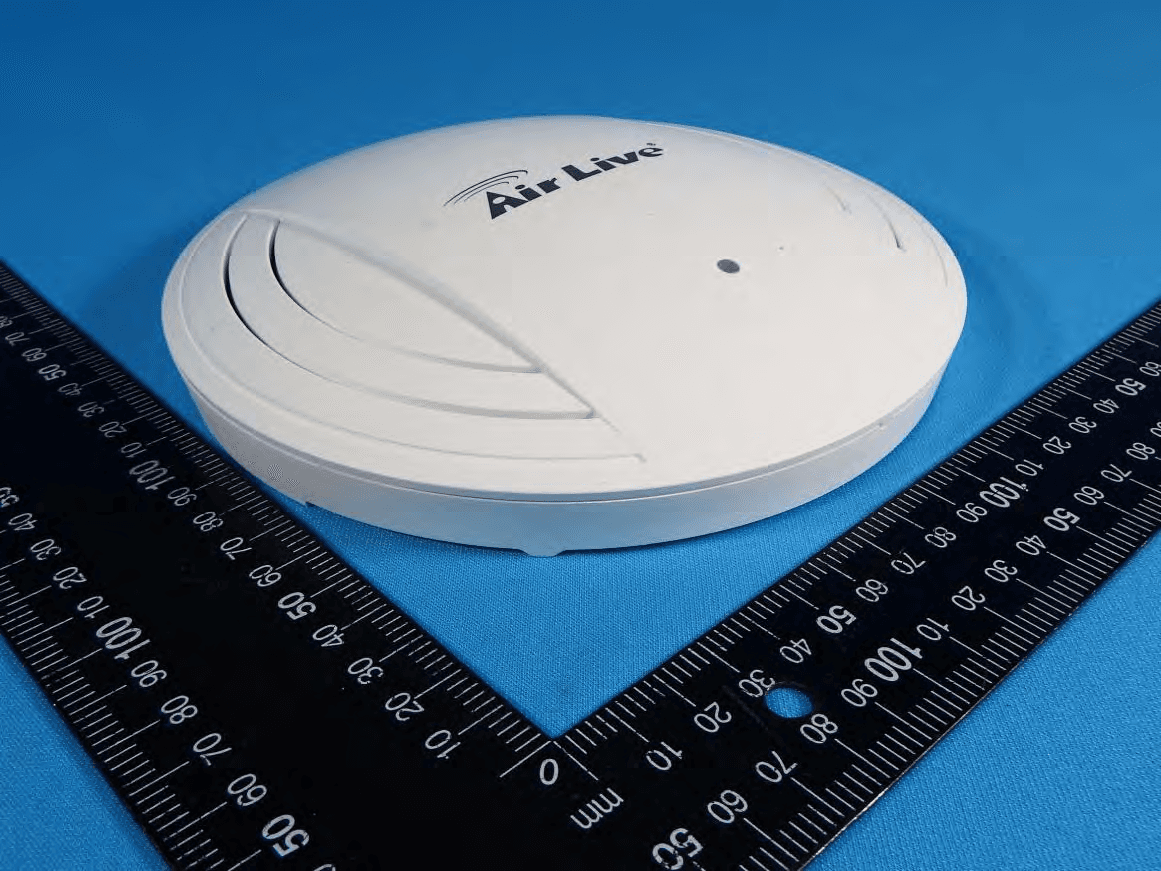
ODMACTOP
Apr 15, 201511 AC Wide Range Ceiling Mount PoE Access Point
Equipment Class
NII - Unlicensed National Information Infrastructure TX
ODMCW720
Mar 19, 2013720P Wireless 150Mbps IPCAM
Equipment Class
DTS - Digital Transmission System
ODMNPOWER
Jan 10, 2013Hi-Power Wireless-N PoE AP Router
Equipment Class
DTS - Digital Transmission System