QGH-VRMX1Light Dimmer
Leviton Manufacturing Co., Inc.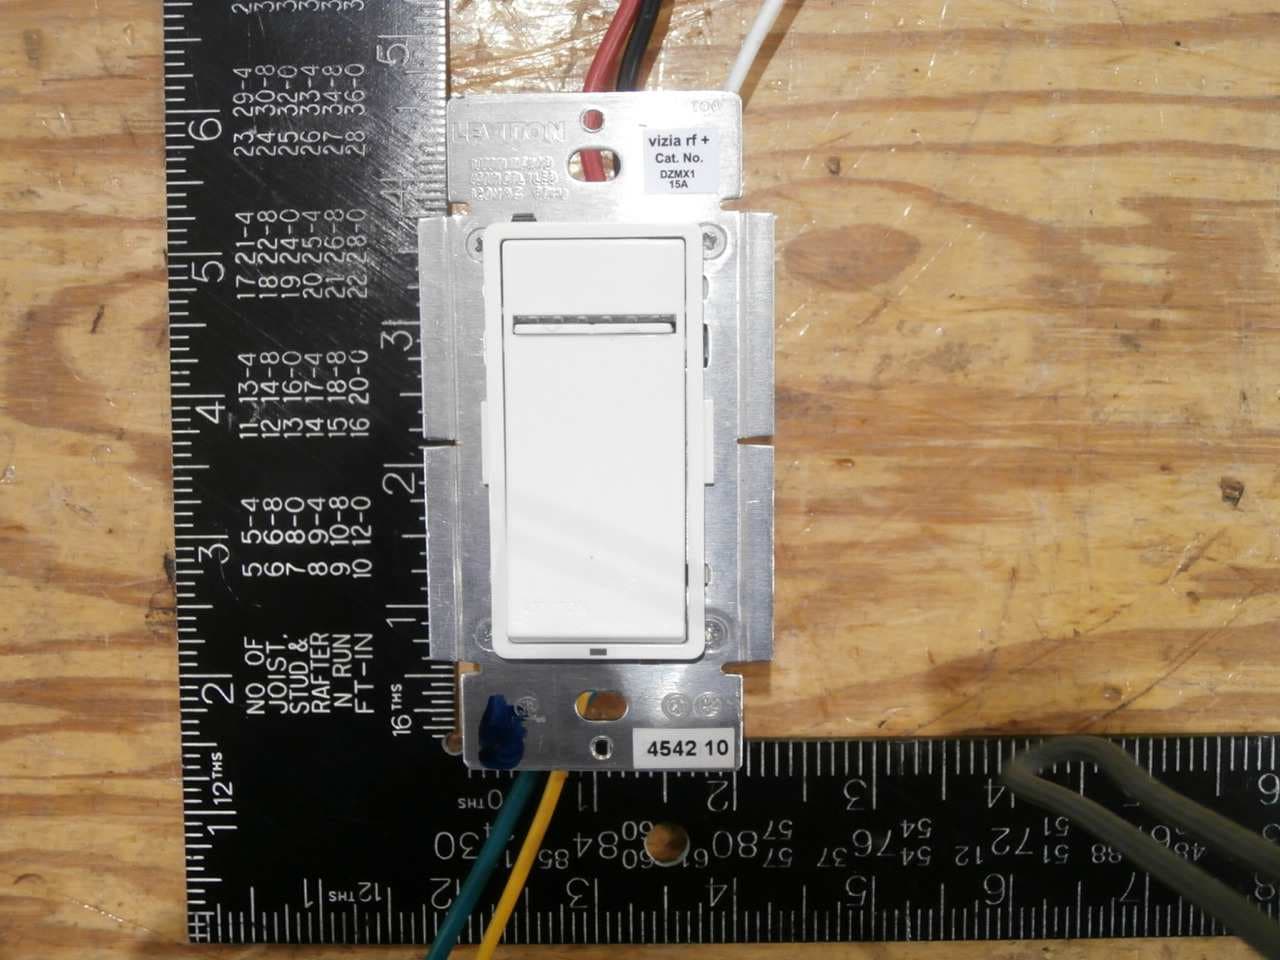
Click to zoom
Application Details
- Equipment Class
- DXT - Part 15 Low Power Transceiver, Rx Verified
- Date of Grant
- Dec 04, 2014
- Application Purpose
- Original Equipment
- Date of Application
- Dec 04, 2014
- Equipment Note
- Light Dimmer
- Frequency Range
- 908.40000000 - 908.40000000
- Country
- United States
Documents & Files
Document Text
Text extracted from the exhibit documents filed with the FCC. Open a document above to read the original.
Users Manual
WARNINGS AND CAUTIONS: • TO AVOID FIRE, SHOCK, OR DEATH; TURN OFF POWER AT CIRCUIT BREAKER OR FUSE AND TEST THAT THE POWER IS OFF BEFORE WIRING • To be installed and/or used in accordance with electrical codes and regulations. • If you are unsure about any part of these instructions, consult an electrician. • Use ONly with the appropriate Advance Transformer 120V Mark 10™ Powerline or Lutron Tu-Wire ® electronic ballasts for controlling the specific fluorescent lamps in Fluorescent Mode. • To avoid overheating and possible damage to this device and other equipment, do not install to control a receptacle, a motor- or a transformer operated appliance. • Use with magnetic low voltage transformers, incandescent, or 120V halogen fixtures only. Use a Leviton electronic low voltage dimmer to control electronic (solid state) low voltage transformers. • When retrofitting Mark 10™ Powerline dimming ballasts into fixtures that originally had Instant Start ballasts, the sockets MUST be replaced with Rapid Start sockets to allow proper dimmer operation and prevent damage to the dimmer ballast. Refer to the instructions provided with the ballast. • Vizia RF + TM dimmers are not compatible with standard 3-way or 4-way switches. They must be used with compatible Vizia + TM or Vizia RF + TM controllers for multi-location dimming. WARNINGS AND CAUTIONS: • When magnetic low voltage circuits are operated at a dim level, with all lamps inoperative, excess current may flow through the transformer. To avoid possible transformer failure due to overcurrent, use a transformer that incorporates thermal protection or a fuse at the primary windings. • Fluorescent lamps must be burned in at full intensity for 100 hours prior to dimming for proper dimming performance. Use only one (1) Vizia RF +™ Incandescent/Magnetic Low Voltage or Fluorescent Dimmer in a multi-location circuit with up to 9 coordinating remotes (without LEDs) or up to 4 matching remotes (with LEDs). The remote(s) will turn the load on (“at the level selected” for dimmers only) at the control. • Total minimum load must exceed 40W. • Dimmer may feel warm to the touch during normal operation. • Recommended minimum wall box depth is 2-1/2". • Maximum wire length from dimmer to all installed remotes cannot exceed 300 ft. • Use this device WITH COPPER OR COPPER ClAD WIRE ONly. Single Pole (One location) or 3-Way (Multi-location) Scene Capable Incandescent/Magnetic low Voltage or Fluorescent Dimmer Cat. No. VRMX1-1L, 1000VA, 1000W (Lighted) 120VAC, 60Hz INSTAllATION INSTRUCTIONS IMPORTANT: For 3-Way applications, note that one of the screw terminals from the old switch being removed will usually be a different color (Black) or labeled Common. Tag that wire with electrical tape and identify as the common (Line or Load) in both the dimmer wall box and remote wall box. For non-standard wiring applications, refer to Wire Nut and Connector Size Chart 1 - #12 w/ 1 to 3 #14, #16 or #18 2 - #12 w/ 1 or 2 #16 or #18 1 - #14 w/ 1 to 4 #16 or #18 2 - #14 w/ 1 to 3 #16 or #18 WIRE CONNECTOR / # OF COND. COMBINATION CHART DI-000-VRMX1-02A • Pull off pre-cut insulation from dimmer leads. • Make sure that the ends of the wires from the wall box are straight (cut if necessary). • Remove insulation from each wire in the wall box as shown. • For Single-Pole Application, go to Step 4a. • For 3-Way Coordinating Remote (no lEDs) Application, go to Step 4b. 3-Way Wiring with Coordinating Remote (no lEDs) Application: Step 4b Coordinating Remote Dimmer BK RD YL/R D 3 2 1 4 Terminal Screw marked White (WH) Terminal Screw marked Yellow/Red (YL/RD) 5 1 4 2 Black White Green Red 3 5 Yellow/ Red Hot (Black) Neutral (White) (PRIMARY SIDE OF MAGNETIC LOW-VOLTAGE TRANSFORMER) Dimmer Coordinating Remote (no LEDs) YL/RD Yellow/ Red RD White Red Black Black BKWH White Line 120VAC, 60Hz (unused) (unused) Green Ground Green Ground Tools needed to install your Dimmer: Slotted/Phillips Screwdriver Electrical Tape Pliers Pencil Cutters Ruler MUl TI-DEVICE APPlICATION In multi-dimmer installations, the reduction of the dimmer’s capacity is required. Refer to the chart for maximum load per dimmer. If installing Dimmer in a single device application, proceed with the INSTAllING yOUR DIMMER section. If installing Dimmer in a multi-device application, proceed as follows: Installing Dimmer by itself or with other devices: Changing the color of your Dimmer: Your device may include color options. To change color of the face proceed as follows: line up tabs and press in sides one at a time to attach Push in side at tab to release INSTAllING yOUR DIMMER NOTE: Use check boxes when Steps are completed. ONOFF ONOFF ONOFF ONOFF ONOFF ONOFF ONOFFONOFF ONOFF ONOFF ONOFF ONOFF WARNING: TO AVOID FIRE SHOCK OR DEATH; TURN OFF POWER at circuit breaker or fuse and test that power is off before wiring! Step 1 Step 2 Identifying your wiring application (most common): NOTE: If the wiring in your wall box does not resemble any of these configurations, consult an electrician. 2 4 3 1 Single Pole 1. Line (Hot) 2. Neutral 3. Ground 4. Load 3-Way 1. Line or Load (see important instruction) 2. Neutral 3. Ground 4. First Traveler – note color 5. Second Traveler – note color 2 4 1 5 3 Cut (if necessary) 5/8" (1.6 cm) Strip Gage (measure bare wire here) Preparing and connecting wires: Pull off pre-cut insulation from dimmer leads. Make sure that the ends of the wires from the wall box are straight (cut if necessary). Remove insulation from each wire in the wall box as shown: Step 3 (PRIMARY SIDE OF BALLAST) Dimmer Insulating Label Black Hot (Black)Black Line 120 VAC, 60Hz Neutral (White) Red Yellow/Red White White Green Ground Insulating label: This wire is used in 3-way installations only. For single pole installations, do not remove this insulating label. Y ellow/Red 1 4 2 Black White Green Red 3 Single Pole Wiring Application: Step 4a MAXIMUM BUlB WATTAGE Low-voltage dimmers are rated in Volt-Amps (VA). The maximum bulb watt…
Text truncated - open the document above for the full version.
External Photos
Side view Front view Side view Rear view
ID Label/Location Info
Label position on product
Test Report
FCC 47 CFR PART 15 SUBPART C INDUSTRY CANADA RSS-210 ISSUE 8 CERTIFICATION TEST REPORT FOR LEVITON MFG. CO. INC. 201 NORTH SERVICE ROAD MELVILLE, NY 11747 EUT LIGHT DIMMER MODEL NUMBER: VRMX1, VRR15, DZR15, VRS15, DZS15, DZMX1 FCC ID: QGH-VRMX1 IC: 2473A-VRMX1 REPORT NUMBER: 4786592274 ISSUE DATE: 2014-11-10 Prepared for LEVITON MFG. CO. INC. 201 NORTH SERVICE ROAD MELVILLE, NY 11747 Prepared by UL LLC 1285 WALT WHITMAN RD MELVILLE, NY 11747, U.S.A. TEL: (631) 271-6200 FAX: (877) 854-3577 REPORT NO: 4786592274 DATE: 2014-11-10 FCC ID: QGH-VRMX1 IC:2473A-VRMX1 Page 2 of 29 UL LLC FORM NO: CCSUP4701i 1285 WALT WHITMAN RD, MELVILLE, NY 11747, USA TEL: (631) 271-6200 FAX: (877) 854-3577 This report shall not be reproduced except in full, without the written approval of UL LLC Revision History Rev. Issue Date Revisions Revised By -- 2014- 11-10 Initial Issue Joseph Danisi REPORT NO: 4786592274 DATE: 2014-11-10 FCC ID: QGH-VRMX1 IC:2473A-VRMX1 Page 3 of 29 UL LLC FORM NO: CCSUP4701i 1285 WALT WHITMAN RD, MELVILLE, NY 11747, USA TEL: (631) 271-6200 FAX: (877) 854-3577 This report shall not be reproduced except in full, without the written approval of UL LLC TABLE OF CONTENTS 1. ATTESTATION OF TEST RESULTS ............................................................................................. 4 2. TEST METHODOLOGY .................................................................................................................. 5 3. FACILITIES AND ACCREDITATION .......................................................................................... 5 4. CALIBRATION AND UNCERTAINTY .......................................................................................... 5 4.1. MEASURING INSTRUMENT CALIBRATION ............................................................................. 5 4.2. SAMPLE CALCULATION ............................................................................................................ 5 4.3. MEASUREMENT UNCERTAINTY ............................................................................................... 5 5. EQUIPMENT UNDER TEST ............................................................................................................ 6 5.1. DESCRIPTION OF EUT .............................................................................................................. 6 5.2. MAXIMUM OUTPUT E-FIELD STRENGTH .............................................................................. 6 5.3. DESCRIPTION OF AVAILABLE ANTENNAS ............................................................................. 6 5.4. SOFTWARE AND FIRMWARE .................................................................................................... 6 5.5. WORST-CASE CONFIGURATION AND MODE ......................................................................... 6 5.6. DESCRIPTION OF TEST SETUP ................................................................................................ 7 6. TEST AND MEASUREMENT EQUIPMENT ................................................................................ 9 7. ON TIME, DUTY CYCLE AND MEASUREMENT METHODS ............................................... 11 7.1. ON TIME AND DUTY CYCLE RESULTS .................................................................................. 11 7.2. DUTY CYCLE PLOTS ................................................................................................................ 11 8. TEST RESULTS ............................................................................................................................... 11 8.1. 20 dB AND 99% BW ................................................................................................................... 12 8.2 RADIATED EMISSIONS............................................................................................................. 14 8.2.1 FUNDAMENTAL FREQUENCY RADIATED EMISSION ............................................ 15 8.2.2 HARMONICS AND SPURIOUS EMISSIONS ABOVE 1GHz ....................................... 16 8.2.3 WORST-CASE BELOW 1 GHz ........................................................................................ 17 8.2.4 WORST-CASE BELOW 30 MHz ...................................................................................... 18 9. AC MAINS LINE CONDUCTED EMISSIONS ............................................................................ 19 10. SETUP PHOTOS .......................................................................................................................... 23 REPORT NO: 4786592274 DATE: 2014-11-10 FCC ID: QGH-VRMX1 IC:2473A-VRMX1 Page 4 of 29 UL LLC FORM NO: CCSUP4701i 1285 WALT WHITMAN RD, MELVILLE, NY 11747, USA TEL: (631) 271-6200 FAX: (877) 854-3577 This report shall not be reproduced except in full, without the written approval of UL LLC 1. ATTESTATION OF TEST RESULTS COMPANY NAME: LEVITON MFG. CO. INC. 201 NORTH SERVICE ROAD MELVILLE, NY 11747 EUT DESCRIPTION: DIMMER MODEL: VRMX1, VRR15, DZR15, VRS15, DZS15, DZMX1 SERIAL NUMBER: Non- Serailized DATE TESTED: 2014-10-08 to 2014-11-10 APPLICABLE STANDARDS STANDARD TEST RESULTS CFR 47 Part 15 Subpart C Pass INDUSTRY CANADA RSS-210 Issue 8 Annex 8 Pass INDUSTRY CANADA RSS-GEN Issue 3 Pass UL LLC tested the above equipment in accordance with the requirements set forth in the above standards. All indications of Pass/Fail in this report are opinions expressed by UL LLC based on interpretations and/or observations of test results. Measurement Uncertainties were not taken into account and are published for informational purposes only. The test results show that the equipment tested is capable of demonstrating compliance with the requirements as documented in this report. Note: The results documented in this report apply only to the tested sample, under the conditions and modes of operation as described herein. This document may not be altered or revised in any way unless done so by UL LLC and all revisions are duly noted in the revisio…
Text truncated - open the document above for the full version.
Test Setup Photos
REPORT NO: 4786592274 DATE: 2014-11-10 FCC ID: QGH-VRMX1 IC:2473A-VRMX1 Page 23 of 29 UL LLC FORM NO: CCSUP4701i 1285 WALT WHITMAN RD, MELVILLE, NY 11747, USA TEL: (631) 271-6200 FAX: (877) 854-3577 This report shall not be reproduced except in full, without the written approval of UL LLC 10. SETUP PHOTOS ANTENNA PORT MEASUREMENT SETUP ANTENNA PORT PHOTO REPORT NO: 4786592274 DATE: 2014-11-10 FCC ID: QGH-VRMX1 IC:2473A-VRMX1 Page 24 of 29 UL LLC FORM NO: CCSUP4701i 1285 WALT WHITMAN RD, MELVILLE, NY 11747, USA TEL: (631) 271-6200 FAX: (877) 854-3577 This report shall not be reproduced except in full, without the written approval of UL LLC RADIATED RF MEASUREMENT SETUP FOR PORTABLE CONFIGURATION X-AXIS PHOTO Y-AXIS PHOTO REPORT NO: 4786592274 DATE: 2014-11-10 FCC ID: QGH-VRMX1 IC:2473A-VRMX1 Page 25 of 29 UL LLC FORM NO: CCSUP4701i 1285 WALT WHITMAN RD, MELVILLE, NY 11747, USA TEL: (631) 271-6200 FAX: (877) 854-3577 This report shall not be reproduced except in full, without the written approval of UL LLC Z-AXIS FRONT PHOTO REPORT NO: 4786592274 DATE: 2014-11-10 FCC ID: QGH-VRMX1 IC:2473A-VRMX1 Page 26 of 29 UL LLC FORM NO: CCSUP4701i 1285 WALT WHITMAN RD, MELVILLE, NY 11747, USA TEL: (631) 271-6200 FAX: (877) 854-3577 This report shall not be reproduced except in full, without the written approval of UL LLC RADIATED EMISSION BELOW 30 MHz RADIATED EMISSIONS ABOVE 30 MHz (FRONT) RADIATED EMISSIONS ABOVE 30 MHz (BACK) REPORT NO: 4786592274 DATE: 2014-11-10 FCC ID: QGH-VRMX1 IC:2473A-VRMX1 Page 27 of 29 UL LLC FORM NO: CCSUP4701i 1285 WALT WHITMAN RD, MELVILLE, NY 11747, USA TEL: (631) 271-6200 FAX: (877) 854-3577 This report shall not be reproduced except in full, without the written approval of UL LLC RADIATED EMISSION ABOVE 30 MHz RADIATED EMISSIONS ABOVE 30 MHz (FRONT) RADIATED EMISSIONS ABOVE 30 MHz (BACK) REPORT NO: 4786592274 DATE: 2014-11-10 FCC ID: QGH-VRMX1 IC:2473A-VRMX1 Page 28 of 29 UL LLC FORM NO: CCSUP4701i 1285 WALT WHITMAN RD, MELVILLE, NY 11747, USA TEL: (631) 271-6200 FAX: (877) 854-3577 This report shall not be reproduced except in full, without the written approval of UL LLC RADIATED EMISSION ABOVE 1000MHz RADIATED EMISSIONS ABOVE 1000 MHz (FRONT) RADIATED EMISSIONS ABOVE 1000 MHz (BACK) REPORT NO: 4786592274 DATE: 2014-11-10 FCC ID: QGH-VRMX1 IC:2473A-VRMX1 Page 29 of 29 UL LLC FORM NO: CCSUP4701i 1285 WALT WHITMAN RD, MELVILLE, NY 11747, USA TEL: (631) 271-6200 FAX: (877) 854-3577 This report shall not be reproduced except in full, without the written approval of UL LLC AC MAINS LINE CONDUCTED EMISSION END OF REPORT LINE CONDUCTED EMISSION (FRONT) LINE CONDUCTED EMISSION (BACK)
Contact Information
Applicant
Frank Tse(Manager)
Test Firm
UL LLCRick Titus
Technical Specifications
| # | Rule Parts | Frequency Range | Power Output |
|---|---|---|---|
| 1 | 15C | 908.4 MHz - 908.4 MHz | - |
Other Applications from Leviton Manufacturing Co., Inc.

QGH-B167601
Jun 25, 2020Lumina Wall Dimmer and Wireless Load Control Dimmer
Equipment Class
DTS - Digital Transmission System
QGH-B167602
Jun 25, 2020Lumina RF Wall Switch and Wireless Load Controller
Equipment Class
DTS - Digital Transmission System
QGH-PVDIM
Apr 07, 2020O5C04-IDW, O5C20-MDW, 06C04-IDW, 06C20-MDW, V6C04-IDW, V6C20-MDW
Equipment Class
DTS - Digital Transmission System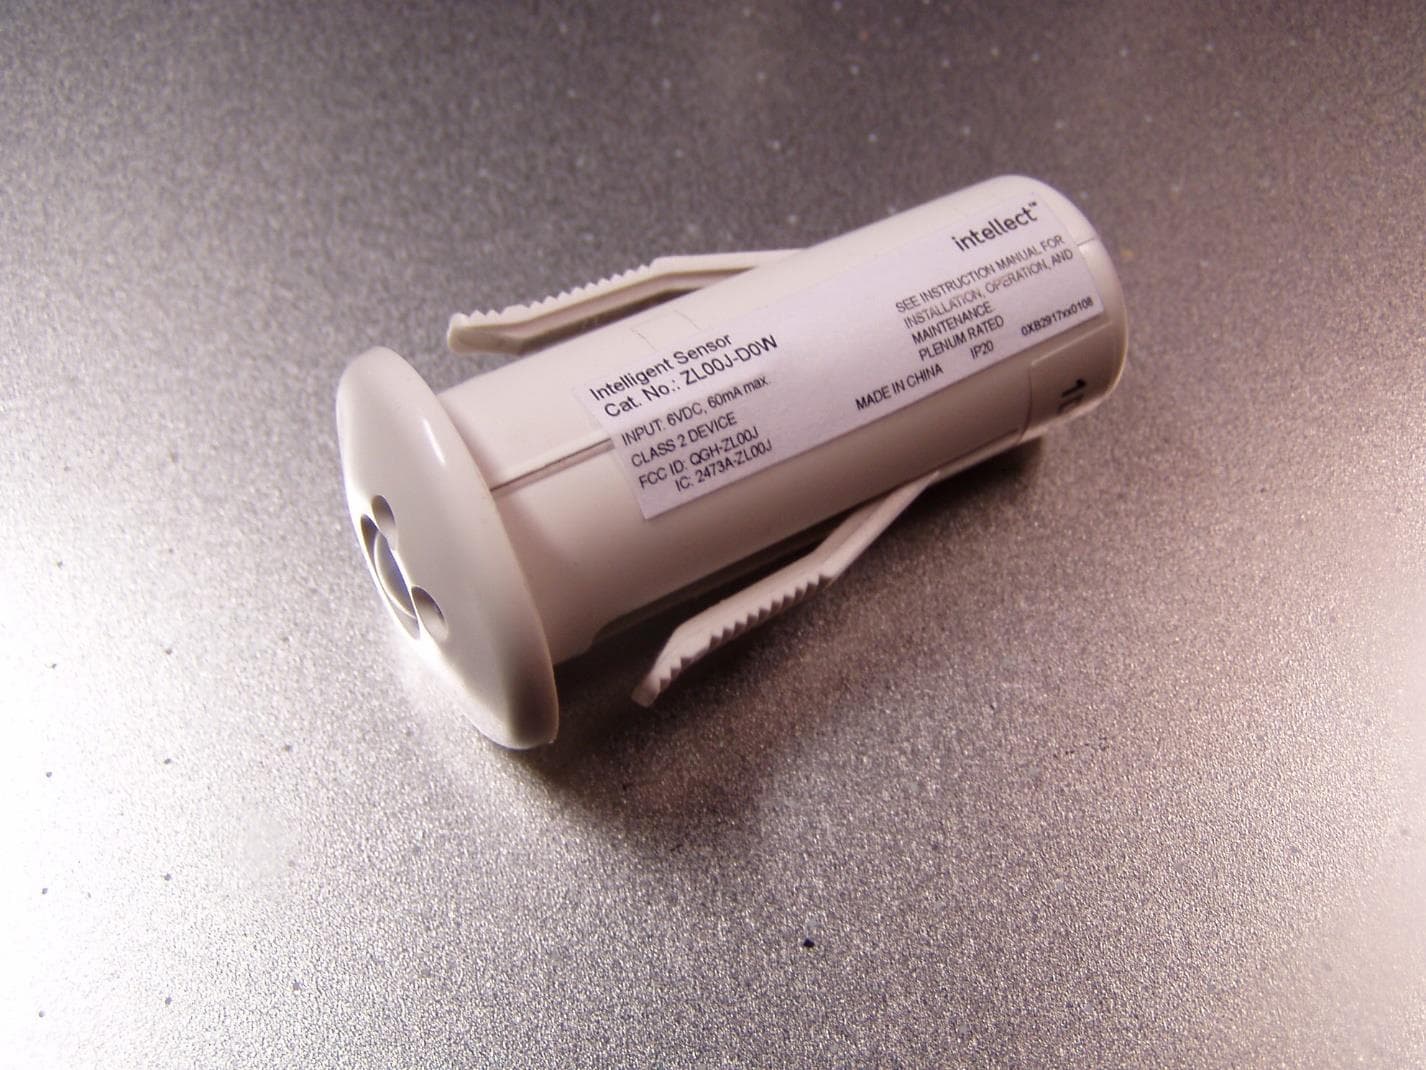
QGH-ZL00J
Apr 07, 2020ZL00J-D0W Intellect Sensor Head
Equipment Class
DTS - Digital Transmission System
QGH-ZBMG
Jan 02, 20200XB1803 Module
Equipment Class
DTS - Digital Transmission System