QTZUSAP1200B2.4 GHz 802.11 Access Point
Airespace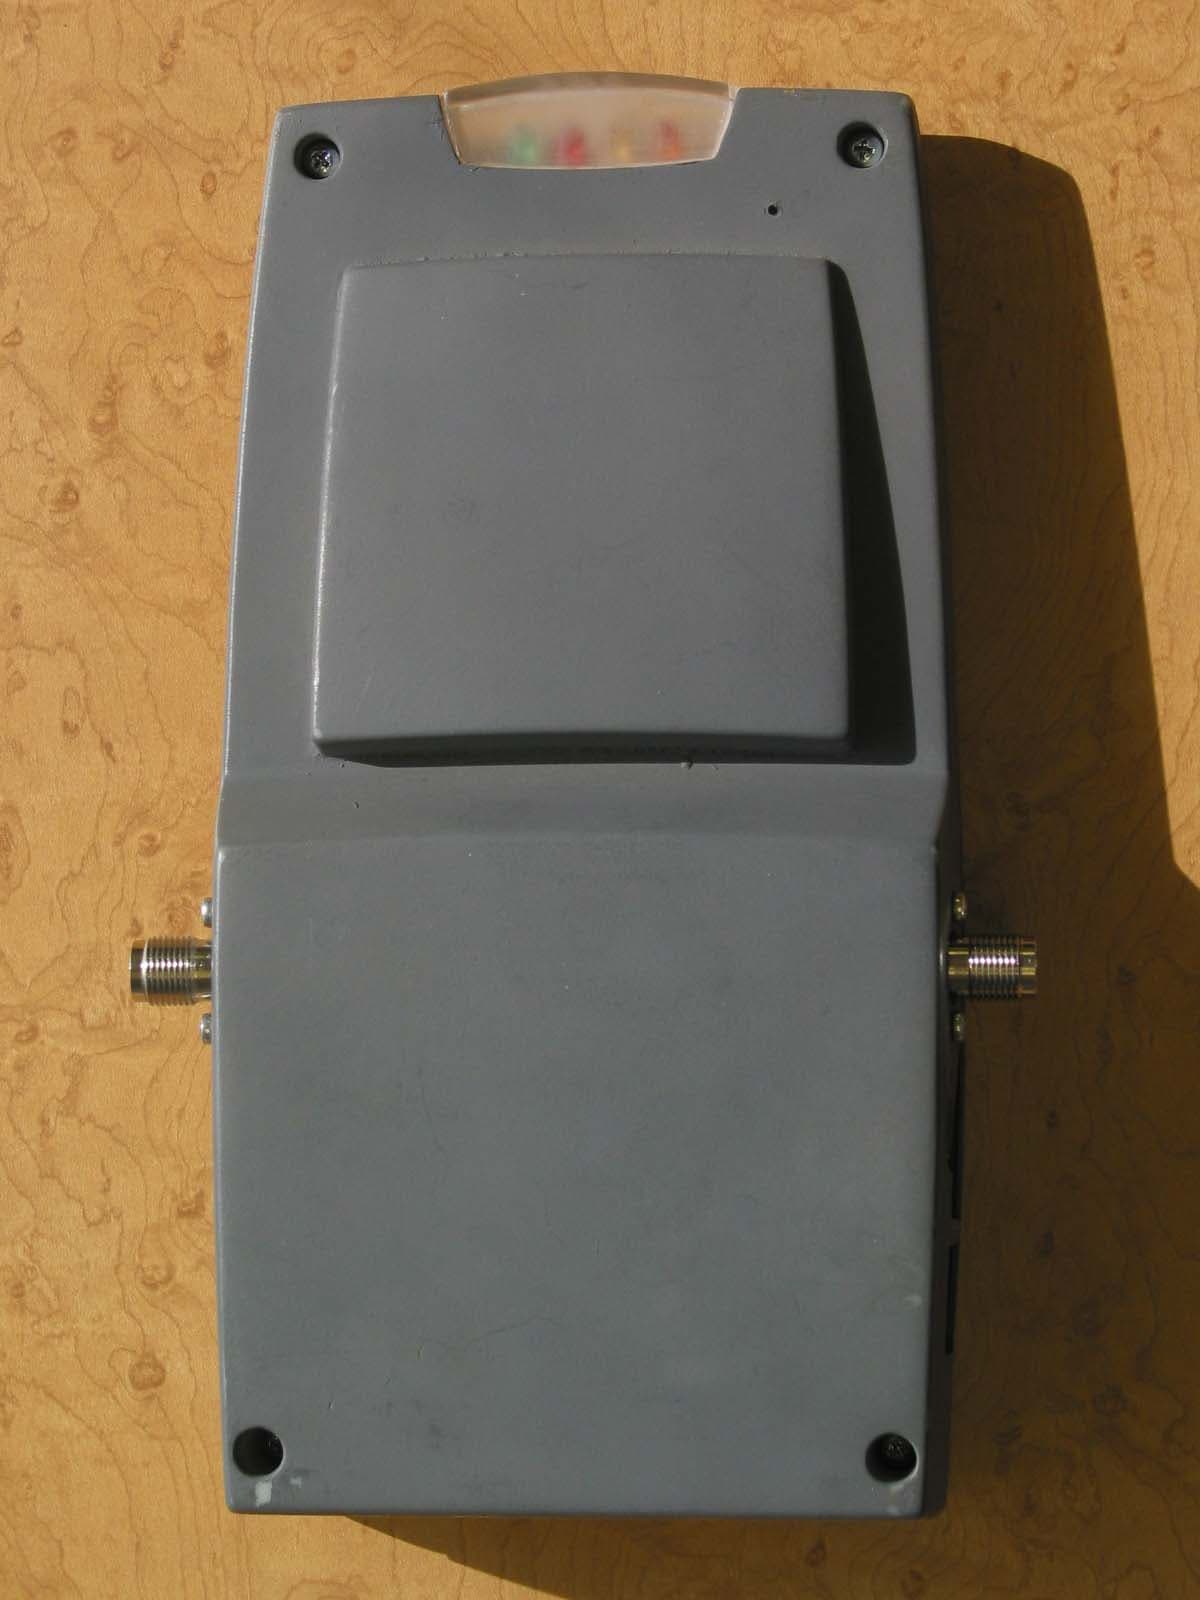
Click to zoom
Application Details
- Equipment Class
- DTS - Digital Transmission System
- Date of Grant
- Apr 03, 2003
- Application Purpose
- Original Equipment
- Date of Application
- Apr 03, 2003
- Equipment Note
- 2.4 GHz 802.11 Access Point
- Frequency Range
- 2412.00000000 - 2462.00000000
- Company
- Airespace
- Country
- United States
Documents & Files
Document Text
Text extracted from the exhibit documents filed with the FCC. Open a document above to read the original.
Users Manual
Copyright © 2003 Airespace, Inc. All Rights Reserved. 1 Airspace Access Point (AP) Installation Guide Airespace System 1.0: March 17, 2003 Airespace, Inc. 110 Nortech Parkway San Jose, CA 95134 1-408-635-2000 www.airespace.com Copyright © 2003 Airespace, Inc. All Rights Reserved. 2 Legal Information Disclaimer Airespace™ and Airespace AP™ are trademarks of Airespace, Inc. All other trademarks, service marks, and product names used in this document are the property of their respective owners. U.S.A. Government Restricted Rights (tbd) Applicable Laws (tbd) Copyright © 2003 Airespace, Inc. All Rights Reserved. 3 FCC Statements This equipment has been tested and found to comply with the limits for a Class A digital device, pursuant to Part 15 of the FCC Rules. These limits are designed to provide reasonable protection against harmful interference when the equipment is operated in a commercial environment. This equipment generates, uses, and can radiate radio frequency energy and, if not installed and used in accordance with the instruction manual, may cause harmful interference to radio communications. Operation of this equipment in a residential area is likely to cause harmful interference in which case the user will be required to correct the interference at his own expense. RF Radiation Hazard Warning To ensure compliance with FCC RF exposure requirements, this device must be installed in a location such that the antenna of the device will be greater than 20 cm (8 in.) from all persons. Using higher gain antennas and types of antennas not covered under the FCC certification of this product is not allowed. Note: No 802.11a external antennas are currently certified or available in this release. Contact Airespace, Inc. for a list of FCC-approved 802.11b external antennas. Installers of the radio and end users of the system must adhere to the installation instructions provided in this manual. Non-Modification Statement Use only the supplied internal antenna, or external antennas supplied by the manufacturer. Unauthorized antennas, modifications, or attachments could damage the badge and could violate FCC regulations and void the user’s authority to operate the equipment. Copyright © 2003 Airspace, Inc. All Rights Reserved. 4 Table of Contents Airspace Access Point (AP) Installation Guide 1 Legal Information 2 Disclaimer 2 Trademarks and Service Marks 2 U.S.A. Government Restricted Rights 2 Applicable Laws 2 FCC Statements 3 RF Radiation Hazard Warning 3 Non-Modification Statement 3 Table of Contents 4 About this Guide 5 About the Airespace Access Point 6 About Airespace AP Models and Upgrade Card 9 About the Airespace AP 802.11a Radio Card 10 About Internal and External Airespace AP Antennas 11 About Airespace AP LEDs 12 About Airespace AP Connectors 13 About Airespace AP Physical Security 14 About Power Over Ethernet 15 Installing Airespace APs 16 Planning Airespace AP Locations 17 Mounting Airespace APs 18 Copyright © 2003 Airespace, Inc. All Rights Reserved. 5 About this Guide The Airespace Access Point (AP) Installation Guide allows installation planners, network administrators, and installers to work together to install Airespace APs in a target environment. Refer to the following sections for more information about the Airespace AP. Copyright © 2003 Airespace, Inc. All Rights Reserved. 6 About the Airespace Access Point The Airespace AP is a part of the innovative Airespace System. When associated with an Airespace 4000 Switch as shown in the following figure, the Airespace AP provides advanced 802.11a and/or 802.11b AP functions in a single sleek enclosure, including unmatched scalability and security solutions for enterprises and Wireless ISPs. In the Airespace System, most of the processing power is removed from a traditional AP to the Airespace Switch. Airespace Switch and APs Copyright © 2003 Airspace, Inc. All Rights Reserved. 7 The following figure shows an Airespace AP with the optional ceiling mount base. Airespace AP with Ceiling Mount Base Refer to the following for more information on Airespace APs: • Airespace AP Models • Airespace AP 802.11a Radio Cards • Internal and External Airespace AP Antennas • About Ethernet Cabling • Airespace AP LEDs • Airespace AP Connectors • Airespace AP Power Requirements • Airespace AP External Power Converter • About Power Over Ethernet (PoE) • Airespace AP Physical Security • Airespace AP Automatic Software Upgrades • Airespace AP Specifications • Installing Airespace APs Copyright © 2003 Airspace, Inc. All Rights Reserved. 8 Copyright © 2003 Airespace, Inc. All Rights Reserved. 9 About Airespace AP Models and Upgrade Card The Airespace AP includes one 802.11a radio (1200A), one 802.11b radio (1200B), or one 802.11a and one 802.11b radio (1200AB). As an added feature, the 1200B Airespace AP can be updated by the customer with an 802.11a radio, allowing for current 802.11b coverage and future 802.11a coverage by the same Airespace AP. Refer to the Airespace AP 802.11a Radio Card section for information on the field-installable radio that adds 802.11a capability to an existing 802.11b Airespace AP. The Airespace AP comes in the following configurations: • Model 1200A - Airespace AP with one 802.11a radio and two high-gain internal antennas • Model 1200B - Airespace AP with one 802.11b radio and four high-gain internal antennas; can be upgraded to a 1200AB by adding an 802.11a Radio Card • Model 1200AB - Airespace AP with one 802.11a and one 802.11b radio and four high-gain internal antennas The following upgrade card is also available: • 802.11a Radio Card - Add this card to a 1200B to create a 1200AB Airespace AP The Airespace AP is shipped with a color-coordinated ceiling mount base, and projection and flush wall mount brackets. These brackets and base allow quick mounting to ceiling, wall or pole: • Ceiling Mounting Kit - Allows you to mount the Airespace AP on any horizontal surface • Flush Wall Mount Kit - Allows you to mount the Airespa…
Text truncated - open the document above for the full version.
Attestation Statements
3/18/03Copyright © 2003, Airespace, Inc. All Rights Reserved. Airespace AP 802.11a Radio Card Quick Installation Guide Airespace AP 802.11a Radio Card Quick Instal- lation Guide System Release 1.1 Overview This guide is designed to provide professional installers with the information needed to install an Airespace AP 802.11a Radio Card in a 1200B Airespace Access Point to create a 1200AB Airespace Access Point. WARNING: DO NOT attempt to install the Airespace AP 802.11a Radio Card if you are not a professional installer certified by Airespace, Inc. to perform this installation. If you perform this installation without Airespace, Inc. certification, you will void the FCC certification for the resulting 1200AB Airespace AP, and will be in violation of FCC regula- tions. (See FCC Statements for Airespace AP in the Airespace Product Guide for additional information.) The following figure shows a typical 802.11a Radio Card. Figure - Typical Airespace AP 802.11a Radio Card Continue with Step 1: Collecting Required Tools and Materials. 3/18/03Step 1: Collecting Required Tools and Materials2 Step 1: Collecting Required Tools and Materials Step 1: Collecting Required Tools and Materials •Airespace AP 802.11a Radio Card kit -- includes 802.11a Radio Card and replacement FCC label. •Correct Security Torx screwdriver (exact size to be determined). •1200B Airespace Access Point to be upgraded to a 1200AB Access Point. See Airespace AP Models for more information. •A power source for the Airespace AP: -Either an Airespace AP External Power Converter, or -A connection from an 802.3af-compliant Power Over Ethernet device. •A separate WiFi-approved device (such as Air Magnet) used to detect and verify 802.11a transmissions. Continue with Step 2: Setting up an ESD Workspace. 3/18/03Step 2: Setting up an ESD Workspace3 Step 2: Setting up an ESD Workspace Step 2: Setting up an ESD Workspace You need an Electrostatic Discharge (ESD) workspace to complete this instal- lation. Because the 802.11a Radio Card is very sensitive to electrostatic discharge, you can destroy it by not following ESD procedures. Caution: DO NOT attempt to install the Airespace AP 802.11a Radio Card if you do not have an ESD workplace, or you may destroy the 802.11a Radio Card. Continue with Step 3: Opening the Airespace AP Case. 3/18/03Step 3: Opening the Airespace AP Case4 Step 3: Opening the Airespace AP Case Step 3: Opening the Airespace AP Case •If necessary, remove any brackets and/or mounting bases from the bottom of the Airespace AP. •Use your Security Torx screwdriver to remove the two screws securing the Airespace AP door. Save the two screws for later reuse. Figure - Airespace AP Screw Locations 3/18/03Step 3: Opening the Airespace AP Case5 •Remove the Airespace AP door. Note that the 1200B has two RF cable ends taped to the inside of the case, one labeled “1” and the other labeled “2”. •Remove the tape to release the two RF cable ends. Figure - Airespace AP with Door Removed Continue with Step 4: Installing the 802.11a Radio Card. 3/18/03Step 4: Installing the 802.11a Radio Card6 Step 4: Installing the 802.11a Radio Card Step 4: Installing the 802.11a Radio Card •Take a moment to ensure that your ESD workspace is secure: wrist strap, desktop mat, floormat and/or heel strap properly grounded. Caution: Even if you are working at an ESD workspace, you can still damage the 802.11a Radio Card. Make sure you pick up the 802.11a Radio Card by the edges as shown in the following figure, and do not touch the connector fingers. Figure - Holding the 802.11 Radio Card by the Edges •Remove the 802.11a Radio Card from its kit and position the card on the edge of the Airespace AP case as shown in the previous figure. 3/18/03Step 4: Installing the 802.11a Radio Card7 •While holding the 802.11a Radio Card on the edge of the Airespace AP, gently snap the RF cable labeled “1” onto the RF connector nearest the corner of the 802.11a Radio Card. When you are done, the assembly should look as follows: Figure - 802.11a Radio Card with RF Cable "1" Attached 3/18/03Step 4: Installing the 802.11a Radio Card8 •Rotate the AP 802.11a Radio Card and position the card on the middle of the Airespace AP case as shown in the next figure. •While holding the 802.11a Radio Card on the middle of the Airespace AP, gently snap the RF cable labeled “2” onto the RF connector nearest the center of the 802.11a Radio Card. •When you are done, the assembly should look as follows: Figure - 802.11a Radio Card with RF Cables "1" and "2" Attached 3/18/03Step 4: Installing the 802.11a Radio Card9 •Carefully rotate the 802.11a Radio Card as shown in the following figure. •Make sure the RF cables are not pinched under the 802.11a Radio Card (small arrow). •Position the 802.11a Radio Card against its mating connector at a shallow angle (large arrow). •Gently press the 802.11a Radio Card all the way into its mating connector until it bottoms out in the connector (large arrow). Figure - Positioning the 802.11a Radio Card in the Airespace AP Case 3/18/03Step 4: Installing the 802.11a Radio Card10 •When you are done, make sure the RF cables are not pinched, and gently snap the 802.11a Radio Card into its retaining detents as shown in the next figure. Figure - Gently Snapping the 802.11a Radio Card into its Retaining Detents 3/18/03Step 4: Installing the 802.11a Radio Card11 •When you are done, the 802.11a Radio Card is secured in its retaining detents as shown in the following figure. Figure - 802.11a Radio Card Installed in the Airespace AP Case You have installed the 802.11a Radio Card in the Airspace AP. Continue with Step 5: Verifying 802.11a Operation. 3/18/03Step 5: Verifying 802.11a Operation12 Step 5: Verifying 802.11a Operation Step 5: Verifying 802.11a Operation You have added 802.11a functionality to a 1200B Airespace AP. Perform the following to verify correct 802.11a operation. •Enable the Site Survey function by placing the factory-supplied jumper across both of the Si…
Text truncated - open the document above for the full version.
Attestation Statements
To: Federal Communications Commission 7435 Oakland Mills Road Columbia, Maryland 21046 Subject: Upgrade process for the AP1200 IEEE802.11 B only radio The purpose of this letter is to outline for the commission the process that will be used to upgrade the AP 1200B radio from an IEEE802.11 B radio to a dual band IEEE802.11 A/B radio. Airespace’s method for addressing the upgrade is outlined below. If additional information is required, please contact me. Best Regards, David Waitt Consultant representing Airespace [email protected] Upgrading from 802.11 B to 802.11 A/B This grant is for an 802.11 B radio. It is possible to upgrade the radio to a dual band 802.11 A /B radio by installing an additional 802.11 card in the open slot within the radio. Airespace understands the FCC concerns regarding “User Upgrades”. In order to assure that the Airespace radios remain compliant after an upgrade from 802.11 B only to 802.11 A/B has been performed Airespace will handle upgrades in the following manner. Airespace is in the process of negotiating contracts with different contractors qualified to install and perform the upgrade. Once an agreement between Airespace and the contractor is reached, Airespace will instruct and certify the contractor to perform the upgrade. The contractor will then be placed on an “Airespace Approved List” on upgrade contractors. The end user (typically an IT department) of the Airespace radio will then be instructed that in order for the network to remain FCC compliant, any “multi-band” upgrade effort must be performed by one of the Airespace qualified contractors in their area. 110 Nortech Parkway San Jose, CA, 95134 The upgrade process will consist of two basic steps: 1: Installing the module: To preclude the opening of the access door by someone other than the trained professional responsible for upgrading/maintaining the system, Airespace has elected to secure the access door with “Security hardware” that can only be removed using very specialized tools not available at local hardware stores. It should be noted that removal of the access door only allows access to the various connectors to allow installation of an 802.11A card. It does NOT allow access to the antennas inside the device. The contractor will open the radio via the access door and simply install a 802.11 module in the “A” slot of the radio. Connect the internal coax cables to the module and re-install the access door. 2: Re-labeling the device: The 802.11 A/B devices have been previously certified as FCC ID QTZVAP1200. The FCC ID on the device will be changed by installing a new FCC ID label over the old one. This will essentially change the FCC ID of the device from QTZUSAP1200B (B only) to QTZVAP1200 (A/B).
Cover Letter(s)
To: Federal Communications Commission 7435 Oakland Mills Road Columbia, Maryland 21046 Subject: Authorization of David Waitt to act on our behalf and as our agent for preparation of certification applications and responses to inquiries. Gentlemen, This is a letter of authorization to accept David Waitt who is a independent consultant who’s services have been retained by Airespace to sign applications before the commission on our behalf, to make representations to you on our behalf and to receive and exchange data between our company and the Commission in connection with the certification of the following Airespace product(s): Multiple versions of the Airespace Access point (VAP) 1200 FCC ID: QTZVAP1200 FCC ID: QTZUSAP1200A FCC ID: QTZUSAP1200B Under FCC Docket number 20780 and General Docket Number 80-284 pursuant to Part 15 of the FCC Rules and Regulations. If you have any further questions or need additional information, please feel free to contact me at (408) 941-0500 (Orig on file) Dec 2002 Bob Friday Date Sr. Scientist 110 Nortech Parkway San Jose, CA, 95134
Cover Letter(s)
To: Federal Communications Commission 7435 Oakland Mills Road Columbia, Maryland 21046 Subject: Confidentiality Request for Certification Application Gentlemen, On behalf of Airespace I request that the following documents associated with the Part 15 Certification application for FCC ID: QTZUSAP1200B be withheld from public disclosure per Section 0.459 of the FCC Rules. Any/All circuit schematics. Any/All electrical block diagrams Any/All parts lists This request is made under the provisions of Section 0.457(d) of the FCC rules and Sections 552(b)(4) of the Freedom of information Act. These Sections authorize withholding from public inspection, materials which would be privileged as a matter of law if retained by the person submitting them in addition to materials, which would not customarily be released to the public, by that person. If you have any questions, please do not hesitate to contact me at: [email protected] or (408) 832-7053 Sincerely, David Waitt Consultant representing Airespace 110 Nortech Parkway San Jose, CA, 95134
Cover Letter(s)
To: Mr. Tim Johnson, American TCB From: David Waitt, Airespace Subject: Inquiries regarding Certification application for FCC ID QTZVAP1200B Date: 1 April 2003 Tim, Below are the replies to your inquiries regarding this application. The answers are numbered corresponding to your inquiries in your letter dated 24 March 2003. If something is unclear, or if you have additional concerns, please contact me. Best Regards, David Waitt Consultant representing Airespace ATCB 1) Please provide a sample label for this device. The labeling exhibit did not include this. Airespace: There was an error that occurred when converting to PDF. A new PDF file has been generated which shows the label and has been uploaded to the ATCB site. ATCB 2) This submittal appears to contain information regarding external antennas. However, it is not certain how the external antennas connect internally to the device. Please explain and provide photographs as necessary. Airespace: The external antennas do not connect to the device internally. The external antennas will connect to the reverse TNC connectors located on the radio and accessible from the outside of the radio. These connectors are visible on the external product photos. When an external antenna is connected, the radio configuration (software) will have to be used to in order to select the external antenna. This configuration change will switch the radio internal RF switch to connect to the external connectors. ATCB 3) Please explain if the firmware or software of this device must be upgraded when the 802.11a card is installed. This does not appear to be addressed within the installation information. Airespace: No. the firmware will automatically detect the presence of a card in the ‘A’ slot once it is installed. No firmware upgrade is required. ATCB 4) Please provide a users manual for this device. This manual must include appropriate FCC statements and RF exposure information. Airespace: The user manual was accidentally omitted from the original application. It has been uploaded to the ATCB site. ATCB 5) The power measured shown on page 4 of the main report shows measuring at the antenna connector. However the RF exposure lists 6.8 dBi instead of 7.8 dBi gain for the antenna path which is assumed to be before the switch. Please confirm as the last application it was assumed to be measured before the switch. Please updated any exhibits affected. Airespace: Correct. The gain should have been 7.8 dBi in the MPE calculation, not 6.8 dBi. The MPE calculation has been re-done and uploaded to the ATCB site. ATCB 6) The sample calculation given on page 16 of 18 of the external antenna report does not match the table. Additionally, page 17 of 18 does not show plots that it references. Airespace: The sample calculation has been edited to show the correct values and the missing plots have been inserted into the report. ATCB 7) The BOM contains 2 RF TX Cards. This device only contains 1 TX card. Please explain. Airespace: The incorrect BOM was accidentally submitted with this application. The correct BOM has been uploaded to the ATCB site. ATCB 8) Please provide a schematic for this device. The schematic provided only contained a block diagram. Airespace: A more detailed schematic has been uploaded to the ATCB site 802.11 mini PCI module 2.4GHz Coax FET Switch Approx -1dB Trace Patch Antenna, 7.8 dBi Trace Agilent Pk power meter Power Head The power measured at this point is equivalent to the power into the antenna BSN Access Point Radio
Cover Letter(s)
To: Mr. Tim Johnson, American TCB From: David Waitt, Airespace Subject: Inquiries regarding Certification application for FCC ID QTZUSAPAP1200B Date: 1 April 2003 Tim, Below are the replies to your inquiries regarding this application. The answers are numbered corresponding to your inquiries in your letter dated 24 March 2003. If something is unclear, or if you have additional concerns, please contact me. Best Regards, David Waitt Consultant representing Airespace ATCB 2) This submittal appears to contain information regarding external antennas. However, it is not certain how the external antennas connect internally to the device. Please explain and provide photographs as necessary. Airespace: The reverse TNC connectors used to support the use of external 2.4GHz antennas are connected to the main circuit board in the radio via short coaxial cables shown in the photos below. Note that the hardware is in place to support external 5 GHz antennas; however the configuration software does not support use of external 5 GHz antennas. Currently, until authorized by the commission, configuring the radio to operate with external 5GHz antennas is not possible. The photos on the next page illustrate the internal cables. These cables connect the main PCB to the external 2.4 GHz antenna connectors Cables used to connect the main PCB to the 2.4 GHz external antennas connectors 5GHz external antenna connector, in place, but not suppoorted by the configuration software.
External Photos
External Product Photos, Airespace VAP1200, FCC ID: QTZUSAP1200B 10 Feb 2003 VAP1200 External View, Side 1 VAP1200 External View, Side 2 Reverse TNC’s – to allow connection of external antennas VAP1200B Left Side The hole shown in the photo will not be present in the production version of the radio. It will house a reverse TNC connector that will eventually allow a external 5GHz antenna once certified with the commission. At the present time the connector will not be functional until certified. Will be used for an ext 5GHz antenna VAP1200B Right Side This hole will not be present in the production version of the VAP1200, This is an error in the prototype housings. VAP1200B Bottom View
External Photos
Addendum to EMI Test Report and Technical Documentation on Airespace Access Point. Model: 1200B FCC ID: QTZUSAP1200B 2.4 GHz External Antenna(s) Pictures and data sheets Prepared by: David Waitt 202 Calvert Drive #217 Cupertino, Ca. 95014 [email protected] (408) 832 7053 110 Nortech Parkway San Jose, California, 95134 Features: Specifications: Element Type Air-Loaded Patch Frequency Range 2400-2500 MHz Peak Gain 3 dBi Polarization 1 Linear Impedance 50 ohms Maximum Input Power 50 watts VSWR (Min. Performance) 1.5:1 Connector Customer Choice Dimensions (cm) 6.4 x 6.3 x 1.7 cm Housing Coating Material ABS Operating Temperature -40º to +70ºC Storage Temperature -40º to +70ºC Includes a low-loss, RG 142, plenum rated “pigtail” cable. 1 Contains both vertical and horizontal components, the ratio of which varies with the spatial location. Cables & Connectors: Part Number Cable Connector CAF94101 12” RG-142 Plenum Rated Coax SMA-Male CAF94170 12” RG-142 Plenum Rated Coax N-Female CAF94150 36” RG-142 Plenum Rated Coax RP-TNC CAF94144 36” RG-142 Plenum Rated Coax RP-TNC 2400 MHz Sphere Part Number (P/N): CAF94101 CAF94170 CAF94150 CAF94144 2400 MHz Sphere – 10/30/02 Omnidirectional Antenna Omnidirectional antenna provides a considerable gain improvement over traditional dipole antennas, within a remarkably small case that perfectly blends into any environment. It is particularly applicable in environments such as offices and hospitals, where aesthetics are critical to successful wireless deployment and wide angle coverage is necessary. For easy installation, the Sphere quickly attaches to a ceiling tile frame with a standard metal clip. Azimuth Plane Cut perpendicular to the antenna and perpendicular to the cable Elevation Plane Cut perpendicular to the antenna alon g the cable axis Omni Plane Cut in the plane of the antenna parallel to the cable Sphere 2400 Xertex Products Reliability Without the Expense... FEATURES & OPTIONS: In-Building Reliable coverage is always a priority in streamlining the effectiveness of wireless devices. This is especially crucial in commercial, office, campus and residential environments that strive to cover a multitude of users in an open space or long corridor. Centurion’s Whisper directional and Terrace bi-directional antennas offer an affordable option for in-building antenna systems. Our innovative designs blend into any atmosphere and provide excellent coverage in high traffic areas. WHI SPER - Directional Antenna • Self contained in a durable sleek radome, the Whisper is designed to blend in anywhere - residential, campus or commercial • Inexpensive yet reliable, the Whisper utilizes Centurion's patented technology to achieve maximum efficiency. • Typical applications include wireless local loop, in-building wireless (voice and data), WLAN, DECT, WPBX, and broadband Internet access. TERRACE - Bi-directional Antenna • Utilizes a patented low-profile design to provide coverage in corridors or long hallways • Provides outstanding performance in healthcare and office environments, where a long hallway presents a design or coverage challenge DIRECTIONAL/BI-DIRECTIONAL ANTENNAS AntennasA www.centurion.com Telematics 802.11/Bluetooth In-Building Mobile Phones LMR Power Specifications subject to change without notice Copyright © 2001 Centurion Wireless Technologies, Inc. All Rights Reserved www.centurion.com 3425 N.44th St., LINCOLN, NE 68504 USA SALES PHONE 800.228.4563 • SALES FAX 800.826.3774 INTERNATIONAL PHONE 402.474.0706 • FAX 402.467.4528 In-Building DIRECTIONAL/BI-DIRECTIONAL ANTENNAS All centurion products are designed for maximum efficiency and are customizable and scalable to meet your frequency and application requirements. SPECIFICATIONS: PATTERNS: As displayed in these typical patterns, In-Building Directional and Bi- Directional antennas offer superior high-gain reception over a broad area. General specifications for In-Building Directional and Bi-Directional Antennas: ELEMENT TYPE Air-Loaded Patch FREQUENCY RANGE 806-2500 MHz PEAK GAIN 5.0-9.0 dBi POLARIZATION 1 Linear IMPEDANCE 50 ohms MAXIMUM INPUT POWER 50 watts FRONT/BACK RATIO 18-20 dBi VSWR (MIN. PERFORMANCE) 1.5:1-2.0:1 RADOME MATERIAL (INDOOR) ABS or Luran RADOME MATERIAL (OUTDOOR) Kydex 2 or Luran 2 1 Polarization axis is parallel to the cable axis, or along the long axis of the antenna for models without cable pigtails. 2 UV tolerance rated to 7 years of outdoor exposure. AZIMUTH PLANE cut perpendicular to the antenna and perpendicular to the cable ELEVATION PLANE cut perpendicular to the antenna along the cable axis OMNI PLANE Spherical Projection AZIMUTH PLANE cut perpendicular to the antenna and perpendicular to the cable ELEVATION PLANE cut perpendicular to the antenna along the cable axis OMNI PLANE cut perpendicular to the antenna along the cable axis TYPICAL WHISPER ANTENNA PATTERNS TYPICAL TERRACE ANTENNA PATTERNS Elevation Azimuth Centurion 2.4 GHz 3dBi (#94150) antenna Centurion 2.4 GHz 5dBi (#94149) antenna
ID Label/Location Info
To: Office of Engineering and Technology Federal Communications Commission 445 12TH ST SW Washington DC 20554 Re: FCC ID: QTZUSAP1200B Certification Application. Regulatory Compliance Label Drawing Gentlemen, The label shown below will appear on the Airespace Access point 1200B and will be located on the bottom of the unit as shown.. PRELIMINARY 110 Nortech Parkway San Jose, CA, 95134 Pre-Printed Label Size – 1 by 2 inches Color –White Location – Bottom of the unit Airespace 1200 110 Nortech Parkway San Jose, CA 95134 USA 408 - 635 - 2000 www.airespace.com Power Input: 48V == 250 mA This device complies with Part 15 of the FCC rules. See manual before use FCC ID: QTZUSAP1200B Can: 4518AUSAP1200B 218920
Internal Photos
Internal Product Photos, Airespace VAP1200B, FCC ID: QTZUSAP1200B 10 Feb 2003 Main PCB, Side 1 removed from housing showing 802.11 A expansion slot Antenna Detail, Main PCB Side 1 2.4 GHz Antenna, PCB Side 1 5 GHz Antenna, PCB Side 1 – used only if 802.11 A upgrade module is installed Main PCB, Side 2 with 802.11 B module installed Detail of 802.11 B module installation, Side 2 Main PCB, Side 2 with 802.11 B module removed Antenna detail, Side 2 5 GHz Antenna 2.4 GHz Antenna Used only if 802.11 A upgrade module is installed RF Module, Side 1, w/ Shield RF Module, Side 2, W/ Shield RF Module, Side 1, w/o shield RF module, Side 2 w/o Shield
Operational Description
Airespace. Part 15 Certification for QTZVAP1200 The Airespace radio is an IEEE 802.11 B Access point (AP) intended to be professionally installed and configured in corporate and industrial environments. The device utilizes a mini PCI module manufactured by an outside vendor. At the time of this certification the module had not received FCC approval as a module. For this reason that Airespace is pursuing its own certification. ). The AP essentially includes only a single 2.4GHz patch antenna. There are actually two internal 2.4 GHz antennas. The AP switches rapidly between them and when a signal is detected, the VAP uses the antenna offering the best connection. At any one time, there is only one antenna connected to the module. Additionally, the VAP includes two integral 5 GHz patch antennas pointing 180 o from each other to create a somewhat omni directional 5GHz pattern. The 5 GHz antennas are built into the unit to allow the unit to be upgraded to an 802.11 A/B access point. (See Upgrade Process letter included in this application) The effective gain of the 2.4 GHz …
Text truncated - open the document above for the full version.
Contact Information
Applicant
Bob Friday(Sr. Scientist)
Technical Contact
Non-Technical Contact
ConsultantDavid Waitt
[email protected]408-832-7053
Test Firm
Elliott Laboratories LLCDavid Bare
Technical Specifications
| # | Rule Parts | Frequency Range | Power Output |
|---|---|---|---|
| 1 | 15C | 2.41 GHz - 2.46 GHz | 34.00 mW |
Other Applications from Airespace
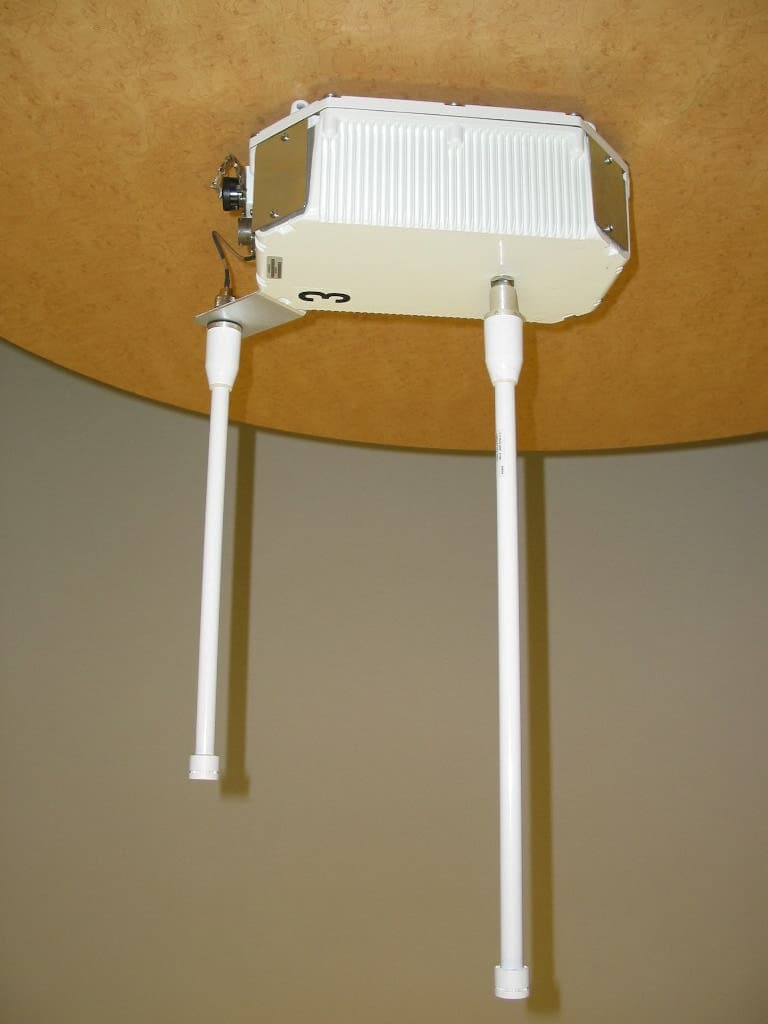
QTZ1300
Mar 30, 2005Outdoor Access Point
Equipment Class
DTS - Digital Transmission System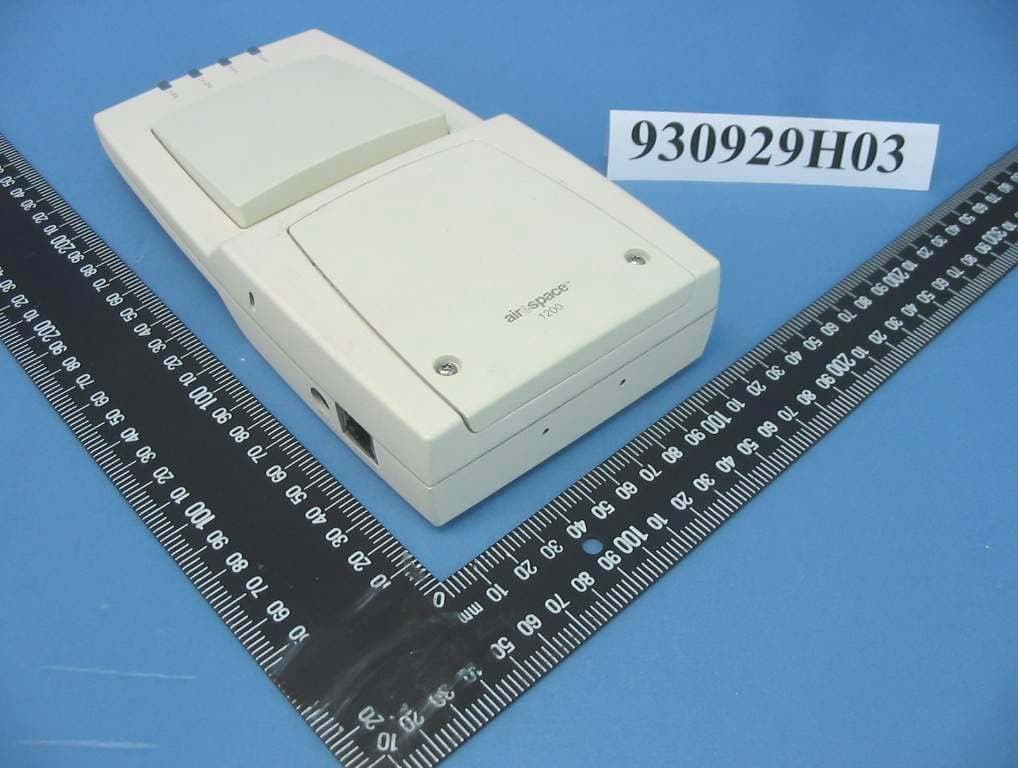
QTZ1200D
Dec 16, 2004IEEE 802.11 a/g Wireless LAN Access Point
Equipment Class
NII - Unlicensed National Information Infrastructure TXQTZ1200W
Jun 19, 2004802.11 Dual Band Access Point
Equipment Class
DTS - Digital Transmission System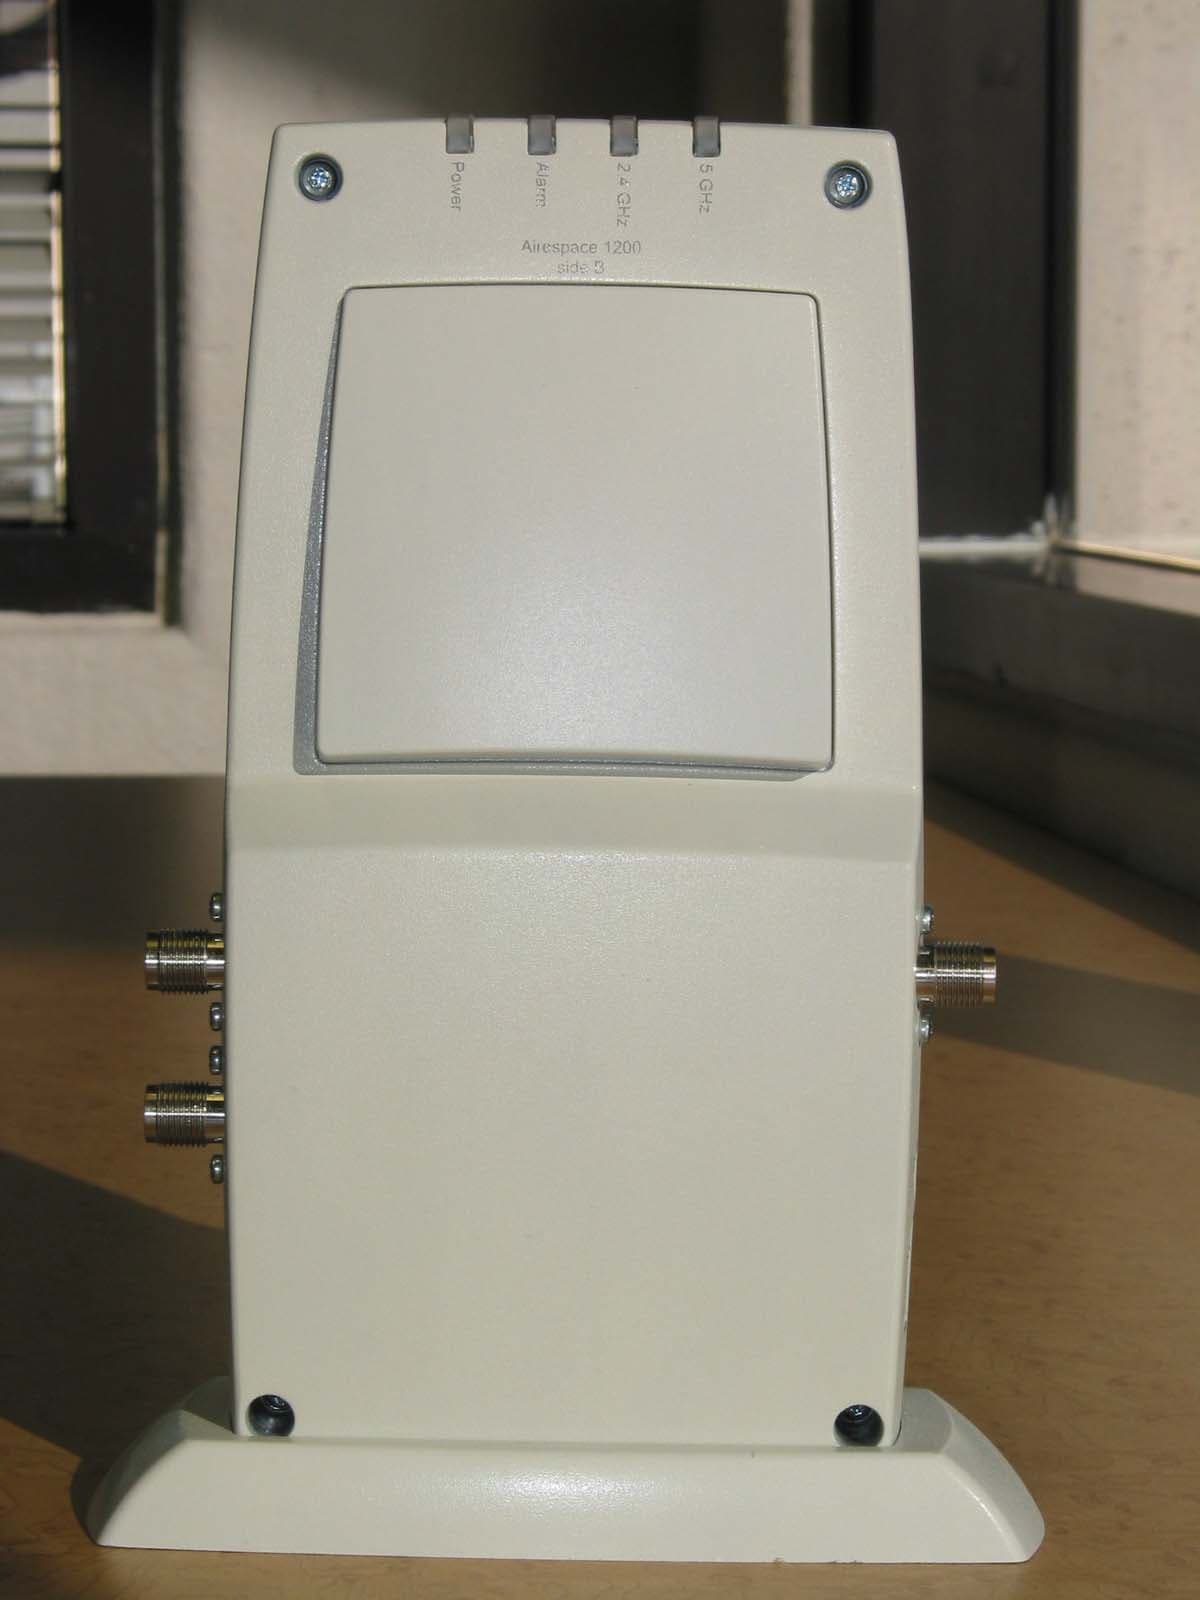
QTZAM1200ABG
Jan 12, 2004802.11 Dual Band Access Point
Equipment Class
DTS - Digital Transmission System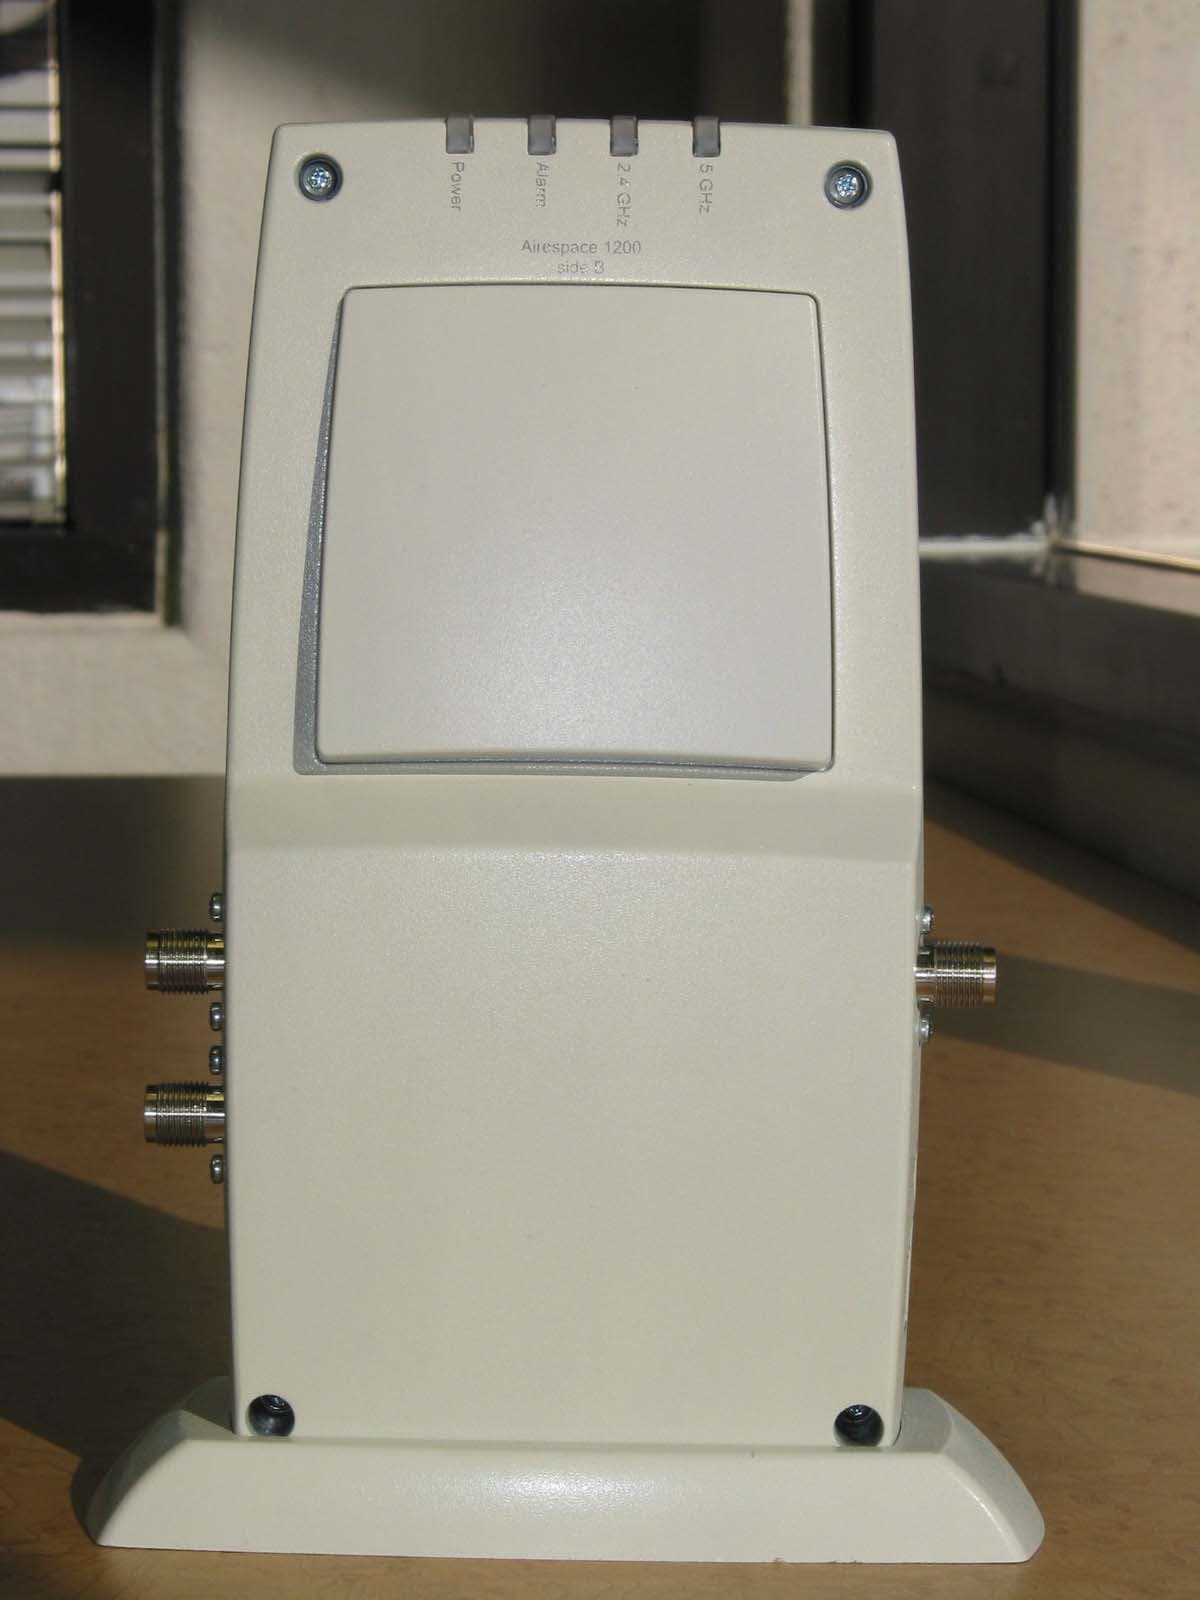
QTZWN1200BG
Dec 17, 20032.4 GHz 802.11 Access Point
Equipment Class
DTS - Digital Transmission System