SBP2487SINSTEON 120-277V Heavy-Duty Dual-Band Wall Switch
Insteon Technologies, LLC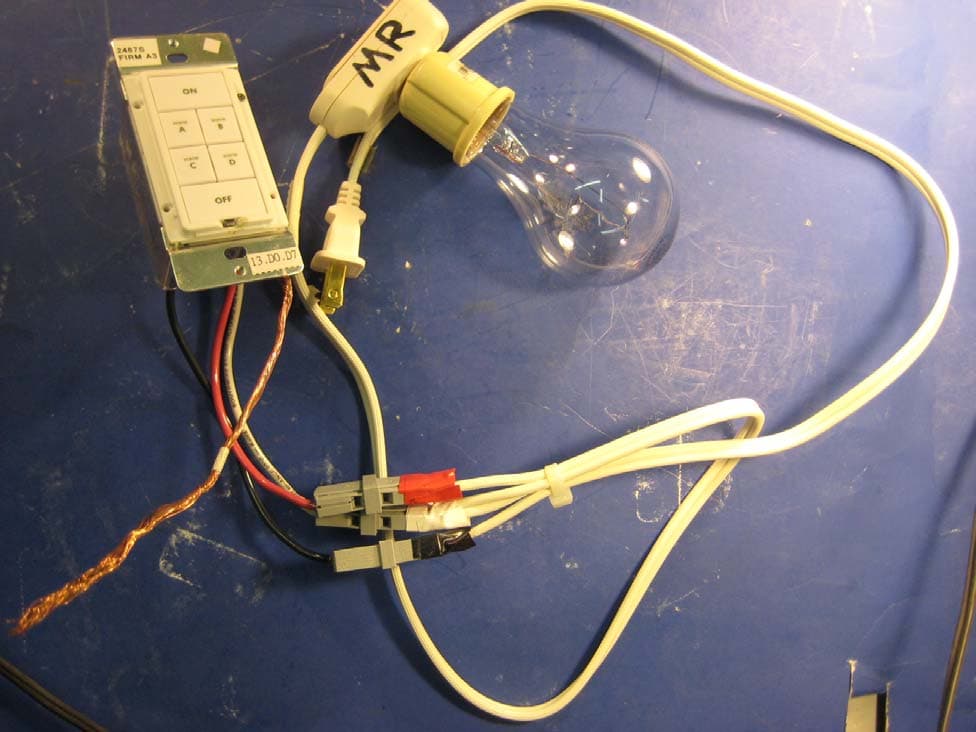
Click to zoom
Application Details
- Equipment Class
- DXT - Part 15 Low Power Transceiver, Rx Verified
- Date of Grant
- Jun 30, 2011
- Application Purpose
- Original Equipment
- Date of Application
- Jun 19, 2011
- Equipment Note
- INSTEON 120-277V Heavy-Duty Dual-Band Wall Switch
- Frequency Range
- 914.90000000 - 915.10000000
- Company
- Insteon Technologies, LLC
- Country
- United States
Documents & Files
Document Text
Text extracted from the exhibit documents filed with the FCC. Open a document above to read the original.
Users Manual
Page 1 of 2 Rev. 10-14-2010 Smarthome Limited Warranty – Smarthome warrants to original consumer of this product for a period of 2 years from date of purchase, this product will be free from defects in material & workmanship & will perform in substantial conformity with its Owner's Manual. Warranty shall not apply to defects caused by misuse or neglect. U.S. Patent No. 7,345,998, International patents pending © Copyright 2010 Smarthome, 16542 Millikan Ave., Irvine, CA 92606, 800-762-7845 Installation 1) At the circuit breaker or fuse panel, disable the circuit supplying power to the fixture 2) Remove the wallplate from the switch you are replacing. Then unscrew the switch itself and pull it out from the junction box. 3) Disconnect the wires from the switch you are replacing and ensure you have ½ inch of bare wire on the ends 4) To correctly identify the LINE, LOAD, and NEUTRAL wires, enable power to the switch from the circuit breaker or fuse panel, use a line voltage meter, then turn the breaker off again. See Figure 1 to properly connect your wires to KeypadLinc. 5) Ensure that all wire connectors are firmly attached and that there is no exposed copper except for the GROUND wire 6) Orient KeypadLinc with the Set button at the bottom, gently place it into the junction box, and then screw it into place 7) Enable power to the switch from the circuit breaker or fuse panel 8) Test that KeypadLinc is working properly by turning the load on and off from KeypadLinc 9) Reinstall the wallplate Quick-Start Guide KeypadLinc ™ - INSTEON ® 6-Button Keypad Controller with On/Off Switch (Dual-Band) Model: 2487S Preparation Installation should be performed only by a qualified electrician or by a homeowner who is familiar and comfortable with electrical circuitry. If you have any questions regarding installation, we suggest consulting an electrician. If you have any questions regarding setup, contact the INSTEON Gold Support Line. Tools Needed • Phillips and standard screwdrivers • Wire cutter / stripper • Voltage tester to identify wires inside the junction box Introduction Control lights and other non-dimmable devices at the touch of a button. Send commands to KeypadL inc from an INSTEON Controller. Or conveniently control other Linked INSTEON devices by using the buttons on KeypadLinc. Supports voltages from 120 to 277V, as well as 50 / 60Hz auto-detect. KeypadLinc also works as an INSTEON signal repeater and can be used to bridge the power phases in your home (like an Access Point, #2443 ). Using KeypadLinc Each of the KeypadLinc buttons is considered a “Scene button”, meaning you can use any of the buttons on KeypadLinc to create INSTEON scenes. Each button will control its own scene, only sending commands to devices Linked specifically to that button. • Tap the desired Scene button to activate the scene The button’s LED should turn on solid and its Responders should respond appropriately • Tap the desired Scene button to deactivate the scene The button’s LED should turn off and its Responders should respond appropriately Figure 1 Set button (push) Air gap (pull) Dedicated On/Off Scene buttons (load-controlling) Secondary Scene buttons Wallplate (sold separately) Page 2 of 2 Rev. 10-14-2010 Smarthome Limited Warranty – Smarthome warrants to original consumer of this product for a period of 2 years from date of purchase, this product will be free from defects in material & workmanship & will perform in substantial conformity with its Owner's Manual. Warranty shall not apply to defects caused by misuse or neglect. U.S. Patent No. 7,345,998, International patents pending © Copyright 2010 Smarthome, 16542 Millikan Ave., Irvine, CA 92606, 800-762-7845 Quick-Start Guide KeypadLinc 6-Button On/Off Switch (Dual-Band) *Setup Modes will automatically time out after 4 minutes Using KeypadLinc as a Responder 1) Set the Controller to Linking Mode*. (For most Controllers, press & hold an On or Scene button for 10 seconds or the Set button for 3 seconds.) 2) Press & hold the Scene button on KeypadLinc that you would like to control until it double-beeps (10 seconds). If you wish to control the load attached to KeypadLinc, press & hold the On button until it double-beeps (3 seconds) instead. The Scene button’s LED should flash once, and then turn on solid. If you used the Set button, the LED will follow the state of the load attached to KeypadLinc (On or Off) 3) Confirm that Linking was successful by tapping the button you just Linked to on the Controller KeypadLinc should respond appropriately FCC Compliance Statement This device complies with FCC Rules Part 15. Operation is subject to two conditions: (1) This device may not cause harmful interference, and (2) This device must accept any interference that may be received or that may cause undesired operation. The digital circuitry of this device has been tested and found to comply with the limits for a Class B digital device, pursuant to Part 15 of the FCC Rules. These limits are designed to provide reasonable protection against harmful interference in residential installations. This equipment generates, uses and can radiate radio frequency energy and, if not installed and used in accordance with the instructions, may cause harmful interference to radio and television reception. However, there is no guarantee that interference will not occur in a particular installation. If this device does cause such interference, which can be verified by turning the device off and on, the user is encouraged to eliminate the interference by one or more of the following measures: • Re-orient or re-locate the receiving antenna of the device experiencing the interference. • Increase the distance between this device and the receiver. • Connect the device to an AC outlet on a circuit different from the one that supplies power to the receiver. • Consult the dealer or an experienced radio/TV technician. WARNING! Changes or modifications to this unit not expressly approved by the party …
Text truncated - open the document above for the full version.
Test Report
This report c written cons e TE S CERT #803 803.05 ontains a total of ent of CKC Laborat Ke STING 3.01, 803.02, 5, 803.06 41 pages and ma tories, Inc. eypadLinc™ SMA Te FCC Par This test rep testing perfo of ISO/IEC 1 CKC Laborato We strive t o sound, adapt our custome processes, bu ay be reproduced Smart TEST ™ ‐ On/Off ART Keypad ested To The rt 15 Subpar RSS Repor Date of issu port bears th ormed herein 17025 under ories, Inc. o create long‐t tive, customer ers’ unique EM ut rather as th in full only. Partia tLabs, REPORT FO f Switch (D d Switch, 2 e Following S rt C Sections and 210 Issue 7 rt No.: 91263 ue: December e accreditati o meets the tes the applicab term, trust ba r first testing MC challenges, e reason we a al reproduction m Inc. OR Dual‐Band) 277V #477 Standards: s 15.207, 15. 7 ‐7 3, 2010 on symbol ind st and reporti ble scope of sed relations h services. We , not as an int are in business may only be done ), #2487S 72 .249 dicating that ing requireme EMC testing hips by provid embrace each terruption to . with the the ents for ding h of set Page 2of 41 Report No.: 91263‐7 TABLE OF CONTENTS Administrative Information ........................................................................................................................................... 3 Test Report Information ............................................................................................................................................ 3 Report Authorization ................................................................................................................................................. 3 Test Facility Information ............................................................................................................................................ 4 Site Registration & Accreditation Information .......................................................................................................... 4 Summary of Results ................................................................................................................................................... 5 Conditions During Testing ......................................................................................................................................... 5 Equipment Under Test ............................................................................................................................................... 6 Peripheral Devices ..................................................................................................................................................... 6 FCC Part 15 Subpart C .................................................................................................................................................... 7 15.207 AC Conducted Emissions................................................................................................................................ 7 15.249(a) RF Power Output ..................................................................................................................................... 20 15.249(b) Field Strength of Harmonics .................................................................................................................... 23 Occupied Bandwidth ............................................................................................................................................... 26 Bandedge ................................................................................................................................................................. 29 15.249(d) Field Strength of Spurious Emissions ...................................................................................................... 33 RSS‐210 ........................................................................................................................................................................ 37 99% Bandwidth ........................................................................................................................................................ 37 Supplemental Information .......................................................................................................................................... 40 Measurement Uncertainty ...................................................................................................................................... 40 Emissions Test Details .............................................................................................................................................. 40 Page 3of 41 Report No.: 91263‐7 ADMINISTRATIVE INFORMATION Test Report Information REPORT PREPARED FOR: REPORT PREPARED BY: SmartLabs, Inc. 16542 Millikan Ave. Irvine, CA 92606 Dianne Dudley CKC Laboratories, Inc. 5046 Sierra Pines Drive Mariposa, CA 95338 Representative: John Lockyer Project Number: 91263 Customer Reference Number: 10‐3JL1006‐02 DATE OF EQUIPMENT RECEIPT: November11, 2010 DATE(S) OF TESTING: November11‐ 29, 2010 Report Authorization The test data contained in this report documents the observed testing parameters pertaining to and are relevant for only the sample equipment tested in the agreed upon operational mode(s) and configuration(s) as identified herein. Compliance assessment remains the client’s responsibility. This report may not be used to claim product endorsement by A2LA or any government agencies. This test report has been authorized for release under quality control from CKC Laboratories, Inc. Steve Behm Director of Quality Assurance & Engineering Services CKC Laboratories, Inc. Page 4of 41 Report No.: 91263‐7 Test Facility Information Our laboratories are configured to effectively test a wide variety of product types. CKC utilizes first class test equipment, anechoic chambers, data acquisition and information services to create accurate, repeatable and affordable test results. TEST LOCATION(S): CKC Laboratories, Inc. 110 Olin…
Text truncated - open the document above for the full version.
Contact Information
Applicant
John Lockyer(Suite 105-665)
Technical Contact
SmartLabs, Inc.John Lockyer
[email protected]949-221-0037
16542 Millikan Ave. · Irvine, California · United States
Test Firm
CKC Laboratories, Inc.Steve Behm
Technical Specifications
| # | Rule Parts | Frequency Range | Power Output |
|---|---|---|---|
| 1 | 15C | 914.9 MHz - 915.1 MHz | - |
Other Applications from Insteon Technologies, LLC

SBP-MS01
Nov 28, 2020Multi Sensor
Equipment Class
DXX - Part 15 Low Power Communication Device Transmitter
SBP-BC01
Sep 10, 2020Bridge Controller
Equipment Class
DSS - Part 15 Spread Spectrum Transmitter
SBP-WR01
Mar 21, 2020Smart Outlet
Equipment Class
DXX - Part 15 Low Power Communication Device Transmitter
SBP-WALL
Mar 19, 2020Smart Wall Switch
Equipment Class
DXX - Part 15 Low Power Communication Device Transmitter
SBP26632
Sep 30, 2014On/Off Outlet
Equipment Class
DXT - Part 15 Low Power Transceiver, Rx Verified