SG70605HG-Z1700Dual Band Mobile Phone
Haier Telecom (Qingdao) Co., Ltd.
Click to zoom
Application Details
- Equipment Class
- PCE - PCS Licensed Transmitter held to ear
- Date of Grant
- Sep 14, 2006
- Application Purpose
- Original Equipment
- Date of Application
- Sep 14, 2006
- Equipment Note
- Dual Band Mobile Phone
- Frequency Range
- 824.20000000 - 848.80000000
- Country
- China
Documents & Files
Document Text
Text extracted from the exhibit documents filed with the FCC. Open a document above to read the original.
Users Manual
HG-Z1700 User manual Haier User Manual for HG-Z1700 Mobile Phone June, 2006 Z1700 User manual I Summary Welcome to select Z1700 mobile phone. This instruction manual explains the exmobileent performance of Z1700 mobile phone for details. Besides basic function of talking, Z1700 mobile phone and system network also provide you with practical multi-functions and service to facilitate your work and leisure activity. We provide you with the multiple special fitting parts including charging battery and charger for your selection. Please refer to section 12 of this instruction manual for the detailed description on these fitting parts. If using fitting parts without permission from the providers, it is possible to result in danger; the resulted damage is beyond warranty. Our company reserves the right to modify the technical specification in this instruction manual without pre-notification. Explanation for reading the manual Different styles are used to describe different operation details in this manual as follows: Operation Content description Example Display content Represented with normal character 0-9 General key Except the function keys, all others are represented by normal character with frame 0-9 Function key Function keys are represented with overstriking and frame Haier H Menu item Represented by italics with boldface Hold the call Note: The pictures used in the manual are the function illustration pictures only, and maybe they are different from display in your mobile phone. Please take yours as the standard. Z1700 User manual 第 2 页 CONTENTS SUMMARY ....................................................................................................................................................................... I SECURITY AND PERFORMANCE.............................................................................................................................. 5 1 START TO USE ....................................................................................................................................................... 9 1.1 BATTERY................................................................................ 9 1.1.1 The disassembly and installation of battery................................................................................................ 9 1.1.2 Battery charging ......................................................................................................................................... 9 1.1.3 Use of battery.............................................................................................................................................. 9 1.1.4 Indication of battery capacity ..................................................................................................................... 9 1.2 CONNECTION OF NETWORK................................................................... 10 1.2.1 SIM card ................................................................................................................................................... 10 1.2.2 Insertion of SIM card ................................................................................................................................ 10 1.2.3 Unlocking of SIM card.............................................................................................................................. 10 1.2.4 Connect to network ................................................................................................................................... 11 1.3 IDLE SCREEN AND CONTENT.................................................................. 11 1.4 KEYS................................................................................. 12 1.5 INPUT OF NUMBER AND CHARACTER............................................................. 13 1.6 INPUT MESSAGE.......................................................................... 14 1.6.1 Edit screen for inputting the text............................................................................................................... 14 1.6.2 Switch the input methods .......................................................................................................................... 14 1.6.3 Input method of Pinyin.............................................................................................................................. 14 1.6.4 Input method of Stroke .............................................................................................................................. 14 1.6.5 Input method of intelligent English ........................................................................................................... 15 1.6.6 Input method of English letter................................................................................................................... 15 1.6.7 Input method of number ............................................................................................................................ 16 1.6.8 Input method of symbol............................................................................................................................. 16 2 DIAL AND ANSWER THE PHONE.................................................................................................................... 17 2.1 TURN ON/OFF PHONE...................................................................... 17 2.2 MAKE A PHONE CALL....................................................................... 17 2.2.1 Direct dial ................................................................................................................................................. 17 2.2.2 Make a phone call from phonebook .......................................................................................................... 18 2.2.3 Quick dial.................................................................................................................................................. 18 2.2.4 S…
Text truncated - open the document above for the full version.
Users Manual
Z1700 User manual II NOTE:
Attestation Statements
Section 1: Manufacturer Information Manufacturer Qingdao Haier Telecom Co.,Ltd Address NO1,HAIER Road,Hi-tech Zone,Qingdao Tel. +86-532-88937356 Fax +86-532-88937365 Contact Person NingDe Wang E-mail [email protected] Section 2: Product Information Terminal product Model HG-Z1700 Brand Haier Hardware Version P1 Market name HG-Z1700 Software Version Z1700-H01-S002-CHN FCCID SG70605HG-Z1700 Section 3: Test Standards 47 CFR Part 2 47 CFR Part 15, Subpart B 47 CFR Part 22, Subpart H 47 CFR Part 24, Subpart E FCC OET Bulletin 65, Supplement C Note : Detailed data please make reference to 6. FCC EMC Report.pdf & 6. FCC SAR Report.pdf
Cover Letter(s)
Federal Communications Commission Authorization and Evaluation Division Equipment Authorization Branch 7435 Oakland Mills Road, Columbia, MD 21046, U.S.A. Subject: Authorization Letter FCC ID: SG70605HG-Z1700 Applicant: Qingdao Haier Telecom Co., LTD Model: HG-Z1700 Part 22 Certification To whom it may concern: We, the undersigned, hereby authorized M o r la b. to act on our behalf in all manners relating to application for equipment authorization, including signing of all documents relating to these manners. Any and all acts carried out by Morlab , on our behalf shall have the same effect as acts of our own. This authorization is valid until July. 31, 2006. Sincerely Yours, Qingdao Telecom Co. Ltd. No. 1 Haier Road, Hi-tech Zone, Qingdao, 266101, PR China Tel. No. : +86 (532) 893 9618; Fax No.: +86 (532) 893 9727 http://mobile .haier.com Type Approval M anager Qingdao Haier Telecom Co. Ltd Date:May 25, 2006 Eddie Wang
Cover Letter(s)
Qingdao Haier Telecom Co.,Ltd BABT Balfour House, Churchfield Road, Walton-on-Thames, Surrey, KT12 2TD, UK RE: Certification Application FCC ID: SG70605HG-Z1700 Confidentiality Request Pursuant to Section 0.459 of the Commission’s Rule, Qingdao Haier Telecom Co.,Ltd hereby requests that the following documents regarding this submission for FCC ID: SG70605HG-Z1700 be kept permanent confidentiality: - Block Diagram - Schematics - Operational Description - Part List/Tune-Up Procedure The above materials contain trade secrets and proprietary information not customarily released to the prublic. The public disclosure of these matters might be harmful to Qingdao Haier Telecom Co.,Ltd and provide unjustified benefits to its competitors. Thank you for your attention in this matter. Yours Sincerely, Signatory: Title:CTA Manager Date:2006-08-29
External Photos
External Photos 1. Front View of EUT 2. Inside View of EUT 3. Back View of EUT 4. Side View of EUT 5. AC adapter
Internal Photos
Internal Photos
RF Exposure Info
Report No. SN0093_900 March 2006 INDEXSAR 900MHz validation Dipole Type IXD-090 S/N 0093 Performance measurements MI Manning Indexsar, Oakfield House, Cudworth Lane, Newdigate, Surrey RH5 5BG. UK. Tel: +44 (0) 1306 632870 Fax: +44 (0) 1306 631834 e-mail: [email protected] 1. Measurement Conditions Measurements were performed using a box-shaped phantom made of PMMA with dimensions designed to meet the accuracy criteria for reasonably-sized phantoms that do not have liquid capacities substantially in excess of the volume of liquid required to fill the Indexsar upright SAM phantoms used for SAR testing of handsets against the ear. An Anritsu MS4623B vector network analyser was used for the return loss measurements. The dipole was placed in a special holder made of low-permittivity, low-loss materials. This holder enables the dipole to be positioned accurately in the centre of the base of the Indexsar box-phantom used for flat-surface testing and validation checks. The validation dipoles are supplied with special spacers made from a low- permittivity, low-loss foam material. These spacers are fitted to the dipole arms to ensure that, when the dipole is offered up to the phantom surface, the spacing between the dipole and the liquid surface is accurately aligned according to the guidance in the relevant standards documentation. The spacers are rectangular with a central hole equal to the dipole arm diameter and dimensioned so that the longer side can be used to ensure a spacing of 15mm from the liquid in the phantom (for tests at 900MHz and below) and the shorter side can be used for tests at 1800MHz and above to ensure a spacing of 10mm from the liquid in the phantom. The spacers are made on a CNC milling machine with an accuracy of 1/40 th mm but they may suffer wear and tear and need to be replaced periodically. The material used is Rohacell, which has a relative permittivity of approx. 1.05 and a negligible loss tangent. The apparatus supplied by Indexsar for dipole validation tests thus includes: Balanced dipoles for each frequency required are dimensioned according to the guidelines given in IEEE 1528 [1]. The dipoles are made from semi-rigid 50 Ohm co-ax, which is joined by soldering and is gold-plated subsequently. The constructed dipoles are easily deformed, if mis-handled, and periodic checks need to be made of their symmetry. Rohacell foam spacers designed for presenting the dipoles to 2mm thick PMMA box phantoms. These components also suffer wear and tear and should be replaced when the central hole is a loose-fit on the dipole arms or if the edges are too worn to ensure accurate alignment. The standard spacers are dimensioned for use with 2mm wall thickness (additional spacers are available for 4mm wall thickness). 2. Typical SAR Measurement A SAR validation check is performed with the box-phantom located on the SARA2 phantom support base on the SARA2 robot system. Tests are then conducted at a feed power level of approx. 0.25W. The actual power level is recorded and used to normalise the results obtained to the standard input power conditions of 1W (forward power). The ambient temperature is 21 o C +/- 1 o C and the relative humidity is around 40% during the measurements. The phantom is filled with a 900MHz brain liquid using a recipe from [1], which has the following electrical parameters (measured using an Indexsar DiLine kit) at 900MHz: Relative Permittivity 42.5 Conductivity 0.96 S/m The SARA2 software version VPM2.2 is used with an Indexsar probe previously calibrated using waveguides. The 3D measurements made using the dipole at the bottom of the phantom box is shown below: The results, normalised to an input power of 1W (forward power) are typically: Averaged over 1 cm3 (1g) of tissue 10.55 W/kg Averaged over 10cm3 (10g) of tissue 6.80 W/kg These results can be compared with Table 8.1 in [1]. The agreement is within 10%. 3. Dipole impedance and return loss The dipoles are designed to have low return loss ONLY when presented against a lossy-phantom at the specified distance. A Vector Network Analyser (VNA) was used to perform a return loss measurement on the specific dipole when in the measurement-location against the box phantom. The distance was as specified in the standard i.e. 10mm from the liquid (for 900MHz). The Indexsar foam spacers (described above) were used to ensure this condition during measurement. The impedance was measured at the SMA-connector with the network analyser. The following parameters were measured: Dipole impedance at 900 MHz Re{Z} = 49.999 Ω Im{Z} = 631.313 μΩ Return loss at 900MHz -20.416 dB 4. Dipole handling The dipoles are made from standard, copper-sheathed coaxial cable. In assembly, the sections are joined using ordinary soft-soldering. This is necessary to avoid excessive heat input in manufacture, which would destroy the polythene dielectric used for the cable. The consequence of the construction material and the assembly technique is that the dipoles are fragile and can be deformed by rough handling. Conversely, they can be straightened quite easily as described in this report. If a dipole is suspected of being deformed, a normal workshop lathe can be used as an alignment jig to restore the symmetry. To do this, the dipole is first placed in the headstock of the lathe (centred on the plastic or brass spacers) and the headstock is rotated by hand (do NOT use the motor). A marker (lathe tool or similar) is brought up close to the end of one dipole arm and then the headstock is rotated by 0.5 rev. to check the opposing arm. If they are not balanced, judicious deformation of the arms can be used to restore the symmetry. If a dipole has a failed solder joint, the dipole can be fixed down in such a way that the arms are co-linear and the joint re-soldered with a reasonably-powerful electrical soldering iron. Do not use gas soldering irons. After such a repair, electrical tests must be performed as described below. Please note that, beca…
Text truncated - open the document above for the full version.
RF Exposure Info
Report No. SN0112_1900 March 2006 INDEXSAR 1900MHz validation Dipole Type IXD-080 S/N 0112 Performance measurements MI Manning Indexsar, Oakfield House, Cudworth Lane, Newdigate, Surrey RH5 5BG. UK. Tel: +44 (0) 1306 633870 Fax: +44 (0) 1306 631834 e-mail: [email protected] 1. Measurement Conditions Measurements were performed using a box-shaped phantom made of PMMA with dimensions designed to meet the accuracy criteria for reasonably-sized phantoms that do not have liquid capacities substantially in excess of the volume of liquid required to fill the Indexsar upright SAM phantoms used for SAR testing of handsets against the ear. An Anritsu MS4623B vector network analyser was used for the return loss measurements. The dipole was placed in a special holder made of low-permittivity, low-loss materials. This holder enables the dipole to be positioned accurately in the centre of the base of the Indexsar box-phantom used for flat-surface testing and validation checks. The validation dipoles are supplied with special spacers made from a low- permittivity, low-loss foam material. These spacers are fitted to the dipole arms to ensure that, when the dipole is offered up to the phantom surface, the spacing between the dipole and the liquid surface is accurately aligned according to the guidance in the relevant standards documentation. The spacers are rectangular with a central hole equal to the dipole arm diameter and dimensioned so that the longer side can be used to ensure a spacing of 15mm from the liquid in the phantom (for tests at 900MHz and below) and the shorter side can be used for tests at 1800MHz and above to ensure a spacing of 10mm from the liquid in the phantom. The spacers are made on a CNC milling machine with an accuracy of 1/40 th mm but they may suffer wear and tear and need to be replaced periodically. The material used is Rohacell, which has a relative permittivity of approx. 1.05 and a negligible loss tangent. The apparatus supplied by Indexsar for dipole validation tests thus includes: Balanced dipoles for each frequency required are dimensioned according to the guidelines given in IEEE 1528 [1]. The dipoles are made from semi-rigid 50 Ohm co-ax, which is joined by soldering and is gold-plated subsequently. The constructed dipoles are easily deformed, if mis-handled, and periodic checks need to be made of their symmetry. Rohacell foam spacers designed for presenting the dipoles to 2mm thick PMMA box phantoms. These components also suffer wear and tear and should be replaced when the central hole is a loose-fit on the dipole arms or if the edges are too worn to ensure accurate alignment. The standard spacers are dimensioned for use with 2mm wall thickness (additional spacers are available for 4mm wall thickness). 2. Typical SAR Measurement A SAR validation check is performed with the box-phantom located on the SARA2 phantom support base on the SARA2 robot system. Tests are then conducted at a feed power level of approx. 0.25W. The actual power level is recorded and used to normalise the results obtained to the standard input power conditions of 1W (forward power). The ambient temperature is 22 o C +/- 1 o C and the relative humidity is around 40% during the measurements. The phantom is filled with a 1900MHz brain liquid using a recipe from [1], which has the following electrical parameters (measured using an Indexsar DiLine kit) at 1900MHz: Relative Permittivity 41.4 Conductivity 1.85 S/m The SARA2 software version 2.2 VPM is used with an Indexsar probe previously calibrated using waveguides. The 3D measurements made using the dipole at the bottom of the phantom box is shown below: The results, normalised to an input power of 1W (forward power) are typically: Averaged over 1 cm3 (1g) of tissue 4.928 W/kg Averaged over 10cm3 (10g) of tissue 2.362 W/kg These results can be compared with Table 8.1 in [1]. The agreement is within 10%. 3. Dipole impedance and return loss The dipoles are designed to have low return loss ONLY when presented against a lossy-phantom at the specified distance. A Vector Network Analyser (VNA) was used to perform a return loss measurement on the specific dipole when in the measurement-location against the box phantom. The distance was as specified in the standard i.e. 10mm from the liquid (for 1900MHz). The Indexsar foam spacers (described above) were used to ensure this condition during measurement. The impedance was measured at the SMA-connector with the network analyser. The following parameters were measured: Dipole impedance at 1900 MHz Re{Z} = 49.996 Ω Im{Z} = 15.160 mΩ Return loss at 1900MHz -26.175 dB 4. Dipole handling The dipoles are made from standard, copper-sheathed coaxial cable. In assembly, the sections are joined using ordinary soft-soldering. This is necessary to avoid excessive heat input in manufacture, which would destroy the polythene dielectric used for the cable. The consequence of the construction material and the assembly technique is that the dipoles are fragile and can be deformed by rough handling. Conversely, they can be straightened quite easily as described in this report. If a dipole is suspected of being deformed, a normal workshop lathe can be used as an alignment jig to restore the symmetry. To do this, the dipole is first placed in the headstock of the lathe (centred on the plastic or brass spacers) and the headstock is rotated by hand (do NOT use the motor). A marker (lathe tool or similar) is brought up close to the end of one dipole arm and then the headstock is rotated by 0.5 rev. to check the opposing arm. If they are not balanced, judicious deformation of the arms can be used to restore the symmetry. If a dipole has a failed solder joint, the dipole can be fixed down in such a way that the arms are co-linear and the joint re-soldered with a reasonably-powerful electrical soldering iron. Do not use gas soldering irons. After such a repair, electrical tests must be performed as described below. Please note th…
Text truncated - open the document above for the full version.
RF Exposure Info
IMMERSIBLE SAR PROBE CALIBRATION REPORT Part Number: IXP – 050 S/N 0177 March 2006 Indexsar Limited Oakfield House Cudworth Lane Newdigate Surrey RH5 5BG Tel: +44 (0) 1306 632 870 Fax: +44 (0) 1306 631 834 e-mail: [email protected] Page 1 of 19 Page 2 of 19 INTRODUCTION This Report presents measured calibration data for a particular Indexsar SAR probe (S/N 0177) and describes the procedures used for characterisation and calibration. Indexsar probes are characterised using procedures that, where applicable, follow the recommendations of CENELEC [1] and IEEE [2] standards. The procedures incorporate techniques for probe linearisation, isotropy assessment and determination of liquid factors (conversion factors). Calibrations are determined by comparing probe readings with analytical computations in canonical test geometries (waveguides) using normalised power inputs. Each step of the calibration procedure and the equipment used is described in the sections below. CALIBRATION PROCEDURE 1. Objectives The calibration process comprises three stages 1) Determination of the channel sensitivity factors which optimise the probe’s overall rotational isotropy in 1800MHz brain fluid 2) At each frequency of interest, application of these channel sensitivity factors to model the exponential decay of SAR in a waveguide fluid cell, and hence derive the liquid conversion factors at that frequency 3) Determination of the effective tip radius and angular offset of the X channel which together optimise the probe’s spherical isotropy in 900MHz brain fluid 2. Probe output The probe channel output signals are linearised in the manner set out in Refs [1] and [2]. The following equation is utilized for each channel: U lin = U o/p + U o/p 2 / DCP (1) where U lin is the linearised signal, U o/p is the raw output signal in voltage units and DCP is the diode compression potential in similar voltage units. DCP is determined from fitting equation (1) to measurements of U lin versus source feed power over the full dynamic range of the probe. The DCP is a characteristic of the Schottky diodes used as the sensors. For the IXP-050 probes with CW signals the DCP values are typically 0.10V (or 20 in the voltage units used by Indexsar software, which are V*200). In turn, measurements of E-field are determined using the following equation (where output voltages are also in units of V*200): Page 3 of 19 E liq 2 (V/m) = U linx * Air Factor x * Liq Factor x + U liny * Air Factor y * Liq Factor y + U linz * Air Factor z * Liq Factor z (3) Here, “Air Factor” represents each channel’s sensitivity, while “Liq Factor” represents the enhancement in signal level when the probe is immersed in tissue-simulant liquids at each frequency of interest. 3. Selecting channel sensitivity factors to optimise isotropic response After manufacture, the first stage of the calibration process is to balance the three channels’ Air Factor values, thereby optimising the probe’s overall axial response (“rotational isotropy”). To do this, an 1800MHz waveguide containing head-fluid simulant is selected. Like all waveguides used during probe calibration, this particular waveguide contains two distinct sections: an air-filled launcher section, and a liquid cell section, separated by a dielectric matching window designed to minimise reflections at the air-liquid interface. The waveguide stands in an upright position and the liquid cell section is filled with 1800MHz brain fluid to within 10 mm of the open end. The depth of liquid ensures there is negligible radiation from the waveguide open top and that the probe calibration is not influenced by reflections from nearby objects. During the measurement, a TE 01 mode is launched into the waveguide by means of an N-type-to-waveguide adapter. The probe is then lowered vertically into the liquid until the tip is exactly 10mm above the centre of the dielectric window. This particular separation ensures that the probe is operating in a part of the waveguide where boundary corrections are not necessary. Care must also be taken that the probe tip is centred while rotating. The exact power applied to the input of the waveguide during this stage of the probe calibration is immaterial since only relative values are of interest while the probe rotates. However, the power must be sufficiently above the noise floor and free from drift. The dedicated Indexsar calibration software rotates the probe in 10 degree steps about its axis, and at each position, an Indexsar ‘Fast’ amplifier samples the probe channels 500 times per second for 0.4 s. The raw U o/p data from each sample are packed into 10 bytes and transmitted back to the PC controller via an optical cable. U linx , U liny and U linz are derived from the raw U o/p values and written to an Excel template. Once data have been collected from a full probe rotation, the Air Factors are adjusted using a special Excel Solver routine to equalise the output from each channel and hence minimise the rotational isotropy. This automated approach to optimisation removes the effect of human bias. Figure 5 represents the output from each diode sensor as a function of probe rotation angle. The directionality of the orthogonally-arranged sensors can be checked by analysing the data using dedicated Indexsar software, which displays the data in 3D format, a representative image of which is shown in Figure 3. The left-hand side of this diagram shows the individual channel outputs after linearisation (see above). The program uses these data to balance the channel outputs and then applies an optimisation process, which makes fine adjustments to the channel factors for optimum isotropic response. 4. Determination of Conversion (“Liquid”) Factors at each frequency of interest A lookup table of conversion factors for a probe allows a SAR value to be derived at the measured frequencies, and for either brain or body fluid- simulant. The method by which the conversion factors are assessed is based…
Text truncated - open the document above for the full version.
Test Setup Photos
Test Setup Photos 1. CE 2. RE-LOOP 3. RE 4. CE-Conducted 5. CE-Radiated
Contact Information
Applicant
David Yang(Certification Manager)
Test Firm
ShenZhen Electronic Product Quality Testing CenterXingsun Lin
Technical Specifications
| # | Rule Parts | Frequency Range | Power Output | Emission | Tolerance |
|---|---|---|---|---|---|
| 2 | 22H | 824.2 MHz - 848.8 MHz | 760.00 mW | 300KGXW | 1 ppm |
Other Applications from Haier Telecom (Qingdao) Co., Ltd.
SG7201511L50
Dec 07, 2015Mobile Phone
Equipment Class
DTS - Digital Transmission System
SG7201511L32
Dec 03, 2015Mobile Phone
Equipment Class
PCE - PCS Licensed Transmitter held to ear
SG71507L51
Dec 03, 2015L51
Equipment Class
DTS - Digital Transmission System
SG720151015I70
Nov 03, 2015Smart phone
Equipment Class
PCE - PCS Licensed Transmitter held to ear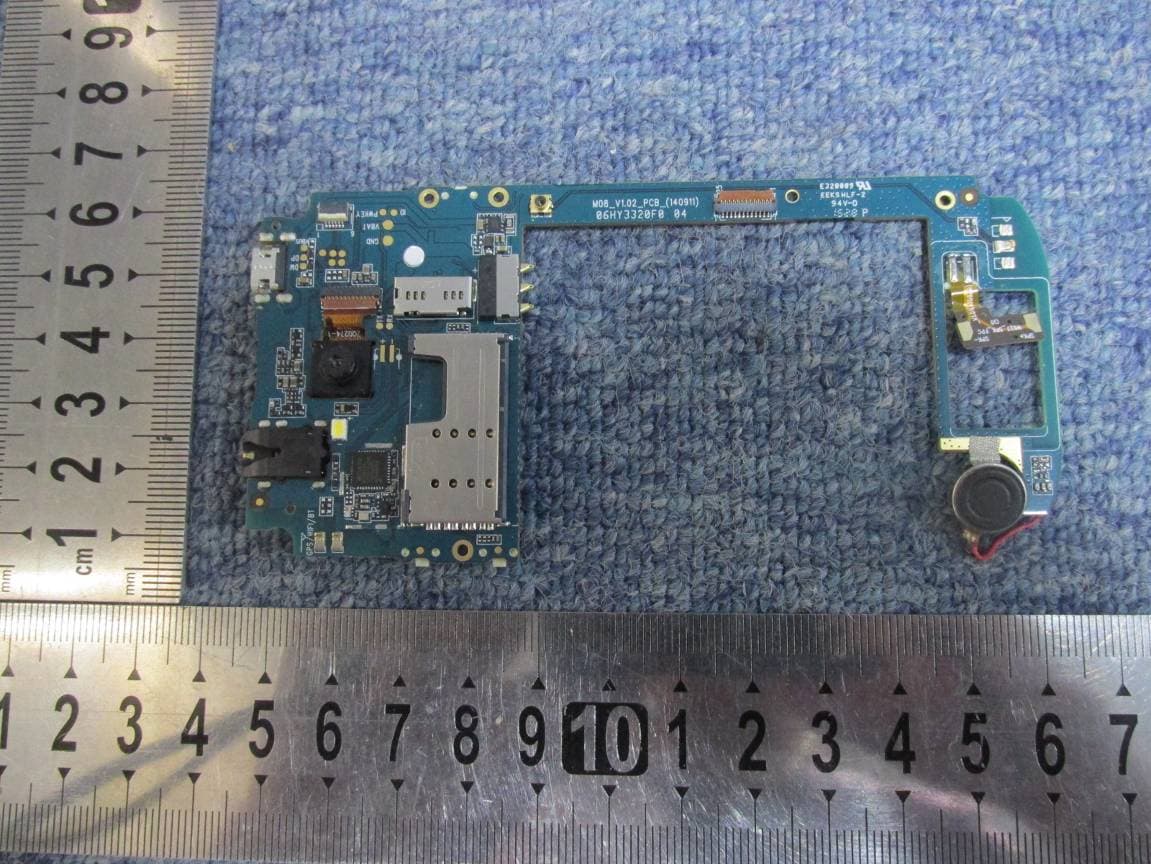
SG720151010G10
Oct 22, 2015Mobile phone
Equipment Class
DSS - Part 15 Spread Spectrum Transmitter