TE7C3150AC3150 Wireless MU-MIMO Gigabit Router
TP-Link Technologies Co., Ltd.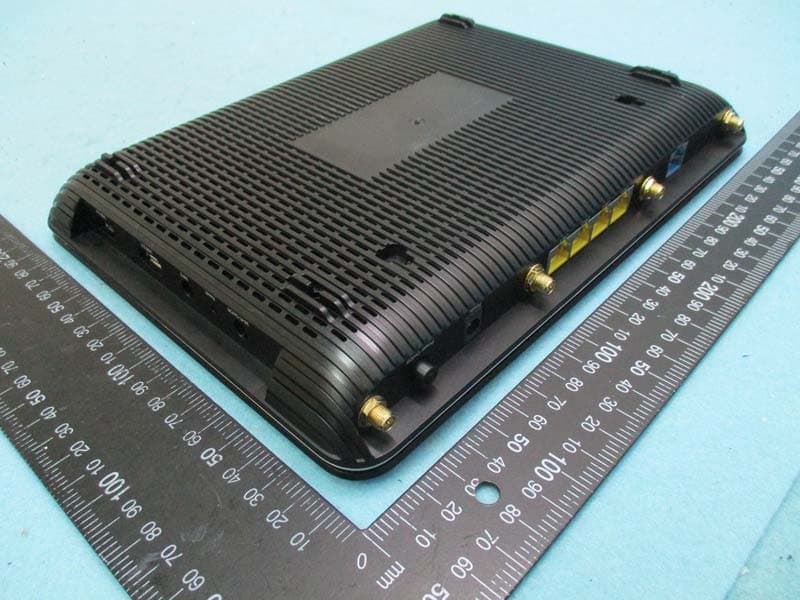
Click to zoom
Application Details
- Equipment Class
- DTS - Digital Transmission System
- Date of Grant
- Nov 19, 2015
- Application Purpose
- Original Equipment
- Date of Application
- Nov 18, 2015
- Equipment Note
- AC3150 Wireless MU-MIMO Gigabit Router
- Frequency Range
- 5745.00000000 - 5825.00000000
- Country
- China
Documents & Files
Document Text
Text extracted from the exhibit documents filed with the FCC. Open a document above to read the original.
Users Manual
REV1.0.0 1910011518 Archer C3150 User Guide AC3150 wireless MU-MIMO Gigabit router Contents About This Guide ...............................................................................................1 Chapter 1. Get to Know About Your Router . . . . . . . . . . . . . . . . . . . . . . . . . 2 1. 1. Product Overview . . . . . . . . . . . . . . . . . . . . . . . . . . . . . . . . . . . . . . . . . . . . . . . . . . . . . . . . . . 3 1. 2. Main Features. . . . . . . . . . . . . . . . . . . . . . . . . . . . . . . . . . . . . . . . . . . . . . . . . . . . . . . . . . . . . . 4 1. 3. Panel Layout . . . . . . . . . . . . . . . . . . . . . . . . . . . . . . . . . . . . . . . . . . . . . . . . . . . . . . . . . . . . . . . 5 1. 3. 1. Front Panel . . . . . . . . . . . . . . . . . . . . . . . . . . . . . . . . . . . . . . . . . . . . . . . . . . . . . . . . . . 5 1. 3. 2. The Back Panel . . . . . . . . . . . . . . . . . . . . . . . . . . . . . . . . . . . . . . . . . . . . . . . . . . . . . . . 6 1. 3. 3. The Side Panel . . . . . . . . . . . . . . . . . . . . . . . . . . . . . . . . . . . . . . . . . . . . . . . . . . . . . . . 7 Chapter 2. Connect the Hardware. . . . . . . . . . . . . . . . . . . . . . . . . . . . . . . . . . 9 2. 1. Position Your Router. . . . . . . . . . . . . . . . . . . . . . . . . . . . . . . . . . . . . . . . . . . . . . . . . . . . . . . 10 2. 2. Connect Your Router . . . . . . . . . . . . . . . . . . . . . . . . . . . . . . . . . . . . . . . . . . . . . . . . . . . . . . 10 Chapter 3. Log into Your Router. . . . . . . . . . . . . . . . . . . . . . . . . . . . . . . . . . . 13 Chapter 4. Set Up Internet Connections . . . . . . . . . . . . . . . . . . . . . . . . . . . 15 4. 1. Quick Setup. . . . . . . . . . . . . . . . . . . . . . . . . . . . . . . . . . . . . . . . . . . . . . . . . . . . . . . . . . . . . . . 16 4. 2. Manually Configure Your Internet Connection Settings . . . . . . . . . . . . . . . . . . . . . 19 4. 3. Setting Up an IPv6 Internet Connection. . . . . . . . . . . . . . . . . . . . . . . . . . . . . . . . . . . . 23 Chapter 5. Guest Network . . . . . . . . . . . . . . . . . . . . . . . . . . . . . . . . . . . . . . . . 27 5. 1. Create Guest Network . . . . . . . . . . . . . . . . . . . . . . . . . . . . . . . . . . . . . . . . . . . . . . . . . . . . . 28 5. 2. Customize Guest Network Options. . . . . . . . . . . . . . . . . . . . . . . . . . . . . . . . . . . . . . . . . 28 Chapter 6. USB Application. . . . . . . . . . . . . . . . . . . . . . . . . . . . . . . . . . . . . . . 30 6. 1. Local Storage Sharing . . . . . . . . . . . . . . . . . . . . . . . . . . . . . . . . . . . . . . . . . . . . . . . . . . . . . 31 6. 1. 1. Access the USB disk . . . . . . . . . . . . . . . . . . . . . . . . . . . . . . . . . . . . . . . . . . . . . . . . . 31 6. 1. 2. Customize Your Settings. . . . . . . . . . . . . . . . . . . . . . . . . . . . . . . . . . . . . . . . . . . . . 31 6. 2. Remote Access via FTP Server. . . . . . . . . . . . . . . . . . . . . . . . . . . . . . . . . . . . . . . . . . . . . . 34 6. 2. 1. Access the USB disk . . . . . . . . . . . . . . . . . . . . . . . . . . . . . . . . . . . . . . . . . . . . . . . . . 34 6. 2. 2. Customize Your Settings. . . . . . . . . . . . . . . . . . . . . . . . . . . . . . . . . . . . . . . . . . . . . 36 6. 3. Media Sharing. . . . . . . . . . . . . . . . . . . . . . . . . . . . . . . . . . . . . . . . . . . . . . . . . . . . . . . . . . . . . 37 6. 3. 1. Access the USB disk . . . . . . . . . . . . . . . . . . . . . . . . . . . . . . . . . . . . . . . . . . . . . . . . . 37 6. 3. 2. Customize Your Settings. . . . . . . . . . . . . . . . . . . . . . . . . . . . . . . . . . . . . . . . . . . . . 38 6. 4. Printer Sharing . . . . . . . . . . . . . . . . . . . . . . . . . . . . . . . . . . . . . . . . . . . . . . . . . . . . . . . . . . . . 39 Chapter 7. Parental Controls. . . . . . . . . . . . . . . . . . . . . . . . . . . . . . . . . . . . . . 43 Chapter 8. Bandwidth Control . . . . . . . . . . . . . . . . . . . . . . . . . . . . . . . . . . . . 47 Chapter 9. Network Security. . . . . . . . . . . . . . . . . . . . . . . . . . . . . . . . . . . . . . 51 9. 1. Protect the Network from Cyber Attacks . . . . . . . . . . . . . . . . . . . . . . . . . . . . . . . . . . . 52 9. 2. Access Control . . . . . . . . . . . . . . . . . . . . . . . . . . . . . . . . . . . . . . . . . . . . . . . . . . . . . . . . . . . . 53 9. 3. IP & MAC Binding. . . . . . . . . . . . . . . . . . . . . . . . . . . . . . . . . . . . . . . . . . . . . . . . . . . . . . . . . . 55 Chapter 10. NAT Forwarding. . . . . . . . . . . . . . . . . . . . . . . . . . . . . . . . . . . . . . . 57 10. 1. Share Local Resources in the Internet by Virtual Server. . . . . . . . . . . . . . . . . . . . . . 58 10. 2. Open Ports Dynamically by Port Triggering. . . . . . . . . . . . . . . . . . . . . . . . . . . . . . . . . 59 10. 3. Make Applications Free from Port Restriction by DMZ . . . . . . . . . . . . . . . . . . . . . . 60 10. 4. Make Xbox Online Games Run Smoothly by UPnP . . . . . . . . . . . . . . . . . . . . . . . . . . 61 Chapter 11. VPN Server. . . . . . . . . . . . . . . . . . . . . . . . . . . . . . . . . . . . . . . . . . . . 63 11. 1. Use OpenVPN to Access Your Home Network. . . . . . . . . . . . . . . . . . . . . . . . . . . . . . . 64 11. 2. Use PPTP VPN to Access Your Home Network. . . . . . . . . . . . . . . . . . . . . . . . . . . . . . . 65 Chapter 12. Customize Your Network Settings . . . . . . . . . . . . . . . . . . . . . . 70 12. 1. Change the LAN Settings . . . . . . . . . . . . . . . . . . . . . . . . . . . . . . . . . . . . . . . . . . . . . . . . . . 71 12. 2. Configure to Support IPTV Service . . . . . . . . . . . . . . . . . . . . . . . . . . . . . . . . . . . . . . . . . 71 12. 3. Specify DHCP Server Settings. . . . . . . . . . . . . . . . . . . . . . . . . . . . . . . . . . . . . . . . . . . . . . 73 12. 4. Set Up a Dynamic DNS Service …
Text truncated - open the document above for the full version.
Users Manual
37 Chapter 6 USB Application 5. Click OK. Tips: The router can share 32 volumes at most. You can click on the page to detach the corresponding volume you do not need to share. 6. 3. Media Sharing The feature of Media Sharing allows you to view photos, play music and watch movies stored on the USB disk directly from DLNA-supported devices, such as your computer, pad and PS2/3. 6. 3. 1. Access the USB disk 1. Connect Your USB Disk Insert your USB storage device into the router’s USB port directly or using a USB cable. Wait several seconds until the USB LED becomes solid on. Tips: • If you use USB hubs, make sure no more than four devices are connected to the router. • If the USB storage device requires using bundled external power, make sure the external power has been connected. • If you use a USB hard drive, make sure its file system is FAT32,NTFS. • Before you physically disconnect a USB device from the router, safely remove it to avoid data damage: Go to Advanced > USB Settings > Device Settings and click Safety Remove. 2. Play the Media on Your USB Disk 38 Chapter 6 USB Application Now the DLNA-supported devices (such as your computer and pad) connected to the router can detect and play the media files on the USB disks. Windows computer 1. Open the Windows Media Player. 2. Click the media server name (such as Genie Media Severs) under the list of Other Libraries, then you can directly view photos, play music and watch movies that you share on the USB disks. Pad • Use a third-party DLNA-supported player. 6. 3. 2. Customize Your Settings ¾To Only Share Specific Content By default, Share All is enabled so all content on the USB disk is shared. If you want to only share specific folders, follow the steps below: 1. Visit http://tplinkwifi.net, then log in with the username and password you set for the router. 2. Go to Advanced > USB Settings > Sharing Access. 3. Focus on the section of Folder Sharing. Click the button to disable Share All, then click Add to add a new sharing folder. 4. Select the Volume Name and Folder Path, then enter a Folder Name as you like. 5. Select Enable Media Sharing and click OK. 39 Chapter 6 USB Application Tips: The router can share 32 volumes at most. You can click on the page to detach the corresponding volume you do not need to share. 6. 4. Printer Sharing The feature of Printer Sharing helps you share a printer with different computers connected to the router. Note: Printers unlisted may be incompatible with the router. You can check Printer Compatibility List to verify whether your printer is supported by the router: http://www.tp-link.com/common/compatible/print-server/. 1. Install the Driver of the Printer Make sure you have installed the driver of the printer on each computer that needs printer service. If you do not have the driver, contact the printer manufacturer. 2. Connect the Printer Cable a printer to the USB port with the USB cable. Wait several seconds until the USB LED becomes solid on. 3. Install the TP-LINK USB Printer Controller Utility TP-LINK USB Printer Controller Utility helps you access the shared printer. Download and install the utility on each computer that needs printer service. You can get the utility from http://www.tp-link.com/app/usb/. PC Utility is for Windows computer and Mac Utility is for Mac computer. 40 Chapter 6 USB Application 4. Access the Printer You should set the shared printer as Auto-Connect Printer on every computer that needs printer service. 1 ) Double-click the icon on your desktop to launch the USB Printer Controller. 2 ) Highlight the printer you share. Windows Mac 3 ) Click the Auto-Connect for printing tab to pull down a list, then select Set Auto- Connect Printer. 41 Chapter 6 USB Application Windows Mac 4 ) Select the printer you share, then click Apply. Windows 42 Chapter 6 USB Application Mac 5 ) You will see the printer marked as Auto-Connect Printer. Now you can print with this printer. Windows Mac Tips: The Print Server also allows different clients to share the scan feature of MFPs (Multi-Function Printers). To scan with TP-LINK USB Printer Controller, right-click the printer and select Network Scanner. Then, a scanning window will pop up. Finish the scanning process by following the on-screen instructions. Chapter 7 Parental Controls This function allows you to block inappropriate, explicit and malicious websites, and controls access to specified websites at specified time. 44 Chapter 7 Parental Controls Control what types of websites my children or other home network users can visit and even the times of day they are allowed to access the Internet. For example, I want to allow my children’s devices (e.g. a computer or a tablet) to access only www.tp-link.com and Wikipedia.org from 18:00 (6PM) to 22:00 (10PM) at the weekend and not other times. 1. Visit http://tplinkwifi.net, and log in with the username and password you set for the router. 2. Go to Basic or Advanced > Parental Controls and enable Parental Controls. 3. Click Add. 4. Click View Existing Devices, and select the access device. Or, enter the Device Name and MAC Address manually. I want to:I want How can I do that? 45 Chapter 7 Parental Controls 5. Click the icon to set the Internet Access Time. Drag the cursor over the appropriate cell(s) and click OK. 6. Enter a Description for the entry. Keep the Enable This Entry checkbox available. Click OK. 7. Select the restriction policy. 1 ) In Blacklist mode, the controlled devices cannot access any websites containing the specified keywords during the Internet Access Time period. 2 ) In Whitelist mode, the controlled devices can only access websites containing the specified keywords during the Internet Access Time period. 46 Chapter 7 Parental Controls 8. Click Add a new keyword to Block. You can add up to 32 keywords for either Blacklist or Whitelist. Below are some sample entries to allow access. 1 ) Enter a web address (e.g. wikipedia.org) or a web address keyword (e.g. wikipedia) to only…
Text truncated - open the document above for the full version.
Users Manual
77 Chapter 12 Customize Your Network Settings the IP address of the company network is the destination IP address, so here enters 172.30.30.1. Subnet Mask: Determines the destination network with the destination IP address. If the destination is a single IP address, enter 255.255.255.255; otherwise, enter the subnet mask of the corresponding network IP. In the example, the destination network is a single IP, so here enters 255.255.255.255. Gateway: The IP address of the gateway device to which the data packets will be sent. This IP address must be on the same subnet with the router’s IP which sends out the data. In the example, the data packets will be sent to the LAN port of Router 2 and then to the Server, so the default gateway should be 192.168.0.2. Interface: Determined by the port (WAN/LAN) that sends out the data packets. In the example, the data is sent to the gateway through the LAN port, so LAN should be selected. Status: Determines the status of the entry. In the example, Enabled should be selected. 6. Click OK to save the settings. 7. Check the System Routing Table below. If you can find the entry you set, the static routing is set successfully. Open a web browser on your PC. Enter the company server’s IP address to visit the company network. 12. 6. Specify Wireless Settings The router’s wireless network names (SSIDs) and passwords, and security options are preset in the factory. The preset SSIDs and passwords can be found on the product label. You can customize the wireless settings according to your needs. 1. Visit http://tplinkwifi.net, and log in with the username and password you set for the router. Done! 78 Chapter 12 Customize Your Network Settings 2. Go to Basic > Wireless. To enable or disable the wireless function: The wireless radio is enabled by default, if you want to disable the 2.4GHz, 5GHz wireless function, just clear the corresponding Enable checkbox. To change the wireless network name (SSID) and wireless password: Create a new SSID in Wireless Network Name (SSID) and customize the password for the network in Password. The default SSID is TP-LINK_XXXX for 2.4GHz, TP-LINK_XXXX_5G for 5GHz, and the value is case-sensitive. Note: If you use a wireless device to change the wireless settings, you will be disconnected when the settings are effective. Please write down the new SSID and password for future use. To hide SSID: Select Hide SSID, and your SSID will not broadcast. Your SSID won’t display when you scan for local wireless network list on your wireless device and you need to manually join the network. Advanced Settings: Go to Advanced > Wireless >Wireless Settings. 79 Chapter 12 Customize Your Network Settings To change the working region for the router: Select the Region from the drop-down list and click Save. Note: Per FCC regulations, all Wi-Fi products marketed in the U.S. is locked to the U.S. region. To use the smart connect function The smart connect function helps devices run faster by assigning them to best wireless bands based on actual conditions to balance network demands. 1. Select the Smart Connect checkbox, and click Save. 2. Keep the default or set a new SSID and password, and click Save. This SSID and password will be applied for 2.4GHz, 5GHz wireless networks. 80 Chapter 12 Customize Your Network Settings To change the security option: In the Wireless section, select an option from the Security dropdown list. The router provides four security options, No Security, WPA/WPA2 - Personal (Recommended), WPA/WPA2 - Enterprise and WEP. We recommend you don’t change the default settings unless necessary. If you select other options, configure the related parameters according to the help page. In addition • Mode - Select a transmission mode according to your wireless client devices. 802.11b/g/n mixed, 802.11g/n mixed or 802.11n only for 2.4GHz; and 802.11a/n/ac mixed, 802.11n/ac mixed or 802.11ac only for 5GHz. It is recommended to just leave it as default. • Channel Width - Select a channel width (bandwidth) for the wireless network. • Channel - Select an operating channel for the wireless network. It is recommended to leave the channel to Auto, if you are not experiencing the intermittent wireless connection issue. • Transmit Power - Select either High, Middle or Low to specify the data transmit power. The default and recommended setting is High. 12. 7. Use WPS for Wireless Connection Wi-Fi Protected Setup(WPS) gives consumers an easier approach to set up a security- protected Wi-Fi connection. 81 Chapter 12 Customize Your Network Settings 1. Visit http://tplinkwifi.net, and log in with the username and password you set for the router. 2. Go to Advanced > Wireless > WPS . 12. 7. 1. Set the Router’s PIN Router’s PIN is enabled by default to allow wireless devices to connect to the router using the PIN. You can use the default one or generate a new one. Note: 1. If you want to enable/disable the WPS feature, go to System Tools > System Parameters > WPS, select or clear the Enable WPS check box. 2. PIN (Personal Identification Number) is an eight-character identification number preset to each router. WPS supported devices can connect to your router with the PIN. The default PIN is labeled on the bottom of the router. 12. 7. 2. Use the WPS Wizard for Wi-Fi Connections 1. Select a setup method: • Push Button (Recommended): Click the Connect button on the screen. Within two minutes, push the WPS button on the client device. • PIN Code: Enter the client’s PIN, and click Connect. 82 Chapter 12 Customize Your Network Settings 2. Success will appear on the above screen and the WPS LED on the router will keep on for five minutes if the client has been successfully added to the network. 12. 8. Schedule Your Wireless Function You can automatically turn off your wireless network at the time when you do not need the wireless connection. 1. Visit http://tplinkwifi.net, and log in with the username and password you set for the router. 2. Go to Advanced > Wireles…
Text truncated - open the document above for the full version.
External Photos
Report No.: 5O1803 SPORTON International Inc. PAGE NUMBER : 1 of 8 TEL : 886-3-327-3456 ISSUED DATE : Nov. 18, 2015 FAX : 886-3-327-0973 Photographs of EUT Report No.: 5O1803 SPORTON International Inc. PAGE NUMBER : 2 of 8 TEL : 886-3-327-3456 ISSUED DATE : Nov. 18, 2015 FAX : 886-3-327-0973 Report No.: 5O1803 SPORTON International Inc. PAGE NUMBER : 3 of 8 TEL : 886-3-327-3456 ISSUED DATE : Nov. 18, 2015 FAX : 886-3-327-0973 Report No.: 5O1803 SPORTON International Inc. PAGE NUMBER : 4 of 8 TEL : 886-3-327-3456 ISSUED DATE : Nov. 18, 2015 FAX : 886-3-327-0973 Report No.: 5O1803 SPORTON International Inc. PAGE NUMBER : 5 of 8 TEL : 886-3-327-3456 ISSUED DATE : Nov. 18, 2015 FAX : 886-3-327-0973 Antenna Report No.: 5O1803 SPORTON International Inc. PAGE NUMBER : 6 of 8 TEL : 886-3-327-3456 ISSUED DATE : Nov. 18, 2015 FAX : 886-3-327-0973 Adapter Model No.: HKA06012050-7C Report No.: 5O1803 SPORTON International Inc. PAGE NUMBER : 7 of 8 TEL : 886-3-327-3456 ISSUED DATE : Nov. 18, 2015 FAX : 886-3-327-0973 Report No.: 5O1803 SPORTON International Inc. PAGE NUMBER : 8 of 8 TEL : 886-3-327-3456 ISSUED DATE : Nov. 18, 2015 FAX : 886-3-327-0973 Power cable
ID Label/Location Info
Label:
Internal Photos
Report No.: 5O1803 SPORTON International Inc. PAGE NUMBER : 1 of 27 TEL : 886-3-327-3456 ISSUED DATE : Nov. 18, 2015 FAX : 886-3-327-0973 Photographs of EUT Report No.: 5O1803 SPORTON International Inc. PAGE NUMBER : 2 of 27 TEL : 886-3-327-3456 ISSUED DATE : Nov. 18, 2015 FAX : 886-3-327-0973 Report No.: 5O1803 SPORTON International Inc. PAGE NUMBER : 3 of 27 TEL : 886-3-327-3456 ISSUED DATE : Nov. 18, 2015 FAX : 886-3-327-0973 Report No.: 5O1803 SPORTON International Inc. PAGE NUMBER : 4 of 27 TEL : 886-3-327-3456 ISSUED DATE : Nov. 18, 2015 FAX : 886-3-327-0973 Report No.: 5O1803 SPORTON International Inc. PAGE NUMBER : 5 of 27 TEL : 886-3-327-3456 ISSUED DATE : Nov. 18, 2015 FAX : 886-3-327-0973 Report No.: 5O1803 SPORTON International Inc. PAGE NUMBER : 6 of 27 TEL : 886-3-327-3456 ISSUED DATE : Nov. 18, 2015 FAX : 886-3-327-0973 Report No.: 5O1803 SPORTON International Inc. PAGE NUMBER : 7 of 27 TEL : 886-3-327-3456 ISSUED DATE : Nov. 18, 2015 FAX : 886-3-327-0973 Report No.: 5O1803 SPORTON International Inc. PAGE NUMBER : 8 of 27 TEL : 886-3-327-3456 ISSUED DATE : Nov. 18, 2015 FAX : 886-3-327-0973 Report No.: 5O1803 SPORTON International Inc. PAGE NUMBER : 9 of 27 TEL : 886-3-327-3456 ISSUED DATE : Nov. 18, 2015 FAX : 886-3-327-0973 Report No.: 5O1803 SPORTON International Inc. PAGE NUMBER : 10 of 27 TEL : 886-3-327-3456 ISSUED DATE : Nov. 18, 2015 FAX : 886-3-327-0973 Report No.: 5O1803 SPORTON International Inc. PAGE NUMBER : 11 of 27 TEL : 886-3-327-3456 ISSUED DATE : Nov. 18, 2015 FAX : 886-3-327-0973 Report No.: 5O1803 SPORTON International Inc. PAGE NUMBER : 12 of 27 TEL : 886-3-327-3456 ISSUED DATE : Nov. 18, 2015 FAX : 886-3-327-0973 Report No.: 5O1803 SPORTON International Inc. PAGE NUMBER : 13 of 27 TEL : 886-3-327-3456 ISSUED DATE : Nov. 18, 2015 FAX : 886-3-327-0973 Report No.: 5O1803 SPORTON International Inc. PAGE NUMBER : 14 of 27 TEL : 886-3-327-3456 ISSUED DATE : Nov. 18, 2015 FAX : 886-3-327-0973 Report No.: 5O1803 SPORTON International Inc. PAGE NUMBER : 15 of 27 TEL : 886-3-327-3456 ISSUED DATE : Nov. 18, 2015 FAX : 886-3-327-0973 Report No.: 5O1803 SPORTON International Inc. PAGE NUMBER : 16 of 27 TEL : 886-3-327-3456 ISSUED DATE : Nov. 18, 2015 FAX : 886-3-327-0973 Report No.: 5O1803 SPORTON International Inc. PAGE NUMBER : 17 of 27 TEL : 886-3-327-3456 ISSUED DATE : Nov. 18, 2015 FAX : 886-3-327-0973 Report No.: 5O1803 SPORTON International Inc. PAGE NUMBER : 18 of 27 TEL : 886-3-327-3456 ISSUED DATE : Nov. 18, 2015 FAX : 886-3-327-0973 Report No.: 5O1803 SPORTON International Inc. PAGE NUMBER : 19 of 27 TEL : 886-3-327-3456 ISSUED DATE : Nov. 18, 2015 FAX : 886-3-327-0973 Report No.: 5O1803 SPORTON International Inc. PAGE NUMBER : 20 of 27 TEL : 886-3-327-3456 ISSUED DATE : Nov. 18, 2015 FAX : 886-3-327-0973 Report No.: 5O1803 SPORTON International Inc. PAGE NUMBER : 21 of 27 TEL : 886-3-327-3456 ISSUED DATE : Nov. 18, 2015 FAX : 886-3-327-0973 Report No.: 5O1803 SPORTON International Inc. PAGE NUMBER : 22 of 27 TEL : 886-3-327-3456 ISSUED DATE : Nov. 18, 2015 FAX : 886-3-327-0973 Report No.: 5O1803 SPORTON International Inc. PAGE NUMBER : 23 of 27 TEL : 886-3-327-3456 ISSUED DATE : Nov. 18, 2015 FAX : 886-3-327-0973 Report No.: 5O1803 SPORTON International Inc. PAGE NUMBER : 24 of 27 TEL : 886-3-327-3456 ISSUED DATE : Nov. 18, 2015 FAX : 886-3-327-0973 Report No.: 5O1803 SPORTON International Inc. PAGE NUMBER : 25 of 27 TEL : 886-3-327-3456 ISSUED DATE : Nov. 18, 2015 FAX : 886-3-327-0973 Report No.: 5O1803 SPORTON International Inc. PAGE NUMBER : 26 of 27 TEL : 886-3-327-3456 ISSUED DATE : Nov. 18, 2015 FAX : 886-3-327-0973 Report No.: 5O1803 SPORTON International Inc. PAGE NUMBER : 27 of 27 TEL : 886-3-327-3456 ISSUED DATE : Nov. 18, 2015 FAX : 886-3-327-0973
RF Exposure Info
SPORTON International Inc. No. 52, Hwa Ya 1st Rd., Hwa Ya Technology Park, Kwei-Shan Hsiang, Tao Yuan Hsien, Taiwan, R.O.C. Ph: 886-3-327-3456 / FAX: 886-3-327-0973 / www.sporton.com.tw Report Format Version: 01 FCC ID : TE7C3150 Maximum Permissible Exposure Report Applicant’s company TP-LINK TECHNOLOGIES CO., LTD. Applicant Address Building 24 (floors 1,3,4,5) and 28 (floors1-4) Central Science and Technology Park, Shennan Rd, Nanshan, Shenzhen, China FCC ID TE7C3150 Manufacturer’s company TP-LINK TECHNOLOGIES CO., LTD. Manufacturer Address Building 24 (floors 1,3,4,5) and 28 (floors1-4) Central Science and Technology Park, Shennan Rd, Nanshan, Shenzhen, China Product Name AC3150 Wireless MU-MIMO Gigabit Router Brand Name TP-LINK Model Name Archer C3150 Ref. Standard(s) 47 CFR FCC Part 2 Subpart J, section 2.1091 Received Date Oct. 28, 2015 Final Test Date Nov. 06, 2015 Submission Type Original Equipment _____________________________ Sam Chen SPORTON INTERNATIONAL INC.Reviewed Project No: CB10411056 Report No.: FA5O1803 Report Format Version: 01 Page No. : i of ii FCC ID : TE7C3150 Issued Date : Nov. 18, 2015 Table of Contents 1. GENERAL DESCRIPTION.................................................................................................................................... 1 1.1. EUT General Information .....................................................................................................................................................................1 1.2. Testing Location..................................................................................................................................................................................1 2. MAXIMUM PERMISSIBLE EXPOSURE.................................................................................................................... 2 2.1. Limit of Maximum Permissible Exposure ..............................................................................................................................................2 2.2. MPE Calculation Method ....................................................................................................................................................................2 2.3. Calculated Result and Limit................................................................................................................................................................3 Report No.: FA5O1803 Report Format Version: 01 Page No. : ii of ii FCC ID : TE7C3150 Issued Date : Nov. 18, 2015 History of This Test Report REPORT NO. VERSION DESCRIPTION ISSUED DATE FA5O1803 Rev. 01 Initial issue of report Nov. 18, 2015 Report No.: FA5O1803 Report Format Version: 01 Page No. : 1 of 3 FCC ID : TE7C3150 Issued Date : Nov. 18, 2015 1. GENERAL DESCRIPTION 1.1. EUT General Information RF General Information Evaluation Mode Frequency Range (MHz) Operating Frequency (MHz) Modulation Type 2.4GHz WLAN 2400-2483.5 2412-2462 802.11b: DSSS (DBPSK, DQPSK, CCK) 802.11g/n: OFDM (BPSK, QPSK, 16QAM, 64QAM) 802.11ac: OFDM (BPSK, QPSK, 16QAM, 64QAM, 256QAM, 1024QAM) 5GHz WLAN 5150-5250 5725-5850 5180-5240 5745-5825 802.11a/n: OFDM (BPSK, QPSK, 16QAM, 64QAM) 802.11ac: OFDM (BPSK, QPSK, 16QAM, 64QAM, 256QAM, 1024QAM) 1.2. Testing Location Testing Location HWA YA ADD : No. 52, Hwa Ya 1st Rd., Kwei-Shan Hsiang, Tao Yuan Hsien, Taiwan, R.O.C. TEL : 886-3-327-3456 FAX : 886-3-327-0973 JHUBEI ADD : No.8, Lane 724, Bo-ai St., Jhubei City, HsinChu County 302, Taiwan, R.O.C. TEL : 886-3-656-9065 FAX : 886-3-656-9085 Report No.: FA5O1803 Report Format Version: 01 Page No. : 2 of 3 FCC ID : TE7C3150 Issued Date : Nov. 18, 2015 2. MAXIMUM PERMISSIBLE EXPOSURE 2.1. Limit of Maximum Permissible Exposure (A) Limits for Occupational / Controlled Exposure Frequency Range (MHz) Electric Field Strength (E) (V/m) Magnetic Field Strength (H) (A/m) Power Density (S) (mW/ cm²) Averaging Time |E|²,|H|² or S (minutes) 0.3-3.0 614 1.63 (100)* 6 3.0-30 1842 / f 4.89 / f (900 / f)* 6 30-300 61.4 0.163 1.0 6 300-1500 F/300 6 1500-100,000 5 6 (B) Limits for General Population / Uncontrolled Exposure Frequency Range (MHz) Electric Field Strength (E) (V/m) Magnetic Field Strength (H) (A/m) Power Density (S) (mW/ cm²) Averaging Time |E|²,|H|² or S (minutes) 0.3-1.34 614 1.63 (100)* 30 1.34-30 824/f 2.19/f (180/f)* 30 30-300 27.5 0.073 0.2 30 300-1500 F/1500 30 1500-100,000 1.0 30 Note: f = frequency in MHz ; *Plane-wave equivalent power density 2.2. MPE Calculation Method The MPE was calculated at 20 cm to show compliance with the power density limit. The following formula was used to calculate the Power Density: E (V/m) = d GP30 Power Density: Pd (W/m²) = 377 2 E E = Electric field (V/m) P = Peak RF output power (W) G = EUT Antenna numeric gain (numeric) d = Separation distance between radiator and human body (m) The formula can be changed to Pd = 2 377 30 d GP Report No.: FA5O1803 Report Format Version: 01 Page No. : 3 of 3 FCC ID : TE7C3150 Issued Date : Nov. 18, 2015 2.3. Calculated Result and Limit Exposure Environment: General Population / Uncontrolled Exposure For 5GHz Band (NII): Antenna Type : Dipole Antenna Conducted Power for IEEE 802.11a: 26.97 dBm The maximum combined Average Output Power Distance (cm) Test Freq. (MHz) Antenna Gain (dBi) Antenna Gain (numeric) (dBm) (mW) Power Density (S) (mW/cm²) Limit of Power Density (S) (mW/cm²) Test Result 20 5240 3.00 1.9953 26.9730 498.0817 0.197811 1 Complies For 5GHz Band (DTS): Antenna Type : Dipole Antenna Conducted Power for IEEE 802.11ac MCS0/Nss1 (VHT40): 29.82 dBm The maximum combined Average Output Power Distance (cm) Test Freq. (MHz) Antenna Gain (dBi) Antenna Gain (numeric) (dBm) (mW) Power Density (S) (mW/cm²) Limit of Power Density (S) (mW/cm²) Test Result 20 5795 3.00 1.9953 29.8243 960.3452 0.381397 1 Complies For 2.4GHz Band: Antenna Type : Dipole Antenna Conducted Power for IEEE 802.11ac MCS0/Nss1 (VHT20): 29.86 dBm The maximum combined Average Output Power Distance …
Text truncated - open the document above for the full version.
Test Report
SPORTON International Inc. No. 52, Hwa Ya 1st Rd., Hwa Ya Technology Park, Kwei-Shan Hsiang, Tao Yuan Hsien, Taiwan, R.O.C. Ph: 886-3-327-3456 / FAX: 886-3-327-0973 / www.sporton.com.tw Report Format Version: Rev. 01 FCC RADIO TEST REPORT Applicant’s company TP-LINK TECHNOLOGIES CO., LTD. Applicant Address Building 24 (floors 1,3,4,5) and 28 (floors1-4) Central Science and Technology Park, Shennan Rd, Nanshan, Shenzhen, China FCC ID TE7C3150 Manufacturer’s company TP-LINK TECHNOLOGIES CO., LTD. Manufacturer Address Building 24 (floors 1,3,4,5) and 28 (floors1-4) Central Science and Technology Park, Shennan Rd, Nanshan, Shenzhen, China Product Name AC3150 Wireless MU-MIMO Gigabit Router Brand Name TP-LINK Model No. Archer C3150 Test Rule Part(s) 47 CFR FCC Part 15 Subpart C § 15.247 Test Freq. Range 2400 ~ 2483.5MHz / 5725 ~ 5850MHz Received Date Oct. 28, 2015 Final Test Date Nov. 06, 2015 Submission Type Original Equipment Statement Test result included is only for the IEEE 802.11b/g, IEEE 802.11n and IEEE 802.11a/ac of the product. The test result…
Text truncated - open the document above for the full version.
Contact Information
Applicant
Jing Huang(Regulatory Compliance Manager)
Test Firm
Sporton International Inc.Alex Chen
Technical Specifications
| # | Rule Parts | Frequency Range | Power Output |
|---|---|---|---|
| 2 | 15C | 5.75 GHz - 5.83 GHz | 959.00 mW |
Other Applications from TP-Link Technologies Co., Ltd.
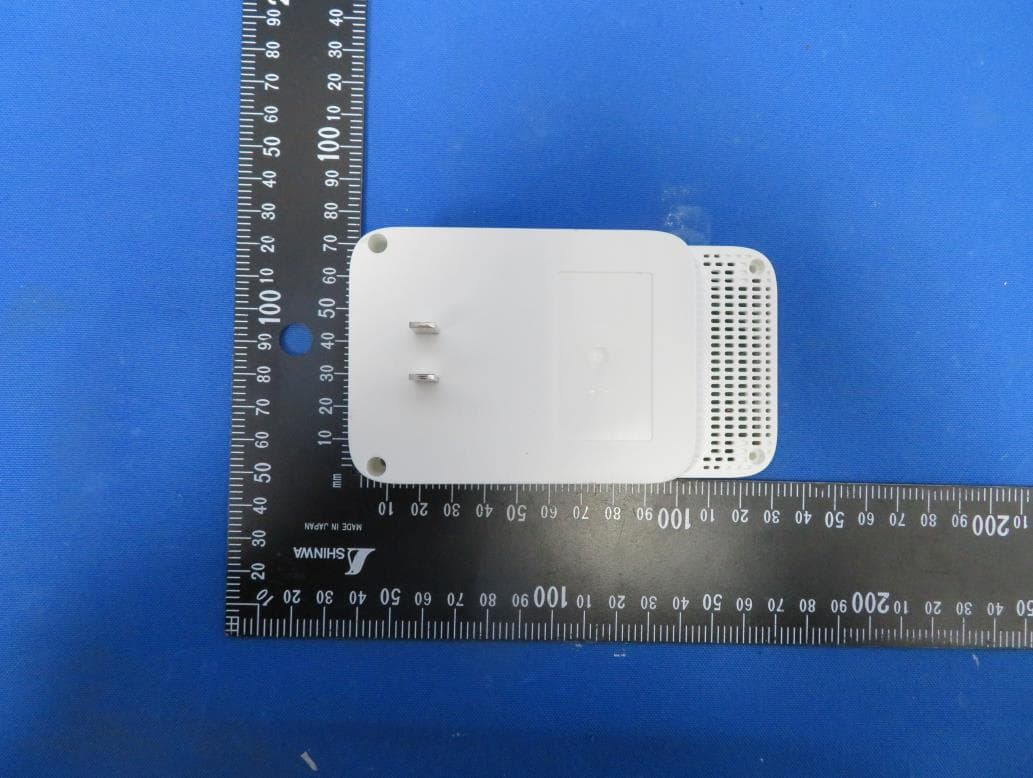
TE7RE230V2
Jan 13, 2021AC750 Wi-Fi Range Extender, AC1200 Wi-Fi Range Extender
Equipment Class
DTS - Digital Transmission System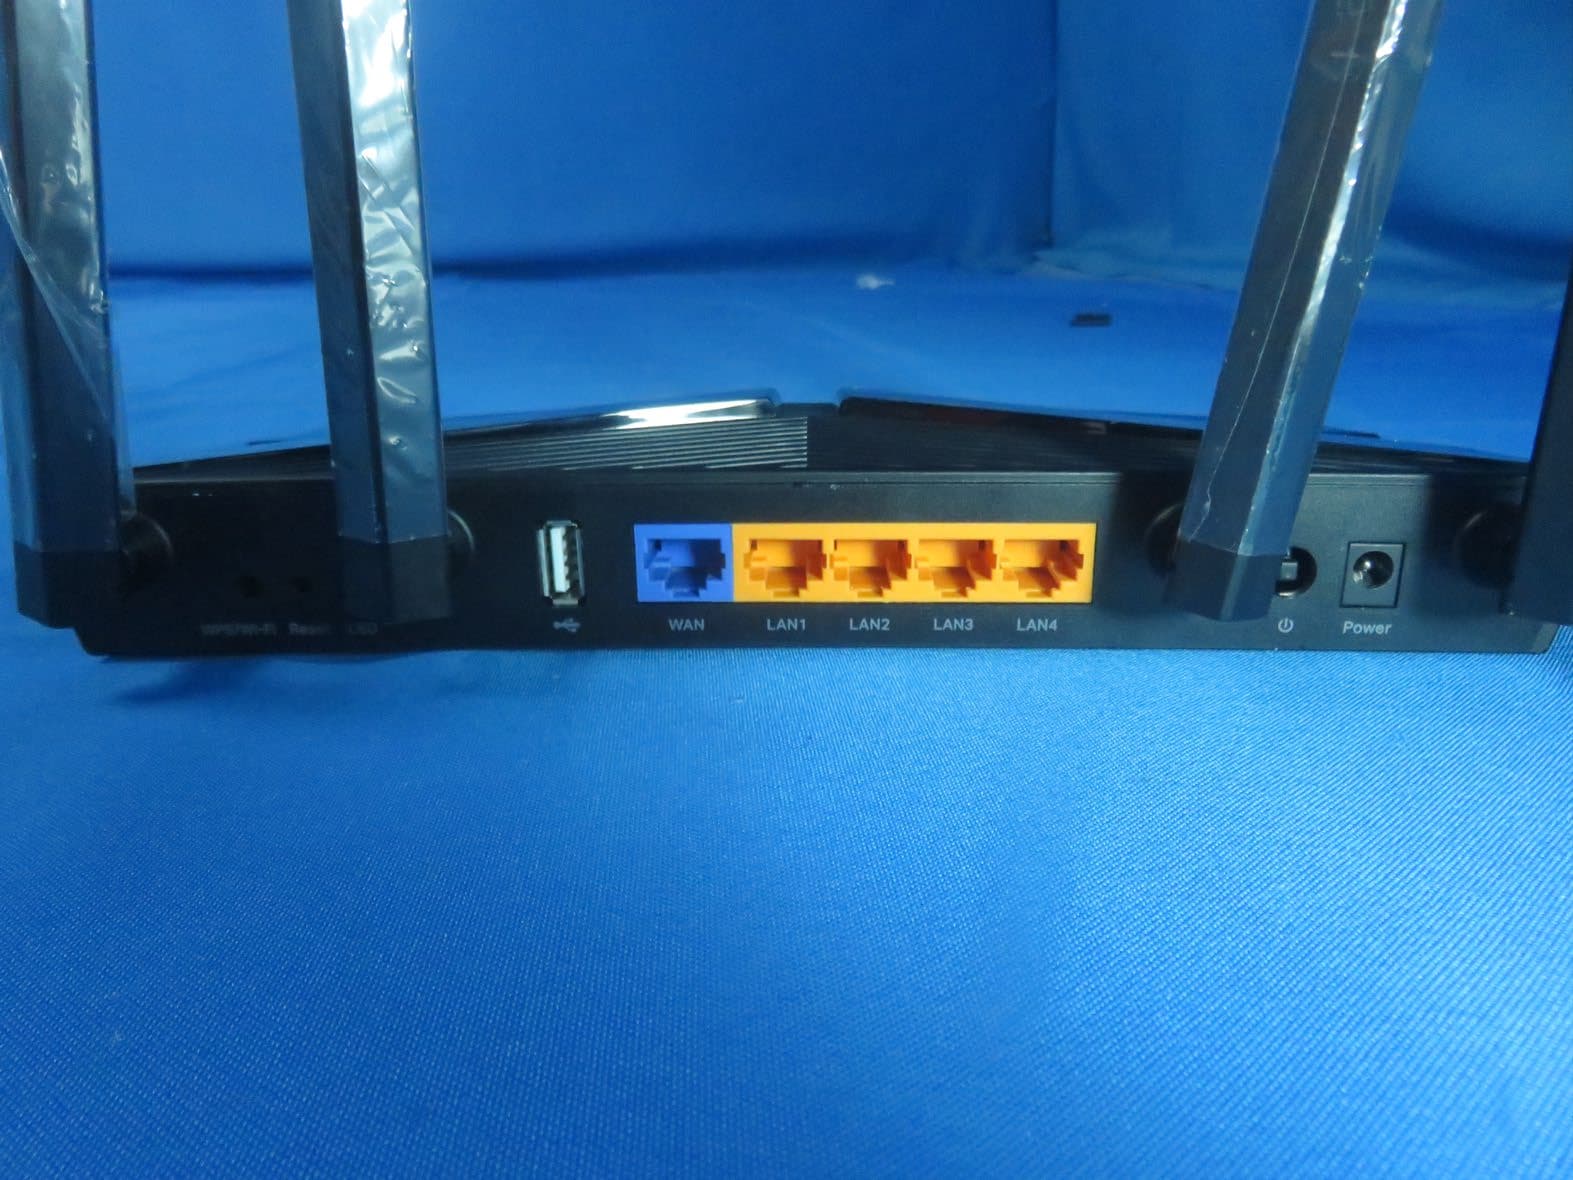
TE7AX20V2
Dec 22, 2020AX1800 Dual-Band Wi-Fi 6 Router
Equipment Class
DTS - Digital Transmission System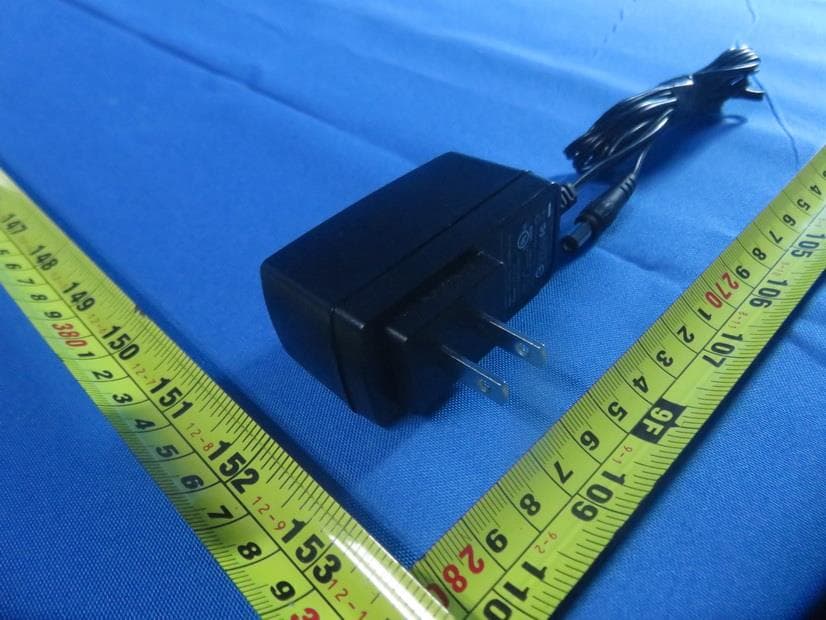
TE7EAP620HD
Dec 17, 2020AX1800 Wireless Dual-Band Gigabit Ceiling Mount Access Point
Equipment Class
NII - Unlicensed National Information Infrastructure TX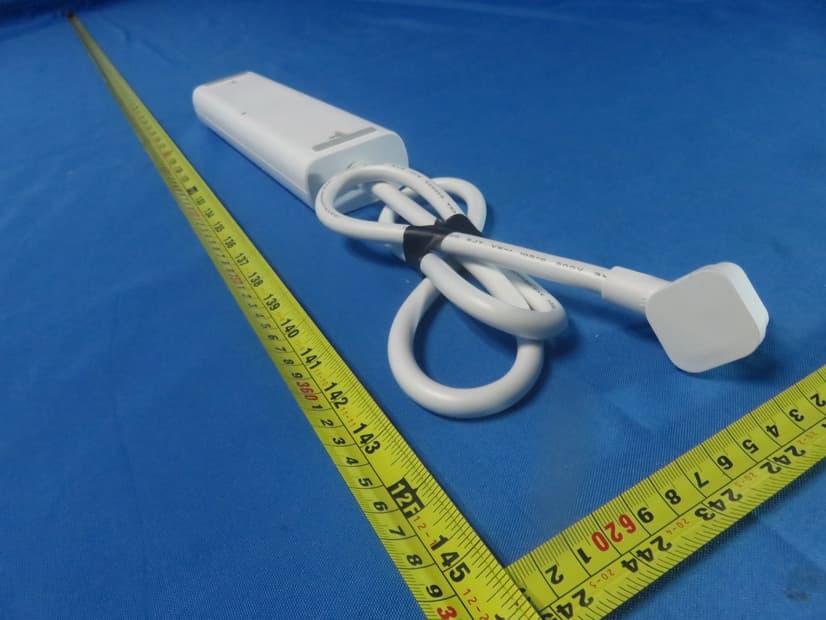
TE7KP303V2
Dec 15, 2020Kasa Smart Wi-Fi Power Strip, 3-Outlet
Equipment Class
DTS - Digital Transmission System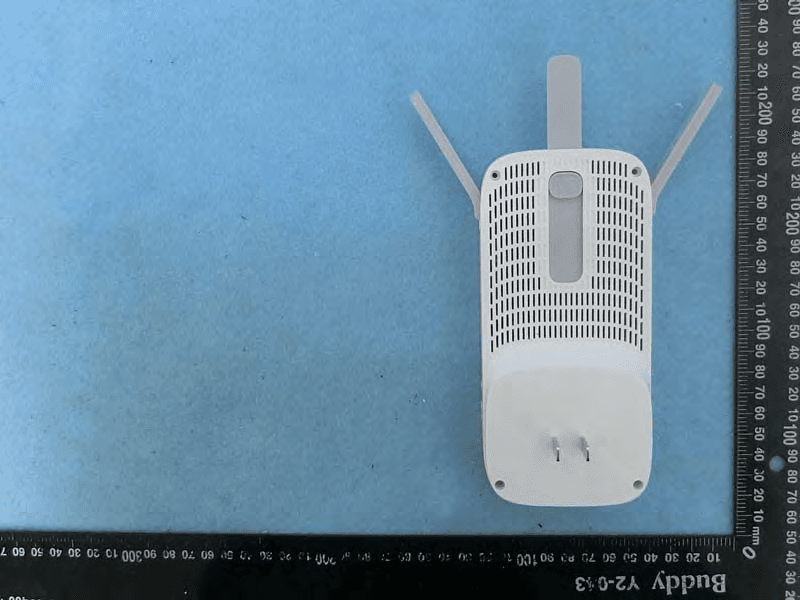
TE7RE550
Dec 03, 2020AC1750 Wi-Fi Range Extender, AC1900 MU-MIMO Wi-Fi Range Extender
Equipment Class
DTS - Digital Transmission System