NWJ10A006AEB-TX310
Panasonic Mobile Communications Development Corporation of USA
Click to zoom
Application Details
- Equipment Class
- TNE - Licensed Non-Broadcast Transmitter Held to Ear
- Date of Grant
- Jun 12, 2001
- Application Purpose
- Original Equipment
- Date of Application
- Apr 30, 2001
- Equipment Note
- EB-TX310
- Frequency Range
- 1850.04000000 - 1909.95000000
- Country
- United States
Documents & Files
Document Text
Text extracted from the exhibit documents filed with the FCC. Open a document above to read the original.
Users Manual
i Introduction.......................................................................... vii About This Manual ............................................................. vii Icons Used in This Manual ............................................... viii Chapter 1: Safety First ......................................................... 1 Batteries................................................................................ 1 Charging Devices................................................................. 1 General.................................................................................. 1 Availability of Service .......................................................... 2 Emergency (911) Service .................................................... 2 Safety Tips ............................................................................ 2 Chapter 2: Getting Started................................................... 5 Battery Use ........................................................................... 5 Attaching the Battery.............................................................. 5 Charging the Battery .............................................................. 5 Recharging Tips .............................................................. 6 Battery Specifications............................................................. 6 Removing the Battery............................................................. 6 Low-Battery Warning.............................................................. 6 Phone Description ............................................................... 7 Phone Specifications.............................................................. 7 Function Keys ...................................................................... 8 Display Icons ........................................................................ 9 Master Display and Icons....................................................... 9 Phonebook Icons ................................................................. 10 Powering Phone On and Off ............................................. 10 Powering ON........................................................................ 10 Powering OFF ...................................................................... 10 Standby Display ................................................................. 11 Moving through the Menu ................................................. 11 Shortcut Keys....................................................................... 11 Setting Date and Time ....................................................... 11 Adjusting Date and Time Settings........................................ 11 Changing the Date Format................................................... 12 Selecting 24-hour or 12-hour Mode ..................................... 12 Contents ii Setting Ring Volume .......................................................... 13 Selecting a Ring Alert ........................................................ 13 Vibration Alert .......................................................................14 Using the Private Handsfree Headset .............................. 15 Personalizing Your Phone................................................. 15 Chapter 3: Everyday Operations ...................................... 17 Placing Calls....................................................................... 17 Dialing from the Keypad .......................................................17 Dialing from the Phonebook .................................................17 Dialing a Phonebook Entry from the Menu ....................18 Super Dial ......................................................................18 Speed Dial .....................................................................18 Answering Calls ................................................................. 19 In-Call Features .................................................................. 19 Adjusting Voice Volume........................................................19 Viewing Your Own Phone Number During a Call .................20 Muting the Mouthpiece .........................................................20 Using the Display as a Scratchpad.......................................20 Turning the Speakerphone On and Off.................................21 Missed Calls ....................................................................... 21 Answer Key Options .......................................................... 22 Voice Mail............................................................................ 22 Listening to New Voice Mail..................................................22 Redialing Numbers ............................................................ 23 Redialing One of the Last 10 Numbers Dialed .....................23 Automatic Redial...................................................................23 Key Lock ............................................................................. 23 Turning On Key Lock ............................................................24 Turning Off Key Lock ............................................................24 Voice Memo ........................................................................ 24 Recording a Voice Memo from Standby ...............................24 Recording a Voice Memo During a Call................................25 Playing and Deleting a Voice Memo.....................................25 Chapter 4: Text Entry Operations ..................................... 27 Letter Entry ......................................................................... 27 Using Letter Entry (ABC) Mode ............................................27 Word Entry (Word T9) Mode.............................................. 28 Using Word Entry (Word T9) Mode ......................................28 Numbers (NUM) Mode........................................................ 29 iii Symbols (SYM) Mode ....…
Text truncated - open the document above for the full version.
Users Manual
Everyday Operations 17 Everyday Operations Your phone comes with a variety of features. In most cases, however, you will use only some of these features on a daily basis. This chapter will familiarize you with most of those “everyday” operations. Descriptions of more advanced features are covered in additional chapters. Placing Calls To place a call, power on your phone and confirm that you have a strong signal indication. If you are in a digital service area, the icon appears. Dialing from the Keypad 1 From standby, enter the phone number (up to 32 digits). 2 Press to place the call. Caution: During a call, if you press and hold , the speakerphone feature is activated. Do not hold the phone next to your ear when speakerphone is activated. • If the outgoing phone number matches an entry in the Phonebook, the corresponding name is also displayed with the number. 3 When the call connects, Voice Call is displayed. • The call timer is displayed if the Current Call timer is on. (See “Setting Call Timers” on page 42 for more information.) 4 Press to end the call. Dialing from the Phonebook To use Super Dial and Speed Dial, you must first program entries into the Phonebook. See Chapter 5, “Phonebook Features” . 1 From standby, press or to scroll through the Phonebook entries. • Depending on your phone’s search method setting, the display shows entries alphabetically by first or last name, or by memory location number. To change, see “Selecting a Phonebook Search Method” on page 36 . • To “jump” to a specific section of the alphabet, press the number key that has the corresponding letter on it. 2 When the arrow points to the entry you want, press (VIEW) to view the Phonebook entry. 3 Press or to scroll to the appropriate phone number and press to place the call. 3 Chapter 3 18 Everyday Operations Dialing a Phonebook Entry from the Menu 1 From standby, press () to enter the Phonebook. 2 Press (OK) to select Search . • Depending on your phone’s search method setting, the display prompts you to enter First Name , Last Name , or Location # . (To change the search method setting, see “Selecting a Phonebook Search Method” on page 36 .) 3 Enter the name, a portion of the name, or the memory location number and press (FIND or OK). Note: If you do not enter anything for the first or last name, the display goes to the first letter of the alphabet for which you have a Phonebook entry. 4 If needed, press or to scroll to the number you want to call. • When the list of names appears, the following may indicate there is no name entry for a number saved in the Phonebook: "----,----". 5 When the arrow points to the entry of your choice, press (VIEW) to view the Phonebook entry. 6 Press or to scroll to the phone number you want to call, and press to place the call. Super Dial Super Dial lets you quickly dial a phone number by pressing and holding a digit key on your keypad. Before you can use Super Dial, you must create entries in your Phonebook and then assign them to Super Dial keys. See “Creating a Super Dial Entry” on page 33 . Note: When you purchase your phone, the key is programmed as a Super Dial key to call the emergency number 911. However, you have to enable this key assignment before you can use it. See “Emergency Call” on page 54 . 1 From standby, press and hold the key ( - ) you have assigned to a number in your Phonebook. • The number is dialed and the name is displayed as it is listed in your Phonebook entry. • If there is no phone number assigned to the digit key, Super Dial Not Assigned is displayed. Speed Dial To call a Speed Dial number directly from standby (without going to a menu), enter the memory location number that contains the phone number you want to call, and press . To view a Speed Dial number before placing the call, follow these steps: 1 From standby, enter the memory location number that contains the phone number you want to call, then press . (For example, to dial a number stored in location 25, press .) Chapter 3 Everyday Operations 19 • The display shows the Phonebook entry with an arrow () pointing to the speed dial number. • If the entered memory location is empty, the display shows the entered digits and the # sign. 2 Press to place the call. OR If necessary, press or to scroll to another phone number and press to place the call. Answering Calls The phone must be on to receive calls. It will not ring or vibrate when powered off. When a call is received, the phone rings and/or vibrates. • If you have Caller ID, the caller’s phone number is displayed under Incoming Call . • If the caller’s phone number matches an entry in the Phonebook, the corresponding name appears and the backlight changes color (unless the call was placed through a PBX). 1 To answer, press or any key except . (See “Answer Key Options” on page 22 .) • Quickly pressing will stop the ringing and/or vibration alert, but not answer the call. 2 When you are ready to end the call, press to disconnect. In-Call Features While you are in a call, you can increase or decrease the volume of the other person’s voice, mute the mouthpiece, display your own phone number, enter a phone number on the display, or switch to Speakerphone operation. You can also record a voice memo of the other person’s voice (see “Recording a Voice Memo During a Call” on page 25 ). Adjusting Voice Volume 1 During a call, press to increase the volume of the other person’s voice, or press to decrease the volume of the other person’s voice. • The volume level is displayed. 2 Release the key when a satisfactory volume is reached. Chapter 3 20 Everyday Operations Viewing Your Own Phone Number During a Call During a call, you can view your own phone number. 1 During a call, press (MENU) to enter the Main Menu. 2 Scroll to Phonebook and press (OK). 3 Scroll to Own Number and press (OK) to view your phone number. 4 Press (OK) and the display returns to standby. Note: If your phone is programmed with more than one phone number, only the number currentl…
Text truncated - open the document above for the full version.
Users Manual
Additional Operations 39 Advanced Operations Additional Operations Many features and settings are accessible only through the phone’s Menu. This chapter will show you how to use your phone’s Menu to get the most from these advanced features. If a particular Menu feature is not listed in this chapter as it appears on the phone’s display, please turn to “Phonebook Features” on page 31 or to “Service Provider Features” on page 63 , or check the Index for pointers to where the information is located. For an overview of how to move through the Menu and how to use the shortcut keys, see “Moving through the Menu” in Chapter 2 and the Menu Map inside the front cover. Call History From the Call History menu you can view and delete information related to calls you have received and placed. You can also reset the timer that monitors the time you spend in conversation on the phone. Dialed Calls 1 From standby, press (MENU) to enter the Main Menu. 2 Scroll to Call History and press (OK). 3 Press (OK) to select Dialed . • The last dialed number is displayed. • If you place a phone call to a number that is already in your dialed numbers list, the newer call record will replace the older one. • Missed or Received calls can be checked by pressing or . 4 Press or to scroll through the last 10 dialed numbers. 5 When the number you want to call is displayed, press . OR Press (OPTION) to add a prefix, to delete a number, to save a number, or to delete all entries in the list. See “Call History Options” on page 40 for instructions. Missed Calls 1 From standby, press (MENU) to enter the Main Menu. 2 Scroll to Call History and press (OK). 3 Scroll to Missed and press (OK). • The last missed (unanswered) number is displayed (unless the call was from a private or unlisted number). • Dialed or Received calls can be checked by pressing or . • A call without caller ID will be stored as Private ID. 6 Chapter 6 40 Additional Operations 4 Press or to scroll through the last 10 missed calls. 5 When the number you want to call is displayed, press . OR Press (OPTION) to add a prefix, to delete a number, to save a number, or to delete all entries in the list. See “Call History Options” on page 40 for instructions. Received Calls 1 From standby, press (MENU) to enter the Main Menu. 2 Scroll to Call History and press (OK). 3 Scroll to Received and press (OK). • The last received number is displayed. • If you receive a phone call from a number that is already in your received numbers list, the newer record will replace the older one. • Dialed or Missed calls can be checked by pressing or . 4 Press or to scroll through the last 10 received calls. 5 When the number you want to call is displayed, press . OR Press (OPTION) to add a prefix, to delete a number, to save a number, or to delete all entries in the list. See “Call History Options” on page 40 for instructions. Call History Options Adding a Prefix This feature is useful if you call a local number and then travel to another location (with a different area code) and want to call the same number. You have the option of adding an area code. Note: If the phone number was originally stored with its area code, the 1 is automatically inserted in front of it. If only the local (7-digit) phone number was stored, you have to add the area code and then the 1 is automatically inserted. 1 From standby, press (MENU) to enter the Main Menu. 2 Scroll to Call History and press (OK). 3 Scroll to Dialed , Missed , or Received and press (OK). 4 Scroll until the phone number you want to add a prefix to is displayed. Then press (OPTION). 5 Press (OK) to select Prefix . Chapter 6 Additional Operations 41 6 Scroll to Edit Number and press (OK). 7 Press repeatedly to position the cursor in front of the phone number and then enter the 3-digit area code. 8 Press (SEND) to place the call. Saving a Number 1 From standby, press (MENU) to enter the Main Menu. 2 Scroll to Call History and press (OK). 3 Scroll to Dialed , Missed , or Received and press (OK). 4 Scroll to the number you want to save and press (OPTION). 5 Scroll to Save and press (OK). 6 Scroll to Home # , Work # , Cell # , or Other # and press (OK). 7 To enter additional information, scroll to an item and press (SELECT). 8 Follow the prompts to enter the name and email address. See Chapter 4 , “Text Entry Operations” for information on entering text. 9 After entering the information for one item, press (OK). 10 When you have entered all the information, press (FINISH). 11 When prompted to save the information, press (YES). Deleting a Number 1 From standby, press (MENU) to enter the Main Menu. 2 Scroll to Call History and press (OK). 3 Scroll to Dialed , Missed , or Received and press (OK). 4 Scroll to the phone number you want to delete and press (OPTION). 5 Scroll to Delete Entry and press (OK). 6 When prompted to confirm, press (YES) to delete the entry. OR Press (NO) to cancel the deletion. Deleting All Entries in a List 1 From standby, press (MENU) to enter the Main Menu. 2 Scroll to Call History and press (OK). 3 Scroll to Dialed , Missed , or Received and press (OK). 4 Press (OPTION). 5 Scroll to Delete All and press (OK). • The display prompts you to confirm the deletion of all entries. 6 Press (YES) to delete all entries or (NO) to cancel the deletion. Chapter 6 42 Additional Operations Setting Call Timers The Last Call and All Calls options allow you to see how much time you have spent connected on calls. The Custom call option allows you to reset the timer. The Current Call option allows you to select whether or not the timer is displayed during a call. 1 From standby, press (MENU) to enter the Main Menu. 2 Scroll to Call History and press (OK). 3 Scroll to Call Timers and press (OK). • Four options are shown: Last Call , All Calls , Custom , and Current Call . 4 To view the time you have spent on the Last Call or All Calls , scroll to your choice and press (OK) to select. OR To view your phone’s call timer after the last reset, s…
Text truncated - open the document above for the full version.
Users Manual
Service Provider Features 63 Service Provider Features Service Provider Features Several features on your phone are available only if you sign up for them with your wireless service provider. If you do not have one of the services listed below, contact your wireless service provider for more information. Caller ID This feature displays the phone number of the person calling you. If the caller’s phone number matches an entry in the Phonebook, the backlight changes color and the corresponding name and a picture (if selected in the Phonebook) are also displayed. The ring tone, color, and picture displayed depend on the settings you selected in the Phonebook. Call Waiting 1 An alert sounds when you receive an incoming call during a conversation. • The display indicates that a call is waiting. • If the caller’s phone number matches an entry in the Phonebook, the backlight changes color and the corresponding name and a picture (if selected in the Phonebook) are also displayed. 2 Press (ACCEPT) to connect with the incoming call and place the first call on hold. OR Press (IGNORE) to silence the ring and continue your current call. 3 Press to switch between the two calls. 4 Press to end the current call. Three-Way Calling This feature lets you dial a third person while you are in a call. You can continue your conversation with one person when the other one hangs up. 1 While in a call, enter a phone number or recall it from the Phonebook. 2 Press . • The phone call you are in is temporarily placed on hold. 3 When the third person answers, press again to connect all three parties. 4 Press to end all calls. Note: This feature may not be available in all areas. Contact your wireless service provider for more information. 7 Chapter 7 64 Service Provider Features Text Messaging Composing a Text Message You can type a text message (up to 160 characters including the e-mail address). Entering the Send To Information 1 From the Text Message menu, scroll to Compose and press (OK). 2 Press (SELECT) to select Send To . 3 From the Send To screen, select From Phonebook , Phone# , or E-mail Address . Follow the display prompts or enter characters. (See Chapter 4 , “Text Entry Operations” .) Press (OK). If you decide to change the phone number or e-mail address you entered, reselect the check-marked Send To: entry, and press (CHANGE). Repeat the first part of this step. OR If you have created a group list, you can send the message to several people at once, by selecting Group Lists and pressing (OK). Select an entry from your group lists and press (OK). (See “Creating a Group List” on page 69 for information on how to set up group lists.) • The Compose menu is displayed with a check mark next to Send To , indicating that this field has been filled in. Entering the Text of Your Message 4 Scroll to Message and press (SELECT). 5 Enter the text of your message and press (OK). (See Chapter 4 , “Text Entry Operations” .) • The Compose menu is displayed with a check mark next to Send To and Message , indicating that both these fields have been filled in. Adding a Picture 6 To send a picture with your message (if sending the message to another EB-TX310 phone), scroll to Picture , and press (SELECT). 7 Select from the list of pictures and press (OK). • The Compose menu is displayed. If you selected a picture to send, there is a check mark next to Picture . Adding a Melody 8 To send a melody with your message (if sending the message to another EB-TX310 phone), scroll to Melody , and press (SELECT). 9 Select from the list of melodies. • To hear a melody, scroll to the melody and press (PLAY). Press (STOP) to stop playing the melody. 10 Press (OK). • The Compose menu is displayed. If you selected a melody to send, there is a check mark next to Melody . 11 Press (FINISH). Chapter 7 Service Provider Features 65 Message Options 12 Do one of the following: - To send the message, press (OK). - To store the message in the outbox before sending it, scroll to Save and press (OK). • The outbox holds up to 20 unsent messages. If the outbox is full, delete or send an outbox message to make more room in the outbox. - To delete the message and return to the Text Message menu, scroll to Exit and press (OK). Note: You can include a picture or a melody with a message only to another EB-TX310 phone. If you send a picture or a melody with a message to a phone other than an EB-TX310, your message will be delivered, but it may contain extraneous characters. Accessing Text Messages 1 From standby, press . OR From standby, press (MENU), scroll to Messages , and press (OK) 2 Scroll to Text Message , and press (OK). 3 Do one of the following: - To look at messages in the Inbox , press (OK). See “Viewing Inbox Messages” on page 68 . - To compose a message, scroll to Compose and press (OK). See “Composing a Text Message” on page 64 . - To create a group list so that you can send a message to several people at once, scroll to Group Lists and press (OK). See “Creating a Group List” on page 69. - To delete all messages in the Inbox or Outbox, scroll to Delete All and press (OK). See “Deleting All Inbox or Outbox Messages” on page 69 . - To look at messages in the Outbox, scroll to Outbox and press (OK). See “Viewing Outbox Messages” on page 68. Chapter 7 66 Service Provider Features Reading New Text Messages When a new text message is received, an alert sounds and appears on the top of the display. • If you have received 40 messages, the oldest read message will be overwritten when you receive a new message. • If the envelope icon is dark (), you have 40 unread (including locked) messages waiting and the inbox is full. See “Deleting a Text Message” on page 69 and delete a message. • The display indicates how many new text messages you have received. 1 Press (VIEW) to view the inbox message list. • The display icons indicate the message status: :Unread message :Locked message :Read message • The urgency level of the received message is also displayed: !…
Text truncated - open the document above for the full version.
Cover Letter(s)
Panasonic Matsushita Mobile Communications Development Corporation of U.S.A. FCC ID: NWJ10A006A COVER LETTERS Page 1 of 1 1225 Northbrook Parkway • Suite 2-359 • Suwanee, GA 30024 • Phone (770)338-6000 • Fax (770)338-6253 MATSUSHITA MOBILE COMMUNICATIONS DEVELOPMENT CORPORATION OF U.S.A. Application for Type Acceptance Panasonic Handheld Portable Cellular Telephone FCC ID: NWJ10A006A THIS COVER PAGE IS FOR FILING IDENTIFICATION ONLY Panasonic Matsushita Mobile Communications Development Corporation of U.S.A. FCC ID: NWJ10A006A COVER LETTERS Page 2 of 2 1225 Northbrook Parkway • Suite 2-359 • Suwanee, GA 30024 • Phone (770)338-6000 • Fax (770)338-6253 Date: 4.26.2001 Authorization & Evaluation Division. Federal Communications Commission Laboratory. 7435 Oakland Mills Road. Columbia, MD 21045. Subject: Application for Type Acceptance of Transmitter with FCC ID: NWJ10A006A Gentlemen: Matsushita Mobile Communications Development Corporation of U.S.A. in Suwanee, Ga., herein submits application for type acceptance of the subject transmitter. This transmitter is intended for use in a dual mode – dual band cellular telephone application with capabilities for clear communications with a maximum transmit power of 28.6 dBm (Variable Power) down to as low as 0.16 mWatts in TDMA 800 MHz mode, 23.0 dBm down to as low as 4.8 mWatts in AMPS 800 MHz mode, and 26.5 dBm down to as low as 0.17 mWatts in PCS TDMA 1900 MHz mode. The subject transmitter complies with Section 90.203 of the rules in that the operator cannot directly program transmit frequencies using only the unit's normally accessible external controls. Enclosed is a complete Type Acceptance Application. Contact me (770) 338-6270 if you require any additional information. Best Regards, Pieter C. Seidel Technical Group Leader Systems Test Phone: 770-338-6270 Fax: 770-338-6210 Panasonic Matsushita Mobile Communications Development Corporation of U.S.A. FCC ID: NWJ10A006A COVER LETTERS Page 3 of 3 1225 Northbrook Parkway • Suite 2-359 • Suwanee, GA 30024 • Phone (770)338-6000 • Fax (770)338-6253 Date: 4.26.2001 Authorization & Evaluation Division. Federal Communications Commission Laboratory. 7435 Oakland Mills Road. Columbia, MD 21045. Subject: REQUEST FOR CONFIDENTIALITY Pursuant to sections 0.457 (d) (1) (ii) and 0.459 of the commission’s rules, the applicant hereby requests confidential treatment of some of the information accompanying this application for FCC ID: NWJ10A006A as outlined below: • Block Diagram • Schematics • Theory of operation and circuit descriptions • Users Manual This information contains trade secrets and proprietary information not customarily released to the public. The public disclosure of this information might be harmful to the applicant and provide unjust benefits to its competitors. The applicant understands that pursuant to rule 0.457d, disclosure of this application and all accompanying documentation will not be made before the date of the grant for this application. MMCD Panasonic Best Regards, Pieter C. Seidel Technical Group Leader Systems Test Phone: 770-338-6270 Fax: 770-338-6210 Panasonic Matsushita Mobile Communications Development Corporation of U.S.A. FCC ID: NWJ10A006A COVER LETTERS Page 4 of 4 1225 Northbrook Parkway • Suite 2-359 • Suwanee, GA 30024 • Phone (770)338-6000 • Fax (770)338-6253 LIST OF EXHIBITS DESCRIPTION FCC REFERENCE Cover Letters 1. Cover 2. Letter of Intent 3. Confidentiality statement 4. List of Exhibits I. Attestation Statement 2.983(a) II. Identification label information 2.983-(f) III. Block Diagrams 2.983(d7) IV. Operational Description 1. General Information 2.983-(a,b,c) 1. Production Plans 2.981-(c) 2. Application References 2.1061 2. Technical Characteristics 2.983-(d1,2,3,4,5) 3. Function of Active devices 2.983-(d6) 4. Circuit Description 1. Frequency Stabilizing 2.983-(d10) 3.Harmonic Suppression 2.983-(d11) 2. Modulation Limiting 2.983-(d11) 4.Power Limiting 2.983-(d11) 5.Attenuating Higher Audio Freq. 2.983-(d11) 6.Digital Modulation Techniques 2.983-(d12) 7.ESN Protection 22.919 V. Schematics 2.983-(d7) VI. Tune Procedure / Parts Lists 2.983-(d9) VII. Test Report 2.983-(e) 1.Data Index 2.RF Output-Data 2.985 3.Modulation Characteristics 2.987, 22.915 A. Audio Response 2.987(a) B. Low Pass Filter Response 2.987(a) C. Modulation Limiting 2.987(b) 4. Occupied Bandwidth 2.989, 22.917 5. Conducted Spurious Emissions 2.991, 24.238, 22.917(e,f) 6. Radiated Spurious Emissions 2.993, 24.238, 22.917(e,f) 7. Frequency Stability (Temp & Supply Volt) 2.995 8. Radiated Power 22.913, 24.232(b) VIII. RF Exposure - SAR 2.1093 IX. Internal Photograph(s) 2.983-(g) X. External Photograph(s) 2.983-(g) XI. User Manual 2.983-(d8) XII. Test System and Measurement Procedure 2.999 & 2.947
External Photos
© 2001 PCTEST Lab PANASONIC FCC ID: NWJ10A006A (Model(s): Atlas CE) NVLAP Lab Code: 100431-0 Tri-Mode Dual-Band Phone (AMPS/TDMA) © 2001 PCTEST Lab PANASONIC FCC ID: NWJ10A006A (Model(s): Atlas CE) NVLAP Lab Code: 100431-0 Tri-Mode Dual-Band Phone (AMPS/TDMA) © 2001 PCTEST Lab PANASONIC FCC ID: NWJ10A006A (Model(s): Atlas CE) NVLAP Lab Code: 100431-0 Tri-Mode Dual-Band Phone (AMPS/TDMA) © 2001 PCTEST Lab PANASONIC FCC ID: NWJ10A006A (Model(s): Atlas CE) NVLAP Lab Code: 100431-0 Tri-Mode Dual-Band Phone (AMPS/TDMA) © 2001 PCTEST Lab PANASONIC FCC ID: NWJ10A006A (Model(s): Atlas CE) NVLAP Lab Code: 100431-0 Tri-Mode Dual-Band Phone (AMPS/TDMA) © 2001 PCTEST Lab PANASONIC FCC ID: NWJ10A006A (Model(s): Atlas CE) NVLAP Lab Code: 100431-0 Tri-Mode Dual-Band Phone (AMPS/TDMA) © 2001 PCTEST Lab PANASONIC FCC ID: NWJ10A006A (Model(s): Atlas CE) NVLAP Lab Code: 100431-0 Tri-Mode Dual-Band Phone (AMPS/TDMA) © 2001 PCTEST Lab PANASONIC FCC ID: NWJ10A006A (Model(s): Atlas CE) NVLAP Lab Code: 100431-0 Tri-Mode Dual-Band Phone (AMPS/TDMA) © 2001 PCTEST Lab PANASONIC FCC ID: NWJ10A006A (Model(s): Atlas CE) NVLAP Lab Code: 100431-0 Tri-Mode Dual-Band Phone (AMPS/TDMA) © 2001 PCTEST Lab PANASONIC FCC ID: NWJ10A006A (Model(s): At…
Text truncated - open the document above for the full version.
Contact Information
Applicant
Pieter C. Seidel(Manager of Hardware Verification)
Technical Contact
Panasonic - MMCDPieter C Seidel
[email protected]770 338 6270
1225 Northbrook Parkway, Ste. 2-400 · Suwanee, Georgia · United States
Non-Technical Contact
Panasonic - MMCDPieter C Seidel
[email protected]770 338 6270
Technical Specifications
| # | Rule Parts | Frequency Range | Power Output | Emission | Tolerance |
|---|---|---|---|---|---|
| 4 | 24E | 1.85 GHz - 1.91 GHz | 664.00 mW | 256KDXW | 200 Hz |
Other Applications from Panasonic Mobile Communications Development Corporation of USA
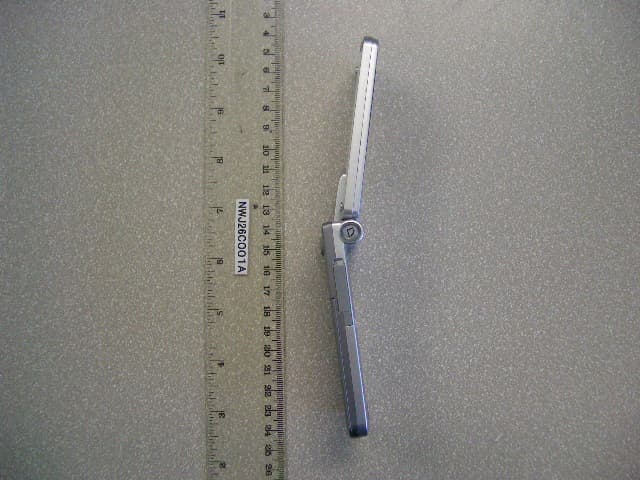
NWJ26C001A
Jun 14, 2005GSM Cellular Mobile Radio
Equipment Class
PCE - PCS Licensed Transmitter held to ear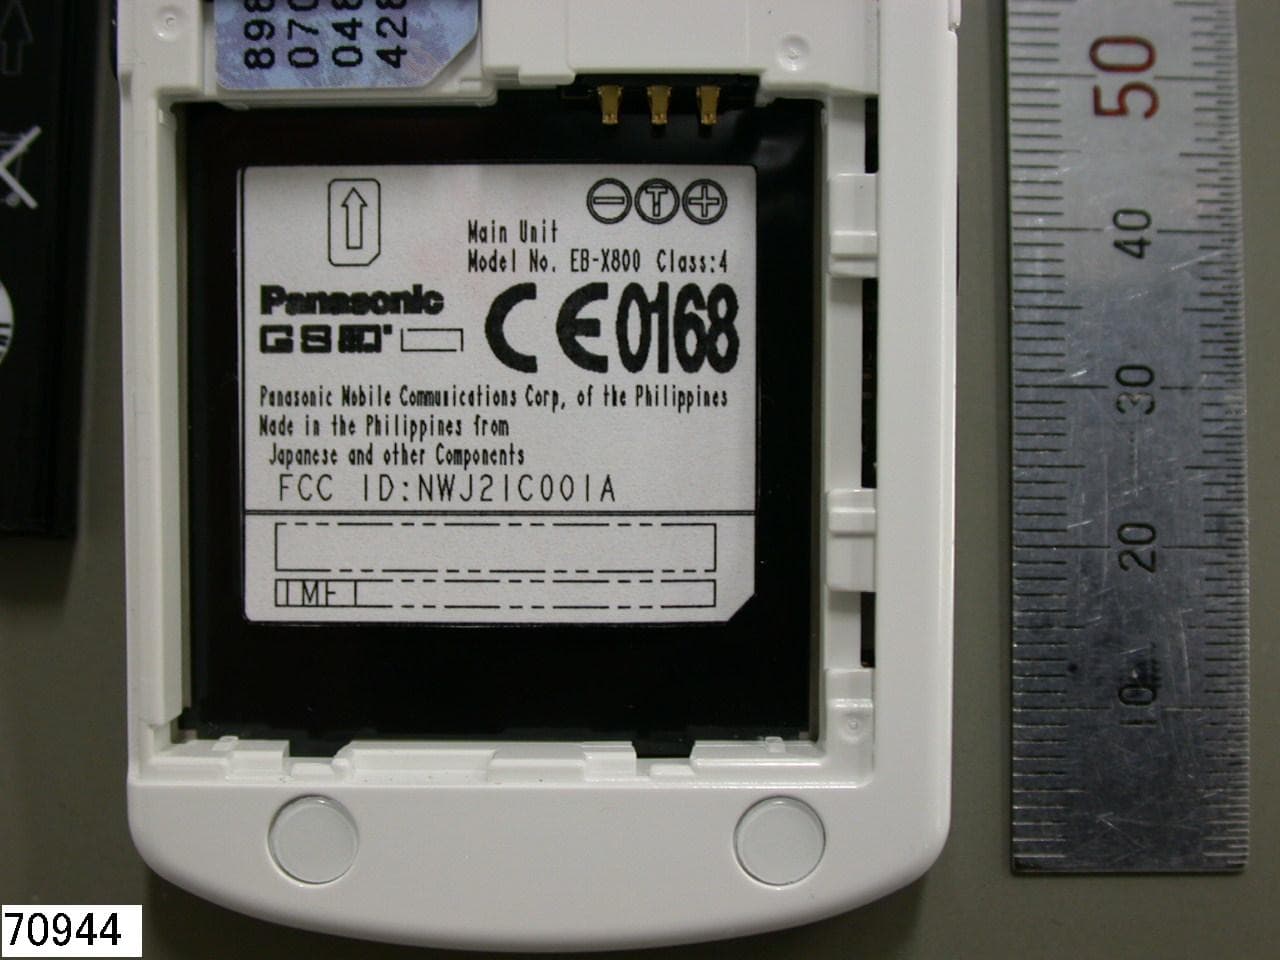
NWJ21C001A
Feb 01, 2005GSM Cellular Mobile Radio
Equipment Class
PCE - PCS Licensed Transmitter held to ear
NWJ22A001A
Nov 04, 2004GSM PCS Handset w/Bluetooth
Equipment Class
DSS - Part 15 Spread Spectrum Transmitter
NWJ22B002A
Feb 26, 2004GSM Cellular Mobile Radio
Equipment Class
PCE - PCS Licensed Transmitter held to ear
NWJ22B001A
Oct 26, 2003GSM Cellular Mobile Radio
Equipment Class
PCE - PCS Licensed Transmitter held to ear