QISU8100-5HSDPA/UMTS/GSM/GPRS/EDGE Mobile Phone with Bluetooth and WLAN
Huawei Technologies Co.,Ltd
Click to zoom
Application Details
- Equipment Class
- JBP - Part 15 Class B Computing Device Peripheral
- Date of Grant
- Apr 19, 2010
- Application Purpose
- Original Equipment
- Date of Application
- Apr 19, 2010
- Equipment Note
- HSDPA/UMTS/GSM/GPRS/EDGE Mobile Phone with Bluetooth and WLAN
- Company
- Huawei Technologies Co.,Ltd
- Country
- China
Documents & Files
Document Text
Text extracted from the exhibit documents filed with the FCC. Open a document above to read the original.
Users Manual
iContents Reading Before Proceeding . . . . . . . . . . . . . . . . . . . . . . . . . 2 Safety Precautions . . . . . . . . . . . . . . . . . . . . . . . . . . . . . . . . . . . . . . . 2 Notice and Copyright. . . . . . . . . . . . . . . . . . . . . . . . . . . . . . . . . . . . . . 5 Getting to Know Your Mobile Phone . . . . . . . . . . . . . . . . . . 9 What's in the Box . . . . . . . . . . . . . . . . . . . . . . . . . . . . . . . . . . . . . . . . 9 Mobile Phone View . . . . . . . . . . . . . . . . . . . . . . . . . . . . . . . . . . . . . . 10 Getting Started with Your Mobile Phone. . . . . . . . . . . . . . . . . . . . . . 13 Power On or Off Your Mobile Phone. . . . . . . . . . . . . . . . . . . . . . . . . 16 Using the Touchscreen . . . . . . . . . . . . . . . . . . . . . . . . . . . . . . . . . . . 19 Locking and Unlocking the Screen . . . . . . . . . . . . . . . . . . . . . . . . . . 20 Home Screen . . . . . . . . . . . . . . . . . . . . . . . . . . . . . . . . . . . . . . . . . . 21 Canvas . . . . . . . . . . . . . . . . . . . . . . . . . . . . . . . . . . . . . . . . . . . . . . . 28 Notifications and Status Information . . . . . . . . . . . . . . . . . . . . . . . . . 41 Using a microSD Card. . . . . . . . . . . . . . . . . . . . . . . . . . . . . . . . . . . . 45 Calling . . . . . . . . . . . . . . . . . . . . . . . . . . . . . . . . . . . . . . . . . . 48 Making a Call. . . . . . . . . . . . . . . . . . . . . . . . . . . . . . . . . . . . . . . . . . . 48 Answering and Rejecting a Call . . . . . . . . . . . . . . . . . . . . . . . . . . . . 52 Using Call log . . . . . . . . . . . . . . . . . . . . . . . . . . . . . . . . . . . . . . . . . . 54 Other Operations During a Call. . . . . . . . . . . . . . . . . . . . . . . . . . . . . 55 Using the Airplane Mode. . . . . . . . . . . . . . . . . . . . . . . . . . . . . . . . . . 57 Contacts . . . . . . . . . . . . . . . . . . . . . . . . . . . . . . . . . . . . . . . . 58 Opening and Viewing Contacts. . . . . . . . . . . . . . . . . . . . . . . . . . . . . 58 Adding a Contact. . . . . . . . . . . . . . . . . . . . . . . . . . . . . . . . . . . . . . . . 63 iiContents Deleting a Contact. . . . . . . . . . . . . . . . . . . . . . . . . . . . . . . . . . . . . . . 64 Adding a Contact to Your Favorites . . . . . . . . . . . . . . . . . . . . . . . . . 64 Removing a Contact from Your Favorites . . . . . . . . . . . . . . . . . . . . . 64 Editing a Contact. . . . . . . . . . . . . . . . . . . . . . . . . . . . . . . . . . . . . . . . 65 Importing Contacts from a SIM Card. . . . . . . . . . . . . . . . . . . . . . . . . 68 Searching for a Contact. . . . . . . . . . . . . . . . . . . . . . . . . . . . . . . . . . . 69 Communicating with Your Contacts . . . . . . . . . . . . . . . . . . . . . . . . . 69 Using the Onscreen Keyboard . . . . . . . . . . . . . . . . . . . . . . 71 Displaying the Keyboard Panel. . . . . . . . . . . . . . . . . . . . . . . . . . . . . 71 Customizing Keyboard Settings . . . . . . . . . . . . . . . . . . . . . . . . . . . . 77 Messaging . . . . . . . . . . . . . . . . . . . . . . . . . . . . . . . . . . . . . . . 82 SMS and MMS . . . . . . . . . . . . . . . . . . . . . . . . . . . . . . . . . . . . . . . . . 82 Email . . . . . . . . . . . . . . . . . . . . . . . . . . . . . . . . . . . . . . . . . . . . . . . . . 89 Getting Connected . . . . . . . . . . . . . . . . . . . . . . . . . . . . . . . . 96 GPRS/3G . . . . . . . . . . . . . . . . . . . . . . . . . . . . . . . . . . . . . . . . . . . . . 96 Wi-Fi . . . . . . . . . . . . . . . . . . . . . . . . . . . . . . . . . . . . . . . . . . . . . . . . . 97 Browser. . . . . . . . . . . . . . . . . . . . . . . . . . . . . . . . . . . . . . . . . . . . . . . 98 Bluetooth. . . . . . . . . . . . . . . . . . . . . . . . . . . . . . . . . . . . . . . . . . . . . 102 Connecting to a Computer via USB . . . . . . . . . . . . . . . . . . . . . . . . 106 Modem Behavior. . . . . . . . . . . . . . . . . . . . . . . . . . . . . . . . . . . . . . . 107 Entertainment . . . . . . . . . . . . . . . . . . . . . . . . . . . . . . . . . . . 109 Taking Photos and Recording Videos. . . . . . . . . . . . . . . . . . . . . . . 109 iiiContents Using the Gallery. . . . . . . . . . . . . . . . . . . . . . . . . . . . . . . . . . . . . . . 114 Using the Gallery. . . . . . . . . . . . . . . . . . . . . . . . . . . . . . . . . . . . . . . 124 Enjoying Music . . . . . . . . . . . . . . . . . . . . . . . . . . . . . . . . . . . . . . . . 127 Listening to FM Radio . . . . . . . . . . . . . . . . . . . . . . . . . . . . . . . . . . . 132 Google Services . . . . . . . . . . . . . . . . . . . . . . . . . . . . . . . . . 136 Creating a Google Account. . . . . . . . . . . . . . . . . . . . . . . . . . . . . . . 136 Using Gmail. . . . . . . . . . . . . . . . . . . . . . . . . . . . . . . . . . . . . . . . . . . 137 Using Talk . . . . . . . . . . . . . . . . . . . . . . . . . . . . . . . . . . . . . . . . . . . . 141 Using Maps . . . . . . . . . . . . . . . . . . . . . . . . . . . . . . . . . . . . . . . . . . . 144 Using YouTube . . . . . . . . . . . . . . . . . . . . . . . . . . . . . . . . . . . . . . . . 146 Using Market. . . . . . . . . . . . . . . . . . . . . . . . . . . . . . . . . . . . . . . . . . 147 Synchronizing Information . . . . . . . . . . . . . . . . . . . . . . . . 151 Managing Your Accounts . . . . . . . . . . . . . . . . . . . . . . . . . . . . . . . . 151 Customizing Your Account Synchronization . . . . . . . . . . . . . . . . . . 154 Using the PC Suite to Synchronize. . . . . . . . . . . . . . . . . . . . . . . . . 156 Using Other Applications . . . . . . . . . . . . . . . . . . . . . . . . . 157 Using the Calendar . . . . . . . . . . . . . . . . . . . . . . . . . . . . . . . . . . . . . 157 Using the Alarm. . . . . . . . . . . . . . . . . . . . . . . . . . . . . . . . . . . . . . . . 166 Using Sound Recorder . . . . . . . . . . . . . . . . . . . . . . . . . . . . . . . . . . 169 Using t…
Text truncated - open the document above for the full version.
Users Manual
58 Contacts Contacts The Contacts application enables you to save and manage information such as phone numbers and addresses of your contacts. After you save the contact information on your mobile phone, it gives you easy access to the people with whom you want to communicate. Opening and Viewing Contacts Opening the Contacts Application If you have a new mobile phone and have not yet added any contacts, Contacts displays a message with hints on how to start adding contacts to your mobile phone. • Touch > Contacts. • Press , and then touch the Contacts tab. All of your contacts are displayed alphabetically in a scrolling list. Each contact is followed by the phone number that you have specified as the person's default phone number. 59 Contacts Quick Contact for Android As you build up your list of contacts on your phone, you can use Quick Contact for Android in many applications to quickly start a chat, email, or text message, to place a call, or to locate your contacts. Quick Contact for Android is a special icon that you can touch to open a bubble with options for quickly initiating a connection to that contact. Contacts that you can access with Quick Contact are displayed differently in different applications, but usually with a picture frame. 60 Contacts 1 Quick Contact icon with a picture frame. Touch to open a bubble with icons for all the ways you can communicate with the contact. 1 3 2 61 Contacts Opening a List of Your Favorite Contacts The Favorites tab contains a short list of the contacts with whom you communicate most often. To open a list of your favorite contacts, touch the Favorites tab in the contacts list. Viewing Contact Details To view contact details, touch the contact whose details you want to view. Detailed information such as the phone number, e- mail address, and physical address appears for each contact. 2 A bubble with icons for all the ways you can communicate with the contact. If there are more icons than can fit in the bubble, drag the icons left or right to view them all. 3 Touch an icon to open its application, and you can start communicating with your contact right away. 62 Contacts Contact details 1 Touch an icon to open Quick Contact. Please refer to “Quick Contact for Android” on page 59. 2 Touch an address to view it on Google Maps. 6 5 4 1 2 3 63 Contacts Tip: Press , and then touch Edit contact to edit the contact’s information. Adding a Contact 1. In the contacts list, press , and then touch Create contact. Tip: In the contacts list, you can touch to add a new contact. 2. If you have more than one account with contacts, touch the account to which you want to add the contact. 3. Enter the contact's name, and then add any detailed information such as phone number or address. 4. When you are finished, touch Done to save the contact information. 3 Touch an icon to call, send a message, chat, and so on. 4 Touch the History tab to view a list of interactions you have had with this contact. 5 Touch to add the contact to your favorites. MENU key MENU key 64 Contacts Deleting a Contact 1. In the contacts list, touch and hold the contact that you want to delete, and then touch Delete contact in the options menu. 2. Touch OK to confirm that you want to delete the contact. Adding a Contact to Your Favorites To add a contact to your favorites, you can do any of the following while you are in the contacts list: • Touch and hold the contact you want to add to Favorites. Then touch Add to favorites. • Access the favorites list, press , and then touch Add favorites to select the contacts you want to add to Favorites. • Touch a contact, and then touch the star to the right of the contact’s name. The star turns gold. Removing a Contact from Your Favorites To remove a contact from your favorites, you can do any of the following while you are in the favorites list: MENU key 65 Contacts • Touch and hold the contact you want to delete from Favorites. Then touch Remove from favorites. • Press , and then touch Remove favorites to select the contacts you want to remove from Favorites. • Touch a contact, and then touch the star to the right of the contact’s name. The star turns gray. Editing a Contact You can always make changes to the information you have stored for a contact. 1. In the contacts list, touch and hold the contact whose details you want to edit, and then touch Edit contact in the options menu. Tip: You can also press , and then touch Edit contact while viewing a contact’s details. 2. If you have more than one account with contacts, touch the account in which you want to edit the contact. MENU key MENU key 66 Contacts 3. Touch a category of contact information, such as contact’s name, phone number or email address, to enter that kind of information about your contact. 4. Make the desired changes to the contact information, and then touch Done. To cancel all changes you made to the contact information, touch Cancel. 67 Contacts Contact Editing Screen 1 Touch the Picture Frame icon to select a picture to display next to the name in your list of contacts and in other applications. 5 4 3 1 2 68 Contacts Importing Contacts from a SIM Card When you open the Contacts application for the first time, you are asked whether to import contacts from the SIM card to your phone. Select Yes to import the contacts, or No to import them later. 1. In the contacts list, press , and then touch Manage contacts. 2. Touch Import from SIM card. Wait for the SIM card contents to be loaded. 2 Touch to open a menu with preset labels, such as Mobile and Work for a phone number, or touch Custom in the menu to create your own label. 3 Touch to remove the entry from that category. 4 Touch to add more than one entry for that category. 5 Touch to display more text boxes for entering the name details such as middle name and last name. MENU key 69 Contacts 3. Select the check box of the contact you want to import. Note: If you want to deselect or select all, press . Then touch Deselect all or Sel…
Text truncated - open the document above for the full version.
Users Manual
118 Entertainment Selecting Pictures or Videos in an Albu m 1. In the Gallery, touch the album whose contents you want to view. 2. Press twice. 3. Select the pictures or videos you want to work with. Tip: To select or deselect all items, touch Select All or Deselect All at the top of the screen. 4. Use the controls button at the bottom of the screen to share or delete the selected items. Tip: You can touch More at the bottom of the screen, and then select to view the details or rotate the selected items. 4 Touch to switch from grid to stack view. Stacks are sorted by the date and location where you took them. MENU key 119 Entertainment Viewing a Picture In the Gallery, touch the album that contains the picture you want to view. • Flick the picture left or right to view the previous or next picture, respectively. • Touch Slideshow to play a slideshow of your pictures (provided the folder you select has pictures in it). 120 Entertainment Picture Screen 1 Touch to return to the album screen. 2 Touch to play a slideshow of your pictures. 1 2 4 3 121 Entertainment Rotating a Picture 1. When viewing a picture, press to display more operations panel. 2. Touch More. 3. Select either Rotate left or Rotate right. The picture is saved with the new orientation. Cropping a Pictu re 1. When viewing a picture, press to display more operations panel. 2. Touch More, and then touch Crop. 3. Use the cropping tool to select the portion of the picture to crop. 3 Touch the picture to see the controls. Drag left or right to see the next or previous picture in the album. 4 Touch to zoom in or out; or double-tap the picture. MENU key MENU key 122 Entertainment • Drag from the inside of the cropping tool to move it. • Drag an edge of the cropping tool to resize it to any proportion. • Drag a corner of the cropping tool to resize it with fixed proportions. 4. Touch Save to save the cropped picture. 123 Entertainment Playing a Video 1. In the Gallery, touch the album that contains the video you want to play. 2. Touch the video you want to play. The video will start to play. 3. Touch the video to show the playback panel. 124 Entertainment Using the Gallery Your Gallery application can automatically search for pictures and videos on your mobile phone and microSD card. It can also sort them into folders, and let you view and edit pictures, watch videos, and set a picture as the wallpaper or photo for a contact. Opening the Gallery Touch > Gallery to open the viewer. The Gallery application categorizes your pictures and videos by storage location and stores these files in folders. To view pictures or videos, touch one of the folders to view pictures or videos. Press to display the Gallery panel. On the panel, you can do the following: • Touch Capture pictureto open the camera and switch to the picture capture mode. • Touch Capture video to open the camera and switch to the video capture mode. • Touch Settingsto go to the Gallery settings screen. There, you can set the size of a picture, arrange pictures, specify MENU key 125 Entertainment whether to prompt confirmation when you delete a picture, and play a slideshow. Viewing a Picture In Gallery, touch the album that contains the picture you want to view. 1. Touch the folder that contains the pictures you want to view. 2. Touch the picture to view it in full-screen mode. When viewing a picture in full-screen mode, flick the picture left or right to view the previous or next picture. 3. Touch the screen. Then the zoom panel appears. You can zoom in or zoom out on the picture. Tip: The picture viewer supports the automatic rotation function. When you rotate your mobile phone, the picture adjusts itself to the rotation. Rotating a Picture 1. When viewing a picture, press to display more operations panel. MENU key 126 Entertainment 2. Touch Rotate. 3. Select either Rotate left or Rotate right. The picture is saved with the new orientation. Cropping a Pictu re 1. When viewing a picture, press to display the more operations panel, then touch Crop. 2. Use the cropping tool to select the portion of the picture to crop. • Drag from the inside of the cropping tool to move it. • Drag an edge of the cropping tool to resize it to any proportion.. • Drag a corner of the cropping tool to resize it with fixed proportions. 3. Touch Save to save the cropped picture. Or touch Rotate to rotate the onscreen picture. Or touch Discard to discard the changes. MENU key 127 Entertainment Enjoying Music You can download music files onto your PC or insert a CD and copy the files to your microSD card so you can listen to music on your mobile phone. Copying Music to the microSD Card 1. Connect the phone to your computer with a USB cable and mount the microSD card. 2. On the PC, navigate to the USB drive and open it. 3. Create a folder on the root folder of the microSD card (for example, Music). 4. Copy the music from your computer to the folder you have created. 5. After copying music, unmount or eject the drive as required by your PC’s operating system to safely remove the mobile phone. 6. Disconnect the mobile phone from the PC. 128 Entertainment Opening the Media Library Touch > Music to display the media library. Library Screen The Music application organizes your music files by storage location. It contains four tabs: Artists, Albums, Songs and Playlists. 129 Entertainment Tip: To randomly play your songs, press key, and touch Party shuffle or Shuffle all . Playing Music 1. Touch a category on the music library screen. 2. Touch the song you want to play. Tip: When you are listening to music, touch , to use another application. Your music continues to play. To return to the music controls, open the notification panel and then touch the song. MENU key 130 Entertainment Music Player Screen 1 Touch and hold to search for information. 2 Touch to control the music. 3 Touch to set the repeat mode. 1 2 5 4 3 131 Entertainment Adding Music to a Pl aylist 1. Touch a category on the music library screen.…
Text truncated - open the document above for the full version.
Users Manual
178 Managing Your Mobile Phone 5. Touch Set time. On the set time screen, touch the up button or down button to adjust the hour and minute. Touch Set when the configuration is complete. Tip: If a 12-hour format is used, you can touch AM to change to PM or vice versa. 6. Select or clear the Use 24-hour format check box to toggle between using a 24-hour or 12-hour format. 7. Touch Select date format to select how you want the date to display on your mobile phone. Setting the Display Adjusting the Screen Brightness 1. On the Settings screen, touch Sound & display > Brightness. 2. Drag the slider left to make the screen darker, or right to make it brighter. 3. Touch OK to save the adjustment. 179 Managing Your Mobile Phone Adjusting the Time Before the Screen Turns Off If your mobile phone is idle for several minutes, it will turn off the screen to save battery power. To set a longer or shorter idle time do the following: 1. On the Settings screen, touch Sound & display > Screen timeout. 2. Select the time you want the screen to be illuminated. Calibrating the screen Calibrate the screen if it does not respond accurately to touch. 1. On the Settings screen, touch Sound & display > Calibration. 2. Touch the target on the screen. 3. After the calibration process, press the Send key to quit. Setting Ringers Turning On Silent Mode 1. On the Settings screen, touch Sound & display. 180 Managing Your Mobile Phone 2. Select the Silent mode check box. Then all sounds except media and alarms are silenced. Adjusting the Ringer Volume You can adjust the ringer volume when you are on the Home screen or any application screens (except during a call or when playing music or videos). Press the Volume keys to adjust the ringer volume to the desired level. You can also adjust the ringer volume on the settings screen. 1. On the Settings screen, touch Sound & display > Ringer volume. 2. Drag the slider left to make the volume softer, or right to make it louder. 3. Touch OK to save the adjustment. Tip: On the Ringer volume screen, if you do not select Use incoming call volume for notifications, you can set Incoming call volume and Notification volume separately. 181 Managing Your Mobile Phone Adjusting the Media Volume When playing music or watching videos, press the Volume keys to adjust the sound. You can also adjust the sound on the settings screen. 1. On the Settings screen, touch Sound & display > Media volume. 2. Drag the slider left to make the volume softer, or right to make it louder. 3. Touch OK to save the adjustment. Changing the Phone Ringtone 1. On the Settings screen, touch Sound & display > Phone ringtone. 2. Touch the ringtone you want to use, and then touch OK. The ringtone plays when selected. Tip: You can set a song as the ringtone. Open the Music application, and then press and hold the song name, and select Use as phone ringtone. 182 Managing Your Mobile Phone Setting Your Phone to Vibrate for Incoming Calls 1. On the Settings screen, touch Sound & display. 2. Select the Phone vibrate check box. Then mobile phone will vibrate when there is an incoming call. Setting Phone Services Customizing Call Settings That is just a fancy term for all the stuff like call forwarding, call waiting, fixed dialing numbers and voicemail. Talk to your operator to learn about the different services you can get. On the Settings screen, touch Call settings to customize your call function. Turning on Data Roaming 1. On the Settings screen, touch Wireless & networks > Mobile networks. 2. Select the Data roaming check box. 183 Managing Your Mobile Phone Note: Accessing data services while roaming may incur additional charges. Ask your wireless service provider about data roaming fees. Switching off the Data Service Things like synchronizing updates and receiving multimedia messages rely on a transfer of data, which is what the data service does. 1. On the Settings screen, touch Wireless & networks > Mobile networks. 2. Clear the Data service check box. Note: When Data service is set to off, you cannot receive or send multimedia messages. Switching on Always-on Mobile Data If you have not selected Enable always-on mobile, after your screen is locked for 30 minutes, your mobile phone will automatically stop all data services (except MMS). For example, your mobile phone will not check new emails or synchronize 184 Managing Your Mobile Phone data in the background. The mobile phone will automatically enable data services only after you have waken up your screen. On the Settings screen, touch Wireless & networks > Mobile network. Select Enable always-on mobile to enable this function. By default, this function is disabled. Setting Text-to-Speech Use the Text-to-Speech settings to configure the Android text- to-speech synthesizer, for applications that can take advantage of it. Installing Voice Data 1. On the Settings screen, touch Text-to-speech > Install voice data. 2. If your mobile phone does not have speech synthesizer data installed, connect to Android Market and let it guide you through the process of downloading and installing the data. 3. Follow the instructions to install the voice data. 185 Managing Your Mobile Phone Adjusting the Speech Rate 1. On the Settings screen, touch Text-to-speech > Speech rate. 2. Select a speed at which the text is to be spoken. Protecting Your Mobile Phone Turning on Your SIM Card PIN 1. On the Settings screen, touch Location & security > Set up SIM card lock. 2. Select the Lock SIM card check box. 3. Use the keyboard to enter the SIM card PIN, and then touch OK. 4. To change the SIM card PIN at any time, touch Change SIM PIN. Note: You can dial emergency numbers any time from your mobile phone. 186 Managing Your Mobile Phone Protecting Your Mobile Phone with a Screen Lock To keep your data more secure, lock the screen and/or require a screen unlock pattern every time your mobile phone is turned on or wakes up from sleep mode. 1. On the Settings screen, touch Location & security > …
Text truncated - open the document above for the full version.
Cover Letter(s)
Huawei Technologies Co., Ltd. Address:Huawei Industrial Base,Bantian Longgang,Shenzhen 518129, P.R China Post ZIP:518129 Page :1/1 To: Jiangsu TÜV Product Service Ltd. – Shenzhen Branch Fax : NULL From:Zhang Xinghai Fax:0086-755-89652518 Tel:0086-755-89651014 Email address: [email protected] Http: www.huawei.com Subject:Letter of Confidentiality Federal Communications Commission 7435 Oakland Mills Road Columbia, MD 21046 Gentlemen: This letter is to comply with the Code of Federal Regulations Title 47 Section 0.457 and 0.459 pertaining to confidential material. Huawei Technologies Co., Ltd. would like the following documents regarding this submission for FCC ID: QISU8100-5 to be kept confidential: 1. Schematic diagram. 2. Block Diagram. 3. Parts list (BOM) Information. 4. Operational description. 5. Tune-up procedure The above material contains trade secrets or technical data, which would customarily be guarded from competitors. We do not want these documents to be accessible to the general public. Sincerely, For and Behalf of: Huawei Technologies Co., Ltd. Zhang Xinghai EMC Laboratory Manager
Cover Letter(s)
Huawei Technologies Co., Ltd. Address:Huawei Industrial Base, Bantian, Longgang, Shenzhen, P.R China Post ZIP:518129 Page :1/1 To: Jiangsu TÜV Product Service Ltd. – Shenzhen Branch Fax : NULL From:Zhang Xinghai Fax:0086-755-89652518 Tel:0086-755-89651014 Email address: [email protected] Http: www.huawei.com Subject:Letter of Authorization 2010-04-08 To whom it may concern: We the undersigned, hereby authorize Louis Lin of Jiangsu TÜV Product Service Ltd. – Shenzhen Branch to act on our behalf in all manners relating to application for equipment authorization, including signing of all documents relating to these matters. Any and all acts carried out by Louis Lin of Jiangsu TÜV Product Service Ltd. – Shenzhen Branch on our behalf shall have the same affect as acts of our own. This authorization is valid until further written notice from Huawei Technologies Co., Ltd. . Sincerely, For and Behalf of: Huawei Technologies Co., Ltd. Zhang Xinghai EMC Laboratory Manager
External Photos
HUAWEI U8100-5/U8100-5/IVY HSDPA/UMTS/GPRS/GSM/EDGE Mobile Phone with Bluetooth SECRET Page1,Total 4 External Photos of HUAWEI U8100-5/U8100-5/IVY HUAWEI U8100-5/U8100-5/IVY HSDPA/UMTS/GPRS/GSM/EDGE Mobile Phone with Bluetooth SECRET Page2,Total 4 HUAWEI U8100-5/U8100-5/IVY HSDPA/UMTS/GPRS/GSM/EDGE Mobile Phone with Bluetooth SECRET Page3,Total 4 HUAWEI U8100-5/U8100-5/IVY HSDPA/UMTS/GPRS/GSM/EDGE Mobile Phone with Bluetooth SECRET Page4,Total 4
ID Label/Location Info
HUAWEI U8100-5/U8100-5/IVY HSDPA/UMTS/GPRS/GSM/EDGE Mobile Phone with Bluetooth SECRET Page1, Total 3 ID Label HUAWEI U8100-5/U8100-5/IVY HUAWEI U8100-5/U8100-5/IVY HSDPA/UMTS/GPRS/GSM/EDGE Mobile Phone with Bluetooth SECRET Page2, Total 3 HUAWEI U8100-5/U8100-5/IVY HSDPA/UMTS/GPRS/GSM/EDGE Mobile Phone with Bluetooth SECRET Page3, Total 3
ID Label/Location Info
HUAWEI U8100-5/U8100-5/IVYHSDPA/UMTS/GPRS/GSM/EDGE Mobile Phone with Bluetooth SECRET Page1, Total 4 Label Location HUAWEI U8100-5/U8100-5/IVY HUAWEI U8100-5/U8100-5/IVYHSDPA/UMTS/GPRS/GSM/EDGE Mobile Phone with Bluetooth SECRET Page2, Total 4 HUAWEI U8100-5/U8100-5/IVYHSDPA/UMTS/GPRS/GSM/EDGE Mobile Phone with Bluetooth SECRET Page3, Total 4 HUAWEI U8100-5/U8100-5/IVYHSDPA/UMTS/GPRS/GSM/EDGE Mobile Phone with Bluetooth SECRET Page4, Total 4
Internal Photos
HUAWEI U8100-5/U8100-5/IVY HSDPA/UMTS/GPRS/GSM/EDGE Mobile Phone with Bluetooth SECRET Page1,Total 6 Internal Photos of HUAWEI U8100-5/U8100-5/IVY HUAWEI U8100-5/U8100-5/IVY HSDPA/UMTS/GPRS/GSM/EDGE Mobile Phone with Bluetooth SECRET Page2,Total 6 HUAWEI U8100-5/U8100-5/IVY HSDPA/UMTS/GPRS/GSM/EDGE Mobile Phone with Bluetooth SECRET Page3,Total 6 HUAWEI U8100-5/U8100-5/IVY HSDPA/UMTS/GPRS/GSM/EDGE Mobile Phone with Bluetooth SECRET Page4,Total 6 HUAWEI U8100-5/U8100-5/IVY HSDPA/UMTS/GPRS/GSM/EDGE Mobile Phone with Bluetooth SECRET Page5,Total 6 HUAWEI U8100-5/U8100-5/IVY HSDPA/UMTS/GPRS/GSM/EDGE Mobile Phone with Bluetooth SECRET Page6,Total 6
Test Report
Report No: SYBHZ(R)E027032010EB -1 Confidential Information of Huawei. No Distribution without Written Permission Page1, Total35 0 EMC Test Report Product Name: HSDPA/UMTS/GPRS/GSM/EDGE Mobile Phone with Bluetooth Model Number: HUAWEI U8100-5/U8100-5/IVY Report No: SYBHZ(R)E027032010EB-1 FCC ID: QISU8100-5 Reliability Laboratory of Huawei Technologies Co., Ltd. Huawei Base, Bantian, Longgang District, Shenzhen 518129, P.R. China Tel: +86 755 28780808 Fax: +86 755 89652518 FCC Test Report of HUAWEI U8100-5/U8100-5/IVY FCC ID: QISU8100-5 Report No: SYBHZ(R)E027032010EB -1 Confidential Information of Huawei. No Distribution without Written Permission Page2, Total35 0 Notice 1 1. The laboratory has obtained the accreditation of China National Accreditation Service for Conformity Assessment (CNAS), and accreditation number: L0310. 2. The laboratory has obtained the accreditation of THE AMERICAN ASSOCIATION FOR LABORATORY ACCREDITATION (A2LA), and Accreditation Council Certificate Number: 2174.01. 3. The laboratory has been listed on the US Federal Communications Commission list of test facilities recognized to perform electromagnetic emissions measurements. The site recognition number is 97456. 4. The laboratory has been listed by industry Canada to perform electromagnetic emission measurement. The site recognition number is 6369A-1. 5. The laboratory also has been listed by the VCCI to perform EMC measurements. The accreditation number is R2364, C2583, and T256. 6. The test report is invalid if not marked with "exclusive stamp for the test report". 7. The test report is invalid if not marked with the stamps or the signatures of the persons responsible for performing, revising and approving the test report. 8. The test report is invalid if there is any evidence of erasure and/or falsification. 9. If there is any dissidence for the test report, please file objection to the test centre within 15 days from the date of receiving the test report. 10. Normally, the test report is only responsible f…
Text truncated - open the document above for the full version.
Contact Information
Applicant
Zhang Xinghai
Test Firm
Huawei Technologies Co., LTDZhou Fengyum
Technical Specifications
| # | Rule Parts | Frequency Range | Power Output |
|---|---|---|---|
| 1 | 15B | - | - |
Other Applications from Huawei Technologies Co.,Ltd
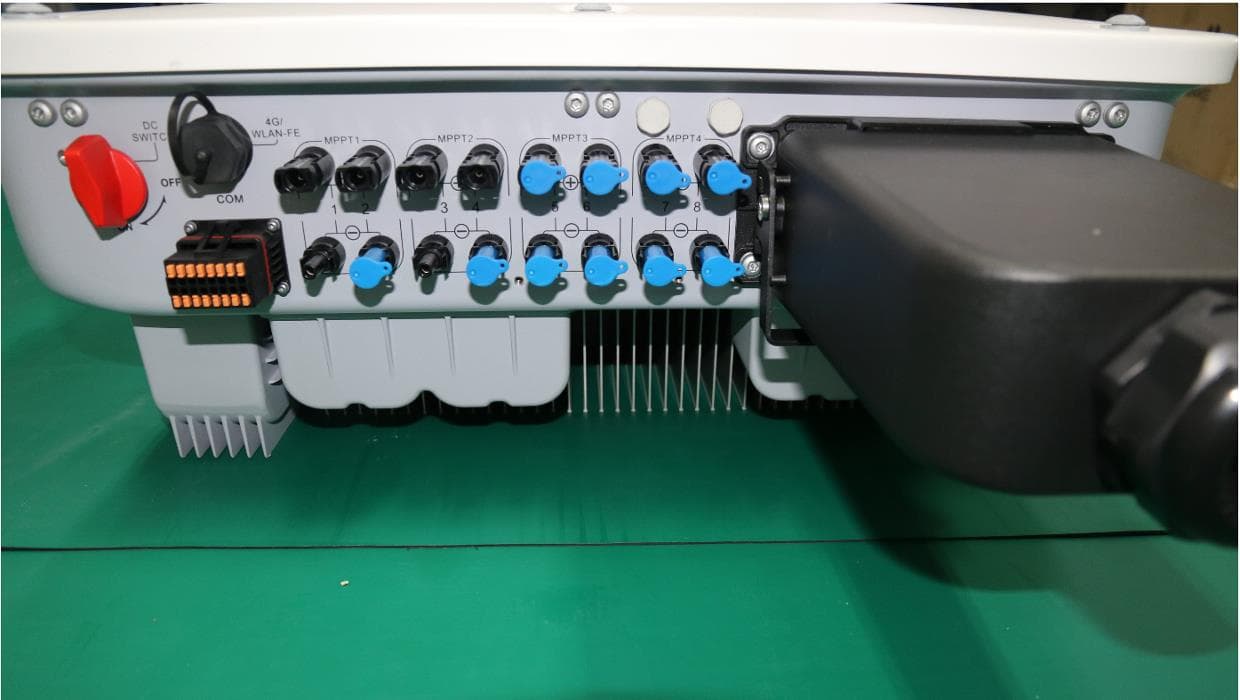
QISSUN2000
Jun 27, 2021Solar Inverter
Equipment Class
DTS - Digital Transmission System
QISCP81-1
Oct 22, 2020Watch Wireless Charger
Equipment Class
DCD - Part 15 Low Power Transmitter Below 1705 kHz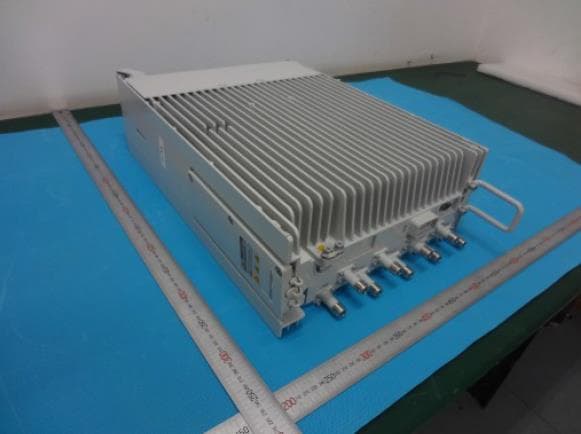
QISRRU3278
Sep 02, 2020Remote Radio Unit
Equipment Class
CBD - Citizens Band Category A and B Devices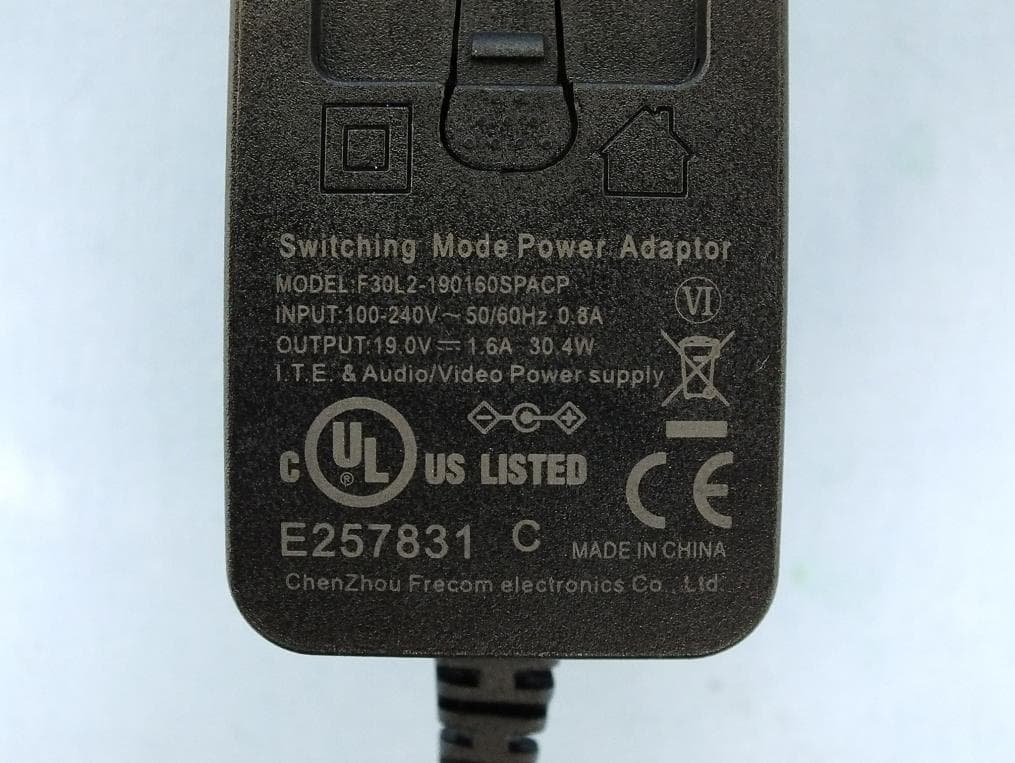
QISR2561
Jul 11, 2020Indoor Router
Equipment Class
DTS - Digital Transmission System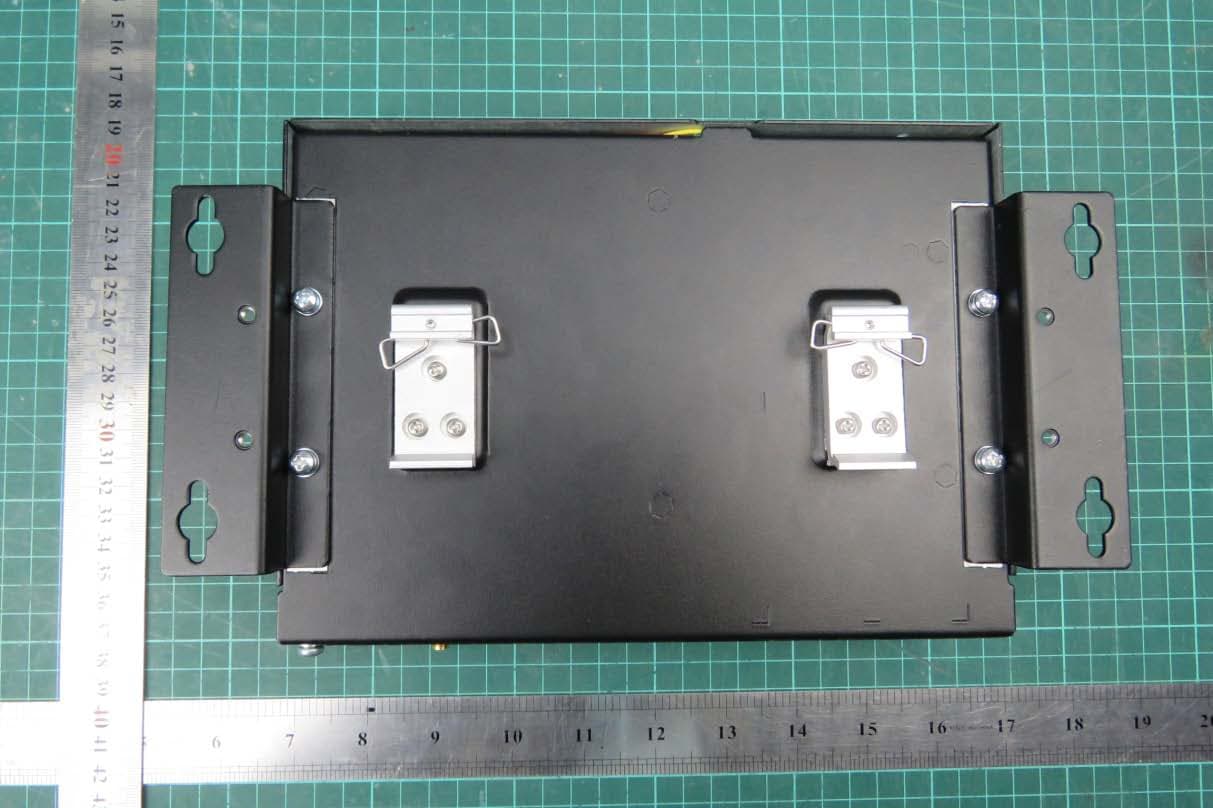
QISSMARTLOGGER310
Mar 23, 2020Solar Smart Monitor & Data Logger
Equipment Class
DTS - Digital Transmission System