QISU8860HSPA/UMTS/GPRS/GSM/EDGE Mobile Phone with Bluetooth; Honor
Huawei Technologies Co.,Ltd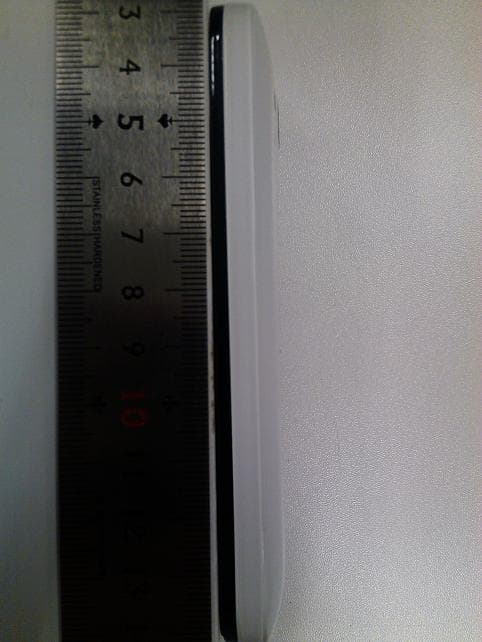
Click to zoom
Application Details
- Equipment Class
- DTS - Digital Transmission System
- Date of Grant
- Nov 03, 2011
- Application Purpose
- Original Equipment
- Date of Application
- Nov 03, 2011
- Equipment Note
- HSPA/UMTS/GPRS/GSM/EDGE Mobile Phone with Bluetooth; Honor
- Frequency Range
- 2412.00000000 - 2462.00000000
- Company
- Huawei Technologies Co.,Ltd
- Country
- China
Documents & Files
Document Text
Text extracted from the exhibit documents filed with the FCC. Open a document above to read the original.
Users Manual
Welcome to Huawei User Guide HUAWEI U8860 THIS DOCUMENT IS FOR INFORMATION PURPOSE ONLY, AND DOES NOT CONSTITUTE ANY KIND OF WARRANTIES. All the pictures in this guide are for your reference only. The actual appearance and display features depend on the mobile phone you purchase. Contents i 1 Reading Before Proceeding...................................................1 1.1 Safety Precautions....................................................................... 1 1.2 Personal Information and Data Security ...................................... 2 1.3 Legal Notice................................................................................. 3 2 Getting Started.......................................................................6 2.1 Appearance ................................................................................. 6 2.2 Setting Up Your Mobile Phone .................................................... 8 2.3 Power On or Off Your Mobile Phone ......................................... 11 2.4 Using the Touchscreen.............................................................. 12 2.5 Locking and Unlocking the Screen ............................................ 12 2.6 Home Screen............................................................................. 13 2.7 Application Screen..................................................................... 18 2.8 Using a microSD Card ............................................................... 18 3 Calling..................................................................................19 3.1 Making a Call ............................................................................. 19 3.2 Answering or Rejecting a Call.................................................... 20 3.3 Other Operations During a Call ................................................. 22 3.4 Using the Call log....................................................................... 22 3.5 Using Airplane Mode ................................................................. 23 4 Contacts...............................................................................23 4.1 Opening the Contacts Application ............................................. 23 4.2 Importing Contacts from a SIM Card ......................................... 23 4.3 Adding a Contact ....................................................................... 24 4.4 Adding a Contact to Your Favorites........................................... 24 4.5 Searching for a Contact ............................................................. 24 4.6 Editing a Contact ....................................................................... 24 4.7 Communicating with Your Contacts........................................... 25 4.8 Deleting a Contact ..................................................................... 25 ii 4.9 Streams ..................................................................................... 25 4.10 Managing Groups .................................................................... 27 4.11 Joining and Separating Contacts............................................. 28 4.12 Sending Contacts .................................................................... 29 5 Using the Onscreen Keyboard.............................................29 5.1 Displaying the Keyboard ............................................................ 29 5.2 Customizing Keyboard Settings................................................. 32 6 Messaging ...........................................................................32 6.1 SMS and MMS........................................................................... 32 6.2 Email .......................................................................................... 34 7 Getting Connected...............................................................37 7.1 Mobile Networks ........................................................................ 37 7.2 Wi-Fi .......................................................................................... 37 7.3 Sharing Your Phone’s Data Connection .................................... 38 7.4 WPS........................................................................................... 39 7.5 Browser...................................................................................... 40 7.6 Bluetooth.................................................................................... 41 8 Entertainment ......................................................................43 8.1 Taking Photos and Recording Videos ....................................... 43 8.2 Using the Gallery ....................................................................... 45 8.3 Enjoying Music........................................................................... 46 8.4 Listening to the FM Radio.......................................................... 48 9 Google Services ..................................................................49 9.1 Creating a Google Account........................................................ 49 9.2 Gmail ......................................................................................... 50 9.3 Talk ............................................................................................ 51 9.4 Maps .......................................................................................... 53 9.5 YouTube .................................................................................... 54 9.6 Market........................................................................................ 54 iii 10 Synchronizing Information .................................................56 10.1 Managing Your Accounts......................................................... 56 10.2 Customizing Your Account Synchronization ............................ 58 11 Using Other Applications ...................................................59 11.1 Huawei Cloud+ .......................................................................…
Text truncated - open the document above for the full version.
Users Manual
15 2.6.2 Notification Panel Your mobile phone will notify you when you receive a new message or there is an upcoming event. The notification panel also informs you of alarms and settings, for example, you will be notified when Call forwarding is activated. Open the notification panel to see your network operator or to view a message, reminder, or event notification. New chat message Problem with text or mult imedia message delivery New voicemailNew email Open Wi-Fi network av ailable Connected to a PC UploadingUpcoming event Memory fullDownloading Carrier data use threshold approaching or exceeded Sign-in or synchronization problem Synchronizing data More undisplayed not ifications Portable Wi-Fi hotspot onSynchronization failed Connected to a VPNUSB tethering on Preparing the mircoSD cardDisconnected from a VPN 16 Opening the Notification Panel 1. When a new notification icon appears on the notification bar, place your finger on the notification bar and flick down to open the notification panel. You can also open the notification panel from the Home screen: Touch > Notifications to open the panel. 2. On the panel, you can: • Touch a notification to open the related application. • Touch Clear to clear all notifications. Closing the Notification Panel Touch and hold the bottom of the panel. Then flick up to close it. 2.6.3 Viewing Other Parts of the Home Screen 2.6.4 Customizing the Home Screen Adding a New Home Screen Item 1. Touch and hold a blank area on the Home screen until the Select action menu is displayed. You can also touch > Add on the Home screen to display the Select Flick your finger left or right across the Home screen. 10:23 17 action menu. 2. Select an item to add it to the Home screen. Moving a Home Screen Item 1. Touch and hold an item on the Home screen until the item expands in size and the mobile phone vibrates. 2. Without lifting your finger, drag the item to the desired position on the screen, and then release it. Removing a Home Screen Item 1. Touch and hold an item on the Home screen until the item expands and the mobile phone vibrates. 2. Without lifting your finger, drag the item to the trash can. When the item and the trash can turn red, the item is ready to be removed. 3. Release the item to remove it from the Home screen. 2.6.5 Service Shortcuts 1. Open the notification bar. 2. Touch at the top of the screen to switch data services on or off. You can also touch , , or turn the corresponding services on or off. 2.6.6 Changing the Wallpaper 1. On the Home screen, touch > Wallpaper. 2. Touch the following menu items to select a picture and set it as the wallpaper: • Gallery • Live wallpapers • Wallpapers 18 2.7 Application Screen The Application screen holds icons for all of the applications on your phone. You can touch on the Home screen to open the application screen. 2.7.1 Moving Icons on the Application Screen 1. On the application screen, touch . 2. Touch and hold the icon you want to move on the application screen. 3. Without lifting your finger, drag the icon to the desired location, and then release it. To move more icons, repeat steps 2 and 3. 4. Touch or to save. 2.8 Using a microSD Card 2.8.1 (Optional) Installing the microSD Card Your mobile phone is already equipped with a large-volume built-in embedded MultiMediaCard (eMMC). If you want to expand your phone memory, you can also insert a microSD card 1. Remove the battery cover. 2. Insert the microSD card into the card slot as shown in the diagram. 2.8.2 Using the microSD Card as a USB Mass Storage To transfer all your favorite music and pictures from your PC to your mobile phone’s microSD card, set the microSD card as a USB mass storage. 12 19 1. Connect your mobile phone to your PC with the USB cable provided. Your PC will detect the microSD card as a removable storage device. 2. Open the notification bar, and then touch USB connected. 3. Touch Turn on USB storage in the dialog box that opens to confirm that you want to transfer files. You can now transfer files from your PC to your mobile phone’s microSD card. When your microSD card acts as a USB mass storage, your mobile phone will not use this memory space. Ensure that you follow the correct procedures to disconnect the USB mass storage device (your mobile phone) from the PC when you have finished transferring files. 2.8.3 Removing the microSD Card 1. On the Home screen, touch > Settings. 2. Scroll down the screen, and then touch Storage > Unmount SD card. 3. Carefully remove the microSD card. 3 Calling To make a phone call, you can dial a number using the keypad or touch a number saved in your contact list, on a webpage, or in a document. When you are in a call, you can answer other incoming calls or redirect them to your voicemail. You can also set up conference calls with several participants. 3.1 Making a Call To make a call, you can use the Dialer application, or select a number from Contacts or Call log. When you are in a call, you can touch to use other functions. To return to the call screen, flick the notification bar down and touch Current call. Be careful not to block the microphone at the bottom of your phone if you want your voice heard by the other parties in a call. 20 3.1.1 Making a Call with the Dialer Application 1. On the Home screen, touch > Dialer to display the dialer. If you are already working with Contacts or Call log, touch the Dialer tab. 2. Touch the appropriate number keys to enter the phone number. Your mobile phone supports the SmartDial function, that is, when you touch numbers on the dialer, the phone automatically searches among your contacts and lists the matching results ordered according to the accuracy of the match. If no contacts match the information entered, the phone will not display any result. 3. Touch to initiate the call. During a call, touch Dialpad to enter other numbers on the dialpad. 3.1.2 Making a Call from Contacts 1. On the Home screen, touch > Contacts to display the contact list. If you a…
Text truncated - open the document above for the full version.
Users Manual
33 3. Touch the composition text box to start entering your message. While writing a message, you can touch > Add > Contact to insert contact information. 4. When you are ready to send the message, touch . Sent and received messages will be displayed in a message thread, grouping t ogether the messages in a conversation. 6.1.3 Creating and Sending a Multimedia Message 1. Touch > Messaging > New message. 2. Enter a phone number in the To field, or touch to select a contact from Contacts or Groups. 3. Touch the composition text box to start entering your message. 4. Touch to display the options panel.Touch Add subject to add the message subject. Your mobile phone is now in multimedia message mode. 5. When the message is ready to be sent, touch . On the message editing screen, you can also touch, and then select your desired files to add. You can direct select a multimedia file (audios, videos, or pictures) and send it via MMS: Touch File Manager, touch and hold the multimedia file to be sent, and then select Share > Messaging. Adding a Slideshow If you want to attach more than one file to your message, use the Slideshow option. 1. On the message editing screen, touch to display the options panel. 2. Touch Add > Slideshow, and then select a slide to start editing it. 3. Touch and then touch More > Add slide to add more slides. 4. Touch Done to finish composing your message and return to the multimedia message screen. 5. To alter your multimedia message, touch the slideshow on the multimedia message screen. When the message is ready to be sent, touch Send. 34 6.1.4 Opening and Viewing a Multimedia Message 1. In the message list, touch the message thread you wish to view. 2. Touch the multimedia message to view the message. 6.1.5 Replying to a Message 1. In the message list, touch a text or multimedia message thread to open it. 2. Touch the text box to compose your message. Once finished, touch Send. You can also do the following to reply to a message: Touch > Multiselect, select one or more message threads, and touch Reply. 6.1.6 Copying a Text Message to Notepad or Calendar 1. In the message list, touch a text message thread to open it. 2. Touch and hold one of the messages, and then touch Copy message to. 3. Touch Notepad or Calendar to save it as a note or an event. For information about how to use Notepad or Calendar, see the relevant sections of this guide. 6.1.7 Customizing Message Settings In the message list, touch , and then touch Settings to customize the message settings. 6.2 Email Your mobile phone also puts email at your fingertips. With your phone’s Email application, you can use your email account with Yahoo!, AOL, or other popular email services on your phone. 6.2.1 Adding an Email Account When using the Email application for the first time, you must configure an email account. The Email setup wizard helps you to configure your account. A number of popular email systems are supported. You can work with the same email service that you use on your PC or you can select another email service. 35 1. On the Home screen, touch > Email. 2. To customize your email settings, follow the onscreen instructions, and then touch Next. 3. Enter the account name and the name you want other people to see when they receive an email from you. 4. Touch Done. Adding Other Email Accounts 1. After creating your initial email account, touch on the Inbox screen, and then touch More > Accounts to access the accounts screen. 2. Touch on the accounts screen, and then touch Add account to create another email account. When adding an additional email account, you have the option to use the new account to send all outgoing messages. 6.2.2 Viewing an Email Message 1. On the accounts screen, touch the email account you want to use. 2. Access a folder, and then touch the message that you want to view. 6.2.3 Saving an Email Attachment 1. On the accounts screen, touch the email account you want to use. 2. Touch the email message you want to view. 3. Touch Save next to the attachment in the email. 4. Select a path for saving the attachment and touch Save. 6.2.4 Creating and Sending an Email Message 1. On the accounts screen, touch the email account you want to use. 2. On the Inbox screen, touch , and then touch Compose in the options panel. 3. In the To field, enter the recipients’ name or email address. 4. Enter the subject of your message and compose the message. To send an attachment with the message, touch , and then touch Add attachment. 36 5. When you are finished, touch Send. If you are not ready to send the message, touch Save as draft or touch to save the message as a draft. 6.2.5 Replying to an Email Message 1. On the accounts screen, touch the email account you want to use. 2. Touch the email message to which you want to reply. 3. Touch Reply or Reply all to reply to the email message. 6.2.6 Deleting an Email Account 1. On the accounts screen, touch and hold the email account you want to delete. 2. Touch Remove account. 3. Touch OK. 6.2.7 Changing Email Account Settings You can change a number of account settings, including how often you check for emails, how you are notified of a new mail, and details about the servers the account uses to send and receive mails. Your account’s incoming and outgoing settings depend on the kind of email service you are using. You can enter the necessary details manually, although you may need to contact your email service provider to obtain the correct information. 1. Touch > Email. 2. On the accounts screen, touch and hold the email account you want to change. 3. Touch Account settings. 4. Change General settings, Notification settings, or Server settings. 37 7 Getting Connected 7.1 Mobile Networks Your mobile phone will be automatically configured to use your network operator’s 2G/3G service (if available) when you turn on the phone for the first time. Note that the SIM/UIM card must be inserted (some CDMA mobile phones have an integrated UIM card and do not need a sep…
Text truncated - open the document above for the full version.
Users Manual
51 9.2.4 Replying to or Forwarding an Email 1. In the mail list, touch the email that you want to reply to or forward. 2. Touch to reply. You can also touch , and then touch Reply, Reply all, or Forward. 3. Do one of the following: • If you selected Reply or Reply all, enter your message. • If you selected Forward, specify the message recipients and add any additional text you want to include in the forwarded message. 4. Touch to send, or touch to save as a draft. 9.2.5 Searching for an Email 1. In the mail list, touch , and then touch Search. 2. Enter the search keywords in the box, and then touch . 9.2.6 Customizing Your Gmail Settings In the mail list, touch , and then touch More > Settings to customizing your Gmail. 9.3 Talk Talk is Google’s instant messaging service. You can use it to communicate in real time with other people using Talk on a phone or on the web. 9.3.1 Opening Talk On the Home screen, touch > Talk to open the application. Your Talk account is based on the Google account you set up with your mobile phone. 52 9.3.2 Adding a Friend 1. In the friends list, touch , and then touch Add friend. 2. Enter the Talk instant messaging ID or Gmail address of the friend you want to add. 3. Touch Send invitation. 9.3.3 Accepting an Invitation 1. If you have invited anyone to chat or if someone else has invited you to chat, this information will appear in the friends list. 2. Touch a pending invitation, and then touch Accept. 9.3.4 Starting a Chat 1. In the friends list, touch a friend's name in the friends list. 2. Use the onscreen keyboard to enter text and chat with your friend. 3. After entering your message, touch Send. 9.3.5 Setting Notifications for New Instant Messages Whenever you receive an instant message, your mobile phone can play a sound, vibrate, or display an icon. To set up one of these handy notifications, start in the friends list, and then touch . Then touch Settings. Now choose from one of the following: Notifications Select the check box to receive a notification on the notification bar when you receive an instant message. Ringtone Touch to choose the ringtone used for a new instant message. You will hear a short sample of the ringtone when you select it. To turn the ringtone off, select Silent. Vibrate Select the check box to make your mobile phone vibrate when you receive a new instant message. 53 9.3.6 Signing out of Talk On the friends list screen, touch , and then touch Sign out to quit Talk. 9.4 Maps Maps lets you find your current location, view real-time traffic conditions (depending on availability in your locale), and get detailed directions to various destinations. You can view satellite images, traffic maps, or other kinds of maps of your current or other locations. 9.4.1 Enabling the Location Service Before you open Maps to find your location or search for places of interest, you must enable the location service. 1. On the Home screen, touch > Settings. 2. Touch Location & security. 3. In the My Location section, select the Use wireless networks check box, the Use GPS satellites check box, or both. 9.4.2 Opening Maps On the Home screen, touch > Maps to open the application. 9.4.3 Searching for Places of Interest 1. On the map, touch , and then touch Search. 2. Enter the place you want to search for in the search box, and then touch the Search icon. 3. Your search results will then be displayed. Touch a place you are interested in and the ap plication will show where it is on the map. 9.4.4 Getting Directions 1. While viewing a map, touch , and then touch Directions. 2. Enter the starting point in the first text box, and then enter your destination in the s econd text box. 3. Touch the icon for car, public transit, or walking directions. 54 4. Touch Get directions. Your directions will appear in a list. 5. Touch a direction item on the list to show it on the map. 6. When you finish viewing or following the directions, touch , and then touch Clear Map to reset the map. 9.5 YouTube YouTube is Google’s free online video streaming service for watching, searching for, and uploading videos. 9.5.1 Opening YouTube On the Home screen, touch > YouTube. You will then see the YouTube screen. 9.5.2 Searching for a Video 1. On the YouTube screen, touch , and then touch Search. 2. Enter a search keyword, and then touch the Search icon. 3. You will see a number of search results displayed below the notification bar. Scroll t hrough the results and touch a video to watch it. 9.5.3 Sharing a Video From the video list on the YouTube screen, select a video clip and touch More > Share. 9.6 Market Android Market provides direct access to applications and games which you can download and install on your phone. 9.6.1 Opening Market 1. On the Home screen, touch > Market. 2. When you open Market for the first time, the Android Market Terms of Service window will appear. Touch Accept to continue. 55 9.6.2 Searching for Applications There are a few different ways to find applications on the Market home screen, including: • Featured applications • List of games • Search function • My apps 9.6.3 Installing an Application If you want to install a non-Market application, touch > Settings > Applications, and then select the Unknown sources check box to allow installation of the non-Market application. 1. In the Market, touch Apps. 2. Touch a category, and then touch the item you want to download. 3. On the item details screen, read more about the application, including its cost, overall rating, and user comments. If you scroll down to the Developer Info section, you can see other applications from the same developer, link to the developer's website, or can send the developer an email. 4. To install the item, touch FREE (if the item is free) or touch the button with a price (if the item is not free), and then touch OK. 5. To check the progress of a download, open the notification panel. Most applications ar e installed within seconds. To stop an item from downloading, touch Cancel. …
Text truncated - open the document above for the full version.
Users Manual
69 11.7.1 Opening the Clock On the Home screen, touch > Clock to open the application. Clock opens with the date and time displayed on your Home screen wallpaper, along with your local weather and other useful information. 11.7.2 Opening the Alarms On the Clock screen, touch to open the Alarms. Adding an Alarm 1. On the alarm list screen, touch Add alarm. 2. Set the alarm, and then touch Done. Setting an Alarm 1. On the alarm list screen, touch one of the alarms on the screen. 2. Touch Time to set the time of the alarm. 3. Touch Repeat to set the days when you want the alarm to sound. 4. Touch Ringtone to select a ringtone for the alarm. 5. Select the Vibrate check box to enable the phone to vibrate, in addition to playing the ringtone. 6. Touch Label to enter a name for the alarm. 7. Touch Done. The alarm clock still works when the phone is powered off. Customizing Alarm Settings On the alarm list screen, touch , and then touch Settings. 11.8 Calculator Use Calculator to solve simple arithmetic problems or use its advanced operators to solve more complex equations. 11.8.1 Opening Calculator On the Home screen, touch > Calculator to open the application. 70 11.8.2 Switching Between Basic and Advanced panel On the Calculator screen, flick the screen to the right or left to switch between Advanced panel and Basic panel. 11.9 Notepad Notepad features a simple text processor. In the note list, you can add, edit, and delete notes. 1. On the Home screen, touch > Tools > Notepad to open the application. 2. Touch , and then touch Add note to create a note. 3. Touch to save the note. 11.10 Richpad Richpad combines text note and paint note functions. In the note list, you can add, edit, and delete notes. 1. Touch > Tools > Richpad to open the application. 2. Touch , and then touch Add text note or Add paint note to create a note. • While you are editing a text note, touch to change the background, or the font, or to insert an icon. • While you are editing a paint note, touch the icon in the upper right corner of the s creen to draw a picture. 3. Touch the icons at the lower part of the screen to save the note, set a reminder, or dis card the note. 71 12 Managing Your Mobile Phone To configure your mobile phone, touch > Settings. 12.1 Setting the Date and Time By default, your mobile phone automatically uses the date, time, and time zone provided by the network. When your mobile phone is using the date and time settings provided automatically by the network, you cannot manually set the date, time, and time zone. 1. On the Settings screen, touch Date & time. 2. Clear the Automatic check box. 3. Touch Set date. On the set date screen, touch or to adjust the date, month, and year, and then touch Set when the configuration is complete. 4. Touch Select time zone, and then select the desired time zone from the list. Scroll the list to view more time zones. 5. Touch Set time. On the set time screen, touch or to adjust the hour and minute. Touch Set when the configuration is complete. 6. Select or clear the Use 24-hour format check box to switch between 24-hour and 12-hour formats. 7. Touch Select date format to select how you want the date to display on your mobile phone. 12.2 Setting the Display 12.2.1 Adjusting the Screen Brightness 1. On the Settings screen, touch Display > Brightness. 2. Drag the slider left to make the screen darker, or right to make it brighter. 3. Touch OK to save the adjustment. 72 12.2.2 Adjusting the Time Before the Screen Turns Off If your mobile phone is idle for several minutes, it will turn off the screen to save battery power. To set a longer or shorter idle time: 1. On the Settings screen, touch Display > Screen timeout. 2. Select the duration you want the screen to be illuminated. 12.3 Setting Ringers 12.3.1 Turning On Silent Mode 1. On the Settings screen, touch Sound. 2. Select the Silent mode check box to silence all sounds except alarms, and music and video media. 12.3.2 Adjusting the Volume You can adjust the volume from the Home screen or any application screen (except during a call or when playing music or videos). Press the Volume keys to adjust volume to the level you desire. You can also adjust the volume from the settings screen. 1. On the Settings screen, touch Sound > Volume. 2. Drag the slider left to make the volume lower, or right to make it higher. 3. Touch OK to save the adjustment. 12.3.3 Changing the Phone Ringtone 1. On the Settings screen, touch Sound > Phone ringtone. 2. Touch the ringtone you want to use, and then touch OK. The ringtone plays when selected. 12.3.4 Changing the Message Ringtone 1. On the Home screen, touch > Messaging. 2. In the message list, touch > Settings > Select ringtone. 3. Touch the ringtone you want to use, and then touch OK. The ringtone plays when selected. 73 12.4 Setting Phone Services 12.4.1 Customizing Call Settings Mobile phone service providers offer different services such as call forwarding, call waiting, fixed dialing numbers, and voicemail. You can customize many of these services if they are part of your calling plan. On the Settings screen, touch Call settings to customize your call functions. 12.4.2 Turning on Data Roaming 1. On the Settings screen, touch Wireless & networks > Mobile networks. 2. Select the Data roaming check box. Accessing data services while roaming may incur additional charges. Ask your wireless service provider about data roaming fees. 12.4.3 Switching off the Data Service 1. On the Settings screen, touch Wireless & networks > Mobile networks. 2. Clear the Data enabled check box. 12.5 Configuring Text-to-Speech Use the Text-to-Speech settings to configure the Android text-to-speech synthesizer, for applications that can take advantage of this feature. 12.5.1 Installing Voice Data 1. On the Settings screen, touch Voice input & output > Text-to-speech settings > Install voice data. 2. If your mobile phone does not have speech synthesizer data installed, connect to Android Market and let it …
Text truncated - open the document above for the full version.
Contact Information
Applicant
Zhang Xinghai
Test Firm
Huawei Technologies Co., LTDZhou Fengyum
Technical Specifications
| # | Rule Parts | Frequency Range | Power Output |
|---|---|---|---|
| 1 | 15C | 2.41 GHz - 2.46 GHz | 91.00 mW |
Other Applications from Huawei Technologies Co.,Ltd
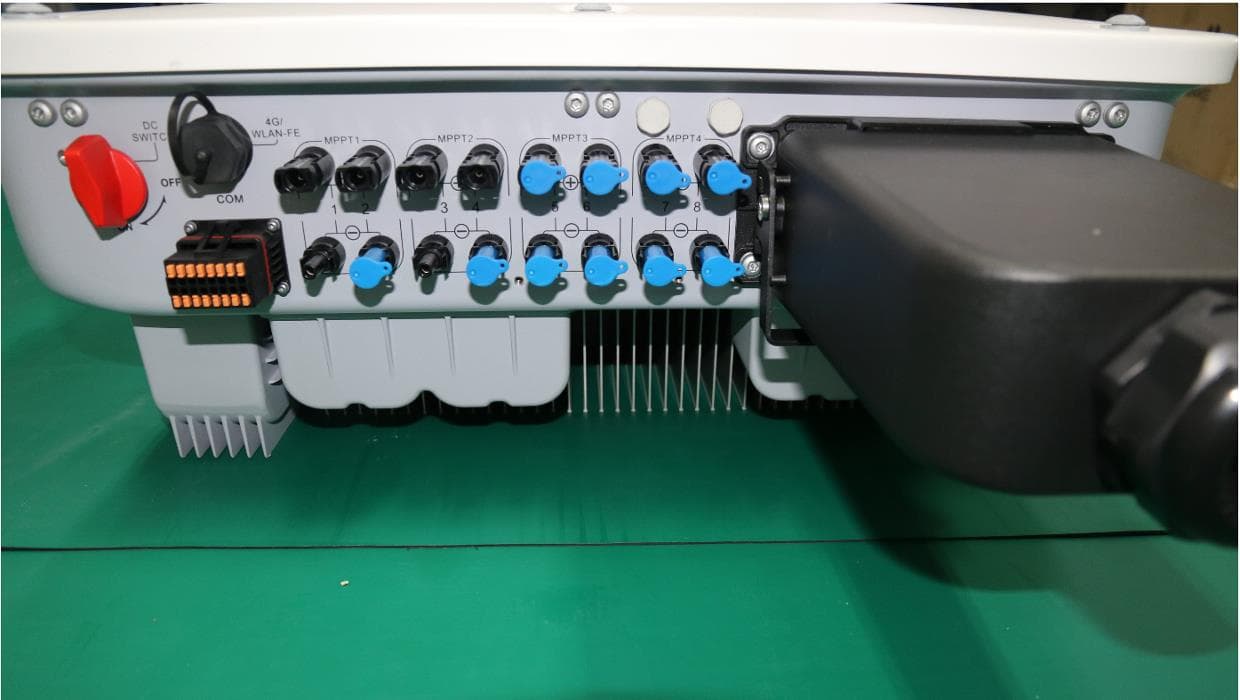
QISSUN2000
Jun 27, 2021Solar Inverter
Equipment Class
DTS - Digital Transmission System
QISCP81-1
Oct 22, 2020Watch Wireless Charger
Equipment Class
DCD - Part 15 Low Power Transmitter Below 1705 kHz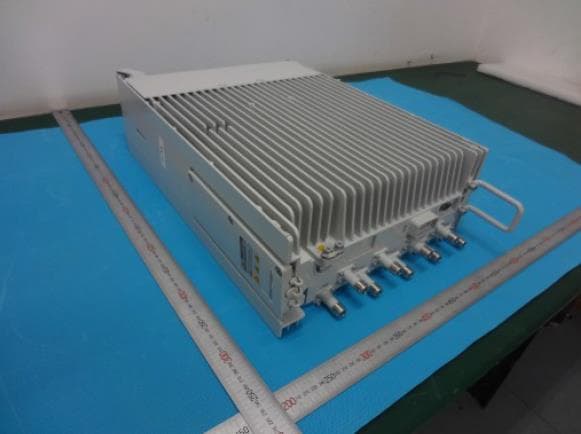
QISRRU3278
Sep 02, 2020Remote Radio Unit
Equipment Class
CBD - Citizens Band Category A and B Devices
QISR2561
Jul 11, 2020Indoor Router
Equipment Class
DTS - Digital Transmission System
QISSMARTLOGGER310
Mar 23, 2020Solar Smart Monitor & Data Logger
Equipment Class
DTS - Digital Transmission System