QISU9201LLTE/HSPA+/HSUPA/HSDPA/UMTS/GSM/GPRS/EDGE Mobile Phone with WLAN and BT
Huawei Technologies Co.,Ltd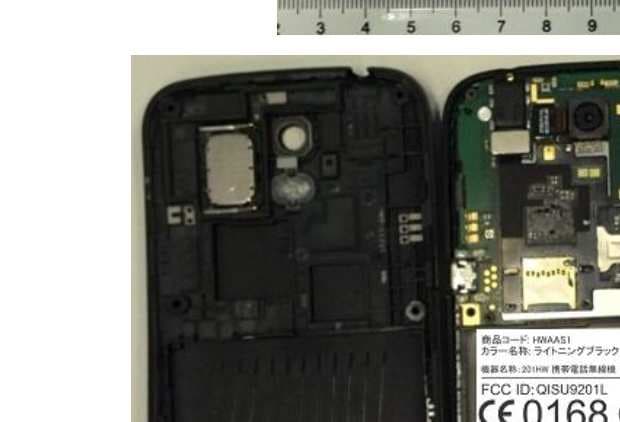
Click to zoom
Application Details
- Equipment Class
- PCE - PCS Licensed Transmitter held to ear
- Date of Grant
- Aug 12, 2012
- Application Purpose
- Original Equipment
- Date of Application
- Aug 07, 2012
- Equipment Note
- LTE/HSPA+/HSUPA/HSDPA/UMTS/GSM/GPRS/EDGE Mobile Phone with WLAN and BT
- Frequency Range
- 2555.00000000 - 2565.00000000
- Company
- Huawei Technologies Co.,Ltd
- Country
- China
Documents & Files
Document Text
Text extracted from the exhibit documents filed with the FCC. Open a document above to read the original.
Users Manual
User Guide Welcome to HUAWEI i Contents Introduction . . . . . . . . . . . . . . . . . . . . . . . . . . . . . . . . . . . . 1 Installation . . . . . . . . . . . . . . . . . . . . . . . . . . . . . . . . . . . . . 2 Keys and Functions . . . . . . . . . . . . . . . . . . . . . . . . . . . . . . . . . . 2 Installing a SIM Card and the Battery . . . . . . . . . . . . . . . . . . . 3 Installing and Removing a microSD Card . . . . . . . . . . . . . . . 4 Charging the Battery . . . . . . . . . . . . . . . . . . . . . . . . . . . . . . . . . 5 Getting Started . . . . . . . . . . . . . . . . . . . . . . . . . . . . . . . . . 8 Powering Your Phone On or Off . . . . . . . . . . . . . . . . . . . . . . . 8 Configuring Your Phone for the First Time . . . . . . . . . . . . . . . 8 Switching to Silent Mode or Airplane Mode Quickly . . . . . . 11 Using the Touchscreen . . . . . . . . . . . . . . . . . . . . . . . . . . . . . . 12 Locking and Unlocking the Screen . . . . . . . . . . . . . . . . . . . . 13 Home Screen . . . . . . . . . . . . . . . . . . . . . . . . . . . . . . . . . . . . . . 15 Managing the Notification Panel . . . . . . . . . . . . . . . . . . . . . . 20 Accessing Applications and Widgets . . . . . . . . . . . . . . . . . . 20 Managing Shortcuts and Widgets . . . . . . . . . . . . . . . . . . . . . 21 Managing Folders on the Home Screen . . . . . . . . . . . . . . . . 21 Calling . . . . . . . . . . . . . . . . . . . . . . . . . . . . . . . . . . . . . . . . 23 Making a Call . . . . . . . . . . . . . . . . . . . . . . . . . . . . . . . . . . . . . . . 23 Answering or Rejecting a Call . . . . . . . . . . . . . . . . . . . . . . . . . 25 Operations During a Call . . . . . . . . . . . . . . . . . . . . . . . . . . . . . 26 Making a Conference Call . . . . . . . . . . . . . . . . . . . . . . . . . . . . 27 Switching Between Calls . . . . . . . . . . . . . . . . . . . . . . . . . . . . . 27 Recording a Call . . . . . . . . . . . . . . . . . . . . . . . . . . . . . . . . . . . . 28 Supplementary Services . . . . . . . . . . . . . . . . . . . . . . . . . . . . . 28 Using the Voicemail Service . . . . . . . . . . . . . . . . . . . . . . . . . . 29 Contacts . . . . . . . . . . . . . . . . . . . . . . . . . . . . . . . . . . . . . . 30 Importing Contacts from a SIM Card . . . . . . . . . . . . . . . . . . . 30 Creating a Contact . . . . . . . . . . . . . . . . . . . . . . . . . . . . . . . . . . 30 Communicating with a Contact Quickly . . . . . . . . . . . . . . . . . 31 Adding a Contact to Your Favorites . . . . . . . . . . . . . . . . . . . . 31 Searching for a Contact . . . . . . . . . . . . . . . . . . . . . . . . . . . . . . 31 Editing a Contact . . . . . . . . . . . . . . . . . . . . . . . . . . . . . . . . . . . . 31 ii Deleting a Contact . . . . . . . . . . . . . . . . . . . . . . . . . . . . . . . . . . 32 Managing Contact Groups . . . . . . . . . . . . . . . . . . . . . . . . . . . 32 Joining Contacts . . . . . . . . . . . . . . . . . . . . . . . . . . . . . . . . . . . 33 Sending a Contact . . . . . . . . . . . . . . . . . . . . . . . . . . . . . . . . . . 33 Backing Up Your Contacts . . . . . . . . . . . . . . . . . . . . . . . . . . . 33 Text Input . . . . . . . . . . . . . . . . . . . . . . . . . . . . . . . . . . . . . 35 Using the Onscreen Keyboard . . . . . . . . . . . . . . . . . . . . . . . 35 Switching Between Text Input Methods . . . . . . . . . . . . . . . . 35 Huawei Input Method . . . . . . . . . . . . . . . . . . . . . . . . . . . . . . . 35 Using the Android Keyboard . . . . . . . . . . . . . . . . . . . . . . . . . 36 Editing Text . . . . . . . . . . . . . . . . . . . . . . . . . . . . . . . . . . . . . . . . 37 Using the Landscape Keyboard . . . . . . . . . . . . . . . . . . . . . . 38 Selecting an Input Method . . . . . . . . . . . . . . . . . . . . . . . . . . . 38 Messaging . . . . . . . . . . . . . . . . . . . . . . . . . . . . . . . . . . . . 39 Sending a Message . . . . . . . . . . . . . . . . . . . . . . . . . . . . . . . . 39 Replying to a Message . . . . . . . . . . . . . . . . . . . . . . . . . . . . . . 40 Searching for a Message . . . . . . . . . . . . . . . . . . . . . . . . . . . . 40 Customizing Message Settings . . . . . . . . . . . . . . . . . . . . . . . 40 Setting the Message Ringtone . . . . . . . . . . . . . . . . . . . . . . . . 40 Using Talk . . . . . . . . . . . . . . . . . . . . . . . . . . . . . . . . . . . . . . . . . 41 Data Connection . . . . . . . . . . . . . . . . . . . . . . . . . . . . . . 43 Turning On Mobile Data Services . . . . . . . . . . . . . . . . . . . . . . 43 Using Wi-Fi . . . . . . . . . . . . . . . . . . . . . . . . . . . . . . . . . . . . . . . . 43 Sharing Your Phone's Data Connection . . . . . . . . . . . . . . . . 45 Controlling Data Usage . . . . . . . . . . . . . . . . . . . . . . . . . . . . . . 47 Bluetooth . . . . . . . . . . . . . . . . . . . . . . . . . . . . . . . . . . . . . . . . . . 49 DLNA . . . . . . . . . . . . . . . . . . . . . . . . . . . . . . . . . . . . . . . . . . . . . 50 Email/Gmail . . . . . . . . . . . . . . . . . . . . . . . . . . . . . . . . . . . 51 Email . . . . . . . . . . . . . . . . . . . . . . . . . . . . . . . . . . . . . . . . . . . . . . 51 Gmail . . . . . . . . . . . . . . . . . . . . . . . . . . . . . . . . . . . . . . . . . . . . . 53 Managing Applications . . . . . . . . . . . . . . . . . . . . . . . . . 56 Using Play Store . . . . . . . . . . . . . . . . . . . . . . . . . . . . . . . . . . . . 56 Hispace . . . . . . . . . . . . . . . . . . . . . . . . . . . . . . . . . . . . . . . . . . . 57 Installing an Application from a microSD Card . . . . . . . . . . . 59 Viewing and Uninstalling Applications . . . . . . . . . . . . . . . . . . 59 Huawei Cloud+ . . . . . . . . . . . . . . . . . . . . . . . . . . . . . . . . 61 iii Cloud+ Settings . . . . . . . . . . . . . . . . . . . . . . . . . . . . . . . . . . . . 61 Security Guard . . . . . . . . . . . . . . . . . . . . . . . . . . . . .…
Text truncated - open the document above for the full version.
Users Manual
21 Viewing Recently Used Applications To display the list of recently used applications, press and hold . To open an application, touch the corresponding thumbnail. To close the application, flick left or right across the screen. Managing Shortcuts and Widgets • To add a shortcut icon or widget: From the application list, touch and hold an application icon, and then drag it to the Home screen. From the widget list, touch and hold a widget, and then drag it to the Home screen. • To delete a shortcut icon or widget: On the Home screen, touch and hold a shortcut icon or widget, and then drag it to the trash can. • To customize the size of a widget: You can adjust the size of some widget icons. To do so, on the Home screen, touch and hold a widget. Four are displayed. Adjust the widget's size by moving the . • To move a shortcut icon to the shortcut bar: On the Home screen, touch and hold a shortcut icon that you want move to the shortcut bar, and then drag it to the shortcut bar at the bottom of the screen. If there is no available space, a folder will be created for the overlapped icons. Managing Folders on the Home Screen • To create a folder: Drag an application icon onto another application icon to create a new folder that contains both icons. 22 • To rename a folder: On the Home screen, touch a folder, and then touch the folder name field beneath it. • To delete a folder: On the Home screen, touch and hold a folder, and then drag it to the trash can. • To move a folder to the shortcut bar: On the Home screen, touch and hold a folder, and then drag it to the shortcut bar. 23 Calling To make a call, you can manually enter phone numbers on the dialer, touch a number in your contacts list or call log, or use voice control. During a call, you can choose to keep the current call on hold to answer an incoming call, forward the incoming call to your voicemail, or start a conference call. To open Phone, touch > Phone. Making a Call 1. On the Phone screen, touch to switch to the dialer tab. 2. Enter a phone number. 3. Touch to make a call. Be careful not to block the microphone or the speaker to avoid affecting the call quality. Making a Call from Contacts 1. On the Phone screen, touch to switch to the contacts tab. 2. Touch a contact to place a call. Making a Call from the Call Log 1. On the Phone screen, touch to switch to the call log tab. 2. Touch to the right of an entry to place a call to that number. 24 Using Voice Dialing Calls can be placed using voice dialing. When you open the voice dialing application, your phone's speaker will be enabled. Background noise will affect the accuracy of voice dialing. 1. On the Home screen, touch > Voice Dialer. 2. Follow the onscreen instructions, then say your command close to the microphone. Your phone will identify the command and make a call. Making an IP Call 1. On the Call log screen, touch > Settings > IP Call Settings . 2. Touch Add IP Number, enter an IP call number, and then touch Save. 3. Touch the number you have just saved and set it as the default IP call number. 4. Return to the phone screen, and enter a phone number you want to call. 5. Touch , and then the default IP call number will be appended to the start of the phone number entered to initiate an IP call. If you are making an IP call for the first time, touch using the dialer, and you will be prompted to set the IP call number. /6 /6 25 Answering or Rejecting a Call When a call comes in, you can: • Answer the call: Drag to the right. • Reject the call: Drag to the left. 26 • Reject the call and send a text message to the caller: Drag upwards. On the Phone screen, touch > Settings > Quick responses to edit the message that will be sent. Operations During a Call During an active call, you can touch any of the following buttons: • : Ends the call. • : Opens the dialer for you to enter another number. • : Activates the speakers. • : Mutes your microphone. • : Places the current call on hold. This function is network dependent. To use this service, contact your network operator. • : Displays your contacts list for you to select a contact to add to the current call. This function is network dependent. To use this service, contact your network operator. 27 : Returns to the Home screen, from where you can use other functions. To return to the call screen, open the notification panel and touch Current call. Making a Conference Call Conference calls allow conversations between more than two people at a time. Contact your network operator to ask if conference calls are supported and, if yes, how many parties can participate. 1. To initiate a conference call, dial the number of the first participant. After connecting to the first participant, keep the connection open, and touch . 2. Enter the phone number of the next participant, or touch , to select a phone number. The first participant is automatically placed on hold while this process is carried out. 3. Once you have connected to the second participant, touch to begin the conference call. 4. To end the conference call, touch . Switching Between Calls To use this service, subscribe to your operators's call switching function. For details, contact your network operator. If you receive an incoming call while you are already busy on a call, you can answer the new call and place the current one on hold. Touch to switch between the two calls. 28 Recording a Call 1. To record a conversation during a call, touch > Record. If a call is being recorded when it ends, the recording will be automatically stopped and saved. 2. To end the recording, touch > Stop recording. Call recordings will be saved to the record folder on the microSD card; if no microSD card is available, the recordings will be saved to the record folder in the phone memory. Supplementary Services Your phone supports multiple supplementary services, including call forwarding and call waiting. These services are network dependent. For details, contact your network operator. Forwarding a…
Text truncated - open the document above for the full version.
Users Manual
46 • You cannot share your phone’s data connection via USB tethering and access its microSD card as a mass storage device at the same time. • Using USB tethering will incur data traffic charges. For details, contact your network operator. 1. On the Home screen, touch > Settings. 2. In the WIRELESS & NETWORKS section, touch More... > Tethering & portable hotspot. 3. Select the USB tethering check box to share your phone's data connection with your PC. You can now access the Internet from the PC. Sharing Your Phone’s Data Connection as a Portable Wi-Fi Hotspot 1. On the Home screen, touch > Settings. 2. In the WIRELESS & NETWORKS section, touch More... > Tethering & portable hotspot. 3. Select the Portable Wi-Fi hotspot check box to share your mobile network. To change the Wi-Fi hotspot's name or secure it, touch Configure Wi-Fi hotspot. 47 Controlling Data Usage With Data usage, you can set a data usage cycle and the mobile data limit for this period. You will be notified when data usage reaches the set limit. You can also query the data usage within a certain period or by a certain application. On the Home screen, touch > Settings > Data usage to configure the data usage settings: 2 6 4 3 1 5 48 On the data usage settings screen, touch to display the options menu and you can: • Turn on data roaming: Select the Data roaming check box. • Prevent background mobile data traffic: Select the Restrict background data check box. 1 Touch Mobile Data to turn on or off the mobile data function. The mobile data function must be turned on to configure data control and query data usage. 2 Select the Set mobile data limit check box. When data traffic reaches the preset limit, your phone's mobile data connection will be disabled. 3 Touch the scroll arrow beside Data usage cycle, then Change cycle.... After setting the data usage cycle, touch Set. 4 Drag the red line to set a data usage limit or the orange line to set a warning limit. When data traffic reaches the yellow line, you will be notified; when data traffic reaches the red line, your phone's mobile networks data connection will be disabled. 5 Scroll the white time axis to view data usage within a certain period. 6Touch an application to check its data usage. 49 • View Wi-Fi data usage: Select the Show Wi-Fi usage check box, and a WI-FI tab is displayed. Touch to tab to view Wi-Fi data usage. Bluetooth Your phone supports Bluetooth, which allows you to transfer data to and from paired Bluetooth devices. When using Bluetooth, stay within 10 meters (33 feet) of other Bluetooth devices. Note that obstacles such as walls or other electronic equipment may block or interfere with your Bluetooth connection. Turning On Bluetooth 1. On the Home screen, touch > Settings. 2. In the WIRELESS & NETWORKS section, touch the switch on the right of Bluetooth, and a Bluetooth icon will be displayed on the notification bar. 3. Touch Bluetooth, and your device's Bluetooth name is displayed on the screen. Touch the device name and set your device to be visible to other Bluetooth devices. To change your device's name, touch > Rename phone , then Rename. Scanning for and Pairing with Another Bluetooth Device To pair your phone with another Bluetooth device for data transmission: 1. Check that the Bluetooth function is enabled on your phone. 50 2. On the Home screen, touch > Settings. 3. In the WIRELESS & NETWORKS section, touch Bluetooth. Your phone will then scan for other Bluetooth devices within range. 4. From the list of the Bluetooth devices searched, choose the device you want to connect, and then follow the onscreen information to pair. To disconnect from the Bluetooth device, in the PAIRED DEVICES section touch > Unpair. Transferring a File via Bluetooth Using Bluetooth you can share pictures, videos, and audio files stored in the File Manager with your friends. 1. Touch and hold the file you want to transfer, and then choose Share > Bluetooth from the displayed options menu. 2. From the detected Bluetooth device list, select the desired device. DLNA Digital Living Network Alliance (DLNA) enables users using the same Wi-Fi network to share multimedia files easily. Before using the DLNA function, ensure that your device and other DLNA devices have connected to the same Wi-Fi network and DLNA is enabled on all devices. Touch > DLNA to display the DLNA screen. You can then share pictures, videos, and audio files with other DLNA devices, as well as view and download the multimedia files shared by other DLNA devices. 51 Email/Gmail Email With Email, you can easily send and receive emails. Adding an Email Account When using the Email application for the first time, set up an email account as follows: (Note that a data connection is required to send and receive emails). 1. On the Home screen, touch > Email. 2. Touch Others to enter an email address and password, then touch Next. 3. Follow the onscreen instructions to configure the account settings. Configure the email account based on the instructions provided by your email service provider. For specific settings, access the website of your email service provider. 4. Touch Next, and the Inbox of the newly configured email account will be displayed. After creating your initial email account, touch > Settings > ADD ANCOUNT on the Inbox screen to add more email accounts. Switching Between Accounts On the Inbox screen, touch the email address bar at the top of the screen, and select an email account from the displayed 52 email account list. The selected account's Inbox is then displayed by default. Creating and Sending an Email 1. On the Inbox screen, touch . 2. In the To field, enter the recipient's email address. 3. Enter the email subject, and then compose your email. 4. When the email is ready to be sent, touch to send the email. Replying to and Forwarding an Email 1. In your Inbox, touch the email you want to reply to. 2. Touch or > Reply all to reply to the email. You can also touch > Forward to forward the email. V…
Text truncated - open the document above for the full version.
Users Manual
71 Taking a Photo 1. Open the camera and frame the photo you want to take on the viewfinder screen. Before taking a photo, you can customize the camera settings or select a picture effect. When you are customizing the settings, the image displayed on the viewfinder screen changes accordingly. 2. Press the volume buttons to zoom in or zoom out. 3. Touch anywhere on the viewfinder screen to focus the camera. 4. Touch to take a photo. You can also touch and hold to focus your camera. When the frame in the center of the capture screen turns green, the photo is in focus. Release your finger to take a photo. You can then touch the thumbnail in the lower right corner of the viewfinder screen to view the photo you just took. When viewing a picture, you can: • Touch to enter the gallery. • Touch to send the photo via a multimedia message, an email, Bluetooth and more. • Touch > Delete to delete the photo. • Flick left or right across the screen to scroll between photos in the gallery. Enabling the GPS Tag Function To tag location information to your photos: 1. On the viewfinder screen, touch > to display the camera settings screen. 72 2. Select the GPS tag check box. will be displayed on the viewfinder screen. To save location information with your photos, enable the GPS location function on your phone. To do so, on the Home screen touch > Settings > Location services, and select the GPS satellites check box. Video Camera On the Home screen touch > Camera to activate the video camera. Switch to camcorder mode to start recording. On the capture screen, touch to exit the camera. Video Camera Mode 1Switch between camera and video capture modes. 7 5 1 2 3 4 6 73 Recording a Video 1. Open Camera and switch to video capture mode. Customize the video capture settings if necessary. When you are customizing the settings, the image displayed on the viewfinder screen changes accordingly. 2. Align the lens with the scene to be framed and customize the settings. 3. Touch to start recording. 4. Touch to stop recording. After recording a video, the thumbnail of the video is displayed in the lower right corner of the capture screen. Touch the thumbnail to view the video. When playing a video, you can: 2Touch to start recording. 3 Thumbnail of the previous recording. Touch to view the video you just recorded. 4Viewfinder screen. 5 Touch to display the options menu as follows: •: Set the video size. •: Adjust the white balance. •: Select a video effect. • : Enable or disable video review, GPS tag, and more. 6Set the light mode. $XWR$XWR 7Switch between the front and rear cameras. 74 • Touch to enter the gallery. • Touch to send the video via a multimedia message, an email, or Bluetooth. • Touch > Delete to delete a video. • Flick left or right across the screen to switch between videos. 75 Gallery Your Gallery application is a great tool for managing photos and videos. Viewing Photos or Videos 1. On the Home screen touch > Gallery to open the media library. In Gallery, touch the desired folder to view its contents. 2. Touch the photo or video you want to view. Editing a Picture 1. When viewing a picture, touch > Edit. 2. On the picture editing screen, you can: 1 2 3 4 5 6 76 Rotating a Picture 1. When viewing a picture, touch to display the options menu. 2. Touch Rotate Left or Rotate Right. The picture will be saved with the new orientation. Cropping a Picture 1. When viewing a picture, touch > Crop. 2. Use the cropping tool as follows: • Drag the inside of the cropping tool to move it. • Drag of the cropping tool to resize the area to be cropped. 3. Touch SAVE or CANCEL to save or discard the changes. 1 Save the changes. 2 Undo the last step or redo the canceled step. 3 Crop or rotate the picture, or remove red eye. 4 Adjust the hue or saturation, or set the picture to black and white. 5 Change filtering effects such as Lomo, Documentary, or Vignette. 6 Set exposure compensation, brightness, and shade. 77 Music Player With a built-in music player, your phone enables you to play your favorite songs at any time. Opening the Media Library On the Home screen touch > Music+ to access your media library. Music+ provides seven tabs to help organize your music: Playlists, Artists, Songs, Albums, Genres, and Folders. Flick left or right across the screen to display the content of each tab. Adding an Audio File to a Playlist 1. Choose a tab from the media library. 2. Touch and hold the audio file you want to add to a playlist, and choose Add to playlist from the displayed options menu. • To add the audio file to a new playlist, touch New playlist. • To add the audio file to an existing playlist, touch the desired playlist. Touch and hold an audio file and the phone displays the options menu. From here you can: • Send the audio file via DLNA, Compose, or Bluetooth: Touch Share. • Set the audio file as the ringtone: Touch Set as ringtone. 78 Playing a Playlist 1. On the media library screen, touch the Playlists tab. 2. Touch and hold the playlist you want to play. 3. From the displayed menu, touch Play. Playing an Audio File 1. Select a tab on the media library screen. 2. Select a playlist and touch the desired audio file to play. When playing the music, you can: 1Enter the media library. 3 1 4 5 2 79 To use other applications when playing music, touch . The song will continue to play in the background. To return to the music playback screen, open the notification bar and select the song being played. Copying an Audio File Audio files can be copied to a microSD card using MTP and HiSuite, or by setting your phone as a mass storage device and transferring files from your PC using a USB connection. Copying an Audio File Using MTP Media Transfer Protocol (MTP) is closely related to Windows Media Player. Ensure that Windows Media Player 10 or a later version is installed on your PC. 1. Use a USB cable to connect your phone to the PC. 2. Open the notification panel, touch Connected as an installer to display the USB computer con…
Text truncated - open the document above for the full version.
Attestation Statements
Statements Date (31/07/2012)DD/MM/YYYY BABT TCB Balfour House, Churchfield Road, Walton-on-Thames, Surrey, KT12 2TD Dear Sir or Madam, We, Huawei Technologies Co., Ltd. Bantian, Longgang District, Shenzhen, 518129, China Hereby to confirm that our device, FCC ID: QISU9201L, is not shipped with the battery pre-installed and the FCC ID is readily visible when users open the product box. Sincerely, For and Behalf of: Huawei Technologies Co., Ltd. Zhangxinghai EMC Laboratory Manager
Cover Letter(s)
Huawei Technologies Co., Ltd. Date (7/31/2012) BABT TCB Balfour House, Churchfield Road, Walton-on-Thames, Surrey, KT12 2TD Dear Sir or Madam, We, Huawei Technologies Co., Ltd. Huawei Industrial Base, Bantian Longgang, Shenzhen 518129, P.R China Hereby authorize TUV-SUD China Shenzhen Branch 6/F, H Hall, Century Craftwork Culture Square, No.4001 Fuqiang Road, Futian District, Shenzhen 518048 P.R. China Louis Lin Phone:+86-755-88286998 e-mail:[email protected] to act as our agent in all matters relating to applications for equipment authorization, including the signing of all documents relating to these matters. We also hereby certify that neither we nor any party to this application are subject to denial of U.S. Federal benefits, which include FCC benefits, pursuant to section 5301 of Anti-Drug Abuse Act of 1988,U.S.C.862 because of conviction for possession or distribution of controlled substance. This authorization is application to following FCC ID application: FCC ID:QISU9201L Sincerely, Zhang Xinghai EMC Laboratory Manager
Cover Letter(s)
Huawei Technologies Co., Ltd. Administration Building, Huawei Base, Bantian, Longgang District, Shenzhen 518129 P.R.C. +86 755 28780808 www.huawei.com Huawei internal reference RCT-US-01-01 USA FCC Short Term Confidentiality Request template Effective date: 2007-01-06 Version 1.1 Short Term Confidentiality Request 2012-07-31 Federal Communications Commission Office of Engineering and Technology Equipment Authorization Division 7345 Oakland Mills Road Columbia, Maryland 21046 Subject: SHORT-TERM Confidentiality Request for FCC ID: QISU9201L Product Name: LTE/HSPA+/HSUPA/HSDPA/UMTS/GSM/GPRS/EDGE Mobile Phone with Bluetooth To whom maybe concern: Pursuant to sections 0.457 and 0.459 of CFR 47 and to avoid premature release of sensitive information prior to marketing or release of the product to the public, Huawei Technologies Co., Ltd requests the following documents contained in this certification application be temporarily withheld from public disclosure for an initial period of 90 days: 1. External Photos 2. Internal Photos 3. Test Setup Photos 4. Users Manual The applicant also acknowledges that they will also provide appropriate notice to JIANGSU TÜV PRODUCT SERVICE LTD.–SHENZHEN BRANCH should either of the following occur: A) If the applicant requires additional 45 day extension periods they will notify JIANGSU TÜV PRODUCT SERVICE LTD.–SHENZHEN BRANCH with a new request letter at least 7 days prior to the short-term confidentiality expiration date-[Note: up to maximum of 3 extensions only are allowed], or b) Immediately notify JIANGSU TÜV PRODUCT SERVICE LTD.–SHENZHEN BRANCH in the event the information regarding the product of the product is made available to the public. JIANGSU TÜV PRODUCT SERVICE LTD.–SHENZHEN BRANCH will then release the documents listed above for public disclosure pursuant to FCC Public Notice DA 04-1705. Sincerely, For and Behalf of: Huawei Technologies Co., Ltd. Zhang Xinghai EMC Laboratory Manager
Cover Letter(s)
Huawei Technologies Co., Ltd. Address:Huawei Industrial Base, Bantian Longgang, Shenzhen 518129, P.R China Post ZIP:518129 Page :1/1 To: Jiangsu TUV Product Service Ltd.-Shenzhen Branch Fax : NULL From:Zhang Xinghai Fax:0086-755-89652518 Tel:0086-755-89651014 Email address: [email protected] Http: www.huawei.com Subject:Letter of Confidentiality Federal Communications Commission 7435 Oakland Mills Road Columbia, MD 21046 Gentlemen: This letter is to comply with the Code of Federal Regulations Title 47 Section 0.457 and 0.459 pertaining to confidential material. Huawei Technologies Co., Ltd. would like the following documents regarding this submission for FCC ID: QISU9201L to be kept confidential: 1. Schematic diagram. 2. Block Diagram. 3. Parts list (BOM) Information. 4. Operational description. 5. Turn-up procedure 6. Lab PBA KDB Inquiry The above material contains trade secrets or technical data, which would customarily be guarded from competitors. We do not want these documents to be accessible to the general public. Sincerely, For and Behalf of: Huawei Technologies Co., Ltd. Zhang Xinghai EMC Laboratory Manager
ID Label/Location Info
201HW SECRET Page1, Total 1 Labe&Label Location 201HW 201HW SECRET Page2, Total 1
Internal Photos
201HW SECRET Page1,Total 3 Internal Photos of 201HW 201HW SECRET Page2,Total 3 201HW SECRET Page3,Total 3
RF Exposure Info
Report No.:SYBH(Z-SAR)011062012-2 FCC ID:QISU9201L Appendix A. System Check Plots Table of contents SystemPerformanceCheck-D1900-ES-Head SystemPerformanceCheck-D1900-ES-Body SystemPerformanceCheck-D2450-EX-Head SystemPerformanceCheck-D2450-EX-Body SystemPerformanceCheck-D2600-EX-Head SystemPerformanceCheck-D2600-EX-Body Date/Time: 6/27/2012 5:35:36 Test Laboratory: HUAWEI SAR Lab SystemPerformanceCheck-D1900-ES-Head DUT: Dipole 1900 MHz D1900V2; Type: D1900V2; Serial: D1900V2 - SN:5d143 Communication System: CW; Frequency: 1900 MHz Medium parameters used: f = 1900 MHz; σ = 1.428 mho/m; ε r = 40.392; ρ = 1000 kg/m 3 Phantom section: Flat Section DASY Configuration: lProbe: ES3DV3 - SN3168; ConvF(5.1, 5.1, 5.1); Calibrated: 9/27/2011; lSensor-Surface: 4mm (Mechanical Surface Detection), z = 2.0, 32.0 lElectronics: DAE4 Sn1236; Calibrated: 3/28/2012 lPhantom: SAM4; Type: SAM; Serial: TP-1620 lDASY52 52.8.1(838); SEMCAD X 14.6.5(6469) Configuration/d=10mm, Pin=250mW/Area Scan (5x8x1): Measurement grid: dx=15mm, dy=15mm Maximum value of SAR (measured) = 10.1 mW/g Configuration/d=10mm, Pin=250mW/Zoom Scan (7x7x7) (7x7x7)/Cube 0: Measurement grid: dx=5mm, dy=5mm, dz=5mm Referen…
Text truncated - open the document above for the full version.
Contact Information
Applicant
Zhang Xinghai
Test Firm
Huawei Technologies Co., LTDZhou Fengyum
Technical Specifications
| # | Rule Parts | Frequency Range | Power Output | Emission | Tolerance |
|---|---|---|---|---|---|
| 6 | 27 | 2.56 GHz - 2.56 GHz | 270.00 mW | 17M9W7D | 2.5 ppm |
Other Applications from Huawei Technologies Co.,Ltd
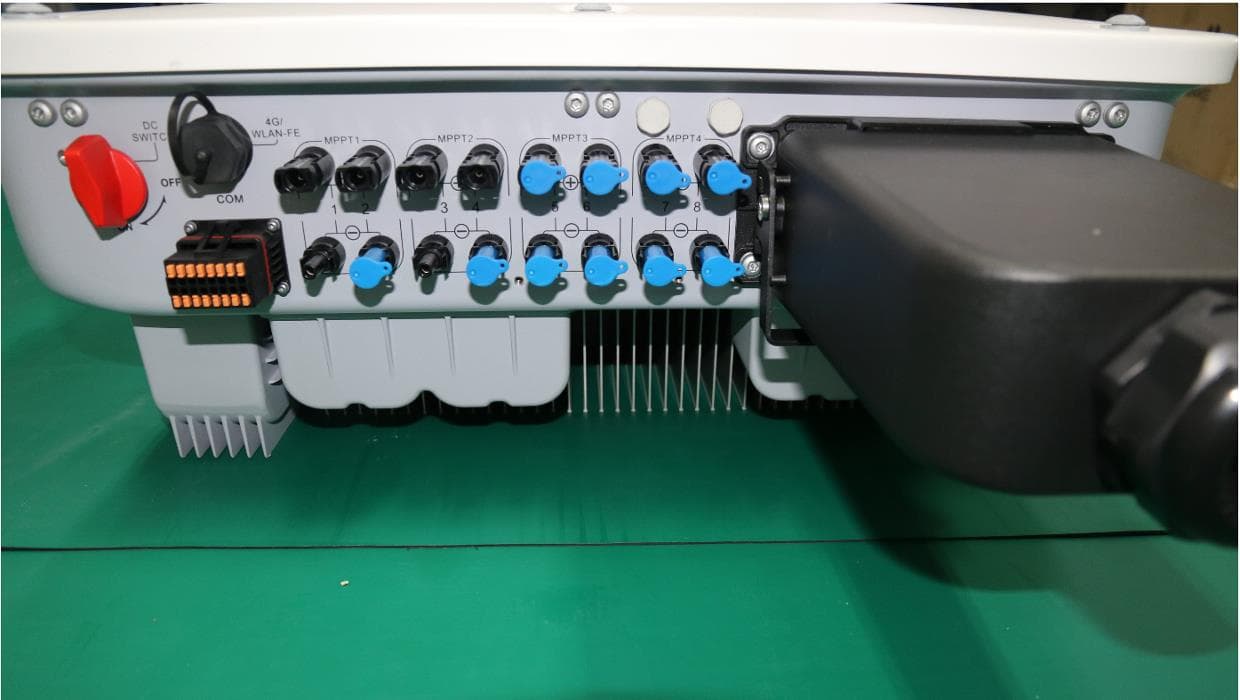
QISSUN2000
Jun 27, 2021Solar Inverter
Equipment Class
DTS - Digital Transmission System
QISCP81-1
Oct 22, 2020Watch Wireless Charger
Equipment Class
DCD - Part 15 Low Power Transmitter Below 1705 kHz
QISRRU3278
Sep 02, 2020Remote Radio Unit
Equipment Class
CBD - Citizens Band Category A and B Devices
QISR2561
Jul 11, 2020Indoor Router
Equipment Class
DTS - Digital Transmission System
QISSMARTLOGGER310
Mar 23, 2020Solar Smart Monitor & Data Logger
Equipment Class
DTS - Digital Transmission System